
Related Manuals for Siemens HB43AB 21B Series


Summary of Contents for Siemens HB43AB 21B Series
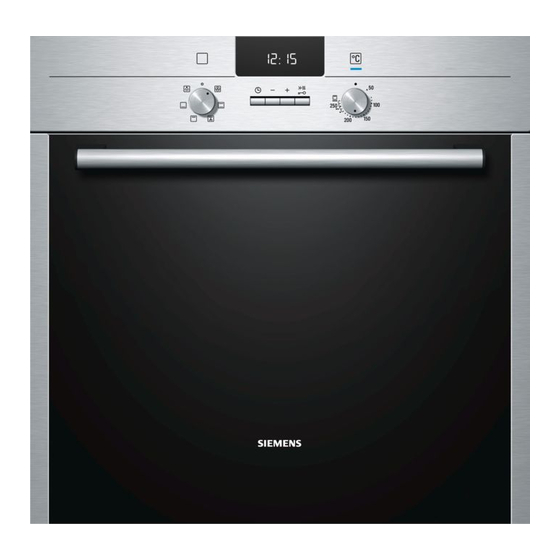
- Page 1 Built-in oven HB43AB.21B siemens-home.com/welcome en Instruction manual Register your product online...
-
Page 3: Table Of Contents
Important safety information.............4 Produktinfo Causes of damage ................5 Your new oven ................5 Additional information on products, accessories, replacement parts and services can be found at www.siemens-home.com Control panel ..................5 and in the online shop www.siemens-eshop.com Buttons and display................6 Function selector.................6 Temperature selector .................6... -
Page 4: Important Safety Information
: Important safety information Read these instructions carefully. Only then mains or switch off the circuit breaker in will you be able to operate your appliance the fuse box. safely and correctly. Retain the instruction A draught is created when the appliance Risk of fire! ■... -
Page 5: Causes Of Damage
or switch off the fuse in the fuse box. Causes of damage Contact the after-sales service. Caution! The cable insulation on electrical Accessories, foil, greaseproof paper or ovenware on the Risk of electric shock and serious injury! ■ ■ cooking compartment floor: do not place accessories on the appliances may melt when touching hot cooking compartment floor. -
Page 6: Buttons And Display
Buttons and display Temperature selector You can use the buttons to set various additional functions. On The temperature selector is used to set the temperature or grill the display, you can read the values that you have set. setting. Button Setting Meaning Time-setting options... -
Page 7: Your Accessories
Your accessories The accessories supplied with your appliance are suitable for Note: The accessories may deform when they become hot. making many meals. Ensure that you always insert the Once they cool down again, they regain their original shape. accessories into the cooking compartment the right way round. This does not affect their operation. -
Page 8: After-Sales Service Products
Optional accessories HZ number Bakestone HZ327000 The bakestone is perfect for preparing home-made bread, bread rolls and pizzas which require a crispy base. The bakestone must always be preheated to the recommended temperature. Enamel baking tray with non-stick coating HZ331011 Cakes and biscuits can be removed more easily from the bak- ing tray. -
Page 9: Before Using The Oven For The First Time
Door lock Product no. 612594 To prevent children from opening the oven door. The locks on different types of appliance door are screwed in differently. See the information sheet supplied with the door lock. Before using the oven for the first time Heating up the oven In this section, you can find out what you must do before using your oven to prepare food for the first time. -
Page 10: Setting The Time-Setting Options
Setting the time-setting options Your oven has various time-setting options. You can use the Press the button twice. button to call up the menu and switch between the individual 0:00 is shown in the display. The time symbols light up and functions. -
Page 11: Clock
Example in the picture: it is 10:30 am, the cooking time is Changing the end time 45 minutes and the oven is required to finish cooking at Use the button to change the end time. After a few 12:30 pm. seconds, the change is adopted. -
Page 12: Changing The Basic Settings
Changing the basic settings Your oven has various basic settings. These settings can be No other time-setting option should have been set. customised to suit your requirements. Press and hold the button for approx. 4 seconds. The current basic setting for the clock display is shown in the Basic setting Selection 1 Selection 2 Selection 3 display, e.g. -
Page 13: Detaching And Refitting The Rails
The oven door hinges each have a locking lever. When the Caution! locking levers are closed (figure A), the oven door is secured in Never use abrasive cleaning agents. You will scratch or ■ place. It cannot be detached. When the locking levers are open destroy the highly porous coating. -
Page 14: Removing And Installing The Door Panels
Risk of injury! Risk of injury! If the oven door falls out accidentally or a hinge snaps shut, do Scratched glass in the appliance door may develop into a not reach into the hinge. Call the aftersales service. crack. Do not use a glass scraper, sharp or abrasive cleaning aids or detergents. -
Page 15: Glass Cover
Replace the bulb with one of the same type. Risk of electric shock! Screw the glass cover back in. Switch off the circuit breaker in the fuse box. Remove the tea towel and switch on the circuit breaker. Place a tea towel in the oven when it is cold to prevent damage. -
Page 16: Tested For You In Our Cooking Studio
Tested for you in our cooking studio Here you will find a selection of dishes and the ideal settings for Wire rack at shelf position 1. ■ them. We will show you which type of heating and which Baking trays that are placed in the oven at the same time will temperature are best suited for your dish. -
Page 17: Baking Tips
Food Dish Shelf Type of Temperature Time position heating in °C in minutes Tart Universal pan + Ø 20 cm plate or pie tin 200-210 50-60 Wire rack + Ø 20 cm plate or pie tin 180-190 50-60 Quiche Wire rack + quiche tin (dark coated) 190-200 45-50 Wire rack + quiche tin (dark coated) -
Page 18: Meat, Poultry, Fish
The cake has risen in the middle but is Do not grease the sides of the springform cake tin. After baking, loosen the cake care- lower around the edge. fully with a knife. The cake goes too dark on top. Place it lower in the oven, select a lower temperature and bake the cake for a little longer. - Page 19 Food Dish Shelf Type of Temperature Time, min. per position heating in °C 500 g + add. time Poultry Chicken Universal pan with wire insert 170-180 25 + 25 Chicken, portion (200-250 g each) Universal pan with wire insert 190-200 20 + 25 Chicken, quarter (450 g each) Universal pan with wire insert...
-
Page 20: Tips For Roasting And Grilling
Do not insert the baking tray or universal pan at level 4 or 5. The high heat distorts it and the cooking compartment can be damaged when removing it. The grill element switches on and off continually. This is normal. The grill setting determines how frequently this will happen. -
Page 21: Preprepared Products
Preprepared products The cooking result greatly depends on the quality of the food. Pre-browning and unevenness can sometimes even be found Observe the instructions on the packaging. on the raw product. If you line the accessories with greaseproof paper, make sure Leave a little space between bread rolls when crisping them up. -
Page 22: Special Dishes
Food Dish Shelf posi- Type of Temperature Time tion heating in °C in minutes Lasagne, 400 g Wire rack 170-180 20-25 Lasagne, 1200 g Wire rack 170-180 30-35 * Preheat. Special dishes Preheat the cooking compartment as indicated. Place the cups or jars on the cooking compartment floor and At low temperatures, 3D hot air is equally useful for incubate as indicated. -
Page 23: Acrylamide In Foodstuffs
Close the oven door. Preparation Bottom heating. Fill the jars, but not to the top. Set the temperature to between 170 and 180 °C. Wipe the rims of the jars, as they must be clean. Place a damp rubber seal and a lid on each jar. Preserving Seal the jars with the clips. -
Page 24: Test Dishes
Test dishes These tables have been produced for test institutes to facilitate Double crust apple pie on 1 level: the inspection and testing of the various appliances. place dark springform cake tins next to each other diagonally on the same level. In accordance with EN 50304/EN 60350 (2009) and IEC Double crust apple pie on 2 levels: 60350. - Page 28 BSH Hausgeräte GmbH Carl-Wery-Straße 34, 81739 München, GERMANY siemens-home.com *9000862668* 9000862668 930108...