Table of Contents
Advertisement
Quick Links
Advertisement
Table of Contents

Related Manuals for Baumatic Megachef B630MC


Summary of Contents for Baumatic Megachef B630MC
- Page 1 MEGACHEF B630MC 60 cm Built-in Pyrolytic oven...
- Page 2 User Manual for your Baumatic Megachef B630MC 60 cm Built-in Pyrolytic oven NOTE : This User Instruction Manual contains important information, including safety & installation points, which will enable you to get the most out of your appliance. Please keep it in a safe place so that it is easily available for future reference;...
-
Page 3: Table Of Contents
Replacing the oven bulb Removing the oven door for cleaning Removing the inner door glass for cleaning Installation 26 - 28 Electrical connection 26-27 Positioning the appliance Ventilation requirements My appliance isn’t working correctly 29 – 30 Baumatic consumables Contact details... -
Page 4: Environmental Note
Environmental note o The packaging materials that Baumatic uses are environmentally friendly and can be recycled. o Please discard all packaging material with due regard for the environment. -
Page 5: Important Safety Information
IMPORTANT SAFETY INFORMATION Your safety is of the utmost importance to Baumatic. Please make sure that you read this instruction booklet before attempting to install or use the appliance. If you are unsure of any of the information contained in this ooklet, please contact the Baumatic Advice Line. - Page 6 Child Safety o Baumatic strongly recommend that babies and young children are prevented from being near to the appliance and not allowed to touch the appliance at any time.
- Page 7 Baumatic Ltd. declines any respon sibility for injury or damage, to person or property, as a result of improper use or installation of this appliance.
-
Page 8: Specifications
cifications Product Dimensio Aperture Dimensions Height: 595 mm Height: 585-590 m Width: 595 mm Width: 565 mm Depth: 575 mm Depth: 585 mm Product specifications 10 functions o Energy efficiency class: A o Oven capacity gross/net: 65/63 litres LED semi-automatic timer o Cooling fan o Thermostatically controlled g rill... -
Page 9: Electrical Details
Optional extras BPS2 Pizza stone Electrical details Rated Voltage: 220-240 Vac 50-60 Hz Supply Connection: 16A (dou ble pole switched fused outlet with 3m m contact gap) ax Rated Inputs: 3.20 kW ains Supply Lead: 3 x 1.5mm² Cooling fan o A tangential cooling fan is fi tted inside of the appliance, to make the internal temperature of the oven stable and the external... -
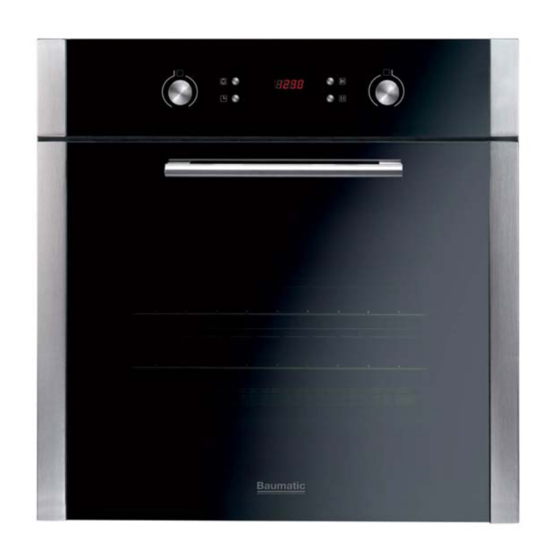
Page 10: Control Panel
Control Panel 1) Selector knob 2) Minute minder button 3) Clock button 4) Pause / Stop cook ing button 5) Start cooking button ) Adjustment knob 7) LED display LED display 8) Oven function symbo 9) Oven temperature 10) Safety lock symbol 11) Time of day/minute m inder time 12) Alarm/timer symbol... -
Page 11: Initial Set-Up Of Your Oven
Initial set-up of your oven Setting the time of day o When the oven is connected to your mains supply for the first time (or after a power cut), the digits on the LED display (7) will show “0:00” and there will be an audible signal. o Press the clock button (3) and the hour digits will flash on the LED display. -
Page 12: Timer Functions
o Outer parts of the oven should be cleaned with warm soapy water, using either a sponge or soft cloth. No abrasive cleaners should be used. We would recommend that an appropriate stainless steel cleaner and polish is regularly used on the stainless steel surfaces of this appliance. -
Page 13: Duration Timer
Note: You cannot amend the minute minder after a cooking function has been sta rted. To do this, you must cancel the urrent cooking operation and re-program the minute minder nd cooking function. The duration timer The duration timer is a countdown timer that is linked to your oven. -
Page 14: Using Your Oven
Using your oven Selecting an oven function, temperature and duration he selector knob should be used to select the particular mode of cooking that you require. The appliance will utilise different elements within the oven cavity, depending on the oven function that you select. o Turn the selector knob (1) to select the oven function that you require. -
Page 15: Oven Functions
Oven unctions VEN LIGHT: Separate light control which allows the light to e switched on, even when the oven is not in use. DEFROST MODE: The fan runs without heat to reduce th defrosting time of frozen foods. The time required to d efrost the food will depend on t he room temperature, the quantity... -
Page 16: Pausing A Cooking Function
FAN OVEN: This method of cooking uses the circular element while the heat is distributed by the fan. This results in a faster and more economical cookin g process. The fan oven allows food to be cooked simultaneously on different shelves, preventing the tran smission of smells and tastes from one dish onto another. -
Page 17: Safety Lock
afety lock When the safety lock is switched on, it di sables the control panel so that it is not possible to alter any settings. o Press the stop cooking (4) and start cooking (5) buttons simultaneously for 3 seconds. o There will be a long audible signal and a symbol will appear on the LED display, these confirm that the safety lock has been... -
Page 18: Cooking Guidelines
ooking guidelines o Please refer to the information given on food packaging for guidance on cooking temperatures and times. Once familiar with the performance of your appliance, temperatures and times can be varied to suit personal preference. o When using the fan oven function you should follow the informat given on the food packaging for this particular mode of cooking. -
Page 19: Shelf Positions
You should also never line the base of your oven with aluminium foil. o During coo king, never place pans or cookware directly onto the bottom of your oven. They should always be placed on the shelves provided. o The grill heating element and other internal components of th e oven become extremely hot during operation, avoid touching them inadvertently when handling the food which you are grilling. - Page 20 Meat probe settings You can cook your favourite dishes using the food probe. The sensor in the probe detects the internal temperature of the food during cooking. It will indicate when the set core temperature has been reache d and the meat has been cooked satisfactorily.
-
Page 21: Using The Meat Probe
o When the temperature that you have set has been reached inside the food, the oven will switch off the active heating elements, an audible signal will sound 5 times and the temperature display (9) will flash on the LCD display. o NOTE: You cannot set a cooking time when using the meat probe. -
Page 22: Cleaning And Maintenance
Cleaning and maintenance External cleaning operations must only be carried out when the oven is cool and with the appliance disconnected from your mains supply. o The oven should be thoroughly cleaned before it is operated for the first time. The pyrolytic cleaning process listed below should be followed AT LEAST once a month or mo re frequently if there have been food spillages inside of the cavity. -
Page 23: General Cleaning
Any damage that is caused to the appliance by a cleaning product will not be fixed by Baumatic free of charge, even if the appliance is within the guarantee period. Replacing the oven bulb... -
Page 24: Removing The Oven Door For Cleaning
Removing the oven door for cleaning To facilitate the cleaning of the inside of the oven and the outer frame of the oven, the door can be removed as follows:- o The hinges (A) have two movable bolts on them (B). o If you raise both of the movable bolts (B), then the hinges (A) are released from the oven housing. -
Page 25: Removing The Inner Door Glass For Cleaning
Removing the inner door glass for cleaning o Do not use harsh or abrasive cleaners or sharp metal scrapers to clean the oven door glass since they can scratch the surface which may result in shattering. o To facilitate cleaning, the inner door glass can be lifted out. ... -
Page 26: Installation
INSTALLATION The installation must be carried out by a suitably qualified person, in accordance with the current version of the following. o UK Regulations and Safety Standards or their European Norm Replacements. o Building Regulations (issued by the Department of the Environment). -
Page 27: Positioning The Appliance
If the mains supply cable is damaged, then it must be replaced by an appropriate replacement which can be obtained from the Baumatic Spares Department. Positioning the appliance o Ensure that the aperture that you will be fitting the oven into is of the size given in the above diagram. -
Page 28: Ventilation Requirements
Ventilation requirements (Figure shows the ventilation and cut-out requirements for the installation of the appliance into a standard kitchen unit). (Figure shows the ventilation and cut-out requirements for the installation of the appliance into a tall housing unit). o Ensure that the oven has been securely fixed into the housing unit. -
Page 29: My Appliance Isn't Working Correctly
My appliance isn’t working correctly o The oven isn’t coming on. * Check that you have selected a cooking function and a cooking temperature. o There appears to be no power to the oven and grill. * Check that the appliance has been connected to the electrical mains supply correctly. - Page 30 Or any installation other than the one specified by Baumatic Ltd. has been completed. Please refer to the conditions of guarantee that appear on the...
-
Page 31: Baumatic Consumables
BC005 Stainless Steel Cleaner and Protector (250 ml) o BC007 E-Cloth – General Purpose Cloth o BC008 Microwave Cover To order a Baumatic consumable product please call 0123 5437 244 and quote the product code. You can also order online from eshop.baumatic.co.uk... -
Page 35: Contact Details
Kundendienst & Ersatzteile E-mail: Deutschland 0049(0)180-5888975 sales@baumatic.co.uk Oesterreich +43 (0) 820 / 420423 customercare@baumatic.co.uk spares@baumatic.co.uk www.baumatic.de technical@baumatic.co.uk Italy Website: Baumatic Italia S.R.L. www.baumatic.co.uk Via Galvani N.3 35011 Campodarsego (PD) Facebook: www.facebook.com/baumatic.uk +3904 9920 2297 www.baumatic.it Republic of Ireland Holland Service Telephone Baumatic Benelux B.V.