Advertisement
Quick Links
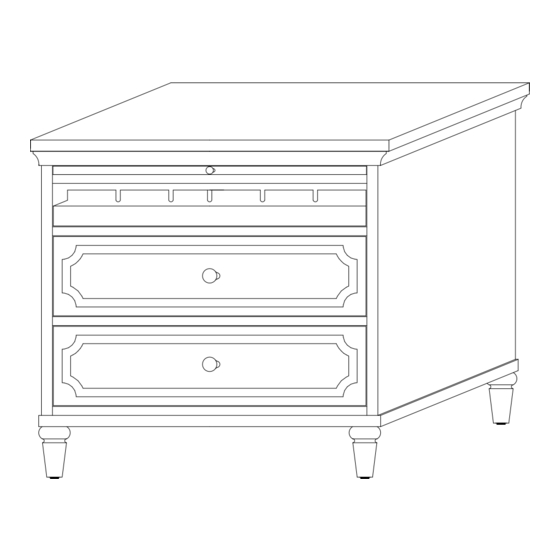
PRODUCT NAME:
Isabella Large Nightstand with Charging Station
ITEM NUMBER:
MB421
DIMENSIONS OF ITEM ASSEMBLED: 30 1/4'' H X 32'' W X 18 1/2'' D
PRODUCTS ARE NOT INTENDED
FOR COMERCIAL USE
UPDATED: 08/11/2015
Customer Service: 800-367-2810
Online:
www.ballarddesigns.com
MADE IN INDONESIA
Page 1 of 4
Advertisement

Related Manuals for Ballard Designs Isabella MB421


Summary of Contents for Ballard Designs Isabella MB421
- Page 1 Customer Service: 800-367-2810 Online: www.ballarddesigns.com PRODUCT NAME: Isabella Large Nightstand with Charging Station ITEM NUMBER: MB421 DIMENSIONS OF ITEM ASSEMBLED: 30 1/4’’ H X 32’’ W X 18 1/2’’ D PRODUCTS ARE NOT INTENDED MADE IN INDONESIA FOR COMERCIAL USE Page 1 of 4 UPDATED: 08/11/2015...
- Page 2 TOOLS NEEDED: Ltr. Qty. Hardware included Assembly may require 2 people. NOTE: When unpacking, lay the parts on a padded surface such as the packaging provided. Anti Tip Kit Ltr. Components Feet (B) STEP 1: Lay the Nightstand on its back on a smooth, clean surface. Screw each Foot (B) into the bottom corners of the Nightstand.
- Page 3 STEP 2: If the Nightstand is uneven, adjust the levelers on the bottom of each Foot (B) by twisting them clockwise or counterclockwise until the Nightstand is even. ANTI TIP INTALLATION PART A: Ltr. Hardware Included Small Screw Large Screw Brackets Retention Belt Customer Service: 800-367-2810...
- Page 4 Attach the Brackets (E) horizontally to the top of the back of the Nightstand using the Small Screws (C). Screw the remaining Brackets (E) vertically 1 inch below the brackets attached to the Nightstand using the large screws (D). The Large Screws (D) should be screwed into a stud in the wall. Align the Brackets vertically and string in the Retention Belt (F).