Panasonic WX-CC412BP Operating Instructions Manual
Hide thumbs
Also See for WX-CC412BP:
- Operating instructions manual (50 pages) ,
- Operating instructions manual (38 pages)

Related Manuals for Panasonic WX-CC412BP


Summary of Contents for Panasonic WX-CC412BP
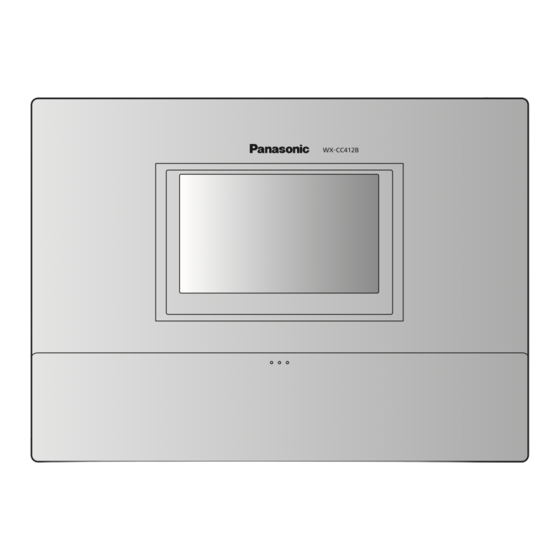
- Page 1 Operating Instructions <Setup Instructions> Center Module WX-CC411BP Model No. WX-CC412BP...
-
Page 2: Table Of Contents
Setting the nighttime volume ..........25 Features ................3 Setting the store hours ...........26 System diagram ...............3 Setting the tandem lane (WX-CC412BP only) ....28 Operation .................4 Setting each lane [Lane] ..........30 Concerning the Operating Instructions ......5 Setting the volume of input sound ........30 Trademarks and registered trademarks ......5... -
Page 3: Before Use
The system contains a scheduler to enable the greeter message to be changed at designated times and reminder messages to be played back automatically. w p Up to four Network Cameras made by Panasonic can be registered, and their images can be monitored on this unit’s LCD display. -
Page 4: Operation
With dual lane operations, the vehicle detectors for lane A and lane B operate independently of each other, and when each of these vehicle detectors is set to ON, the greeter message for the lane concerned is played back. These lane operations are supported by the WX-CC412BP. Hello... -
Page 5: Concerning The Operating Instructions
A is OFF and the vehicle detector for lane B is set to ON, a tandem lane message urging the customer to move to lane A is played back. These lane operations are supported by the WX-CC412BP. Pull forward... -
Page 6: Network Security
Before use w Network Security Important w p Apply measures such as user authentication for the servers and the connected devices to protect your network against leakage or theft of information, including image data, authentication information (usernames and passwords), alarm mail information, FTP server information, etc. -
Page 7: Screen Operations
Screen operations Notice w Basic screen operations w p The LCD display is easily scratched, so always This section describes basic screen operations. perform the operations involving this display using one finger. w p Do not use a ballpoint pen or other hard-tipped or sharp object, including fingernails, to perform touch panel operations. -
Page 8: Inputting Characters
Screen operations w Inputting characters w Inputting the date and time Use the keys on the keyboard to input the characters when Input the date and time by using the [+] and [-] buttons. a password or an address is to be input. 1 Input character display area The characters that have been input are displayed. -
Page 9: Displaying The Settings Screen
Displaying the Settings screen The Settings screen for the Center Module is displayed after the password is confirmed. w Settings screen display <When starting for the first time> <After setting the password> A password needs to be set. You need to input the password. Touch (setting button) on the touch Touch... -
Page 10: Setting The Center Module
Setting the Center Module This function is used to select an item to set from the w Setting the current date and Settings screen and perform the required settings. time w Installation settings This function is used to set the current date and time for the [Installation Settings] Center Module. -
Page 11: Setting The Daylight Saving Time
Setting the Center Module Touch the [Set] button. w Setting the daylight saving time w p The daylight saving time setting is updated. This function is used to set the daylight saving time. Note On the Settings screen, touch the [Installation w p After daylight saving time is set, all schedule-related Settings] button, [Date &... -
Page 12: Changing The Password
Setting the Center Module w Changing the password w Setting the network address Change the password. This function is used to set the network for the Center Module. On the Settings screen, touch the [Installation On the Settings screen, touch the [Installation Settings] button, and then the [Password] Settings] button, and then the [Network] button. -
Page 13: Setting The Help Contact
Setting the Center Module [IP Address] w Setting the help contact Set the IP address. Touch the [Edit] button, and then input the IP address. “Help Contact” is a function that allows you to check the Default setting: 192.168.0.50 emergency contact number on the Help Contact screen. Input the phone number to be displayed on the Help Contact [Subnet Mask] screen. -
Page 14: Setting The Screen And Touch Panel
Setting the Center Module [Language] w Setting the screen and touch Select the language to be displayed on the panel LCD display. Touch the [Select] button, and then select a display language. Select a This function is used to set items related to the LCD display language from the following. -
Page 15: Setting The Quick Login [Quick Login]
Setting the Center Module w Setting the quick login w Setting audio quality [Quick Login] [Sound Band] Quick login is a function for logging in without inputting a Set the audio quality for TALK and PAGE on the All-In-One password in a password input screen when displaying the Headsets and Belt Packs. -
Page 16: Setting The Order Post Microphone [Outside Mic]
[Lane A/B] button)* . system restarts automatically. w p The greeting messages, reminder messages, and * This appears only when the WX-CC412BP is used. alert messages remain in the Narrowband audio quality even when the setting is “Wideband”. -
Page 17: Setting Terminals [Terminal Settings]
Setting the Center Module Note w Setting terminals w p Refer to “Speed Team” in “Convenient Functions” in [Terminal Settings] “Operating procedures” in the Operating Instructions <Installation Guide> for information about Speed Team Set the external devices connected to the Center Module. operation. -
Page 18: Setting The All-In-One Headset Or Belt Pack [Headset]
Setting the Center Module Note w Setting the All-In-One Headset w p For information about operations when a vehicle or Belt Pack [Headset] detector is connected or a button for calling from the order post is connected, refer to “Call button The Headset is a general term for All-In-One Headset or connection”... - Page 19 [NO] button. heard from the earphone, and the lane indicator will blink orange. In the case of the WX-CC412BP, after lane A registration, the “Connecting center module B” voice prompt will be heard, and the lane indicator will blink green.
- Page 20 Setting the Center Module Important How to delete an ID w p When registering the IDs of a multiple number of All- In-One Headsets or Belt Packs, register the ID of each This function is used to cancel the ID registration of All-In- unit in sequence.
- Page 21 Setting the Center Module Note How to register groups w p You can register up to 32 All-In-One Headsets or Belt Packs in a group. Register a group of All-In-One Headsets or Belt Packs. w p You can register an All-In-One Headset or Belt Pack If you select a group as the broadcast destination for alert in multiple groups.
-
Page 22: Setting The Single Talk [Talk]
[ID Registration] button. Use the single talk function. Default setting: OFF * This appears only when the WX-CC412BP is used. Note w p The number of units that can simultaneously talk per lane is up to 4 when TALK and PAGE are combined. - Page 23 L When WX-CC411BP is used, 2 can be registered in 1 lane. w p The numbers of any registered Wireless Repeaters L When WX-CC412BP is used, you can register 1 are shown in the [Registered Wireless Repeaters] Wireless Repeater per lane or 2 in 1 lane.
- Page 24 Repeater] button, ([Lane A/B] button,)* and then the [ID Deletion] button. * This appears only when the WX-CC412BP is used. w p All of the Wireless Repeater with registered IDs are displayed in a list. On the ID Deletion screen, touch the [Deletion] button of the Wireless Repeater to be deleted.
-
Page 25: Store Settings [Store Settings]
Note This function is used to reduce the volume level of the voice w p When WX-CC412BP is used, this setting is applied to output from the order post speaker. Use this function to both lane A and lane B. -
Page 26: Setting The Store Hours
Store settings [Store Settings] Set the closing greeter message or holiday w Setting the store hours greeter message. This function is used to set the business hours for the store. Touch the [Select] button for the [Closed Message]/ With this function, you can play back the closing greeter [Holiday Message] and select a message from the message for customers who visit the store outside of greeter message list. - Page 27 Store settings [Store Settings] Setting business hours How to copy Store Hours settings When setting the Store Hours to AUTO, set the business You can copy settings for the Store Hours to another day hours in advance. The following is the setting method for the of the week.
-
Page 28: Setting The Tandem Lane (Wx-Cc412Bp Only)
Setting the tandem lane (WX-CC412BP only) Tandem lane When WX-CC412BP is used, you can select dual lane mode or tandem lane mode, depending on how the order posts Operations in an environment in which the order posts are installed. are installed in series are referred to as “tandem lane”... - Page 29 Setting the tandem lane (WX-CC412BP only) On the Settings screen, touch the [Store Settings] button, and then the [Tandem Lane] button. [Tandem Lane] Set the tandem lane. OFF: Dual lane Tandem lane Default setting: OFF [Message] Select the tandem lane message.
-
Page 30: Setting Each Lane [Lane]
All-In-One Headsets or Belt Packs or order [Output Volume] button. post speakers. * This appears only when the WX-CC412BP is used. On the Settings screen, touch the [Lane] button, ([Lane A/B] button,)* and then the [Input Volume] button. -
Page 31: Setting The Aux Sp
([Lane A/B] button,)* and then the [AUX kitchen speaker. Speaker] button. Default setting: TALK: PAGE: * This appears only when the WX-CC412BP is used. Volume: 11 [AUX Mic] Set whether to output the voice of the kitchen microphone to the kitchen speaker. The volume setting of the kitchen microphone is common to all the outputs and you can set it by referring to “Setting the volume of... -
Page 32: Setting The Dsp
[DSP] button. for outbound audio. This function removes ambient noise from inside the * This appears only when the WX-CC412BP is used. store so that the operator’s voice is conveyed clearly. Set according to the environment around the operator’s microphone. -
Page 33: Setting The Messages [Message]
Setting the messages [Message] This function is used to set the greeter message, reminder w Recording messages message, and alert message. As an example, the procedure for recording a greeter Greeter message message is explained below. You can also record the reminder message and alert message using this procedure. - Page 34 Setting the messages [Message] Register the recorded voice to the message. Perform PAGE operation with an All-In-One Headset or Belt Pack and start recording. w p When automatic playback after recording is finished, the registration confirmation screen is displayed. w p When PAGE operation is performed using the All-In- One Headset or Belt Pack for lane A according to the directions displayed on the screen, a beep tone is heard and recording starts.
-
Page 35: Confirmation Playback
Setting the messages [Message] w Confirmation playback To confirm the recorded message, play back the message on the All-In-One Headset or Belt Pack for lane A. As an example, the procedure for playing back and confirming the greeter message is explained below. You can also play back and confirm the reminder message and alert message according to this procedure. -
Page 36: Setting The Greeter Message
Setting the messages [Message] w Setting the greeter message Setting the overall greeter message This function provides a voice message to “greet” each customer. When the vehicle detector detects a vehicle, the This function is used to set the overall greeter message. greeter message is automatically output from the order post. - Page 37 Setting the messages [Message] Setting individual greeter message Setting the greeter message schedule This function is used to set individual greeter message. You This function is used to set the greeter message schedule. can use up to 30 greeter messages. You can change the greeter message automatically to play back different greeter messages in different time zones.
- Page 38 Setting the messages [Message] Set the schedule. Touch the [Set] button. w p When adding a new schedule, touch the [Add] button. w p The set contents are applied to the schedule. w p When editing a schedule that has already been set, Note touch the schedule number button.
-
Page 39: Setting The Reminder Message
Setting the messages [Message] How to delete daily schedules Setting individual reminder message You can delete the entire currently displayed schedule. When deleting the entire schedule, touch the [YES] button. This function is used to set individual reminder message. To return without deleting, touch the [NO] button. You can use up to 30 reminder messages. - Page 40 Setting the messages [Message] Set the schedule. Setting the reminder message schedule w p When adding a new schedule, touch the [Add] button. w p When editing a schedule that has already been set, This function is used to set the reminder message schedule. touch the schedule number button.
-
Page 41: Setting The Alert Message
Setting the messages [Message] w Setting the alert message Setting individual alert message Set the alert message to notify store personnel when a security alert occurs. This function is used to set individual alert message. For operations to be performed when a security alert occurs, You can use up to 30 alert messages. -
Page 42: Setting The Security Alert [Security Alert]
Setting the security alert [Security Alert] On the Settings screen, touch the [Security This function is used to set the operations to be performed when a security alert notice is received from button F of an Alert] button. All-In-One Headset or Belt Pack or from alert inputs 1 to 4. w p The following types of security alerts are displayed. - Page 43 Setting the security alert [Security Alert] [Camera Monitoring] When the [Alert 1 to 4] (alert input terminal) is selected Touch the [Select] button to select a Network Camera to be displayed on the LCD display when a security alert occurs. OFF: The image of the Network Camera is not displayed on the LCD display.
-
Page 44: Using An Sd Card [Sd Memory Card]
Using an SD card [SD Memory Card] You can back up current settings and messages on an w w Back up the settings data and SD card. You can also restore the backup settings and messages messages. This function backs up the current settings and messages Important on an SD card. -
Page 45: Restoring The Backup Data
Using an SD card [SD Memory Card] When the [Operation Settings] button is touched w Restoring the backup data w p The following confirmation pop-up screen is displayed. To perform restoration, touch the [OK] This function is used to restore the data backed up on an button. - Page 46 The backup data acquired from the following Center Modules cannot be restored to WX-CC411BP or WX-CC412BP. Furthermore, the backup data acquired from WX-CC411BP and WX-CC412BP cannot be restored to the following Center Modules. L WX-CC411 L WX-CC412 L WX-CC411A...
-
Page 47: Formatting An Sd Card
Using an SD card [SD Memory Card] w Formatting an SD card Composition of folders on SD card When an SD card is inserted in this unit, the following This function is used to format an SD card. An SD card folders are created on it. -
Page 48: Maintenance [Maintenance]
Maintenance [Maintenance] This function is used to check the software version of the w Data initialization Center Module or return the Center Module to the factory settings. This function is used to return the settings to the factory settings. The data, including the registration information for w Displaying the software version the All-In-One Headsets or Belt Packs and messages, is initialized. -
Page 49: Pop-Up Messages
Pop-up messages The following are typical pop-up messages displayed on the LCD display and the causes and remedies for them. Category Wording Cause/solution Displayed when an inserted SD card is read SD card was read successfully. normally. Password was changed successfully. Displayed when the password is changed normally. - Page 50 Pop-up messages Category Wording Cause/solution Displayed when you perform group setting or deletion Warning No headset is registered. of an All-In-One Headset or Belt Pack when no All-In- One Headset or Belt Pack is registered. Displayed when a password change fails. Check the Unable to set the password.
-
Page 51: Troubleshooting
Troubleshooting Check the following before requesting repair. Consult your sales shop if these measures do not resolve a problem, if symptoms not listed here occur, or if you have a question related to engineering. Symptom Cause/solution Reference pages No communication between Operating w p Is the power cord connected securely to the AC input terminal the order post, Belt Packs... - Page 52 Troubleshooting Symptom Cause/solution Reference pages Even when an All-In-One w p Is the [Sound Band] set to “Wideband”? Headset or belt pack is Set to “Narrowband” when using WX-CT420, WX-CH450, registered to a Center P.15 WX-CH455, or WX-CH457P (software version earlier than 2.0). Module, they remain out of (The default setting is “Wideband”.) range.