Bushnell Neo Ghost - GPS Rangefinder Manual
- User manual (76 pages) ,
- Quick start manual (4 pages) ,
- User manual (16 pages)
Advertisement
- 1 Care and Maintenance
- 2 Legal Disclaimer
- 3 Additional Information
- 4 Bushnell Golf GPS Website
- 5 Charging the Battery
- 6 Buttons and Functions
- 7 GETTING STARTED
- 8 USING THE PLAY GOLF MODE
- 9 Displayed Info in Play Golf Mode
- 10 Button Functions in Play Golf Mode
- 11 USING THE PLAY MENU IN PLAY GOLF MODE
- 12 PLAY GOLF MENU ITEMS
- 13 USING THE SETTINGS MODE
- 14 SETTINGS MENU ITEMS
- 15 Accessing Updated Golf Course Data
- 16 How to Find the Product ID / Serial Number
- 17 Documents / Resources
Care and Maintenance
The NEO Ghost is durable and waterproof. To help ensure reliable operation, the following care and maintenance guidelines are recommended:
- Avoid exposing the unit to extreme environmental conditions for a prolonged period of time.
- Avoid severe impacts on the unit.
- You may clean the unit occasionally with a soft, damp cloth.
- DO NOT expose the unit to strong chemicals such as gasoline and alcohol, as they will damage the unit.
- Store the unit in a dry place when it is not in use.

Do not attempt to open the NEO Ghost.
Risk of explosion if battery is replaced with incorrect type.
- Do not attempt to open, disassemble or service the internal battery. The battery must be replaced by a qualified technician.
- Do not crush, puncture or short the battery's external contacts. Do not expose to temperatures above 140o F (60o C).
- Properly recycle or dispose of the battery. Do not dispose in fire or water.
Legal Disclaimer
By using this product, you agree that Bushnell Outdoor Products will not be held legally responsible for any injury or damage to you or any person or property caused by the user's improper operation and/or poor judgment while using this product.
Note: See Limited Warranty for other limitations to our liability.
Additional Information
The Global Positioning System (GPS), a network of 32 satellites orbiting Earth, is operated and maintained by the U.S. government. This GPS device requires at least 3 satellites to be acquired to accurately determine your position. Any change made to the system by the government could affect the accuracy and performance of this product.
Bushnell Golf GPS Website
www.bushnellgolf.com is the best online resource for all our Golf GPS product owners, including product support, FAQs, etc. It also serves as a portal to access iGolf.com GPS course files to use with these Bushnell products. Registering your NEO Ghost via www.bushnell.igolf.com is not required, but will ensure you have access to the latest updated GPS course data.
Charging the Battery
The rechargeable battery of the NEO Ghost is long lasting and provides up to 16 hrs (3 rounds of golf typically) on a charge. However, battery life may be reduced due to a variety of factors (external temperature, etc). All rechargeable batteries lose their effective charge length over time. At the end of your round, be sure to completely power off your NEO Ghost by pressing and holding the PWR button until the display goes off.
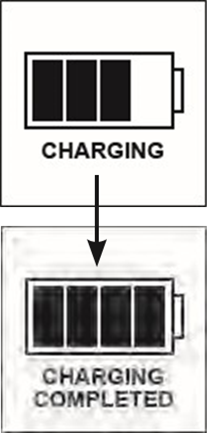
To check your remaining battery life, select "Battery" from the PLAY GOLF menu, or from the SETTINGS menu. To recharge the battery, attach the smaller plug on the included USB cable to the port at the bottom side of the unit and connect the large (standard) USB plug to your computer. The NEO Ghost and USB cable are compatible with all USB ports, including iPhone/other smartphone USB chargers. Once connected, press the PWR button-the display will read "CHARGING". When the Ghost is fully charged (about 4 hrs from totally discharged state, less if partial charge remains) and ready to use, "CHARGING COMPLETED" will be displayed (press PWR to check charge status if not displayed).
Package Contents
1 - Bushnell NEO Ghost GPS Rangefinder
1 - USB/Charging Cable 1 - Quick Start Guide
Computer Requirements
USB Port
OS: Windows (XP/Vista/Windows 7 or higher), Mac (OS X 10.4 or higher)
Firmware/Software Updates
Please check www.bushnellgolf.com periodically for the latest firmware and software releases.
Buttons and Functions

- SHOT DISTANCE Button: Press at starting point, walk to ball position to find length of shot.
- MENU Button: View Menu options/items.
- UP
![]() Button: Scrolls up through Menu.
Button: Scrolls up through Menu. - SELECT
![]() Button: Selects highlighted Menu item.
Button: Selects highlighted Menu item. - DOWN
![]() Button: Scrolls down through Menu.
Button: Scrolls down through Menu. - PWR Button: Press & hold (1.5 sec.) to power on/off.
- USB Port: Connect to PC or smartphone charger with supplied cable to charge.
 Button: Scrolls up through Menu.
 Button: Selects highlighted Menu item.
 Button: Scrolls down through Menu.
*Note: Backlight is activated with any button push. The backlight will remain lit for 10 seconds after last button push. Backlight is disabled in Play Golf Mode.
GETTING STARTED
- First, be sure the battery has a full charge. If you are using it for the first time, it should be charged until full. Next, make sure you are outdoors, in a location with a clear view of the sky overhead, to ensure good reception of GPS satellite signals. Now, you're ready to power up and use your NEO Ghost.
![]()
- Press and hold the PWR button on the top side of the unit until it powers on (start screen as shown on right). Press and hold again to turn off the power.
![]()
- To turn on the backlight after the unit is powered on, briefly press and release the PWR button.
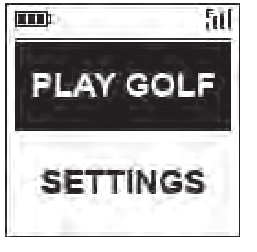
- The display will show the Main Menu (from the time & date display screen, press the MENU button on the right side), with a choice of two operating modes: PLAY GOLF or SETTINGS.
![]()


USING THE PLAY GOLF MODE
- Highlight PLAY GOLF and press the SELECT button. Display will show "SEARCHING", then SELECT COURSE.
![]()
- Use the UP/DOWN buttons to select (highlight) your course from list of nearby courses (closest distance at top), then press SELECT.
- The display will show "LOADING", then: Current hole # (at upper left), Par for the hole (upper right), and distances to the center (large number at center screen), front (lower left) and back (lower right) of green.
![]()


Displayed Info in Play Golf Mode

Button Functions in Play Golf Mode

- Press UP or DOWN buttons to manually advance to the next hole (useful for "shotgun" starts), or go back to the previous hole.
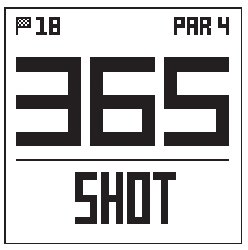
- Press the SHOT button at the tee ("point A")-display will update to indicate distance from point A to your current location ("point B") as you walk. Useful to measure the length of your shot. Press SHOT again to return to zero and set a new starting point.
![]()
- Press the SELECT button to display distances to bunkers, hazards, etc. for the hole from your current location. Press SELECT again to return to the regular PLAY GOLF display.
![]()

USING THE PLAY MENU IN PLAY GOLF MODE
- In PLAY GOLF Mode, press the MENU button to view the PLAY MENU.
![]()
- Select item from menu using UP/ DOWN buttons to highlight it, then press SELECT button.
- If multiple options are available for a setting, use UP/DOWN to highlight your choice, then press select.
- A dot in a checkbox to the left of a setting indicates the current setting (to change it, highlight a different setting and press SELECT).
- Press MENU button to return to previous menu screen.

PLAY GOLF MENU ITEMS
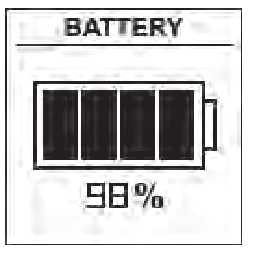
- BATTERY*: press SELECT button to see battery condition (charge %). (*also provided in the SETTINGS Menu)
![]()
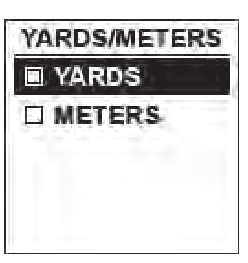
- YARD/METER*: press SELECT. Dot in checkbox indicates current setting (default=YARDS). To change how distances are displayed, highlight YARDS or METERS, press select. (*also provided in the SETTINGS Menu)
![]()
- RESUME PLAY: from any screen, returns display to showing current hole and distances based on current location.
- NEW COURSE: select another golf course from list.
- EXIT ROUND: stops tracking course, ends current game.
USING THE SETTINGS MODE
- Highlight SETTINGS (if you are in PLAY GOLF mode, press MENU and select EXIT ROUND to go to the main menu) and press SELECT.
![]()
- Select item from menu using UP/ DOWN buttons to highlight it, then press SELECT button.
- If multiple options are available for a setting, use UP/ DOWN to highlight your choice, then press select.
- A dot in a checkbox to the left of a setting indicates the current setting (to change it, highlight a different setting and press SELECT).
- Press MENU button to return to previous menu screen.

SETTINGS MENU ITEMS
- BATTERY*: press SELECT button to see battery condition (charge %). (*also provided in the PLAY GOLF Menu)
- YARD/METER*: press SELECT. Dot in checkbox indicates current setting (default=YARDS). To change how distances are displayed, highlight YARDS or METERS, press select.(*also provided in the PLAY GOLF Menu)
- AUTO OFF: press SELECT. Dot in checkbox indicates current setting (default=OFF). ON=unit will automatically power off after 30 minutes if no buttons have been pressed (or if unit has not auto advanced to next hole as you walk the course). OFF=unit will stay powered on until user manually powers off by holding PWR button. To change setting, highlight ON or OFF, press SELECT.
![]()
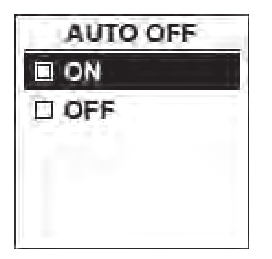
NOTE: selecting "ON" can help avoid running down the battery charge if you forget to power off after a round-but there is the possibility of losing GPS satellite contact, along with all data generated since your start of play. "OFF" is the normally recommended setting. Use "ON" with caution.
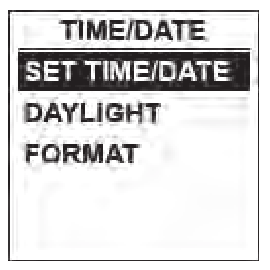
- TIME/DATE > press SELECT then highlight and select one of these four time/date related settings:
![]()
- TIME ZONE: scroll through list and highlight your time zone (list continues if DOWN button is pressed at bottom of screen), press SELECT.
-
SET TIME/DATE: press SELECT and highlight a method:
- BY GPS: press SELECT to automatically set the time based on your current GPS location.
![]()

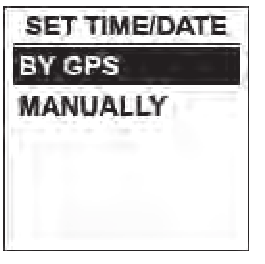

- MANUALLY: use the UP/DOWN buttons to enter the correct current time and date yourself.


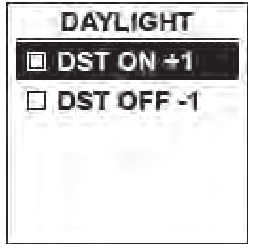
- DAYLIGHT SAVI: press SELECT and highlight current daylight savings time status for your location:
- DST ON +1
- DST OFF -1
![]()
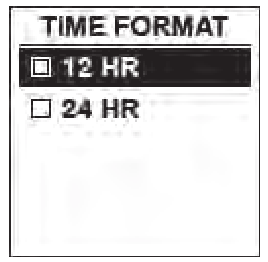
- FORMAT: press SELECT and highlight preference for time display:
- 12 HOUR
- 24 HOUR
![]()
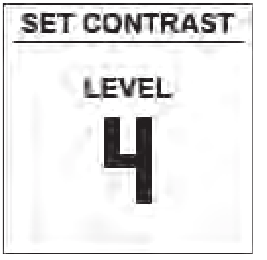
- CONTRAST: press SELECT then use UP/DOWN to select the display contrast level for best viewing quality, from 1 (lowest) to 10 (highest). Lower contrast can improve screen viewing in bright sun, as can higher contrast settings on cloudy days.
![]()
- ABOUT: press SELECT to display your unit's firmware version.
![]()

Accessing Updated Golf Course Data
Your NEO Ghost is pre-loaded with data for over 33,000 courses located worldwide. It is ready to use right out of the box, with no need to download software or pay any membership fees.
But you might be thinking, "What if a new course opens sometime after my unit was made? Is there a way to update the database in my unit to add it?" The answer is yes, and it's simple to do.
Go to www.bushnellgolf.com and view the product page for any of the different color versions of the NEO Ghost. You'll find three orange links you can click:
- How to Update Your Golf GPS with the Latest Maps
Click this link for step-by-step directions for finding and downloading new course data from iGolf.com -
Request Course Update
Click this link to go to a form you can fill out and email to iGolf to submit a course that is not included in the database, or if you find information (data for a hole) that is not mapped correctly on an existing course. - Search for Available Courses on Your Bushnell Golf GPS
Click this link to search the current iGolf database to verify a course you are interested in is included.
You can also go to: https://igolf.com and click "Join Now", fill in your contact info on the registration form then select "I Have A GPS Device" to access course updates.
Use the provided USB cable to connect your NEO Ghost to your PC or Mac. Once connected, the screen will display "USB MODE".

How to Find the Product ID / Serial Number
The serial # (Product ID) of your Ghost can be found on the back of the unit. Write it down below for future reference. You will need it to register on the iGolf site so you can access newly added golf courses or update data for existing courses.
Product ID (serial #)

Documents / Resources
References
![www.bushnellgolf.com]() Bushnell Golf | Golf Accessories - GPS - Laser Rangefinders
Bushnell Golf | Golf Accessories - GPS - Laser RangefindersHOME | Legacy Support
![igolf.com]() iGolf: Unlock Endless Potential with us
iGolf: Unlock Endless Potential with us
Download manual
Here you can download full pdf version of manual, it may contain additional safety instructions, warranty information, FCC rules, etc.
Advertisement
Thank you! Your question has been received!


Need Assistance?
Do you have a question about the Neo Ghost that isn't answered in the manual? Leave your question here.