Table of Contents
Advertisement
Quick Links
Advertisement
Table of Contents

Related Manuals for Nespresso Essenza FS


Summary of Contents for Nespresso Essenza FS
- Page 1 Service Manual Coffee Machine EF 473 EF 474 Essenza FS...
-
Page 2: Table Of Contents
Contents Preface Electronic control board, wiring diagram - _____________________________ 3 USA (UL, 120 V / 60 Hz) _____________ 24 Main Components __________________ 4 Electronic control board, wiring diagram - Japan (100 V / 50-60 Hz) _____________ 25 Overview ___________________________ 4 Descaling (1) _______________________ 26 Overview of rating plates... -
Page 3: Preface
Preface The purpose of this Service Manual is to provide the service personnel with all necessary information with regards to correct handling, maintenance and repair of the coffee machines EF 473 and EF 474. This manual should be used by the technicians as a valuable aid to guarantee the permanent readiness for use of the machine. -
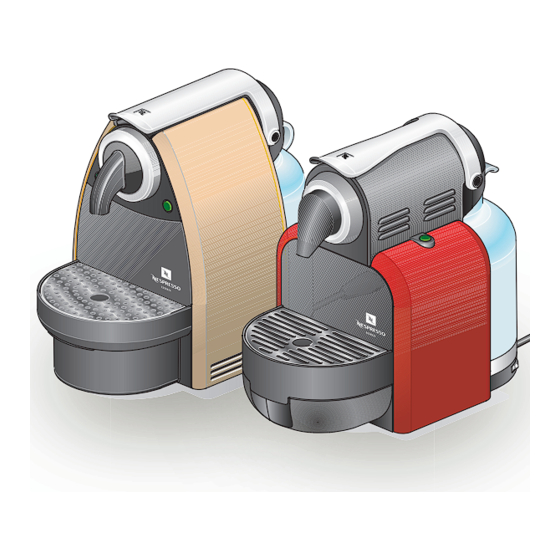
Page 4: Main Components
Main Components Overview 1) Closing handle 2) Cover 3) Compact brewing unit (CBU) 4) Capsule inlet 5) Side panel 6) Flow meter 7) Button "small cup", back lighted 8) Coffee outlet 9) Button "large cup", back lighted 10) Container for used capsules 11) Drip grid 12) Drip tray 13) Lower chassis... -
Page 5: Overview Of Rating Plates
Main Components Overview of rating plates The rating plate NESPRESSO Type C100 MAGIMIX M100 AUTO can be found at the underside of the coffee ref 11244 machine, 220-240V 1260W 50Hz 220-240V~ 1260W 50Hz may be of varying design, depending on... -
Page 6: Water Circuit
Main Components Water circuit 1) Water tank 2) Water tank valve and connector 3) Flow meter 4) Pump 5) Thermoblock 6) Compact brewing unit (CBU) 7) Coffee outlet Service Manual EF 473 / EF 474 Version 1.0... -
Page 7: Technical Data
Main Components Technical data Mains Power consumption 230V / 50 Hz (at all voltages and frequencies) USA /CAN 120 V / 60 Hz Thermoblock 1’200 W EF 473 100 V / 50-60 Hz Pump 60 W Approvals SEV, CENELEC, CE-conform, UL, CUL, MITI Ratings 255 mm... -
Page 8: Operation
Operation Preparation 1. Fill tank with water. 2. Insert water tank in coffee machine. 3. Switch on machine with On/Off switch. 4. Position receptacle with a capacity of min.100 ml under coffee outlet. Do not insert a capsule yet. 5. Wait until machine is ready (both buttons are lighted). -
Page 9: Fill Water System
Operation Fill water system If the coffee machine cannot pump water although there is water in the tank, the water circuit may be empty. Procedure to fill water system: 1. Perform steps 1 to 5 for preparation (see page 8). 2. -
Page 10: Making Coffee
Operation Making coffee 1. Open closing handle. 2. Insert capsule. 3. Press down closing handle completely. 4. Position cup under coffee outlet. 5. Press button "small cup" or "large cup". Coffee flow starts and stops automaticly. 6. In case the cup is going to flow over, press the same button again. -
Page 11: Programming
Operation Programming The filling amount for coffee is preset and can be changed with the following procedure. Factory settings: 3 sec Button "small cup" ......40ml Button "large cup".......110ml 1. Switch on machine. 2. Open closing handle. 3. Insert capsule. 4. Press down closing handle completely. 5. -
Page 12: Reset To Factory Settings
Operation Reset to factory settings 1. Switch off machine. 2. Press and hold button "large cup". 3. Switch on machine. 4. Release button. Service Manual EF 473 / EF 474 Version 1.0... -
Page 13: Empty Water System
Operation Empty water system After operation, residual water remains in the water circuit. This residual water can be removed - before a longer period of non-use, - for frost protection, - before repair and following shipping. 1. Switch off machine. 2. -
Page 14: Coffee Machine Status
Operation Coffee machine status Coffee buttons Operating modes LED signals left right After switching on, an automatic self-test is performed to check if the NTC is connected, the NTC is short circuited, Heat up (coffee) / self-test blinking slow the thermoblock reaches the standby temperature within 2 minutes. -
Page 15: Troubleshooting
Troubleshooting Checking the machine on receipt Follow the check procedure. The receipt check enables you to rapidly Repair any faults found and check if the locate faults on the machine and to initiate machine is operating perfectly. appropriate repair action. Check procedure Symptoms Action / repair work... - Page 16 YES - Machine is scaled NO - Replace pump 6.3 Flow rate out of range Contact Nespresso Technical Correspondant for NO - No trouble found during the check procedure. further details in order to take decision. YES - Descale machine (see page 25) 7 Descaling process (if needed) 7.1 Machine scaled...
-
Page 17: Repair
Repair General disassembly Tool: Oval screwdriver Empty water system if necessary (see page 12). Unplug from the mains before disassembling machine - appliance must be isolated! Procedure: 1. Remove water tank (33) and drip tray (8) together with drip grid (7) and capsule container (6). -
Page 18: Replacing Thermoblock And Ntc
Repair Replacing thermoblock and NTC Use a torque wrench (90 - 110 Ncm) to tighten NTC temperature sensor (43) with spring washer (42). Tools: Torx screwdrivers T10, T30 Open-ended spanner 10 mm AF Torque wrench Procedure: 1. Follow general disassembly (see page 16). 2. -
Page 19: Replacing Flow Meter And On/Off Switch
Repair Replacing flow meter and On/Off switch Tools: Torx screwdriver T10 Procedure for flow meter: 1. Follow general disassembly (see page 16). 2. Remove screw (23) and detach holder (48) with flow meter (47). 3. Snap holder (48) from flow meter (47). 4. -
Page 20: Replacing Pump
Repair Replacing pump Tools: Torx screwdriver T10 Long-nose pliers Blade screwdriver, no. 7 Procedure: 1. Follow general disassembly (see page 16) 2. Unplug fixed pump cable and electrical connection on pump (17). 3. Remove clip (14), hose (18) and o-ring (15). -
Page 21: Replacing Electronic Control Board With Button Prints
Repair Replacing electronic control board with button prints Tools: Torx screwdriver T10 The service engineer must be earthed using an earthing strap! Only touch button prints with dedicated gloves to avoid oxydation. Procedure: 1. Follow general disassembly (see page 16). 2. -
Page 22: Replacing Compact Brewing Unit (Cbu)
Repair Replacing compact brewing unit (CBU) Tools: Torx screwdrivers T10, T20 Blade screwdriver no. 4 Oval screwdriver Long-nose pliers Torque wrench Procedure: 1. Remove water tank (33) and drip tray (8) together with drip grid (7) and capsule container (6). 2. -
Page 23: Electronic Control Board, Wiring Diagram - Europe (230V / 50 Hz)
Repair Electronic control board, wiring diagram - Europe (230V / 50 Hz) Electronic Main Board Print “large cup” Print “small cup” 1) Heat sink 2) Print for button "large cup" with LED 3) Print for button "small cup" with LED 4) Flow meter 5) NTC temperature sensor 6) Fine-wire fuse on thermoblock... -
Page 24: Electronic Control Board, Wiring Diagram - Usa (Ul, 120 V / 60 Hz)
Repair Electronic control board, wiring diagram - USA (UL, 120 V / 60 Hz) Electronic Main Board Print “large cup” Print “small cup” 1) Heat sink 2) Print for button "large cup" with LED 3) Print for button "small cup" with LED 4) Flow meter 5) NTC temperature sensor 6) Fine-wire fuse on thermoblock... -
Page 25: Electronic Control Board, Wiring Diagram - Japan (100 V / 50-60 Hz)
Repair Electronic control board, wiring diagram - Japan (100 V / 50-60 Hz) Electronic Main Board Print “large cup” Print “small cup” 1) Heat sink 2) Print for button "large cup" with LED 3) Print for button "small cup" with LED 4) Flow meter 5) NTC temperature sensor 6) Fine-wire fuse on thermoblock... -
Page 26: Descaling (1)
Repair Descaling (1) Only use Nespresso decalcifier - never vinegar! Decalcifier is aggressive to surfaces. Preparation: 1. Switch off machine. 2. Eject capsule. Insert filter from descaling kit in capsule inlet and close handle. 3. Empty drip tray and capsule container and remove drip grid. -
Page 27: Descaling (2)
Repair Descaling (2) 10. Fill water tank again with descaling solution from pot. 11. Repeat descaling procedure one more time: Press button "large cup" and let entire descaling solution run through. Rinsing: 12. Empty pot. 13. Remove filter from capsule inlet. 14. -
Page 28: Measuring Flow Rate
Repair Measuring flow rate Procedure: 1. Fill water tank. 2. Insert pressure plug in capsule inlet. 3. Press down closing handle lightly till pressure plug fits in capsule cage. 4. Pull off holding device. The pressure plug clamps itself to the capsule cage. 5. -
Page 29: Checking For Leaks And Pump Pressure (1)
Repair Checking for leaks and pump pressure (1) The following components are checked for leaks: Compact brewing unit Connections Thermoblock Pump Preparation (unplug machine from mains): 1. Remove right side panel (pump is visible). 2. Insert pressure plug in capsule inlet. 3. -
Page 30: Checking For Leaks And Pump Pressure (2)
Repair Checking for leaks and pump pressure (2) Procedure (continued): 8. Switch on machine. 9. Press button "large cup" after heating-up. 10. Open valve and leave water to run out for approx. 10 s. 11. Fully close valve. The pressure will rise rapidly initially and stabilise between 16 - 19 bar (check of pump pressure). -
Page 31: Measuring Coffee Temperature
Repair Measuring coffee temperature Procedure: 1. Switch on machine. 2. Position measuring beaker underneath coffee outlet. 3. After warming up, press button "large cup" and preheat coffee outlet with hot water. 4. Insert a capsule (Cosi is the most suitable). 5. -
Page 32: Daily Care And Final Cleaning
Repair Daily care and final cleaning Procedure (machine is switched off): 1. Eject capsule. 2. Empty capsule container. 3. Empty water tank and drip tray. 4. Clean water tank and drip tray. 5. Fill tank with fresh water. 6. Reassemble coffe machine. 7. -
Page 33: Spare Parts
Repairing/service holder device A (for EF 473) Repairing/service holder device B (for EF 474) 0004872 Special screwdriver with oval bit 0004878 Oval bit for screwdriver * Only available through Nespresso. Please call your Nespresso contact. 0004878 0004872 Service Manual EF 473 / EF 474 Version 1.0... -
Page 34: Spare Parts Ef 473
39150 Drip grid EF 470 Inox 40478 Drip tray EF 470 print: Krups/Nespresso, silvery 43212 Drip tray EF 473 print: Turmix TX150/Nespresso, silvery Drip tray EF 473 print: Nespresso Essenza 43211 Automatic, silvery 43073 Hose water tank / pump 40691... - Page 35 Spare Parts Spare parts EF 473 (continued) Pos. EFR nr. Component 42572 Angle connection for hoses 44636 Electronic set 230V EF 473 Electronic set 120V EF 473 Electronic set 100V EF 473 39153 "Coffee" button EF 470 43060 "Espresso" button EF 473 26392 Silicon hose 39198...
-
Page 36: Spare Parts Ef 474
Side panel EF 474 platin lacquered 39171 Capsule container EF 471 black 39151 Drip grid EF 471 Inox Drip tray EF 474 print: Nespresso Essenza 43215 Automatic, silvery 40483 Drip tray EF 474 print: DeLonghi/Nespresso,silvery Drip tray EF 474 print: Koenig Capri Autom./... - Page 37 Spare Parts Spare parts EF 474 (continued) Pos. EFR nr. Component 42572 Angle connection for hoses 44636 Electronic set 230V EF 473 Electronic set 120V EF 473 Electronic set 100V EF 473 39154 "Coffee" buttonEF 471 43061 "Espresso" button EF 474 26392 Silicon hose 39198...
-
Page 38: Notes
Notes Service Manual EF 473 / EF 474 Version 1.0...