Table of Contents

Related Manuals for Craftsman 944.365860


Summary of Contents for Craftsman 944.365860
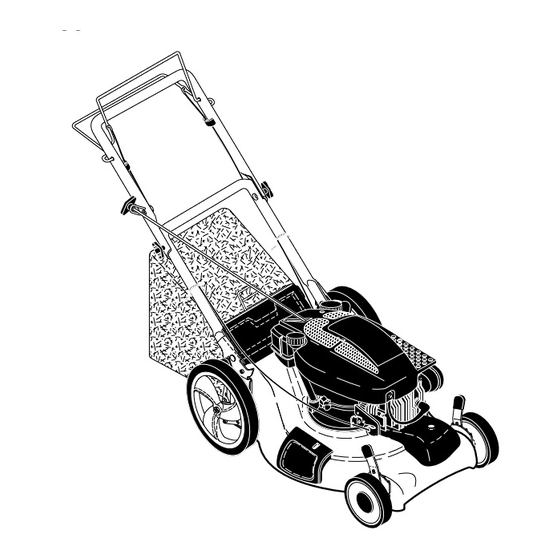
- Page 1 Owner’s Manual ROTARY LAWN MOWER 6.75 Horsepower Power-Propelled 21" Multi-Cut Model No. 944.365860 CAUTION: Read and follow all Safety Rules and In struc tions before operating this equipment Sears Canada, Inc., Toronto, Ontario M5B 2B8...
-
Page 2: Table Of Contents
• In-home service. Warranty service is available by returning the Craftsman Power Mower to the nearest Sears Service Centre/Department in Canada. This warranty applies only while this prod- uct is used in Canada. - Page 3 • Do not operate the mower when bare- DO NOT: foot or wearing open sandals. Al ways • Do not trim near drop-offs, ditches or wear substantial foot wear. embankments. The operator could lose • Do not pull mower backwards unless footing or balance.
-
Page 4: Product Specifications
• Never overfi ll fuel tank. Replace gas • Stop and inspect the equipment if you cap and tighten securely. strike an object. Repair, if nec es sary, before restarting. • Never attempt to make wheel height V. GENERAL SERVICE adjustments while the engine is running. -
Page 5: Assembly/Pre-Operation
ASSEMBLY / PRE-OPERATION Read these instructions and this manual in Operator MOWING its entirety before you attempt to assemble presence POSITION or operate your new lawn mower. control bar IMPORTANT: This lawn mower is shipped LIFT WITHOUT OIL OR GASOLINE in the engine. -
Page 6: Operation
OPERATION KNOW YOUR LAWN MOWER READ THIS OWNER'S MANUAL AND ALL SAFETY RULES BEFORE OPERATING YOUR LAWN MOWER. Compare the illustrations with your lawn mower to familiarize yourself with the location of various controls and adjustments. Save this manual for future reference. These symbols may appear on your lawn mower or in literature supplied with the product. - Page 7 The operation of any lawn mower can result in foreign objects thrown into the eyes, which can result in severe eye damage. Always wear safety glasses or eye shields while operating your lawn mower or performing any ad just ments or repairs. We recommend standard safety glasses or a wide vision safety mask worn over spectacles.
- Page 8 1. Be sure lawnmower is level. 2. Remove oil dipstick from oil fi ll spout. 3. You receive a container of oil with the unit. Slowly pour the entire container down the oil fi ll spout into the engine. NOTE: Initial oil fi ll requires only 18 oz. due to residual oil in engine from the manufacturers 100% quality testing.
- Page 9 TO STOP ENGINE • Keep top of engine around starter clear and clean of grass clippings and chaff. • To stop engine, release operator pres- This will help engine air fl ow and extend ence con trol bar. engine life. TO START ENGINE MULCHING MOWING TIPS NOTE: Due to protective coatings on the...
-
Page 10: Maintenance Schedule
MAINTENANCE BEFORE AFTER EVERY EVERY EVERY BEFORE EACH EACH 25 HOURS STORAGE HOURS OR SEASON HOURS Check for Loose Fasteners Clean / Inspect Grass Catcher * Check Tires Check Drive Wheels *** Clean Lawn Mower **** Clean under Drive Cover *** Check Drive Belt / Pulleys *** Check / Sharpen / Replace Blade Lubrication... - Page 11 LAWN MOWER NOTE: Remove the blade adapter and check the key inside hub of blade adapter. Always observe safety rules when per- The key must be in good con di tion to work form ing any main te nance. properly. Replace adapter if damaged. TIRES TO REPLACE BLADE •...
- Page 12 GRASS CATCHER 2. Remove engine oil cap; lay aside on a clean surface. • The grass catcher may be hosed with 3. Tip lawn mower on its side as shown water, but must be dry when used. and drain oil into a suitable container. •...
-
Page 13: Service And Adjustments
Collar TURN CLOCKWISE CLEANING IMPORTANT: For best performance, keep REMOVE Clip mower housing free of built-up grass and trash. Clean the underside of your mower after each use. CAUTION: Disconnect spark plug wire from spark plug and place wire where it cannot come in contact with plug. -
Page 14: Storage
TO ADJUST HANDLE The handle can be mounted in a high or low position. The mounting holes in the bottom of lower handle are off center for Lower raising or lowering the handle. handle 1. Remove upper handle and wire tie(s) securing cable(s) to lower handle. -
Page 15: Troubleshooting
Operator MOWING Add stabilizer to gasoline in fuel tank or presence POSITION storage con tain er. Always follow the mix control bar ratio found on stabilizer container. Run engine at least 10 min utes after adding stabilizer to allow the stabilizer to reach the car bu re tor. - Page 16 TROUBLESHOOTING - See appropriate section in manual unless directed to a Sears Service Centre. PROBLEM CAUSE CORRECTION Does not start 9. Control bar defective. 9. Replace control bar. (continued) 10. Fuel valve lever (if so 10. Turn fuel valve lever equipped) in OFF position.
- Page 17 TECUMSEH 4-CYCLE ENGINE MODEL NUMBER 143.056700 KEY PART DESCRIPTION 640350 Carburetor (Includes Key Number 184 of Engine Parts List) 631615 Throttle Shaft & Lever Assembly 631767 Throttle Return Spring 631184 * Dust Seal Washer 631183 * Dust Seal (Throttle) 640070 Throttle Shutter 650506 * Shutter Screw...
- Page 18 TECUMSEH 4-CYCLE ENGINE MODEL NUMBER 143.056700...
- Page 19 TECUMSEH 4-CYCLE ENGINE MODEL NUMBER 143.056700 KEY PART KEY PART DESCRIPTION DESCRIPTION 37465 Cylinder (Includes 151A 40017 Intake Valve Seal Key Numbers 2, 20 and 150) 37727 Engine Shroud 26727 Dowel Pin 36783 * Valve Cover Gasket 33734 Breather Element 36784 Valve Cover 36557...
-
Page 20: Repair Parts
REPAIR PARTS... - Page 24 196975 02.04.05 BY Printed in U.S.A.