
Related Manuals for Toshiba RAS-24E2KVG-TR


Summary of Contents for Toshiba RAS-24E2KVG-TR
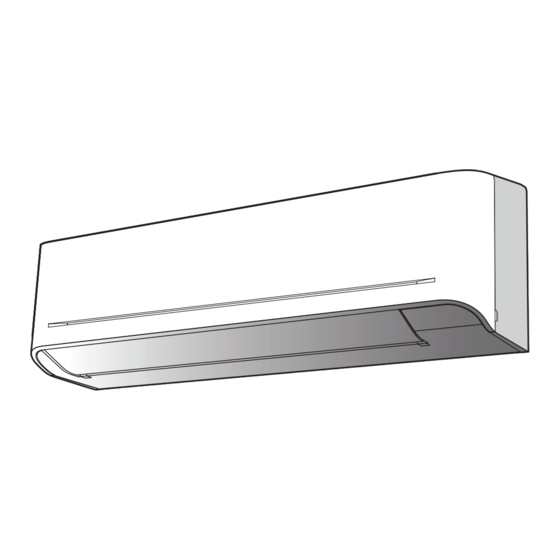
- Page 1 INSTALLATION MANUAL ENGLISH AIR CONDITIONER (SPLIT TYPE) TÜRKCE Indoor unit RAS-24E2KVG-TR Outdoor unit RAS-24E2AVG-TR 1 1 3 3 5 5 0 1 0 8...
-
Page 2: Table Of Contents
CONTENTS İÇINDEKILER PRECAUTIONS FOR SAFETY ............1 GÜVENLİK ÖNLEMLERİ .............1 ACCESSORY PARTS ..............5 AKSESUAR PARÇALARI ............5 INSTALLATION DIAGRAM OF INDOOR AND İÇ VE DIŞ ÜNITENIN MONTAJ ŞEMASI ........6 OUTDOOR UNITS ...............6 İsteğe Bağlı Montaj Parçaları ..........6 Optional Installation Parts ............6 İÇ ÜNİTE ..................7 INDOOR UNIT ................7 Montaj Yeri ................7 Installation Place ..............7... -
Page 3: Precautions For Safety
PRECAUTIONS FOR SAFETY PRECAUTIONS FOR SAFETY Read the precautions in this manual carefully before This appliance is fi lled with R32. operating the unit. Warning indications on the air conditioner unit Warning indication Description CAUTION BURST HAZARD Open the service valves before the operation, otherwise there might be the burst. - Page 4 DANGER • FOR USE BY QUALIFIED PERSONS ONLY. • TURN OFF MAIN POWER SUPPLY BEFORE ATTEMPTING ANY ELECTRICAL WORK. MAKE SURE ALL POWER SWITCHES ARE OFF. FAILURE TO DO SO MAY CAUSE ELECTRIC SHOCK. • CONNECT THE CONNECTING CABLE CORRECTLY. IF THE CONNECTING CABLE IS CONNECTED WRONGLY, ELECTRIC PARTS MAY BE DAMAGED.
- Page 5 • Do not use means to accelerate the defrosting process or to clean, other than those recommended by the manufacturer. • The appliance shall be stored in a room without continuously operating ignition sources (for example: open fl ames, an operating gas appliance or an operating electric heater).
- Page 6 CAUTION • Exposure of unit to water or other moisture before installation could result in electric shock. Do not store it in a wet basement or expose to rain or water. • After unpacking the unit, examine it carefully for possible damage. •...
-
Page 7: Accessory Parts
ACCESSORY PARTS ACCESSORY PARTS Indoor Unit Part name Part name Installation plate × 1 Wireless remote control × 1 Battery × 2 Remote control holder × 1 Ultra Fresh fi lter × 2 Mounting screw × 6 Flat head wood screw × 2 Owner’s Manual ×... -
Page 8: Installation Diagram Of Indoor And Outdoor Units
INSTALLATION DIAGRAM OF INDOOR AND OUTDOOR UNITS INSTALLATION DIAGRAM OF INDOOR AND OUTDOOR UNITS For the rear left, bottom left and left piping Wall Hook Installation plate Cut out a piece of SPACER from indoor unit packaging box, roll it and insert between the indoor unit and wall to tilt Flat head wood screw... -
Page 9: Indoor Unit
INDOOR UNIT INDOOR UNIT When the installation plate is directly mounted Installation Place on the wall • A place which provides the spaces around the indoor unit as shown in the 1. Securely fi t the installation plate onto the wall by screwing it in the upper and diagram lower parts to hook up the indoor unit. -
Page 10: Piping And Drain Hose Installation
Front panel Control wire Screw (Ø3.1×16L) Control wire for hang remote controller Hole for hang remote controller Remote controller Wall Screw Screw Remote controller Screw cap Screw (Ø3.1×25L) for fi x battery cover 70 mm * Wire size 28-22AWG or 0.08-0.32 mm Outer diameter not over 4.7 mm, control wire length 30 m. -
Page 11: Indoor Unit Fixing
How to remove the drain hose NOTE • The drain hose can be removed by removing the If the pipe is bent incorrectly, the indoor unit may unstably be set on the wall. screw securing the drain hose and then pulling out After passing the connecting pipe through the pipe hole, connect the the drain hose. -
Page 12: Drainage
2. Put water in the drain pan and make sure that the water is drained out of Drainage doors. 3. When connecting extension drain hose, insulate the connecting part of extension drain hose with shield pipe. 1. Run the drain hose sloped downwards. Shield pipe NOTE •... -
Page 13: Draining The Water
IMPERIAL (wing nut type) Draining the Water Outer dia. of copper pipe Ø6.35 1.5 to 2.0 • Holes are provided on the base plate of the outdoor unit to ensure that the defrost water produced during heating operations is drained off effi ciently. Ø9.52 1.5 to 2.0 Pipe... - Page 14 • Securely tighten the valve cap with torque in the following table: Compound pressure gauge Pressure gauge –101 kPa Cap Size (H) Torque (–76 cmHg) Manifold valve 14~18 N·m H17 - H19 Handle High (1.4 to 1.8 kgf·m) Handle Low Valve Rod Cap (Keep full closed) 33~42 N·m...
-
Page 15: Electrical Works
The power supply can be selected to connect to indoor unit or outdoor unit. Choose proper way and connect the power supply and connecting cable by follow the instruction as following. Model RAS-24E2KVG-TR Power source 50Hz, 220 – 240V Single phase Maximum running current 12.00 A... -
Page 16: Power Supply And Connecting Cable Connection
Power Supply and Connecting Cable Connection Power Supply Input at Outdoor Unit Terminal Block (Recommend) Indoor Unit Outdoor Unit Stripping length of the Connecting cable Connecting cable 1 2 3 connecting cable connect to 1 2 3 Terminal block (L N 1 2 3) Earth line 50 mm 10 mm... -
Page 17: Power Supply Input Wiring Diagram
Power Supply Input Wiring Diagram Power input at Outdoor Terminal Block (Recommend) Indoor Terminal Block Outdoor Terminal Block Power input Power input at Indoor Terminal Block (Optional) Indoor Terminal Block Power input Outdoor Terminal Block CAUTION 1. The power supply must be same as the rated of air conditioner. 2. -
Page 18: Others
OTHERS OTHERS Gas Leak Test Test Operation To switch the TEST RUN (COOL) mode, press [RESET] button for 10 seconds. (The beeper will make a short beep.) Check places for the indoor unit. OPERATION / RESET Button Check places for the outdoor unit. -
Page 20: Güvenli̇k Önlemleri̇
GÜVENLİK ÖNLEMLERİ GÜVENLİK ÖNLEMLERİ Üniteyi çalıştırmadan önce bu kılavuzdaki önlemleri dikkatlice Bu aygıt R32 ile doldurulmuştur. okuyun. Klima ünitesindeki uyarı göstergeleri Uyarı göstergesi Açıklama DİKKAT PATLAMA TEHLİKESİ Çalıştırmadan önce servis vanalarını açın; aksi halde patlama meydana gelebilir. • Lütfen, montaj işleminden önce güvenliğiniz için bu önlemleri dikkatli bir şekilde okuyun. - Page 21 TEHLİKE • SADECE KALİFİYE PERSONEL TARAFINDAN KULLANILMALIDIR. • HERHANGİ BİR ELEKTRİK İŞİNE BAŞLAMADAN ÖNCE CİHAZI ŞALTERDEN KAPATIN. BÜTÜN ELEKTRİK ŞALTERLERİNİN KAPALI OLMASINA DİKKAT EDİN. EĞER BU SAYILANLARI YAPMAYI İHMAL EDERSENİZ ELEKTRİK ÇARPMASI MEYDANA GELEBİLİR. • BAĞLANTI KABLOLARINI DÜZGÜN BİR ŞEKİLDE TAKIN. EĞER BAĞLANTI KABLOLARI YANLIŞ...
- Page 22 • Eklenmek veya değiştirilmek üzere belirtilen dışında bir soğutucu kullanmayın. Aksi halde soğutma döngüsünde, ürünün arızalanması ya da patlaması veya vücudunuzda yaralanmayla sonuçlanabilecek anormal derecede yüksek basınç oluşabilir. • Buz çözme sürecini hızlandırmak ya da temizlemek için üreticinin tavsiye ettikleri dışındaki araçları...
- Page 23 DİKKAT • Cihaz monte edilmeden önce suya veya herhangi bir nemli ortama maruz kalırsa, elektrik çarpması meydana gelebilir. Cihazı nemli bir ortamda muhafaza etmeyin veya yağmur veya su altında bırakmayın. • Cihazı paketinden çıkardıktan sonra olası bir hasara karşı dikkatlice inceleyin. •...
-
Page 24: Aksesuar Parçalari
AKSESUAR PARÇALARI AKSESUAR PARÇALARI İç Ünite Parça adı Parça adı Montaj plakası × 1 Uzaktan kumanda × 1 Piller × 2 Uzaktan kumanda muhafazası × 1 Ultra Temiz Hava fi ltresi × 2 Montaj vidası × 6 Düz basil ahşap vidası × 2 Kullanım kılavuzu ×... -
Page 25: İç Ve Diş Ünitenin Montaj Şemasi
İÇ VE DIŞ ÜNITENIN MONTAJ ŞEMASI İÇ VE DIŞ ÜNITENIN MONTAJ ŞEMASI Sol arka, sol alt ve sol borular için Duvara Askı Montaj plakası İç ünite ambalaj kutusundan çıkan ARA PARÇA’dan bir parça kesin, silindir haline getirin ve daha iyi çalışması için iç üniteyi Düz başlı... -
Page 26: İç Üni̇te
İÇ ÜNİTE İÇ ÜNİTE Montaj plakası doğrudan duvara monte edildiği Montaj Yeri zaman • Şemada gösterildiği gibi iç ünitenin etrafında alan bırakılabilecek bir yer 1. İç üniteye asmak için montaj plakasını üst ve alt parçalarından tutturmak • Hava giriş ve çıkışlarını engellemeyecek bir yer suretiyle duvara sağlam bir şekilde yerleştirin. -
Page 27: Boruların Bağlanması Ve Boşaltma Hortumunun Monte Edilmesi
Kontrol kablosu Ön panel Uzaktan kumandanın Kontrol kablosu aslı vidası (Ø3.1×16L) Uzaktan kumandanın askı deliği Uzaktan kumanda Duvara Vida Vida Uzaktan kumanda Pil kapağını Vida kapağı sabitleme vidası (Ø3,1×25L) 70 mm * Kablo ölçüleri: 28-22 AWG veya 0,08-0,32 mm Dış çap 4,7 mm üzerinde değil, Tip A Tip B kontrol kablosu uzunluğu 30 m. -
Page 28: İç Ünitenin Takılması
Tahliye hortumunun çıkarılması • Tahliye hortumunu çıkarmak için tahliye Eğer boru yanlış ir biçimde bükülürse, iç ünite duvarda sabit duramaz. hortumunu tutan vidayı sökün ve tahliye Bağlantı borusunu boru deliğinden geçirdikten sonra bağlantı borusunu hortumunu çekerek çıkarın. yardımcı borulara bağlayın ve etrafına macun kaplayın. •... -
Page 29: Su Boşaltma
2. Drenaj kabının içine su koyun ve suyun dışarı atıldığından emin olun. Su Boşaltma 3. Ek boşaltma hortumunu bağlarken hortumun bağlantı kısmını koruyucu bir boruyla yalıtın. 1. Boşaltma hortumunu aşağı doğru eğin. Koruma borusu • Boru deliği, dış ünitede hafi f eğik bir pozisyonda olmalıdır. Boşaltma hortumu ilavesi Drenaj hortumu Odanın iç... -
Page 30: Suyun Boşaltılması
IMPERIAL (kelebekli somun, klasik aletler) Suyun Boşaltılması Bakır borunun dış çapı Ø6,35 1,5 ila 2,0 • Isıtma işlemleri sırasında oluşan buz çözme suyunun verimli bir şekilde boşaltılmasını sağlamak için dış ünitenin taban plakasında delikler Kalıp Ø9,52 1,5 ila 2,0 Boru bulunmaktadır. - Page 31 • Valf kapağını aşağıdaki tablodaki torka göre iyice sıkın. Birleşik basınç göstergesi Basınç göstergesi –101 kPa Kapak Kapak Boyutu (H) Tork (–76 cmHg) Manifold valfı 14~18 N·m H17 - H19 Üst Kol Alt kol (1,4 ila 1,8 kgf•m) Valf Kolu Kapağı (Tamamen kapalı...
-
Page 32: Elektri̇k İşleri̇
ELEKTRİK İŞLERİ ELEKTRİK İŞLERİ Güç kaynağı, iç üniteye veya dış üniteye bağlanacak biçimde seçilebilir. Uygun yöntemi seçin ve aşağıdaki talimatlara uyarak güç kaynağını ve bağlantı kablosunu bağlayın. Model RAS-24E2KVG-TR Elektrik 50Hz, 220-240V Tek fazlı Maksimum gelen akım 12,00A Devre kesici derecelendirmesi Güç... -
Page 33: Güç Kaynağı Ve Bağlantı Kablosu Bağlantısı
Güç Kaynağı ve Bağlantı Kablosu Bağlantısı Dış Ünite Terminal Blokundaki Güç Kaynağı Girişi (Önerilen) İç Ünite Diş ünite Bağlantı kablosu Bağlantı kablosunda soyulacak Bağlantı kablosu bağlanmak 1 2 3 1 2 3 kısım uzunluğu Terminal tablosu (L N 1 2 3) Topraklama hattı... -
Page 34: Güç Beslemesi Girişi Kablo Şeması
Güç Beslemesi Girişi Kablo Şeması Dış Ünite Terminal Blokundaki Güç Kaynağı Girişi (Önerilen) İç Ünite Terminal Bloku Dış Ünite Terminal Bloku Güç kaynağı girişi İç Ünite Terminal Blokundaki Güç Kaynağı Girişi (İsteğe bağlı) İç Ünite Terminal Bloku Güç kaynağı girişi Dış... -
Page 35: Di̇ğerleri̇
DİĞERLERİ DİĞERLERİ Gaz Kaçağı Testi Test İşlemi TEST RUN (COOL) modunu açmak için 10 saniye boyunca [RESET] düğmesini basılı tutun. (Kısa bir bip sesi duyulacaktır.) İç ünite için alanları yerleri edin. OPERATION / RESET Düğmesi Dış ünite için alanları yerleri edin. Otomatik yeniden başlama işlevi ayarı... - Page 38 1 1 3 3 5 5 0 1 0 8...