Table of Contents
Advertisement
Quick Links
SAFETY INSTRUCTIONS
1. 120 Volts may cause serious injury from electric shock. Disconnect electrical power before starting installation or servicing. Leave power
disconnected until installation/service is completed.
2. Dropping may cause personal injury or equipment damage. Handle with care and follow installation instructions.
3. Sharp edges may cause serious injury from cuts. Use care when cutting plenum openings and handling duct work.
1. Read all instructions before beginning installation.
2. Improper installation may cause property damage or injury. Read instructions before installation, service or maintenance.
3. Do not use in pool applications. Pool chemicals can damage the dehumidifier.
4. Do not use solvents or cleaners on or near the circuit board. Chemicals can damage circuit board components.
5. Wait 24 hours before running the unit if it was not shipped or stored in the upright position
6. Do not use dehumidification to prevent window condensation in the winter. To address window condensation, use ventilation to lower
indoor humidity in the winter.
7. This appliance is not intended for use by persons(including children) with reduced physical, sensory, or mental capabilities, or lack of
experience and knowledge, unless they have been given supervision or instruction concerning the use of this appliance by a person
responsible for their safety.
8. Children should be supervised to ensure that they do not play with the appliance.
9. If the supply cord is damaged, it must be replaced by a special cord or assembly available from the manufacturer or its service agent.
TABLE OF CONTENTS
SAFETY INSTRUCTIONS � � � � � � � � � � � � � � � � � � � � � � � � � � � � � � � � � � � � � � � � � 1
SPECIFICATIONS � � � � � � � � � � � � � � � � � � � � � � � � � � � � � � � � � � � � � � � � � � � � � � � � 2
REMOVE SHIPPING BRACKET � � � � � � � � � � � � � � � � � � � � � � � � � � � � � � � � � � � � 2
LOCATION CONSIDERATIONS � � � � � � � � � � � � � � � � � � � � � � � � � � � � � � � � � � � � 3
LEVELING � � � � � � � � � � � � � � � � � � � � � � � � � � � � � � � � � � � � � � � � � � � � � � � � � � � � � � 3
DRAIN INSTALLATION � � � � � � � � � � � � � � � � � � � � � � � � � � � � � � � � � � � � � � � � � � � 4
Condensate Pump and Float Switch � � � � � � � � � � � � � � � � � � � � � � � � � � � � � 5
SETTING THE DESIRED HUMIDITY LEVEL � � � � � � � � � � � � � � � � � � � � � � � � � 6
MAINTENANCE� � � � � � � � � � � � � � � � � � � � � � � � � � � � � � � � � � � � � � � � � � � � � � � � � � 7
Clean or Replace the Air Filter � � � � � � � � � � � � � � � � � � � � � � � � � � � � � � � � � � 7
Check the Drain � � � � � � � � � � � � � � � � � � � � � � � � � � � � � � � � � � � � � � � � � � � � � � � 8
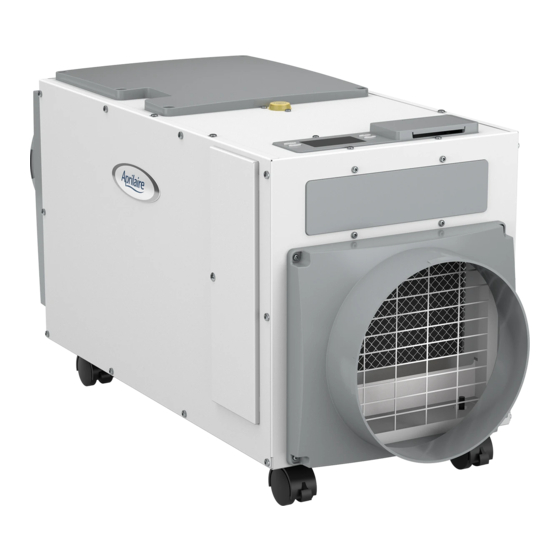
Model E100C Dehumidifier
Installation and Operating Manual
WARNING
CAUTION
READ AND SAVE THESE INSTRUCTIONS
DUCT COLLAR INSTALLATION� � � � � � � � � � � � � � � � � � � � � � � � � � � � � � � � � � � � 9
Control Location� � � � � � � � � � � � � � � � � � � � � � � � � � � � � � � � � � � � � � � � � � � � � � 10
DUCTING � � � � � � � � � � � � � � � � � � � � � � � � � � � � � � � � � � � � � � � � � � � � � � � � � � � � � � �11
Ducting in Basement � � � � � � � � � � � � � � � � � � � � � � � � � � � � � � � � � � � � � � � � � �11
Ducting to HVAC System in Mechanical Closet � � � � � � � � � � � � � � � � � � � 12
Ducting to Whole Home without an Air Handler� � � � � � � � � � � � � � � � � 12
TROUBLESHOOTING � � � � � � � � � � � � � � � � � � � � � � � � � � � � � � � � � � � � � � � � � � � 13
Table 1 - Diagnostic Codes � � � � � � � � � � � � � � � � � � � � � � � � � � � � � � � � � � � � 13
Table 2 - Troubleshooting Guide � � � � � � � � � � � � � � � � � � � � � � � � � � � � � � � 14
SERVICE PARTS � � � � � � � � � � � � � � � � � � � � � � � � � � � � � � � � � � � � � � � � � � � � � � � � 15
LIMITED WARRANTY � � � � � � � � � � � � � � � � � � � � � � � � � � � � � � � � � � � � � � � � � � � 16
English 1
Advertisement
Table of Contents

Related Manuals for Aprilaire E100C


Summary of Contents for Aprilaire E100C
-
Page 1: Table Of Contents
Model E100C Dehumidifier Installation and Operating Manual SAFETY INSTRUCTIONS WARNING 1. 120 Volts may cause serious injury from electric shock. Disconnect electrical power before starting installation or servicing. Leave power disconnected until installation/service is completed. 2. Dropping may cause personal injury or equipment damage. Handle with care and follow installation instructions. -
Page 2: Specifications
SPECIFICATIONS MODEL E100C Unit Weight 64 lbs� Shipping Weight 82 lbs� Capacity 100 pints per day @ 280 CFM 80°F, 60% RH Conditions Power 6�9A operating current 115 VAC, Single Phase, 60Hz Dehumidifier Inlet Air Conditions Dehumidification: 50°F – 104°F, 40°F dew point minimum... -
Page 3: Location Considerations
LOCATION CONSIDERATIONS • Allow sufficient clearance for filter removal and to prevent airflow obstruction FIGURE 2 – FILTER ACCESS CLEARANCE • Electrical service access will require the removal ELECTRICAL SERVICE 6" MINIMUM CLEARANCE of the side panel shown� Allow sufficient space ACCESS THIS SIDE FOR PROPER AIR FLOW for service on this side of the unit�... -
Page 4: Drain Installation
DRAIN INSTALLATION CAUTION Do not damage drain cover. The drain cover is a critical feature of the dehumidifier drain management system. WARNING Running the dehumidifier without the drain cover can lead to condensate leaks. The drain outlet on the dehumidifier can be hard piped using a 3/4" PVC Slip x 3/4" MNPT fitting and 3/4" nominal drain tubing or the provided 3/4" MNPT x 3/4"... -
Page 5: Condensate Pump And Float Switch
CONDENSATE PUMP AND FLOAT SWITCH If a condensate pump is needed, install it in the condensate pan if installed� FIGURE 4 – FLOAT SWITCH WIRING Install a condensate overflow safety switch (i�e� float switch) in the condensate pan, remove the factory installed jumper wire between the Float Switch terminals on the control and wire the float switch to the dehumidifier as shown in FIGURE 4�... -
Page 6: Setting The Desired Humidity Level
SETTING THE DESIRED HUMIDITY LEVEL 1. Plug in dehumidifier and turn on/off switch ON� See FIGURE 5� FIGURE 5 – ON/OFF SWITCH 2. Press the ON/OFF button to turn the dehumidifier control ON� The display will show the current setting, and the dehumidifier blower will turn on to start sampling the air� 3. -
Page 7: Maintenance
MAINTENANCE CLEAN OR REPLACE THE AIR FILTER After initial installation the air filter should be checked and cleaned every 6 months� The CLEAN FILTER service reminder will display on the on-board control screen every 6 months� To clear the service message, press the buttons simultaneously for 3 seconds�... -
Page 8: Check The Drain
CHECK THE DRAIN The drain and drain pan cover should be checked annually to ensure there are no blockages or air lock in the drain system� IMPORTANT! The drain cover is a critical feature of the dehumidifier drain management system� This component is required for the dehumidifier to run properly�... -
Page 9: Duct Collar Installation
DUCT COLLAR INSTALLATION HORIZONTAL DISCHARGE: • Use the screws in the parts bag to attach the duct collars to the FIGURE 9 – FULLY DUCTED INSTALLATIONS inlet and outlet of the dehumidifier� The outlet collar has a backflow OUTLET COVER damper�... -
Page 10: Control Location
CONTROL LOCATION The on-board control can be located on the top of the dehumidifier or can be relocated to the front of the FIGURE 10 – CONTROL LOCATION dehumidifier if the control cannot be seen/accessed in CONTROL the top orientation� It may also be rotated 180 degrees PANEL COVER in either orientation as shown in FIGURE 11�... -
Page 11: Ducting
DUCTING DUCTING IN BASEMENT The dehumidifier can be ducted to pull air from and return dehumidified air to the HVAC return duct� This installation will ensure warm, dehumidified air is thoroughly mixed with the HVAC system air before being discharged into the living space� Alternatively, the dehumidifier can be ducted to discharge to the supply duct, but the external static pressure of the HVAC system must not exceed 0�6"... -
Page 12: Ducting To Hvac System In Mechanical Closet
DUCTING TO HVAC SYSTEM IN MECHANICAL CLOSET The dehumidifier in these applications is typically installed under or next to the HVAC equipment� See Figure 11� The dehumidifier is ducted FIGURE 14 – ALTERNATE CLOSET INSTALLATION to the HVAC supply duct using the outlet on the top of the unit� The supply side external static pressure of the HVAC system must not 0.6"w.c. -
Page 13: Troubleshooting
TROUBLESHOOTING Technical Support is available Monday through Friday, 7:00 a�m� to 5:00 p�m� CST, at (800) 334-6011� Use the guides on the following pages to identify and correct system faults� Contact Technical Support before replacing the unit or any components and for additional troubleshooting� DIAGNOSTIC CODES When an error occurs, the Diagnostic Code along with SERVICE REQUIRED will be displayed on the control screen�... - Page 14 TABLE 1 – DIAGNOSTIC CODES Diagnostic Code Failure Mode Action Reset 1. Empty the condensate pan� 2. Check the float switch connection at the control board� Float Switch Open Self-Correcting 3. If not using a float switch, verify jumper is between float switch terminals on dehumidifier control board�...
-
Page 15: Service Parts
SERVICE PARTS 90-2592-17B Part Description Part No. Part Description Part No. EZK Filter, 13�5" x 11�875" x 0�875" 5881 Cover, Outlet, AA Deh 5452 Internal Control Board, Deh 5444 Fan, 100pt Deh, with 12MFD Capacitor 5886 User Interface Assembly, Deh 5445 Wire Harness, Power, Deh 5884... -
Page 16: Limited Warranty
WARRANTY REGISTRATION Visit us online at www.aprilaire.com to register your Aprilaire product� If you do not have online access, please mail a postcard with your name, address, phone number, email address, product purchased, model number, date of purchase, and dealer name and address to: Research Products Corporation, P�O� Box 1467, Madison, WI 53701�...