Table of Contents

Related Manuals for NAL SHOUT nano 100


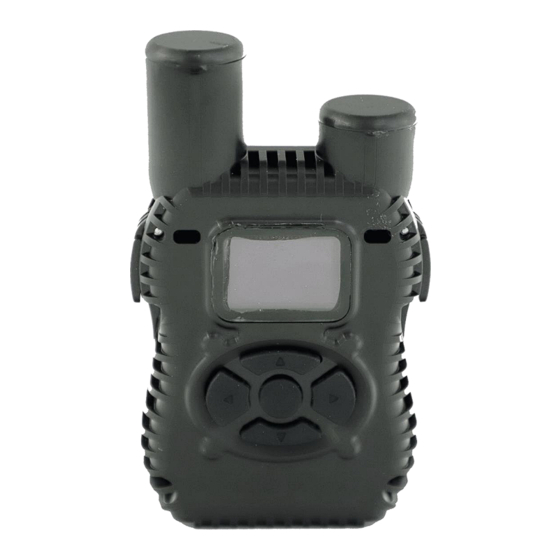
Summary of Contents for NAL SHOUT nano 100
- Page 1 SatTerm Manual for SHOUT nano 100 451-21012-003A Version A May 18, 2023 Copyright © 2023 by NAL Research Corporation 11100 Endeavor Ct., Suite 300 Manassas, Virginia 20109 USA Phone: 703-392-1136 Email: contact@nalresearch.com...
- Page 2 NAL Research is not liable for any claim made by a third party or made by you for a third party. Document Number: 451-21012-003A...
- Page 3 EVISION ISTORY Revision Date Description 05/18/2023 Formal Release EFERENCE OCUMENTS The latest revisions of the NAL documents are available by request via email. Support@nalresearch.com. Reference Title Revision/Date Revision A, SHOUT nano 100 User Guide 15 May 2023 Document Number: 451-21012-003A...
-
Page 4: Table Of Contents
SatTerm for SHOUT nano 100 Manual Version A ABLE OF ONTENTS Introduction ........................7 Installing SatTerm ......................... 7 Connecting SatTerm to the SHOUT nano 100 ..............8 1.2.1 USB Connection ......................8 1.2.2 Pair SHOUT nano 100 to Bluetooth Device ..............9 Profile Descriptions ...................... - Page 5 SatTerm for SHOUT nano 100 Manual Version A ABLE OF IGURES Figure 1: SatTerm Home Screen ......................7 Figure 2: Select Device ........................8 Figure 3: Bluetooth Options ......................10 Figure 4: Select Port Properties in SatTerm ..................10 Figure 5: Select BT ..........................11 Figure 6: Port Properties ........................
- Page 6 SatTerm for SHOUT nano 100 Manual Version A Figure 32: Load *.ncf Configuration File ..................40 Figure 33: Browsing Window ......................41 Figure 34: Successful Update Made Window .................. 41 Figure 35: Address Book ........................42 Figure 36: Login Screen ........................42 Figure 37: Add to Address Form ......................
-
Page 7: Introduction
NAL Research that runs on the Windows® operating system. It communicates with the family of NAL Research devices through RS232 or USB interface. The following sections cover how to use SatTerm 9.1.0 to configure the SHOUT nano 100. Figure 1 is an example of the SatTerm 9.1.0 Home screen. -
Page 8: Connecting Satterm To The Shout Nano 100
SatTerm for SHOUT nano 100 Manual Version A SHOUT ONNECTING ERM TO THE NANO The SHOUT nano 100 can be connected to SatTerm via a USB port of a Windows® PC, and can also be connected to SatTerm through a Bluetooth link. 1.2.1 USB C ONNECTION Connect the SHOUT nano 100 to an available USB port on your computer with the provided USB cable (or any standard USB cable). -
Page 9: Pair Shout Nano 100 To Bluetooth Device
(see Figure 2). 1.2.2 SHOUT NANO LUETOOTH EVICE Depending on your security requirements, pair the SHOUT nano 100 to a BT device using one of two methods: Pairing without a PIN Pairing with a PIN 1.2.2.1 AIRING... -
Page 10: Figure 3: Bluetooth Options
SatTerm for SHOUT nano 100 Manual Version A Figure 3: Bluetooth Options Run SatTerm to connect to the paired SHOUT nano 100 Select Port Properties at the top left corner of the SatTerm window (see Figure 4). Figure 4: Select Port Properties in SatTerm The Port Properties window appears (see Figure 5). -
Page 11: Figure 5: Select Bt
Figure 5: Select BT Figure 6: Port Properties Select your SHOUT nano 100 device from the Unpaired Bluetooth Devices List and press Pair when the Pair button becomes enabled (see Figure 6). The selected device now displays in the Paired Bluetooth Devices section of the Port Properties window (see Figure 7). -
Page 12: Figure 7: Paired Bt Device
AIRING ITH A The SHOUT nano 100 allows connection to a BT device, such as a BT enabled PC, with the extra security of a requiring a PIN (AT^BTPASSEN=1). The Pairing steps are show below running on a Windows® PC and are as follows: To turn on the SHOUT nano 100, press the Power / Enter button for at least two (2) seconds. -
Page 13: Figure 9: Bluetooth Options
Scroll Back (Left Button), scroll down to select Enable Passkey> select [X] Enable on your Shout nano 100 device. Scroll Back (Left Button) to the SHOUT nano 100 device menu. On your BT enabled PC, select Start>Settings>Devices. Slide the Bluetooth switch to the ON position (see Figure 9). -
Page 14: Figure 11: Select Bt
Pair when the Pair button becomes enabled (see Figure 12). Figure 13: Key Pass Entry Window Enter the Passkey that is displayed on the SHOUT nano 100 into the Key Pass data entry field. You have 20 seconds to enter the Passkey displayed on the SHOUT nano 100 before the pairing process will expire, in which case, press the Pair button again when it becomes enabled (see Figure 13). -
Page 15: Profile Descriptions
Select the Paired SHOUT nano 100 and press Connect when the Connect button becomes enabled (see Figure 14). Verify the “Current BT Connection:” is the desired SHOUT nano 100 at the bottom of the SatTerm screen, and the SHOUT nano 100’s Bluetooth icon is green (see Figure 15). - Page 16 SatTerm for SHOUT nano 100 Manual Version A At power-up, by default, general profile 0 is loaded into the “active” general profile. However, you can change the power-up profile using AT command &Y. After power-up, you can load the “active” general profile with any stored general profile using the soft reset command Z.
- Page 17 SatTerm for SHOUT nano 100 Manual Version A “active” profile associated with these parameters to be saved or retrieved. Any modifications to these settings are saved to nonvolatile memory directly. Document Number: 451-21012-003A 17 of 56...
-
Page 18: Configure Window
SHOUT nano 100 and a connected DTE (computer, laptop, etc.). Connect the SHOUT nano 100 to an available USB port on your computer with the provided USB cable. Launch SatTerm software from the Windows® Start tab. -
Page 19: Miscellaneous Tab
Profile, Emergency Tracking Profile, Power Update Time Refresh Frequency, Remote Update Time Check, and Bluetooth Power Delay. Successful Send Required for State Change: This option restricts the SHOUT nano 100 from changing to a lower priority tracking mode based on whether or not a tracking report has been transmitted. - Page 20 GPS receiver timing signal. If the GPS receiver does not yet have a time fix, the SHOUT nano 100 stays awake for a specified period of time (Allowed GPS Acquisition Time) waiting for a GPS time fix. After which, the SHOUT nano 100 sleeps for another period of time (Power Up Time Refresh Frequency) before retrying to find a time fix.
-
Page 21: Tracking Tab
SatTerm for SHOUT nano 100 Manual Version A Bluetooth Power Mode and Delay: This sets the Bluetooth power settings. When set to off, the Bluetooth radio will not turn when the device powers on. The Bluetooth radio can be turned back on by using the device menu option or setting this option to on. When turned on, the delay setting determines how long the Bluetooth will stay turned on while there is no active connection with the Bluetooth. - Page 22 The default is to power up the unit in tracking mode to allow the unit to begin tracking after a power cycle and to automatically send reports at a predetermined interval. Alternatively, the SHOUT nano 100 can also be configured to turn on in command mode, allowing users to enter AT commands via a connected computer.
- Page 23 SatTerm for SHOUT nano 100 Manual Version A SatTerm can be used to retrieve tracking reports later using Options > Tracking Log. The AT command associated with this setting is ^DLTRK. Max. Queued Reports: Sets the maximum number of reports that can be queued on the SHOUT nano 100 for retransmit.
-
Page 24: Motion Tab
2.1.3 OTION The SHOUT nano 100 has a built-in sensor that can reliably detect motion. The Motion tab, as shown in Figure 19, provides ways to detect different motion characteristics without having to interpret the raw motion sensor signals. Motion detection can be enabled or disabled through the Motion Enabled option in the tracking profile (see section 2.2 Tracking Profile Settings). -
Page 25: Figure 20: Motion Detection Example
SatTerm for SHOUT nano 100 Manual Version A from the motion sensor. Figure 20 illustrates the algorithm with a window count of 3, window duration of one (1) minute, and a sensitivity of two (2) TTL pulses. Note: The motion detection algorithm starts over whenever the device receives a remote update. -
Page 26: Gps Tab
The GPS tab provides the option to configure the GPS receiver and stream NMEA formatted GPS data from the SHOUT nano 100 USB port while in Command mode, Tracking mode, or both modes (see Figure 22). When selected the GPS tab offers three (3) settings (see Figure 17) –... -
Page 27: Figure 22: General Profile Window With Gps Tab
SatTerm for SHOUT nano 100 Manual Version A Figure 22: General Profile Window with GPS Tab Invalid Course Value: This value is sent in GPS reports to indicate an invalid course when the GPS receiver is unable to determine the course. -
Page 28: Tracking Profile Settings
SatTerm for SHOUT nano 100 Manual Version A Mode: This parameter selects the mode (Tracking, Command or both modes) in which GPS data streaming is active. Rate: This parameter sets the NMEA streaming update rate in seconds. Message: The checked boxes select which NMEA sentences stream through the SHOUT nano 100 USB port. -
Page 29: Interval Tab
Between Reports, Time To Keep Trying, and Delayed First Report, as shown Figure 23. Use Alternate Interval for Motion: When this setting is set to Yes, the SHOUT nano 100 uses alternate Time Between Reports, Time To Keep Trying, and Delayed First Report settings while in motion. -
Page 30: Geofence Tab
SatTerm for SHOUT nano 100 Manual Version A The AT command associated with this setting are ^TTKT (Standard) and ^TTKTA (Motion). Delay First Report: When enabled, this setting prevents the transmission of the first tracking report. This applies when tracking is turned on from off or if there is a mode change. -
Page 31: Tracking Tab
Allowed GPS Acquisition Time: Sets the amount of time the geofence check attempts to acquire a GPS position. If the SHOUT nano 100 fails to acquire a position in the time allowed, the geofence check is aborted and occurs at the next scheduled check or the next time the GPS receiver has a valid position. -
Page 32: Figure 25: Tracking Profile Window With Tracking Tab
SatTerm for SHOUT nano 100 Manual Version A Figure 25: Tracking Profile Window with Tracking Tab Report Flood: This parameter sets the number of tracking reports that are to be transmitted continuously when first entering Tracking mode and when the tracking mode changes (for example, from Normal to Emergency). - Page 33 When Callable is set to No, the SHOUT nano 100 puts all its internal circuitry in sleep mode while idle. Any incoming messages or updates from a control center have to wait until the next reporting cycle (when the RF module wakes up for sending).
-
Page 34: Other Profile Settings
SatTerm for SHOUT nano 100 Manual Version A Skip Reporting when Stationary: This parameter limits the SHOUT tssA from sending tracking reports when it has not moved out of a specified radius. When enabled, this causes the unit to be bounded by a sphere with a specified radius. While the unit remains in the sphere, report sending skips a specified Cycles to Skip number of report cycles. -
Page 35: Miscellaneous Tab
When selected the Miscellaneous tab offers three (3) settings Figure 26 –Remote Update Password, Identifier in Reports, and Power–up Delay. Remote Update Password: An unattended SHOUT nano 100 can be reconfigured without requiring direct access to the device. All of the tracking profile parameters and most of the general parameters can be configured via remote updates. -
Page 36: Encryption Tab
2.3.2 NCRYPTION The SHOUT nano 100 can send and receive data in AES 256-bit encrypted format. Options include changing the Crypto Officer Password, enabling or disabling encryption, and setting the encryption and decryption keys. A factory-default Crypto Officer Password is initially set on the SHOUT nano 100. -
Page 37: Figure 27: Other Profile Window With Encryption Tab
SatTerm for SHOUT nano 100 Manual Version A Figure 27: Other Profile Window with Encryption Tab The Change Encryption Setting screen displays (see Figure 28). Figure 28: Change Encryption Settings Enter the default password, “temp password,” in the Old Password box. - Page 38 The encryption settings are included in the configuration file when the Save to file checkbox is selected. NOTE 1: The Zeroize button erases the encryption/decryption keys on the SHOUT nano 100. NOTE 2: Configuration can also be accomplished by using AT commands. The following five AT commands are used to configure the SHOUT nano 100 device’s cryptographic options:...
-
Page 39: Configure Settings
SatTerm for SHOUT nano 100 Manual Version A 2.3.3 ONFIGURE ETTINGS Select Configure at the bottom of the Configuration window (see Figure 29). Figure 29: Other Profile Window with Encryption Tab SatTerm displays the confirmation message (see Figure 30). Figure 30: Successful Update Made Window Press OK (see Figure 30). -
Page 40: Figure 31: Save Configuration File
Enter the desired File Name for the configuration, and press Save (Figure 31). NOTE: The SHOUT nano 100 can also be configured from an existing *.ncf configuration file. To load an existing *.ncf configuration file into the SHOUT nano 100: a. -
Page 41: Figure 33: Browsing Window
Locate the configuration file you wish to load, and select Open (see Figure 33). SatTerm proceeds to configure the SHOUT nano 100 with the settings contained in the selected configuration file. When this has completed, the Success window appears (See Figure 34). -
Page 42: Address Book
SatTerm for SHOUT nano 100 Manual Version A DDRESS SatTerm can be used to edit the SHOUT nano 100’s address book using the Address Book window. To access the Address Book window, select Options > View Address Book… from the SatTerm main window. -
Page 43: Figure 37: Add To Address Form
NOC server. NOTE: SatTerm is setup specifically to communicate with NAL Research’s network operation center (NOC) server using a web service. Application developers can configure SatTerm to use a different web service through the Options >... - Page 44 To erase the entire address book, click the Clear button (see Figure 35). A warning message will pop up asking to confirm the removal of all addresses from both the SHOUT nano 100 and the server. Click OK to confirm or Cancel to reject (see Figure 38).
-
Page 45: Canned Messages
To access the Canned Messages window, select Options > View Canned Messages… from the SatTerm main window. SatTerm must have an open connection with a SHOUT nano 100 for the Canned Messages window to be available. -
Page 46: Figure 40: Login Screen
Canned Message window (see Figure 41). This form prompts you to enter a label for the canned message and optional message text. This label is displayed on the SHOUT nano 100 LCD screen while scrolling through the canned messages stored on the device. Clicking Update adds the canned message to the SHOUT nano 100 as well as the server. -
Page 47: Figure 42: Warning Screen
To erase all canned messages, click the Clear button (see Figure 39). A warning message will pop up asking you to confirm the removal of all canned messages from both the SHOUT nano 100 and the server. Click OK to confirm or Cancel to reject (see Figure 42). -
Page 48: Tracking Log
The Tracking Log is a collection of reports that may or may not have been transmitted from the SHOUT nano 100. This log can be viewed, saved, and cleared using the Tracking Log window in SatTerm. To access the Tracking Log window, select Options > Tracking Log… from the SatTerm main window. -
Page 49: Figure 45: Alert Confirmation Screen
You will be prompted to enter a name for the file. To clear the entire tracking log from the SHOUT nano 100, click the Clear Tracking Log button (see Figure 44). You will be prompted to confirm deletion of all logged points on the device. Click Yes to confirm or No to cancel (see Figure 45). -
Page 50: Geofencing
A SHOUT nano 100 can be configured to send a report when entering or exiting a geofence, and to use a different tracking profile. This provides the ability to change the behavior of the SHOUT nano 100 based on its location. -
Page 51: Figure 46: Geofences
SatTerm for SHOUT nano 100 Manual Version A Figure 46: Geofences The Geofences window displays (see Figure 47). Figure 47: Geofences Window Document Number: 451-21012-003A 51 of 56... - Page 52 (e.g., "USA", "BASE", and “DANGERZN"). Enable: Enables this specific geofence. Arrive notice: Sends a NAL format GPS version 6 tracking report with short code 18 when entering this specific geofence. See document NAL GPS Report Version 6 Format [2] for details.
-
Page 53: Figure 48: Create/Edit Geofence Window
SatTerm for SHOUT nano 100 Manual Version A Clear: Deletes all configured Geofences. Figure 48: Create/Edit Geofence Window Create Geofence: Opens a window to create a geofence by adding points on a map. The window is shown in Figure 48. - Page 54 SatTerm for SHOUT nano 100 Manual Version A Edit Geofence: Opens a window to edit the coordinates of the selected geofence. The window is the same as Create Geofence with the same functionality, but it opens prepopulated with coordinates, as shown in Figure 48.
-
Page 55: Call Outs
SatTerm for SHOUT nano 100 Manual Version A In addition to normal tracking reports sent at a predefined interval, the SHOUT nano 100 can also send daily tracking reports at specific UTC times. These daily reports are called Call Outs. Call Outs can be configured two ways: using AT commands and using SatTerm. -
Page 56: Figure 50: Callout Form Window
SatTerm for SHOUT nano 100 Manual Version A Figure 50: Callout Form Window The main portion of the Callout Form window has a list of existing Call Outs. The list displays three columns: Index is the position of the Call Out in the list, UTC Time is the time a Call Out is to be made (in HH:MM:SS format), and State indicates whether the Call Out is enabled (1) or disabled (0).