
Related Manuals for Bosch HBN 97 Series


Summary of Contents for Bosch HBN 97 Series
- Page 1 HBN 97 . . Installing and °C °C Operating Instructions Internet: http://www.bosch-hausgeraete.de Bosch Info-Team: de Tel. 01 80/5 30 40 50 (E 0,12/Min. DTAG)
-
Page 2: Table Of Contents
Table of Contents Page Page Important Information Grilling Notes on disposal Cooking Tips and Helpful Hints Before connecting your new appliance Defrosting and Cooking – Main oven 19 Appliance safety considerations Cleaning and Care Before Using Your Appliance for the Important cleaning basics First Time Enamel and glass... -
Page 3: Important Information
Important Information Notes on disposal Before connecting your new appliance Old appliances still have some residual value. An environment-friendly method Before using your new appliance, please of disposal will ensure that valuable raw read these Instructions for use carefully. materials can be recovered and used They contain important information again. -
Page 4: Appliance Safety Considerations
Important Information Appliance safety considerations ‰ If using hot air , do not place The appliance should only be used for greaseproof paper loosely in the oven the preparation of food. (e.g. when heating the oven). The surfaces of heating and cooking The hot-air fan could draw in the paper appliances get hot during operation. -
Page 5: Introducing: Your New Oven
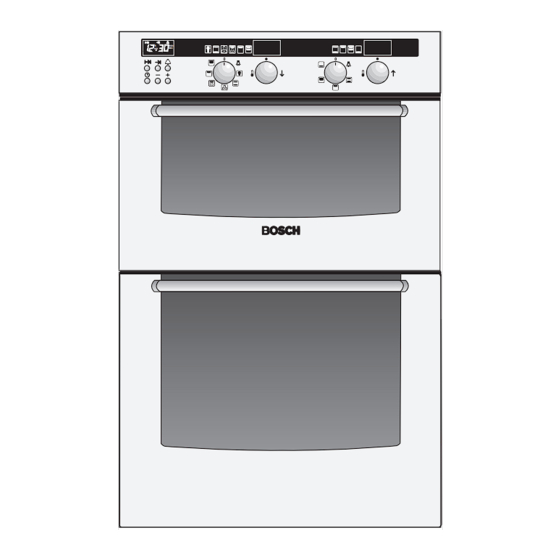
Introducing: Your new Oven Electronic timer Main oven Mini oven controls °C °C Function selector Temperature Function Temperature selector selector selector The control panel: The switches are retractable. To engage The control panel is illuminated. and disengage, depress the switch, As soon as you set a function, making sure that it is in OFF position. -
Page 6: Accessories
Introducing: Your new Oven Accessories Your oven comes with the following accessories: Universal baking pan / shelf wire shelf Additional accessories are available from your dealer. Shelf positions Mini oven Your oven features 3 shelf positions. The shelf positions are counted from bottom to top. -
Page 7: Electronic Timer
Electronic timer Dauer Ende Wecker Cooking time Minute timer Off time Time Set time Notes: Hinweise: If you keep the button – or + pressed The time of day is not displayed if you down, you can set the time in steps of have already set the timer, a duration or 10 minutes. -
Page 8: Alarm Function
Electronic timer The alarm The alarm (timer) can be set at any time. This applies even if a duration or an end has already been set. The alarm time always counts down visibly in the display. The alarm also features a special acoustic signal. This enables you to hear when the alarm time or a selected duration has expired. -
Page 9: Automatic Off
Electronic timer Automatic timer for the main oven You can switch the oven on and off via the electronic clock. Automatic switch off: If you wish to bake or roast food immediately, it is only necessary to set the cooking time. 1. -
Page 10: Automatic On And Off
Electronic timer Automatic switch on and switch off: Please remember that easily spoiled foods must not be allowed to remain in the oven for Dauer Ende Wecker too long. Need to be somewhere else – quickly? Don’t worry, the food will still be ready at the right time. That’s because the oven switches on and off automatically at the desired times. - Page 11 Definition of Oven Features – Main oven Gentle defrosting ———————— Advantages: Hot air grilling —————————— ˆ Recommended for delicate pastries only With hot air grilling the fan and the grill (i.e., whipped-cream gateaus). elements are activated alternatively. The heat generated by the grill element is evenly distributed in the oven cavity by the Conventional cooking ——————...
- Page 12 Definition of Oven Features – Mini oven Conventional cooking —————— Bottom heat —————————— (top and bottom heat) With this setting on the heating element if The food being cooked is exposed to heat the base of the oven cavity is activated. radiation from heating elements located at Advantages: the top and bottom of the oven cavity.
-
Page 13: Switching The Oven On And Off
Switching the Main and Mini oven ON and OFF Before you switch on your oven, decide Example: Hot air – Main oven which heating system you would like to Temperature display use. Switching on the oven: Turn the function selector until the symbol for the desired heating system illuminates. -
Page 14: Baking - Main Oven
Baking – Main oven Using baking tins ‰ Always place baking tins in the centre of the wire shelf. The wire shelf may be turned upside down to accommodate different size tins. If the cake bottom gets too dark: Check the shelf level. Shorten the baking time, and possibly use a lower baking temperature. -
Page 15: Roasting - Main Oven
Roasting – Main oven Roasting with hot air ‰ Notes: Meat roasted using the hot air system will brown on all sides and stay moist without adding additional fat. Choose cuts of meat that weigh 150 grams (5oz) or more. Place the shelf on top of the universal Place in a cold oven to save energy or pan. -
Page 16: Roasting - Mini Oven
Roasting – Main oven Whole poultry should be turned after After the end of the selected roasting approx. two-thirds of the cooking time time and with the oven switched OFF, has elapsed. With duck and goose, leave the roast in the closed oven for approx. -
Page 17: Grilling
Grilling – Main and Mini oven Radiant grilling Used for small cuts of meat or poultry. = centre-area grill for small amounts of food = full-surface grill for larger amounts of foods Exercise CAUTION when grilling. Always keep children away from the oven when it is in use. -
Page 18: Cooking Tips And Helpful Hints
Cooking Tips and Helpful Hints When cooking conventionally: Cakes baked in a tin get too dark at the Ensure that no other pans or trays are in back. the oven. Lower shelf position. Place tin on wire shelf. The cake gets too dry. Select a slightly higher oven temperature. -
Page 19: Defrosting And Cooking - Main Oven
Defrosting and Cooking – Main oven Defrosting and cooking using the hot air cooking option ‰ Important heating system information: Standard defrosting of various foods: For defrosting and cooking of frozen Shelf positions: or deep-frozen foods, use only the With 1 baking tray: shelf position 3 hot-air heating system. -
Page 20: Cleaning And Care
Cleaning and Care Important cleaning basics: For cleaning, do not use abrasives, corrosive cleaners, aerosol cleaners or sharp objects. Do not scratch off burnt-on food residues, but soak off them with a damp cloth and washing up liquid. Oven cleaners must not be used on aluminium or plastic parts. Stainless steel front: Enamel and glass: When using commercially available... -
Page 21: Removing/Installing The Oven Door
Cleaning and Care Manual cleaning steps: Note: To make cleaning more convenient, the oven offers you the following options: Removing the oven door: 1. Fully open the oven door. 2. Move the catch levers on the right and left-hand sides to the fully open position. 3. -
Page 22: Service And Repair Information
Service and Repair Information In the event of problems or repairs that you Caution: Calling customer service because cannot solve or perform yourself, our of an operator error can be very costly! In service company will be happy to help. the event of a customer service request, Check the service directory for the service please have the following information... -
Page 23: Trouble-Shooting Guide
Trouble-shooting Guide Calling the customer service is not always really necessary. In some cases, you can remedy the situation your- self. The following table may contain some helpful tips. Important general safety guidelines: Service or repair work on the electronic components may only be performed by a qualified expert. Without exception, prior to starting such repairs, the appliance must be disconnected from the mains. -
Page 24: Assembly Instructions
Assembly Instructions For the installer and kitchen Kitchen furniture Oven housing units from virtually all lines of expert! kitchen furniture are suitable for installing the built-in oven. However, the veneers or Important installation notes: plastic laminates on the housing unit must Properly dispose of packaging be applied with heat-resistant glue (90 °C). -
Page 25: Installation Of The Built-In Oven
Assembly Instructions Installation of the built-in oven To burn-in the insulation, heat up the oven prior to installing the unit. Push the built-in oven into the housing unit and align the unit until it is in a level position. Open the oven door and, using one screw on each side, fasten the built-in min. - Page 26 Note...
- Page 27 Note...
- Page 28 BOSCH’s contribution to the environment – This manual has been printed on recycled paper 5750 196 715 Printed in Germany 1002 Es. Robert Bosch Hausgeräte GmbH Ident-Nr. 580 303...