
Related Manuals for Bushnell 119904S


Summary of Contents for Bushnell 119904S
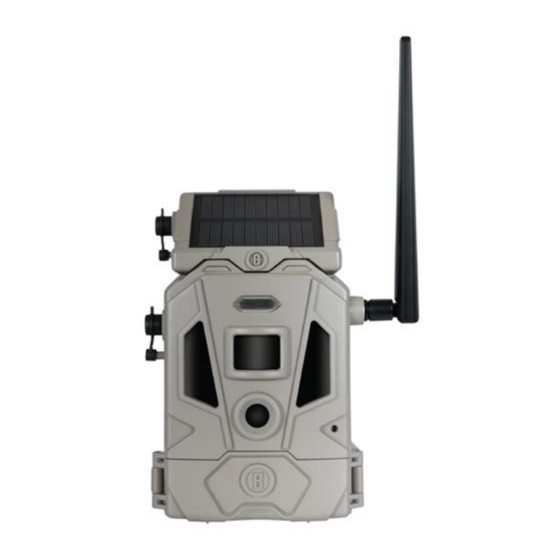
- Page 1 CELLUCORE 20 SOLAR TRAIL CAMERA INSTRUCTION MANUAL CELLUCORE 20 SOLAR MODEL # 119904S...
- Page 2 WELCOME Welcome to your Bushnell Trail Camera! This manual has all the instructions you need to set up your camera and your account, plus quick answers to your questions. If your camera does not seem to be functioning properly or if you are having image quality issues, please check the Troubleshooting Tips section.
-
Page 3: Table Of Contents
TABLE OF CONTENTS Camera Overview Camera Status Indicator Guide Quick Start Guide Settings Menu Mounting & Positioning Positioning the Solar Panel Frequently Asked Questions Technical Specifications Two-Year Limited Warranty... -
Page 4: Camera Overview
CAMERA OVERVIEW Antenna DC Out (For connecting to the camera through power cable) PIR Sensor DC In (For optional solar panel Motion accessory) Indicator LED IR Flash Temperature Sensor Lens Control Panel Lock Hole Cover Latch... - Page 5 Camera Status Camera Status Indicator Guide Indicator Lights Battery Life Wake Up Power On/Off Battery Panel Door SD Card Slot Battery Tray...
-
Page 6: Camera Status Indicator Guide
Look here to identify what a green, yellow, or red light means for your camera status and battery life. QUICK START GUIDE 1. Download the free Bushnell Trail Camera app on your smartphone from the App Store (iPhone®) or Google Play® (Android®). - Page 7 3. Log in and click the Camera icon at the bottom of the screen, then click “+” to add a new camera. Scan the QR code on the label inside your camera again or manually enter its serial # to associate this camera with your account.
- Page 8 on. If you want to ensure you have the strongest signal in a given area, simply power the camera off and power it back on. This will ensure you have maximum signal strength. (We recommend using your camera in a location that gives you minimally two bars of signal strength.
- Page 9 chosen for typical usage as a scouting camera for hunters: photo mode at 2MP resolution, with a 10 second interval between photos, and “Medium” LED flash power output. These settings may be easily changed to suit your individual preferences or application (for example, if you would rather capture videos, or photos at a different resolution, spaced further apart),...
-
Page 10: Settings Menu
SETTINGS MENU (Check your app for these settings) CAMERA MODE - Selects type of image files that are stored/ transmitted (note: see “Hybrid” under Video submenu). IMAGE - Still images will be captured by the camera at settings made in the PHOTO menu. MOVIE - Video clips will be captured at settings made in the VIDEO menu. - Page 11 of your choice to identify this camera. Especially useful for multi-camera setups. This will be imprinted on each photo. Default name is “CORE CAM”. PIR DELAY - Selects the length of time that the camera will ignore additional triggers from the PIR after an animal is first detected and remains within the sensor’s range.
-
Page 12: Mounting & Positioning
FAST MOTION – This setting has maximum flash output and fast shutter speed. It will provide the sharpest images and medium flash range and battery life. LONG RANGE – This setting has High LED output and Slow shutter speed and provides maximum flash range but the least battery life. - Page 13 place to be monitored, with the camera placed at a height of 3.5-5 ft. Also, keep in mind that you will get the best results at night when the subject is within the ideal flash range, no farther than 60’ and no closer than 10’ from the camera. The height away from the ground for placing the device should vary with the animal size appropriately.
- Page 14 • Using the tripod socket: The camera is equipped with a socket at the back (below the strap brackets) to enable mounting on a tripod or other camera mounting accessories that have a standard 1/4”-20 thread.
-
Page 15: Positioning The Solar Panel
POSITIONING THE SOLAR PANEL (Power accessory not included) You can remove the included solar panel from the camera and move it to a different position. This allows you to achieve maximum sunlight and solar charging regardless of where the camera lens is pointed. - Page 16 Q: How do I cancel or suspend my data plan? You can Cancel or Suspend your data plan through the wireless application in the “Camera” tab or through the management website. PHOTOS Q: Can I transmit photos to more than one cell phone number or email address? Accounts are tied to a customer’s e-mail address.
-
Page 17: Technical Specifications
TECHNICAL SPECIFICATIONS Lens: F = 2.3; FOV=47°; Auto IR-Cut-Remove (at night) Picture Size (pixel count in 16:9 format): 2MP=1920x1080, 8MP=3840x2160, 20MP=5888x3312 Video Size: 1280x720P or 960x544 (544p) @ 15-30 fps Video Length: Fixed length video time settings range from 5 to 20 seconds PIR Sensitivity: 4 settings: Low/Normal/High/Auto Response Time: 1 second (Photo), 2.5 second (Video). -
Page 18: Two-Year Limited Warranty
DO NOT USE THE SOLAR PANEL ON OTHER PRODUCTS TWO-YEAR LIMITED WARRANTY Your Bushnell® product is warranted to be free of defects in materials and workmanship for two years after the date of purchase. In the event of a defect under this warranty, we will, at our option, repair or replace the product, provided that you return the product postage prepaid. - Page 19 This warranty gives you specific legal rights. You may have other rights which vary from country to country. ©2022 Bushnell Outdoor Products Specifications and designs are subject to change without any notice or obligation on the part of the manufacturer.
- Page 20 Inc. (“Zipit”), that is copyrighted work of, and may be patented by, Zipit Wireless, Inc. Copyright 2003-2020 Zipit Wireless, Inc. All rights reserved. Access to the Zipit services may be bound by EULA and Privacy policies located at www.bushnell. com or www.zipitwireless.com/legal. CAUTION : RISK OF EXPLOSION IF BATTERY IS REPLACED BY AN INCORRECT TYPE.
- Page 21 mechanically crushing or cutting of a battery, that can result in an explosion; Do not leaving a battery in an extremely high temperature surrounding environment that can result in an explosion or the leakage of flammable liquid or gas. Do not expose the battery to extremely low air pressure that may result in an explosion or the leakage of flammable liquid or gas.
- Page 22 For further questions or additional information please contact: Bushnell Outdoor Products 9200 Cody, Overland Park, Kansas 66214 (800) 423-3537 | www.bushnell.com ©2022 Bushnell Outdoor Products...