
Related Manuals for Philips DSR 7121


Summary of Contents for Philips DSR 7121
- Page 1 DSR 7121 Digitale Satellietontvanger Décodeur Satellite Numérique Digital Satellite Receiver...
- Page 2 Garantie en service Inhoudstabel Technische gegevens Belangrijk Veelgestelde vragen Uw digitale satellietontvanger Wat zit er in de doos? Woordenlijst Dit heeft u ook nodig Overzicht digitale satellietontvanger Index Overzicht hoofdmenu Hoe dient u deze handleiding te lezen? Starten met het apparaat Afstandsbediening voorbereiden Aansluiten Smartcard invoeren...
- Page 3 Het recyclingsymbool op plastic verpakkingen betekent dat deze gerecycleerd kunnen worden. Zet ze dus niet bij het huisvuil. De groene stip op kartonnen verpakkingen betekent dat PHILIPS fi nancieel bijdraagt aan de organisatie voor het ”Vermijden en terugwinning van verpakkingsafval”.
- Page 4 De digitale satellietontvanger is vervaardigd volgens de geldende veiligheidsvoorschriften. Voor een veilig gebruik dient u de instructies hieronder op te volgen. Bewaar deze gebruiksaanwijzing zorgvuldig. Gevaarlijk • De digitale satellietontvanger bevat geen onderdelen die u zelf kunt vervangen of repareren. Probeer hem niet te openen.
- Page 5 Uw digitale satellietontvanger Hartelijk dank voor uw aanschaf van dit product, dat is ontworpen om u vele jaren zonder problemen van dienst te zijn! Wat zit er in de doos? Afstandsbediening Digitale satellietontvanger Gebruikershandleiding en 2 batterijen SCART-kabel Voedingskabel HDMI-kabel Pas op Plastic zakken kunnen gevaarlijk zijn.
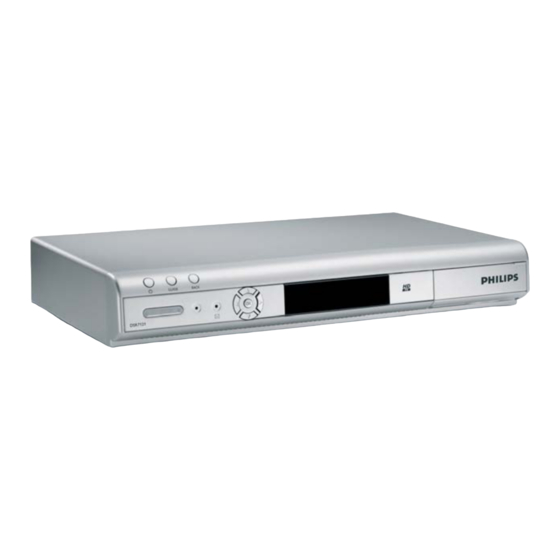
- Page 6 Dit heeft u ook nodig Overzicht digitale satellietontvanger Hoofdunit A Stand-by B Status-led C Navigatieknoppen D Sensor E Smartcard-klep Hoofdunit Achterkant hoofdunit A SAT-ingang B ETHERNET C USB D L/R audio (analoog) A B C D E F G E Tv-SCART F Optische digitale audio Hoofdunit G HDMI...
- Page 7 Overzicht hoofdmenu Hoe dient u deze handleiding te lezen? Druk op de knop MENU om naar het hoofdmenu te gaan. Deze gebruikershandleiding bevat alle informatie die u nodig heeft om: Druk op de knop OK om het menu • alle beschikbare zenders in te stellen Instellingen te openen: •...
- Page 8 HDMI/SCART -aansluiting Starten met het apparaat Dit hoofdstuk beschrijft de basisstappen Satellietontvanger waarmee u kunt starten. Kabel van de schotelantenne Afstandsbediening voorbereiden Televisietoestel Sluit de satellietantennekabel aan vanuit de LNB naar de SAT IN-aansluiting aan de Open de batterijbehuizing. achterkant van de digitale satellietontvanger. Plaats de twee meegeleverde batterijen in de Sluit de bijgeleverde HDMI-kabel aan op behuizing conform de aanwijzingen (+/-).
- Page 9 Smartcard invoeren Kies de gewenste taal door op de pijltjestoetsen of , te drukken en druk dan op de knop OK. De digitale satellietontvanger controleert automatisch de signaalkwaliteit. De smartcard voert u zo in: • Open het smartcard-klep aan de rechterkant van het voorpaneel.
- Page 10 Druk op de knop OK om met het zoeken naar zenders te beginnen. Uw digitale satellietontvanger gebruiken Wanneer u uw digitale satellietontvanger aangesloten heeft, kunt u de afstandsbediening gebruiken om de meest gebruikte basisfuncties te bedienen, zoals het aan- en uitzetten van de ontvanger, het van zender veranderen en het aanpassen van het volume.
- Page 11 Informatiebalk tonen Druk op pijltjestoets voor een korte Wanneer u van zender verandert, wordt de beschrijving van het volgende programma informatiebalk getoond. Om de balk op een voor de gekozen zender. willekeurig moment te bekijken, drukt u op Druk op de knop OK om uw keuze te INFO.
- Page 12 Instellingen Opmerkingen Druk op de knop MENU om naar het • Bij het allereerste gebruik of wanneer u hoofdmenu te gaan. geen favorietenlijst heeft samengesteld, Druk op OK om het menu Instellingen te zal alleen de optie Nieuwe lijst maken openen.
- Page 13 Tv-scherm Met deze optie kunt u diverse tv-instellingen bepalen. Druk op de knop MENU en druk dan op Klik op Tv-scherm. Druk op de knop OK. Er zijn twee opties beschikbaar: • Technische informatie • Uitgebreide instellingen Teletekst Via de tv heeft u toegang tot teletekst. Kijk hiervoor in de gebruikershandleiding van uw Er zijn vijf opties beschikbaar: televisie.
- Page 14 Uw digitale satellietontvanger nog beter gebruiken In dit hoofdstuk vindt u een volledige functiebeschrijving van uw digitale satellietontvanger. Volledig overzicht digitale satellietontvanger D E F Voorkant satellietontvanger Achterkant satellietontvanger - Aanzetten of in stand-bystand zetten A SAT-ingang - Ingang om de kabel van uw B Status-led satellietschotel aan te sluiten Groen: De ontvanger staat aan...
- Page 15 Volledig overzicht afstandsbediening Afstandsbediening - Aanzetten of in stand-by-stand zetten B MUTE - Geluid uit- of weer aanzetten C VOD - Niet actief D HD - Niet actief E EXIT - Menu/Informatiebalk sluiten F Navigatieknoppen - Omhoog/Omlaag, links/ rechts OK : de selectie bevestigen G Pagina omhoog/omlaag - Niet actief H Niet actief I Zender omhoog/omlaag - Selecteer de...
- Page 16 Favorieten Voer een naam in door middel van de pijltjestoetsen en druk op de Druk op de knop MENU en druk dan op knop OK. OK. Het menu-onderdeel Favorieten Wanneer u de naam heeft ingevoerd, drukt u wordt standaard geselecteerd. ◄...
- Page 17 Een favorietenlijst verwijderen Selecteer de naam van de favorietenlijst en druk dan op OK. Selecteer Verwijderen door middel van de pijltjestoetsen of . Druk op de knop OK. Een favorietenlijst hernoemen Selecteer de naam van de favorietenlijst en druk dan op OK. Selecteer Hernoemen door middel van de pijltjestoetsen of .
- Page 18 PIN-code wijzigen Er zijn drie opties beschikbaar. Klik op PIN-code wijzigen. • Engels Druk op de knop OK. • Frans • Nederlands Informatiebalk zichtbaar De optie bepaalt hoe lang de Informatiebalk in beeld blijft. Er zijn drie opties beschikbaar: • 3 seconden •...
- Page 19 Satellietontvanger Druk opnieuw op de knop OK om het zoeken te starten. Opmerking U dient dezelfde handelingen uit te voeren als bij Voor toegang tot dit menu wordt om de de eerste installatie. Zie voor meer informatie Master-PIN-code (1234) gevraagd. het hoofdstuk Installeren.
- Page 20 Fabrieksinstellingen Gebruik de pijltjestoetsen U kunt alle instellingen gemakkelijk terugzetten de audio naar achteren of naar voren naar de fabrieksinstellingen. Alle door u te verschuiven en zo de video te veranderde instellingen worden dan teruggezet synchroniseren. naar de standaardinstellingen zoals bij de eerste Druk op de knop OK om te bevestigen.
- Page 21 Onderhoud Schoonmaken Gebruik voor het schoonmaken een zachte, vochtige doek (geen natte doek). Gebruik nooit schuurlinnen of spuitbussen. Vervanging De digitale satellietontvanger bevat geen onderdelen waarop de gebruiker onderhoud dient te plegen. Probeer de satellietontvanger niet te openen. Alle onderhoudswerkzaamheden dienen door vakbekwame servicecentra te worden uitgevoerd.
- Page 22 Accessoires en aansluitingen Aansluiten recorder Aansluiten audio Recorder Satellietontvanger Satellietontvanger Digital audio-uitrusting Sluit een SCART-kabel aan op de AUX-SCART- Optie A – Optische digitale aansluiting aansluiting aan de achterkant van de digitale Uw geluidsapparatuur is voorzien van een satellietontvanger en op SCART-ingang EXT1 optische digitale geluidsingang: van de recorder.
- Page 23 Garantie en service Geachte klant, Hartelijk bedankt voor uw aanschaf van dit product. Met betrekking tot de garantie die op dit product van toepassing is, verwijzen wij u naar de website van uw satellietprovider. Mocht u niet over een internetaansluiting beschikken, neem dan contact op met de leverancier/ verkoper van de satellietontvanger Garantie en service...
- Page 24 • DDRAM Video 32 MB Technische gegevens • Flash geheugen 32 MB • EEPROM geheugen 32 kB of gesimuleerd in Dit product is geproduceerd conform de Flash memory Europese richtlijnen 95/47/EG en 2002/21/EG. Het product is conform de volgende richtlijnen Aansluitingen van de Europese Raad: 2006/95/EEG and 89/336/ •...
- Page 25 • 1 x USB2.0 “A” type* • 1 x Ethernetpoort* Accessoires • Gebruikershandleiding • Afstandsbediening • 2 batterijen • 1 SCART-kabel • 1 HDMI-kabel • Voedingskabel Diversen • Temperatuurbereik (°C) Functioneert +05°C to +45°C Opslag -20°C tot +60°C • Netspanning: 230 V ac +/- 10%, 50 Hz •...
- Page 26 Als u nog steeds zenders mist, neem dan contact Veelgestelde vragen op met uw satellietprovider. Dit hoofdstuk beschrijft de meest gestelde Sommige TV- en/of radiostations kunnen vragen en antwoorden over uw digitale soms niet ontvangen worden. satellietontvanger. Deze diensten worden niet 24 uur per dag uitgezonden en kunnen soms niet beschikbaar Aansluiting zijn.
- Page 27 HDMI Woordenlijst De ‘High-Defi nition Multimedia Interface’ is een audio/video-aansluitingsinterface onder vergunning voor het overbrengen van HDTV- Analoge audio streams. Geluid dat niet numeriek is omgezet. Analoog geluid is beschikbaar vanuit de LINKS/RECHTS geluidsuitgangen. De rode en witte aansluitingen Lengte-hoogteverhouding sturen geluid door twee kanalen, links en rechts.
- Page 28 Index Aansluiten Basisaansluiting, 9 Afstandsbediening Afstandsbediening gebruiken, 16 Afstandsbediening voorbereiden, 9 Digitale satellietontvanger aanzetten, 11 Favorietenlijst Favorietenlijst hernoemen, 18 Favorietenlijst samenstellen, 17 Favorietenlijst verwijderen, 18 Zender aan uw favorietenlijst toevoegen, 17 Zender uit uw favorietenlijst verwijderen, 17 Informatiebalk, 12 Informatiebalk tonen, 12 Installeren Eerste installatie, 10 Zoekstoring, 10...
-
Page 29: Table Of Contents
Branchement d’un enregistreur Table des matières Branchement audio Important Garantie et service Votre décodeur satellite numérique Caractéristiques techniques Contenu du carton Autre équipement nécessaire Questions fréquentes (FAQ) Présentation du décodeur satellite numérique Glossaire Présentation du menu principal Au sujet de ce mode d’emploi Index Premiers pas Préparer la télécommande... -
Page 30: Important
Ne les jetez donc pas à la poubelle comme des déchets ménagers normaux. Le « Point Vert » qui fi gure sur l’emballage en carton signifi e que PHILIPS verse une cotisation fi nancière à l'organisme « Avoidance and Recovery of Packaging waste ». - Page 31 Votre décodeur satellite numérique a été fabriqué dans le respect des normes de sécurité en vigueur, mais il convient de suivre les instructions ci-dessous pour l’utiliser en toute sécurité. Conservez ces informations pour pouvoir vous y référer plus tard. Danger •...
-
Page 32: Votre Décodeur Satellite Numérique
Votre décodeur satellite numérique Nous vous remercions d’avoir acheté cet appareil qui a été conçu et fabriqué pour une utilisation optimale dans la durée. Contenu du carton Décodeur satellite numérique Mode d’emploi 1 Télécommande et 2 piles 1 câble péritel 1 cordon d’alimentation Câble HDMI Avertissement... -
Page 33: Autre Équipement Nécessaire
Autre équipement nécessaire Présentation du décodeur satellite numérique Boîtier principal A Touche marche/arrêt B Voyant d’état C Touches de navigation D Capteur E Compartiment pour carte à puce Panneau avant Face arrière du boîtier principal A Entrée SAT B ETHERNET C USB D G/D audio (analogique) -
Page 34: Présentation Du Menu Principal
Présentation du menu principal Au sujet de ce mode d’emploi Appuyez sur la touche MENU pour accéder Ce manuel contient toutes les informations dont au menu principal. vous avez besoin pour : • installer les chaînes disponibles Appuyez sur la touche OK pour ouvrir le •... -
Page 35: Premiers Pas
Connexion HDMI/SCART Premiers pas Décodeur satellite Dans ce chapitre, vous trouverez des Câble de informations utiles pour commencer à vous l’antenne familiariser avec l’appareil. Téléviseur Préparer la télécommande Branchez le câble de l’antenne satellite murale à la prise SAT IN située à l’arrière de votre décodeur satellite numérique. -
Page 36: Insérer La Carte À Puce
Insérer la carte à puce Lors de la première installation, l’écran Choix du langage apparaît: Pour insérer la carte à puce : • Ouvrez le compartiment à carte à puce situé sur le côté droit du panneau avant. Sélectionnez la langue souhaitée en utilisant •... - Page 37 Si le signal est suffi sant, la fenêtre Première Une fois la recherche terminée, la liste des Installation apparaît. chaînes trouvées apparaîtra à l’écran. Vous pouvez désormais utiliser votre décodeur satellite numérique. Appuyez sur la touche OK pour démarrer la recherche des chaînes.
-
Page 38: Utilisation De Votre Décodeur Satellite Numérique
Affi chage du bandeau d’information Utilisation de votre Le bandeau d’information est affi ché à chaque décodeur satellite changement de chaîne. Pour affi cher à tout numérique moment le bandeau, appuyez sur INFO. Pour le fermer, appuyez sur EXIT. Une fois votre décodeur satellite numérique Sur le bord gauche du bandeau, vous pouvez voir branché, utilisez la télécommande pour activer la liste de chaînes active (TV / Radio / listes de... -
Page 39: Réglages
Langues et sous-titres Quatre options vous sont proposées : Dans la liste de chaînes active, sélectionnez • Favoris la chaîne souhaitée à l’aide des touches • Contrôle parental ou . • Affi chage TV Appuyez sur la touche . • Décodeur En cours est en surbrillance. -
Page 40: Contrôle Parental
Contrôle parental Cinq options vous sont proposées : Vous pouvez protéger l’accès à certaines chaînes. • Langue affi chage Ces chaînes seront protégées par un code PIN. • Langue par défaut Elles ne seront activées qu’après saisie du code • Sous-titres par défaut PIN. -
Page 41: Utilisation Avancée De Votre Décodeur Satellite Numérique
Utilisation avancée de votre décodeur satellite numérique Ce chapitre vous offre une description complète des fonctions de votre décodeur satellite numérique. Présentation détaillée de votre décodeur satellite numérique D E F Boîtier principal Face arrière du boîtier principal Boîtier principal Face arrière du boîtier principal - Allumer le décodeur ou passer en mode A Entrée SAT... -
Page 42: Présentation Détaillée De Votre Télécommande
Présentation détaillée de votre télécommande Télécommande - Allumer le décodeur ou passer en mode veille B Coupure du son - Couper ou remettre le son C VOD - Non actif D HD - Non actif E EXIT - Fermer le menu / le bandeau F Touches de navigation - Déplacement vers le haut/vers le bas, vers la gauche/vers la droite OK : confi... -
Page 43: Favoris
Sélectionnez le clavier virtuel en appuyant sur Favoris Saisissez un nom à l’aide des touches et de la touche OK. Appuyez sur la touche MENU puis sur OK. Après avoir saisi votre nom, appuyez sur Le menu Favoris est en surbrillance par jusqu’à... -
Page 44: Contrôle Parental
Supprimer une liste de favoris Sélectionner le nom de la liste de favoris puis appuyez sur OK. Sélectionnez Supprimer à l’aide des touches ou . Appuyez sur la touche OK. Renommer une liste de favoris Sélectionner le nom de la liste de favoris puis appuyez sur OK. -
Page 45: Affi Chage Tv
Changement PIN code Mettez en surbrillance Changement PIN Langue affi chage code. Trois langues sont disponibles : Appuyez sur la touche OK. • English • Français • Nederlands Temps affi chage bandeau Cette option détermine la durée d’activation du bandeau. Trois options vous sont proposées : •... -
Page 46: Décodeur
Décodeur Appuyez sur la touche OK Appuyez à nouveau sur la touche OK pour Remarque démarrer la recherche. Le code PIN permanent (1234) est nécessaire Il faudra effectuer les mêmes opérations que pour accéder à ce menu. lors de la première installation. Pour plus de détails, consultez le chapitre Installation. - Page 47 Paramètres usines Remarques Vous pouvez ramener votre appareil aux • Si vous disposez d’une connexion péritel, le réglages par défaut. Tous les réglages de votre son HD n’est pas disponible. décodeur satellite numérique seront initialisés • Le son HD est utile si vous disposez d’une comme lors de la première installation.
-
Page 48: Maintenance
Maintenance Nettoyage Pour le nettoyage, utilisez un chiffon légèrement humide. N’utilisez jamais de matériau abrasif ni de produit de nettoyage en aérosol. Remplacement Le décodeur satellite numérique ne contient aucun composant dont l’utilisateur pourrait assurer seul la maintenance. N’essayez pas de l’ouvrir. -
Page 49: Accessoires Et Branchements
Accessoires et branchements Branchement d’un enregistreur Branchement audio Décodeur satellite Enregistreur Décodeur satellite Equipement audio numérique Branchez le câble péritel fourni à la prise péritel AUX située à l’arrière de votre décodeur et à Option A – Branchement numérique l’entrée péritel EXT1 de l’enregistreur. optique Votre équipement audio est équipé... -
Page 50: Garantie Et Service
Garantie et service Cher client, Nous vous remercions d’avoir acheté cet appareil Philips. Pour de plus amples informations le concernant, veuillez consulter le site web www.telesat.be. Si vous ne disposez pas d’un accès à Internet, veuillez contacter votre revendeur TéléSAT le plus proche. -
Page 51: Caractéristiques Techniques
• DDRAM Vidéo 32 MB Caractéristiques • Mémoire Flash 32 MB techniques • mémoire EEPROM 32 kB ou émulée en Flash mémoire Ce produit est conforme aux directives européennes 95/47/CE et 2002/21/CE. Connectivité Ce produit est conforme aux directives • Prise péritel TV européennes suivantes : 2006/95/CEE et 89/336/ Output: CVBS or RGB / Fast blanking Volume CEE. - Page 52 • 1 x S/P-DIF (Optique)* • 1 x USB2.0 type « A »* • 1 x port Ethernet* Accessoires • Mode d’emploi • Télécommande • 2 piles • 1 câble péritel • 1 câble HDMI • Cordon d’alimentation Divers • Plage de températures (°C) Fonctionnement de +05°C à...
-
Page 53: Questions Fréquentes (Faq)
Si vous ne parvenez toujours pas à accéder à Questions fréquentes certaines chaînes, appelez votre conseiller client. (FAQ) De temps en temps, la réception de Ce chapitre offre des réponses aux questions certaines stations de radio est impossible. les plus fréquentes concernant votre décodeur Ces programmes ne sont pas transmis 24 heures satellite numérique. -
Page 54: Glossaire
Glossaire Dolby Digital Système audio surround conçu par les Dolby Laboratories contenant jusqu’à six canaux de son numérique (à gauche et à droite à l’avant, Audio analogique gauche surround et droite surround, centre et Son qui n’a pas été numérisé. Un son analogique caisson de basses subwoofer). -
Page 55: Index
Index Affi chage TV, 42 Bandeau d’informations, 40 Chaînes Listes de chaînes, 40 Recherche manuelle, 48 Sélectionner une chaîne, 40 Utilisation des listes de chaînes, 40 Code PIN Changement PIN code, 47 Connexion Branchements de base, 37 Contrôle parental, 42 Insérer la carte à... - Page 56 Technical data Table of contents Frequently asked questions Important Glossary Your Digital Satellite Receiver What’s in the box? Index What you also need Digital Satellite Receiver overview Contact information Main menu overview How to read this manual Trademarks and partner logos Getting started Prepare the remote control Connect...
-
Page 57: Important
So do not dispose of them with your normal household waste. The “Green Dot” affi xed on cardboard means PHILIPS pays a fi nancial duty to the “Avoidance and Recovery of Packaging Waste” organization. Important... - Page 58 The Digital Satellite Receiver has been manufactured to meet the appropriate safety standards, but the instructions below must be followed to operate it safely. These instructions must be kept for future reference. Danger • The Digital Satellite Receiver does not contain any user-serviceable parts. Do not attempt to open it.
-
Page 59: Your Digital Satellite Receiver
Your Digital Satellite Receiver Thank you for purchasing this product which has been designed and manufactured to give you many years of trouble-free service. What’s in the box? Digital Satellite Receiver User manual Remote control and 2 batteries SCART cable Power cord HDMI cable Caution... -
Page 60: What You Also Need
What you also need Digital Satellite Receiver overview Main unit A Standby B Status led C Navigation buttons D Sensor E Smart Card door Main Unit Main unit backside A SAT input B ETHERNET C USB D L/R audio (analogue) A B C D E F G E TV scart F Optical digital audio... -
Page 61: Main Menu Overview
Main menu overview How to read this manual Press the MENU key to access to the main This User Manual contains all information you menu. need to: • Set up all the available channels Press the OK key to open the Settings •... -
Page 62: Getting Started
HDMI/SCART connection Getting started Satellite Receiver In this chapter, the basic steps to get you started Lead from are described. satellite dish Prepare the remote control TV set Connect the Satellite antenna cable from the wall socket to the SAT IN socket at the rear of the Digital Satellite Receiver. -
Page 63: Install
To insert the smart card: • Open the smart card door on the right side of the front panel. • Insert the smart card into the smart card slot as far as it will go. The end of the card will be visible from outside the slot. -
Page 64: Using Your Digital Satellite Receiver
Press the OK key to start scanning for Using your Digital Satellite channels. Receiver Once you have connected your Digital Satellite Receiver, use the remote control to operate the basic, frequently-used functions, such as switching on and off, changing channels and altering the volume. -
Page 65: Settings
Displaying information banner From the active channel list, select the Every time you change channels, the information desired channel using the arrow keys or . banner is displayed. To display the banner Press the arrow key . Current Event is anytime, press INFO. -
Page 66: Parental Control
Press the MENU key and then press OK. The menu item Favorite Lists is highlighted. Press the OK key. Two options are now available: • Existing favorite channels list. • New favorite Notes • At the fi rst use or if you did not create any Five options are available: favorite list, only the option New favorite •... -
Page 67: Use More Of Your Digital Satellite Receiver
Use more of your Digital Satellite Receiver This chapter gives a complete description of the functionalities of your Digital Satellite Receiver. Digital Satellite Receiver full overview D E F Main unit Main unit backside Main unit Main unit backside - Switch on or to standby mode A SAT input - Input to connect the cable from B Status led... -
Page 68: Remote Control Full Overview
Remote control full overview Remote control unit - Switch on or to standby mode B Mute - Mute or restore the sound C VOD - Not active D HD - Not active E EXIT - Close Menu / Zapping Banner F Navigation keys - Move up/down, left/right OK: confi... -
Page 69: Favorites
Favorites Notes • You can create up to 5 favorite lists. Press the MENU key and then press OK. • The favorite list name is limited to 6 The menu item Favorite Lists is highlighted characters. by default. • To view a channel from your favorite list, Press the OK key. -
Page 70: Parental Control
Rename a favorite list The channel will be locked. Each time you will Select the Favorite list’s name and then press select it, a padlock will appear. Select Rename with the arrow keys or . Press the OK key. Proceed as indicated in Create a Favorite list. -
Page 71: Tv Display
TV Display Format This option allows you to defi ne TV settings. Two TV screen format are available: Press the MENU key and then the OK key. • Highlight TV Display. • 16:9 Press the OK key. Note By default, the language selected is the one set during the fi... - Page 72 Press the OK key. HD Audio Press the OK key again to start the scanning. This option allows to synchronize the SPDIF The same operations will have to be done as audio sound to the HDMI video. during the fi rst installation. For more details, see Highlight this option with the arrow keys chapter Install.
-
Page 73: Maintenance
Maintenance Cleaning For cleaning, use a soft, damp (not wet) cloth. Never use any abrasive cloth or aerosol cleaners Replacement The Digital Satellite Receiver does not contain any user-serviceable parts. Do not attempt to open it. All maintenance work must be carried out by qualifi... -
Page 74: Accessories And Connections
Accessories and connections Recorder connection Audio connection Satellite Receiver Recorder Satellite Receiver Digital Audio equipment Connect the supplied scart cable to the AUX scart socket at the rear of the Digital Satellite Option A – Optical digital connection Receiver and to the scart input EXT1 of the Your audio equipment is fi... -
Page 75: Guarantee And Service
Guarantee and service Dear Customer, Thank you for purchasing this product. For the warranty applicable to this product, we refer you to the Web site www.canaldigitaal.nl. In the event you do not have an Internet connection, please contact your local CanalDigitaal dealer. -
Page 76: Technical Data
• DDRAM Video 32 MB Technical data • Flash memory 32 MB • EEPROM memory 32 kB or emulated in Flash This product is in conformity with European memory 95/47/EC and 2002/21/EC directives. The product complies with the following Connectivity European council Directives: 2006/95/EEC and •... - Page 77 Accessories • User manual • Remote control • 2 batteries • 1 SCART cable • 1 HDMI cable • Power cord Miscellaneous • Temperature range (°C) Operating +05°C to +45°C Storage -20°C to +60°C • Mains : 230 V ac +/- 10%, 50 Hz •...
-
Page 78: Frequently Asked Questions
Frequently asked Some radio stations cannot be received questions from time to time These services are not transmitted 24 hours This chapter gives the most frequently asked a day and can sometimes be unavailable. This questions and answers about your Digital is not a fault. -
Page 79: Glossary
Glossary Analogue audio HDTV Sound that has not been turned into numbers. High-defi nition television is a digital television Analogue sound is available from the LEFT/ broadcasting system with greater resolution than RIGHT AUDIO outputs. The red and white traditional television systems sockets send audio through two channels, the left and right. -
Page 80: Index
Index Channel Channel lists, 68 Select a channel, 68 Use channel lists, 68 Connect basic connection, 65 Control Volume, 67 Displaying information banner, 68 Favorite lists Add a channel to a Favorite list, 72 Create a Favorite list, 72 Delete a Favorite list, 72 Remove a channel from a Favorite list, 72 Rename a favorite list, 73 Information banner, 68... -
Page 81: Contact Information
Contact information Trademarks and partner logos Trademarks are the property of Koninklijke Philips Electronics N.V. or their respective owners. DSR 7121 Serial number: www.canaldigitaal.nl Manufactured under license from Dolby Laboratories. “Dolby”, “Pro Logic”, and the double-D symbol are trademarks of Dolby Laboratories. - Page 84 © 2006 Koninklijke Philips Electronics N.V. All rights reserved. Document order number: 3111 176 54371...