Table of Contents
Advertisement
Quick Links
INSTALLATION MANUAL
AIR
CONDITIONER
Please read this installation manual completely before install-
ing the product.
Installation work must be performed in accordance with the
national wiring standards by authorized personnel only.
Please retain this installation manual for future reference
after reading it thoroughly.
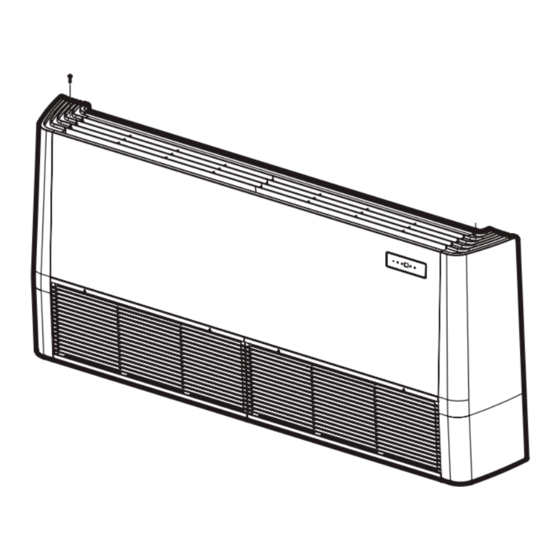
Ceiling suspended air conditioner
P/NO : MFL67889012
Copyright © 2017 LG Electronics Inc. All Rights Reserved.
www.lg.com
Advertisement
Table of Contents

Related Manuals for LG AVNQ18GM1A1


Summary of Contents for LG AVNQ18GM1A1
- Page 1 Installation work must be performed in accordance with the national wiring standards by authorized personnel only. Please retain this installation manual for future reference after reading it thoroughly. Ceiling suspended air conditioner www.lg.com P/NO : MFL67889012 Copyright © 2017 LG Electronics Inc. All Rights Reserved.
- Page 2 TIPS FOR SAVING ENERGY TIPS FOR SAVING ENERGY Here are some tips that will help you minimize the power consumption when you use the air con- ditioner. You can use your air conditioner more efficiently by referring to the instructions below: •...
-
Page 3: Important Safety Instructions
IMPORTANT SAFETY INSTRUCTIONS IMPORTANT SAFETY INSTRUCTIONS READ ALL INSTRUCTIONS BEFORE USING THE APPLIANCE. Always comply with the following precautions to avoid dangerous situations and ensure peak performance of your product WARNING It can result in serious injury or death when the directions are ignored CAUTION It can result in minor injury or product damage when the directions are ignored WARNING... - Page 4 IMPORTANT SAFETY INSTRUCTIONS • Do not install the product on a defective installation stand. - It may cause injury, accident, or damage to the product. • Be sure the installation area does not deteriorate with age. - If the base collapses, the air conditioner could fall with it, causing property damage, product failure, and personal injury.
- Page 5 IMPORTANT SAFETY INSTRUCTIONS CAUTION Installation • Always check for gas (refrigerant) leakage after installation or repair of product. Low refrigerant lev- els may cause failure of product. • Install the drain hose to ensure that water is drained away properly. A bad connection may cause water leakage.
-
Page 6: Table Of Contents
TABLE OF CONTENTS TABLE OF CONTENTS TIPS FOR SAVING ENERGY IMPORTANT SAFETY INSTRUCTIONS INSTALLATION PLACES THE INDOOR UNIT INSTALLATION Open side-cover Mounting the anchor nut and bolt Indoor unit drain piping Drain piping Drain test Heat insulation Connecting cables to the indoor unit Wiring connection TEST RUNNING Precautions in test running... -
Page 7: Installation Places
INSTALLATION PLACES INSTALLATION PLACES Indoor unit Ceiling suspended type - There should not be any heat source or steam near the unit. - There should not be any obstacles to prevent the air circulation. - A place where air circulation in the room will be good. - A place where drainage can be easily obtained. -
Page 8: The Indoor Unit Installation
THE INDOOR UNIT INSTALLATION THE INDOOR UNIT INSTALLATION Air conditioner Take enough distance Use the ventilation fan for smoke-collecting hood with sufficient capacity. Cooking table CAUTION NOTE • Avoid the following installation location. • Install the unit horizontally using a level 1. -
Page 9: Open Side-Cover
THE INDOOR UNIT INSTALLATION Open side-cover Step 4 Step 1 - Remove paper bracket from side-cover. Step 5 - Remove two screws from side-cover. Step 2 Right side cover - Knock out the pipe hole from the left side- cover with nipper/plier. Left side cover CAUTION... -
Page 10: Mounting The Anchor Nut And Bolt
CAUTION (Unit : mm) Tighten the nut and bolt to prevent unit Dimension Model from falling AVNQ18GM1A1 • Drill the piping hole on the wall slightly AVNQ24GM1A1 1018 tilted to the outdoor side by using a AVNQ30GM1A1 Ø 70 hole-core drill. - Page 11 THE INDOOR UNIT INSTALLATION CAUTION Installation information for declination - Install declination of the indoor unit is very important for the drain of the convertible type air conditioner. - Minimum thickness of the insulation for the connecting pipe shall be 10 mm. - If the Installation Plates are fixed to horizontal line, the indoor unit after installing will be de- clined to the bottomside.
-
Page 12: Indoor Unit Drain Piping
THE INDOOR UNIT INSTALLATION Indoor unit drain piping - Do not make drain piping like the following. Accumulated - Drain piping must have down-slope (1/50 to Do not raise drain water 1/100): be sure not to provide up-and-down slope to prevent reversal ow. - During drain piping connection, be careful not to exert extra force on the drain port on Water... -
Page 13: Heat Insulation
THE INDOOR UNIT INSTALLATION Heat insulation Wiring connection Use the heat insulation material for the refrig- Connect the wires to the terminals on the control board individually according to the out- erant piping which has an excellent heat-resis- tance (over 120 °C). door unit connection. - Page 14 THE INDOOR UNIT INSTALLATION Precautions when laying power wiring Use round pressure terminals for connections to the power terminal block. Power wire Round pressure terminal When none are available, follow the below instruction - Do not connect wiring of different thickness- es to the power terminal block.
-
Page 15: Test Running
TEST RUNNING TEST RUNNING M4..118 N.cm {12 kgf.cm} M5..196 N.cm {20 kgf.cm} M6..245 N.cm {25 kgf.cm} Precautions in test running M8..588 N.cm {60 kgf.cm} - The initial power supply must provide at least 90 % of the rated voltage. Otherwise, the air conditioner should not be Connection of power supply operated. -
Page 16: Hand Over
TEST RUNNING Hand over CAUTION Teach the customer the operation and mainte- After the confirmation of the above condi- nance procedures, using the operation manual tions, prepare the wiring as follows: (air filter cleaning, temperature control, etc.). • Never fail to have an individual power specialized for the air conditioner. -
Page 17: Installation Instructions
INSTALLATION INSTRUCTIONS INSTALLATION INSTRUCTIONS Installer setting - setting address of central control With the MODE button pressed, press the RESET button. By using the temperature setting button, set the indoor unit address. • Setting range : 00 ~ FF After setting the address, press the ON/OFF button toward the indoor unit 1 time. - Page 19 ะ ล อ เ ย ี ด แ ล ้ ว ้ ค เ ร ง อ ่ ื ป ร บ ั อ ากาศแบบแขวนใต้ ฝ ้ า www.lg.com P/NO : MFL67889012 Copyright © 2017 LG Electronics Inc. All Rights Reserved.
- Page 20 ทำความสะอาดแผ่ น กรองอากาศทุ ก ๆ 2 สั ป ดาห์...
- Page 21 คำแนะนำความปลอดภั ย ที ่ ส ำคั ญ คํ า แนะนํ า ค า ว ม ป ล อ ด ภ ย ั ท ส ่ ี ํ า ญ ั ค อ ่ านคํ า แนะนํ า ท ง ้ ั ห...
- Page 22 คำแนะนำความปลอดภั ย ที ่ ส ำคั ญ • อย ่ าต ด ิ ต ง ้ ั ค เ ร ง อ ่ ื บ น พ น ้ ื ท ช ่ ี ํ า ด ุ ร - อาจทํ า ให ้ ได ้ ร...
- Page 23 คำแนะนำความปลอดภั ย ที ่ ส ำคั ญ ข อ ้ ค ร ว ะ ร ง ั ว ก ร า ต ด ิ ต ง ้ ั ห ม น ่ ั ต ว ร จ ส อ บ ก...
- Page 24 ข้ อ ควรระวั ง ในการทอดสอบเดิ น เครื ่ อ ง คู ่ ม ื อ การติ ด ตั ้ ง การต้ ั ง ค่ า การติ ด ตั ้ ง - การตั ้ ง ค่ า หมายเลขแอดเดรสของระบบควบคุ ม ส่ ว นกลาง การตั...
- Page 25 หน่ ว ย : มม.(นิ ้ ว ) 10 (13/32) หรื อ มากกว่ า 300 (11 – 13/16) หรื อ มากกว่ า 2500 (98 – 3/7) หรื อ มากกว่ า พื ้ น 700(27 – 9/16) หรื อ มากกว่ า 700(27 –...
- Page 26 ฝ้ า เพดาน...
- Page 27 ขั ้ น ตอนที ่ 4 - แกะกระดาษแข็ ง ที ่ แ ปะมากั บ ฝาครอบด้ า นในออก ขั ้ น ตอนที ่ 5 ฝาครอบด้ า นขวา - ถอดรู ท ่ อ จากฝาครอบด้ า นซ้ า ยโดยใช้ ค ี ม สำหรั บ ตั ด หรื อ คี...
- Page 28 อ ็ น สอดน็ อ ตและวงแหวนเข้ า ไปในสลั ก เกลี ย วแขวนเพื ่ อ ล็ อ คสลั ก เกลี ย วแขวนยึ ด เข้ า ไปกั บ เพดาน DIMENSION MODEL AVNQ18GM1A1 AVNQ24GM1A1 1018 AVNQ30GM1A1 AVNQ36GM2A1 AVNQ36LM2A1 1418 AVNQ48LM2A1 น ต อ ็...
- Page 29 แขวนใต้ ฝ ้ า เพดาน 10~20 มม. เพดาน 5~10 มม.
- Page 30 า ้ ํ น า ้ ํ น า ้ ํ น การดั ด ท่ อ ขึ ้ น ลง ป ย า ล อ ข ท ง ะ ร อ ่ า บ น ย จ า ้ ํ อ...
- Page 31 ฝาปิ ด กล่ อ งขั ้ ว สายไฟ...
- Page 32 เดิ น ขั ้ ว ต่ อ สายไฟ เส้ น ผ่ า นศู น ย์ ก ลางแตกต่ า งกั น เข้ า กั บ เส้ น ผ่ า นศู น ย์ ก ลางเท่ า กั น ให้ ป ฏิ บ ั ต ิ เชื...
- Page 33 M4..118 N•cm / 12 kgf•cm / 87 klbf•in M5..196 N•cm / 20 kgf•cm / 145 klbf•in M6..245 N•cm / 25 kgf•cm / 181 klbf•in M8..588 N•cm / 60 kgf•cm / 434 klbf•in เครื ่ อ งวั ด อุ ณ หภู ม ิ กำลั...
- Page 34 ยื น ยั น ว่ า เส้ น ผ่ า นศู น ย์ ก ลางของสายเคเบิ ้ ล สอดคล้ อ ง กั บ ที ่ ร ะบุ ไ ว้ ใ นข้ อ กำหนดเฉพาะของแหล่ ง จ่ า ยกระแส ไฟฟ้ า (หมายเหตุ พ ิ เ ศษ ให้ พ ิ จ ารณาความสั ม พั น ธ์ ระหว่...
- Page 35 คู ่ ม ื อ การติ ด ตั ้ ง คู ่ ม ื อ การติ ด ตั ้ ง การตั ้ ง ค่ า การติ ด ตั ้ ง -การตั ้ ง ค่ า หมายเลขแอดเดรสของระบบควบคุ ม ส่ ว นกลาง กดด...