Table of Contents
Advertisement
Available languages
Available languages
Quick Links
INSTALLATION MANUAL
AIR
CONDITIONER
Please read this installation manual completely before install-
ing the product.
Installation work must be performed in accordance with the
national wiring standards by authorized personnel only.
Please retain this installation manual for future reference
after reading it thoroughly.
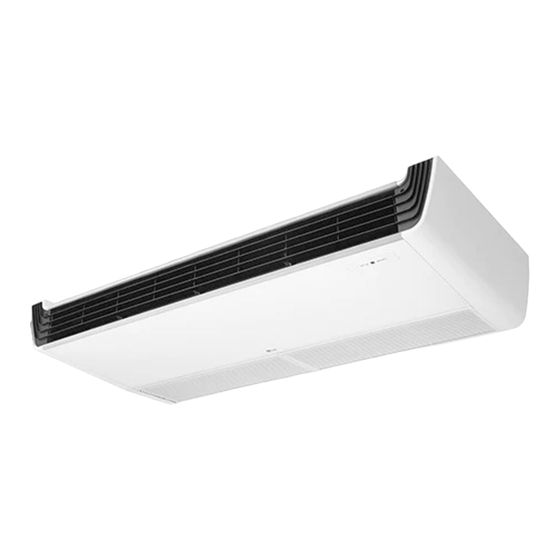
Single ceiling suspended air conditioner
P/NO : MFL68065208
www.lg.com
Advertisement
Table of Contents

Related Manuals for LG AVNQ48GM2A0


Summary of Contents for LG AVNQ48GM2A0
- Page 1 Installation work must be performed in accordance with the national wiring standards by authorized personnel only. Please retain this installation manual for future reference after reading it thoroughly. Single ceiling suspended air conditioner www.lg.com P/NO : MFL68065208...
- Page 2 TIPS FOR SAVING ENERGY TIPS FOR SAVING ENERGY Here are some tips that will help you minimize the power consumption when you use the air con- ditioner. You can use your air conditioner more efficiently by referring to the instructions below: •...
-
Page 3: Important Safety Instructions
IMPORTANT SAFETY INSTRUCTIONS IMPORTANT SAFETY INSTRUCTIONS READ ALL INSTRUCTIONS BEFORE USING THE APPLIANCE. Always comply with the following precautions to avoid dangerous situations and ensure peak performance of your product WARNING It can result in serious injury or death when the directions are ignored CAUTION It can result in minor injury or product damage when the directions are ignored WARNING... - Page 4 IMPORTANT SAFETY INSTRUCTIONS • Do not install the product on a defective installation stand. - It may cause injury, accident, or damage to the product. • Be sure the installation area does not deteriorate with age. - If the base collapses, the air conditioner could fall with it, causing property damage, product failure, and personal injury.
-
Page 5: Table Of Contents
TABLE OF CONTENTS TABLE OF CONTENTS TIPS FOR SAVING ENER- TEST RUNNING Precautions in test running Check the following items when installa- IMPORTANT SAFETY tion is complete INSTRUCTIONS Connection of power supply Evaluation of the performance INSTALLATION PLACES Hand over THE INDOOR UNIT INSTALLATION INSTRUC- INSTALLATION... -
Page 6: Installation Places
INSTALLATION PLACES INSTALLATION PLACES Indoor unit Ceiling suspended type - There should not be any heat source or steam near the unit. - There should not be any obstacles to prevent the air circulation. - A place where air circulation in the room will be good. - A place where drainage can be easily obtained. -
Page 7: The Indoor Unit Installation
THE INDOOR UNIT INSTALLATION THE INDOOR UNIT INSTALLATION Air conditioner Take enough distance Use the ventilation fan for smoke-collecting hood with sufficient capacity. Cooking table CAUTION NOTE • Avoid the following installation location. • Install the unit horizontally using a level 1. -
Page 8: Open Side-Cover
THE INDOOR UNIT INSTALLATION Open side-cover Step 4 Step 1 - Remove paper bracket from side-cover. Step 5 - Remove two screws from side-cover. Step 2 Right side cover - Knock out the pipe hole from the left side- cover with nipper/plier. Left side CAUTION cover... -
Page 9: Mounting The Anchor Nut And Bolt
Tighten the nut and bolt to prevent unit from falling • Drill the piping hole on the wall slightly AVNQ36GM1A0 1018 tilted to the outdoor side by using a Ø 70 hole-core drill. AVNQ48GM2A0 1418 AVNQ60GM2A0 Wall Anchor nut Indoor Outdoor... - Page 10 THE INDOOR UNIT INSTALLATION CAUTION Installation information for declination - Install declination of the indoor unit is very important for the drain of the convertible type air conditioner. - Minimum thickness of the insulation for the connecting pipe shall be 10 mm. - If the Installation Plates are fixed to horizontal line, the indoor unit after installing will be de- clined to the bottomside.
-
Page 11: Indoor Unit Drain Piping
THE INDOOR UNIT INSTALLATION Indoor unit drain piping - Do not make drain piping like the following. Accumulated - Drain piping must have down-slope (1/50 to Do not raise drain water 1/100): be sure not to provide up-and-down slope to prevent reversal flow. - During drain piping connection, be careful not to exert extra force on the drain port on Water... -
Page 12: Heat Insulation
THE INDOOR UNIT INSTALLATION Heat insulation Wiring connection Use the heat insulation material for the refrig- Connect the wires to the terminals on the erant piping which has an excellent heat-resis- control board individually according to the out- tance (over 120 °C). door unit connection. - Page 13 THE INDOOR UNIT INSTALLATION Precautions when laying power wiring Use round pressure terminals for connections to the power terminal block. Power wire Round pressure terminal When none are available, follow the below instruction - Do not connect wiring of different thickness- es to the power terminal block.
-
Page 14: Test Running
TEST RUNNING TEST RUNNING M4..118 N.cm {12 kgf.cm} M5..196 N.cm {20 kgf.cm} M6..245 N.cm {25 kgf.cm} Precautions in test running M8..588 N.cm {60 kgf.cm} - The initial power supply must provide at least 90 % of the rated voltage. Otherwise, the air conditioner should not be Connection of power supply operated. -
Page 15: Hand Over
TEST RUNNING Hand over CAUTION Teach the customer the operation and mainte- After the confirmation of the above condi- nance procedures, using the operation manual tions, prepare the wiring as follows: (air filter cleaning, temperature control, etc.). • Never fail to have an individual power specialized for the air conditioner. -
Page 16: Installation Instructions
INSTALLATION INSTRUCTIONS INSTALLATION INSTRUCTIONS Installer setting - how to enter installer setting mode CAUTION Installer setting mode is to set the detail function of the remote controller. If the installer setting mode is not set correctly, it can cause problems to the product, user injury or property damage. -
Page 17: Installer Setting - Installer Setting Code Table
INSTALLATION INSTRUCTIONS Installer setting - installer setting code table Installer setting code table Function Function code Setting value Remote controller LCD 0 : Set to master Mode override 1 : Set to slave 1 : Standard 2 : Low Ceiling height Selection 3 : High 4 : Super high... -
Page 18: Installer Setting - Setting Address Of Central Control
INSTALLATION INSTRUCTIONS Installer setting - setting address of central control With the MODE button pressed, press the RESET button. By using the temperature setting button, set the indoor unit address. • Setting range : 00 ~ FF After setting the address, press the ON/OFF button toward the indoor unit 1 time. - Page 19 Lea completamente este manual de instalación antes de instalar el producto. El trabajo de instalación debe realizarse de acuerdo con la Norma- tiva eléctrica nacional y solamente por personal autorizado. Por favor, una vez haya leído el manual atentamente, guárdelo para futuras consultas. Aire acondicionado de techo www.lg.com...
- Page 20 CONSEJOS PARA AHORRAR ENERGÍA CONSEJOS PARA AHORRAR ENERGÍA Estos consejos le ayudarán a reducir el consumo de energía cuando utilice el aire acondicionado. Podrá utilizar el aparato de aire acondicionado de forma eficiente siguiendo estas instrucciones: • No enfríe excesivamente los espacios. Puede ser nocivo para su salud y consumirá más electrici- dad.
- Page 21 INSTRUCCIONES DE SEGURIDAD IMPORTANTES INSTRUCCIONES DE SEGURIDAD IMPORTAN- LEA TODAS LAS INSTRUCCIONES ANTES DE UTILIZAR EL APARATO Cumpla con las siguientes precauciones para evitar situaciones de peligro y garantizar un funcio- namiento óptimo de su producto. ADVERTENCIA Puede sufrir lesiones de gravedad o mortales si ignora las instrucciones PRECAUCIÓN Puede sufrir lesiones leves o dañar el producto si ignora las instrucciones ADVERTENCIA...
- Page 22 INSTRUCCIONES DE SEGURIDAD IMPORTANTES • Para la instalación, retirada o reinstalación, póngase en contacto con el distribuidor o un centro de servicio técnico autorizado. - Existe el riesgo de incendio, descargas eléctricas, explosión o heridas. • No instale el producto en una base de instalación defectuosa. - Esto podría causar lesiones, accidentes o daños al producto.
- Page 23 ÍNDICE ÍNDICE CONSEJOS PARA AHO- FUNCIONAMIENTO DE RRAR ENERGÍA PRUEBA Precauciones durante la prueba de fun- INSTRUCCIONES DE cionamiento SEGURIDAD IMPORTAN- Compruebe lo siguiente cuando haya finalizado la instalación Conexión de la alimentación eléctrica LUGARES DE INSTALA- Evaluación del rendimiento CIÓN Entrega INSTALACIÓN DE LA...
- Page 24 LUGARES DE INSTALACIÓN LUGARES DE INSTALACIÓN Unidad de interior Tipo de techo - No habrá ninguna fuente de calor o vapor cerca de la unidad. - No habrá ningún obstáculo para la circulación del aire. - El lugar de instalación debe tener una buena circulación de aire. - El lugar de instalación debe disponer de un sistema de desagü...
- Page 25 INSTALACIÓN DE LA UNIDAD INTERIOR INSTALACIÓN DE LA UNIDAD INTERIOR Aire acondicionado Calcule una distancia suficiente Utilice el ventilador para una campana extractora con la capacidad suficiente. Placa de cocina PRECAUCIÓN NOTA • Evite las siguientes ubicaciones de ins- • Instale la unidad horizontalmente utili- talación.
- Page 26 INSTALACIÓN DE LA UNIDAD INTERIOR Tapa lateral abierta Paso 4. Paso 1. - Retire el soporte de papel de la tapa lateral Paso 5. - Afloje los dos tornillos de la tapa lateral. Paso 2. Lado trasero - Abra el orificio del tubo desde la tapa lateral izquierda utilizando un alicate o tenaza.
- Page 27 Apriete la tuerca y el tornillo para evitar que pueda caer la unidad. • Utilizando una broca de Ø 70, taladre el orificio para los tubos en la pared ligera- AVNQ36GM1A0 1018 mente inclinado hacia el lado exterior. AVNQ48GM2A0 1418 AVNQ60GM2A0 Pared Tuerca de anclaje Interior Exterior...
- Page 28 INSTALACIÓN DE LA UNIDAD INTERIOR PRECAUCIÓN Información de instalación para la inclinación - La inclinación de la unidad interior es muy importante para el desagü e del aparato de aire acondicionado de tipo de conducto. - El grosor mínimo del aislamiento para el tubo de conexión será de 10 mm. - Si las placas de instalación se fijan en línea horizontal, la unidad interior se inclinará...
- Page 29 INSTALACIÓN DE LA UNIDAD INTERIOR Tubo de desagüe de unidad Agua de desagüe No elevar acumulada interior Aire - El tubo de desagü e debe tener una inclina- ción descendente (1/50 a 1/100): asegúrese de no disponer la inclinación arri- Fuga de agua Fuga de agua Arrugas...
- Page 30 INSTALACIÓN DE LA UNIDAD INTERIOR Aislamiento del calor Conexión eléctrica Utilice un material aislante del calor para el Conecte individualmente los cables a los ter- conducto refrigerante que tenga una gran minales de la placa de control, según las cone- resistencia al calor (superior a 120°C).
- Page 31 INSTALACIÓN DE LA UNIDAD INTERIOR Precauciones durante la conexión del cablea- - Para el cableado, use el cable de alimenta- do de alimentación ción designado y conéctelo firmemente, a continuación, fíjelo para evitar que la presión Utilice terminales de presión redondos para exterior afecte al bloque de terminales.
- Page 32 FUNCIONAMIENTO DE PRUEBA FUNCIONAMIENTO DE PRUEBA Precauciones durante la prueba de M4..118 N.cm {12 kgf.cm} funcionamiento M5..196 N.cm {20 kgf.cm} M6..245 N.cm {25 kgf.cm} - La alimentación eléctrica inicial debe sumi- M8..588 N.cm {60 kgf.cm} nistrar un mínimo del 90 % del voltaje nomi- nal.
- Page 33 FUNCIONAMIENTO DE PRUEBA ENTREGA PRECAUCIÓN Enseñe al cliente los procedimientos de uso y Tras la confirmación de estas condicio- mantenimiento, ayudándose del manual de nes, prepare el cableado del modo si- instrucciones (limpieza del fitro de aire, control guiente. de temperatura, etc.). •...
- Page 34 INSTALLATION INSTRUCTIONS INSTRUCCIONES DE INSTALACIÓN Configuración del instalador - entrar en el modo de configuración de instalador PRECAUCIÓN El modo de configuración del instalador permite establecer las funciones detalladas del con- trolador remoto. Si el modo de configuración del instalador no se configura correctamente, puede producir problemas en el producto, lesiones al usuario o daños a la propiedad.
- Page 35 INSTALLATION INSTRUCTIONS Configuración del instalador - tabla de códigos de ajuste de instalador Tabla de códigos de ajuste de instalador Código de LCD del Nº Función Valor de ajuste función controlador remoto 0 : Ajusta como principal Cancelación de modo 1 : Ajustar como esclavo 1 : Estándar Selección de...
- Page 36 INSTALLATION INSTRUCTIONS Configuración del instalador - ajuste de direcciones de control central Con el botón MODE pulsado, pulse el botón Reset. Con el botón de ajuste de temperatura, ajuste la dirección de la unidad interior. • Rango de ajuste : 00 ~ FF Tras ajustar la dirección, pulse el botón ON/OFF hacia la unidad interior una vez.
- Page 37 O trabalho de instalação deverá ser executado em conformidade com as normas de instalação nacionais e apenas por pessoal autorizado. Depois de ler este manual de instalação na totalidade, por favor, guarde-o para consultas futuras. Split tipo teto www.lg.com...
- Page 38 DICAS PARA ECONOMIZAR ENERGIA DICAS PARA ECONOMIZAR ENERGIA Para utilizar o seu ar condicionado de forma mais eficiente e reduzir o consumo de energia, basta seguir as instruções abaixo: • Não resfrie excessivamente o interior da residência. Além de ser prejudicial para a saúde, o equi- pamento consome mais energia elétrica.
- Page 39 INSTRUÇÕES DE SEGURANÇA IMPORTANTES INSTRUÇÕES DE SEGURANÇA IMPORTANTES LEIA TODAS AS INSTRUÇÕES ANTES DE UTILIZAR O APARELHO. Cumpra sempre as seguintes precauções para evitar situações de perigo e de modo a garantir o máximo desempenho do seu produto. AVISO Se as indicações forem ignoradas tal pode resultar em lesões graves ou morte. ALERTA Se as instruções forem ignoradas tal pode resultar em lesões leves ou danos no produto AVISO...
- Page 40 INSTRUÇÕES DE SEGURANÇA IMPORTANTES ● Este aparelho não se destina à utilização por pessoas (inclusive crianças) com capacidades físicas, sensoriais ou mentais reduzidas, ou por pessoas com falta de experiência e conheci- mento, a menos que tenham recebido instruções referentes à utilização do aparelho ou este- jam sob a supervisão de uma pessoa responsável pela sua segurança.
- Page 41 ÍNDICE ÍNDICE DICAS PARA ECONOMI- EXECUÇÃO DO TESTE ZAR ENERGIA Precaucões na execução do teste Verifique os tópicos seguintes quando a INSTRUÇÕES DE SEGU- instalação estiver concluída RANÇA IMPORTANTES Conexão à rede de alimentação elétrica Avaliação de desempenho LOCAIS DE INSTALAÇÃO Finalizando a instalação INSTALAÇÃO DA UNIDA- INSTRUÇÕES DE INSTA-...
- Page 42 LOCAIS DE INSTALAÇÃO LOCAIS DE INSTALAÇÃO Unidade interna Tipo suspenso no teto - Não deve existir nenhuma fonte de calor ou vapor junto da unidade. - Não devem haver quaisquer obstáculos que impeçam a circulação de ar. - Local onde a circulação de ar na divisão seja boa. - Local onde a drenagem possa ser facilmente efetuada.
- Page 43 INSTALAÇÃO DA UNIDADE INTERNA INSTALAÇÃO DA UNIDADE INTERNA Ar condicionado Considere uma distância suficiente Use a ventoinha de ventilação, para a estrutura do receptor de fumaça, com Fogão capacidade suficiente. ALERTA NOTA • Evite os seguintes locais de instalação. • Instale a unidade horizontalmente utili- 1.
- Page 44 INSTALAÇÃO DA UNIDADE INTERNA Abra a estrutura lateral Passo 4. Passo 1. - Remover suporte de papel da capa lateral. Passo 5. - Remova os dois parafusos da cobertura lateral. Passo 2. Painel lado direito - Bloqueie o encaixe do buraco na cobertura do lado esquerdo com lenços de papel.
- Page 45 • Faça o furo na parede para a tubulação ligeiramente inclinado para o lado ex- terno, usando uma broca de coroa de AVNQ36GM1A0 1018 Ø 70. AVNQ48GM2A0 1418 AVNQ60GM2A0 Lado da Parede Parafuso de fixação Interna Externa...
- Page 46 INSTALAÇÃO DA UNIDADE INTERNA ALERTA Informações de instalação para Inclinação - A inclinação na instalação da unidade interna é muito importante para garantir a drenagem. - A espessura mínima de isolamento para a canalização de ligação deve ser de 10 mm. - Se as placas forem fixadas à...
- Page 47 INSTALAÇÃO DA UNIDADE INTERNA Mangueira de escoamento da Água acumulada Não aumente para drenagem unidade interna - A tubulação de escoamento deve ter uma inclinação descendente (1/50 a 1/100) : certi- Vazamento Vazamento Ondulação fique-se de não criar inclinação ascendente a de água de água fim de prevenir o fluxo inverso.
- Page 48 INSTALAÇÃO DA UNIDADE INTERNA Isolamento térmico Ligação dos cabos Utilize material de isolamento de calor para a Assegure-se que a cor e o número de condu- tubulação de refrigeração com uma excelente tores elétricos sejam coincidentes nas duas resistência ao calor (acima de 120 °C). extremidades.
- Page 49 INSTALAÇÃO DA UNIDADE INTERNA Precauções ao efetuar a ligação dos cabos elétricos Utilize terminais de pressão de olhal nas liga- ções ao terminal de alimentação. Terminal de Cabo de Alimentação pressão de olhal Quando não tiver nenhum disponível, siga as instruções abaixo.
- Page 50 EXECUÇÃO DO TESTE EXECUÇÃO DO TESTE M4..118 N.cm {12 kgf.cm} M5..196 N.cm {20 kgf.cm} M6..245 N.cm {25 kgf.cm} Precaucões na execução do teste M8..588 N.cm {60 kgf.cm} - A tensão de alimentação elétrica não deve ser inferior a 90 % da tensão nominal do equipamento.
- Page 51 EXECUÇÃO DO TESTE Finalizando a instalação ALERTA Ensine os procedimentos de funcionamento e Após confirmação das condições acima manutenção ao cliente, utilizando o manual de especificadas, prepare as ligações da se- instruções (limpeza do filtro de ar, controle de guinte forma: temperatura, etc.).
- Page 52 INSTRUÇÕES DE INSTALAÇÃO INSTRUÇÕES DE INSTALAÇÃO Configurações do Instalador - como entrar no modo de configurações do Instalador ALERTA O modo de configurações do instalador serve para definir em detalhes as funções do controle remoto. Se o modo de configurações do instalador não estiver devidamente configurado, pode provocar problemas no produto ou danos materiais.
- Page 53 INSTRUÇÕES DE INSTALAÇÃO Configurações do Instalador - tabela de códigos deconfigurações do Instalador Tabela de códigos de configurações do Instalador Função Código da função Valor configurado LCD do controlador remoto 0 : Configurar como principal Anular modo 1 : Configurar como secundário 1 : Padrão 2 : Baixo Seleção da altura...
- Page 54 INSTRUÇÕES DE INSTALAÇÃO Configurações do Instalador - configuração do endereço de controle central Pressione os botões MODE e RESET ao mesmo tempo. Ao utilizar o botão de configuração de temperatura, configure o endereço da unidade interna. • Configuração do alcance : 00 ~ FF Após configurar o endereço, pressione 1 vez o botão ON/OFF na direção da unidade interna.