Sennheiser RS 130 - Wireless Headphones Manual
- Instructions for use manual (41 pages) ,
- Instruction manual (13 pages) ,
- Brochure (2 pages)
Advertisement
- 1 Delivery includes
- 2 Safety instructions
- 3 Wall mounting
- 4 Connecting the transmitter (Fig. 1)
- 5 Removing the ear cushions (Fig. 2 and 3)
- 6 Inserting the rechargeable batteries (Fig. 4)
- 7 Charging the rechargeable batteries
- 8 Turning the transmitter on and off (Fig. 5)
- 9 Turning the headphones on and off (ON/OFF, Fig. 5)
- 10 Adjusting the volume (VOLUME, Fig. 6)
- 11 Auto-tuning – automatic transmitter search-tuning with memory function (TUNE, Abb. 7)
- 12 Self-learning automatic level control with memory function
- 13 Under-modulation (audio signal too low)
- 14 Over-modulation (audio signal too high)
- 15 Enhancement of the 3D and the bass portion of the stereo signal (Fig. 8)
- 16 Automatic noise reduction
- 17 Meanings of the LEDs and acoustic signals
- 18 Turning the acoustic signals (beeps) on and off
- 19 If problems occur...
- 20 Accessories
- 21 Warranty
- 22 Type approval regulations
- 23 Specifications
- 24 Documents / Resources
The RS 130 is an up-market wireless RF headphone system suitable for use with hi-fi systems and televisions. The headphones are very comfortable to wear and the system incorporates a variety of technical innovations such as:
- Transmitter with automatic on/off function
- Automatic transmitter search-tuning with memory function
- Self-learning automatic level control with memory function
- Acoustic signals provide feedback on the functions
- "Noise Gate" function reduces hissing noise, e.g. during pauses
- Intelligent battery charging technology
- Enhancement of the 3D and the bass portion of the stereo signal
![]()
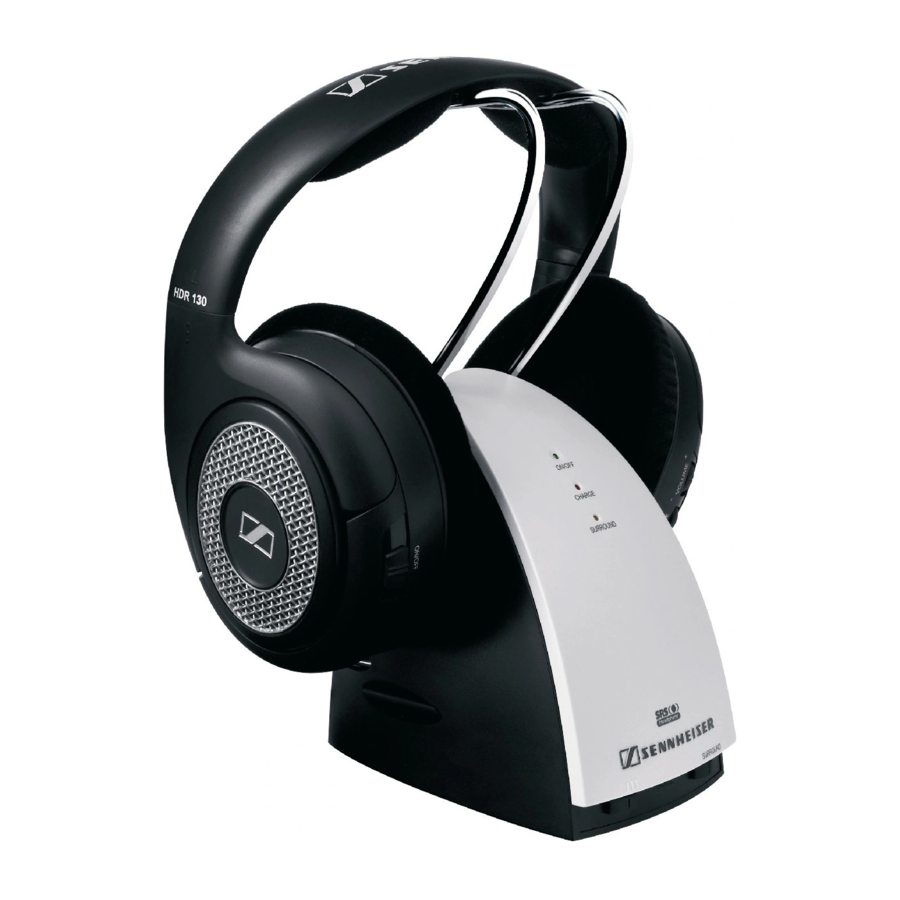
Delivery includes
- HDR 130 headphones
- 2 x AAA size Ni-MH rechargeable battery, 1.2 V
- TR 130 transmitter with audio connecting cable (permanently connected)
- NT-RS 100 mains unit
- Adapter 3.5 mm/6.3 mm
- RCA phono plug (926 MHz variant only)
- Instructions for use
Safety instructions
Never open the transmitter nor the receiver, otherwise you can be injured and the warranty becomes null and void.
 Attention: Do not wear the headphones in situations which require special attention (e.g. in traffic or when performing skilled jobs).
Attention: Listening at high volume levels can lead to hearing defects.
Attention: Do not charge standard batteries via the headphones! Only use rechargeable batteries (danger of explosion)!

Dispose of exhausted rechargeable batteries at special collection points or return them to your specialist dealer.
- Always keep the system dry and do not expose it to extreme temperatures (ideally 10–35°C).
- Use the system with care and set it up in a clean, dust-free environment.
- Varnish or furniture polish may degrade the rubber feet of the transmitter, which could stain your furniture.
- Do not store your headphones on a glass dummy head, chair armrest, or similar for long periods of time as this can widen the headband and reduce the contact pressure of the headphones.
- Use a soft cloth for cleaning the units. Do not use abrasive cleaners.
Wall mounting
The transmitter is prepared for wall mounting. The required mounting hardware (screws and plugs) is not included in the delivery.
Connecting the transmitter (Fig. 1)

Establish the necessary connections (mains unit, audio connecting cable).
Removing the ear cushions (Fig. 2 and 3)

The ear cushions are secured to the earcups by means of a quarter turn fastener. To remove an ear cushion, turn it in the direction of the arrow until you overcome a slight resistance and lift it off the earcup.
Inserting the rechargeable batteries (Fig. 4)

Remove the left ear cushion (Fig. 2 and 3).
Insert the rechargeable batteries.
Attention: Observe correct polarity when inserting the batteries!
Charging the rechargeable batteries
For charging the batteries, place the headphones on the charging cradle of the transmitter. (The headphones automatically turn off during charging.) The red LED "CHARGE" lights up during the charging process. If the batteries are fully charged, the transmitter automatically switches to trickle charging and the red LED "CHARGE" flashes slowly.
Charge the batteries for at least 16 hours prior to first time use. Subsequent charging time is about the same time as the previous operating time.
Always store the headphones on the transmitter to ensure that they are fully charged when they are needed. The intelligent battery charging technology prevents overcharging. If you do not use the head-phones for extended periods of time, please remove the batteries and disconnect the transmitter's mains unit from the mains.
Nearly discharged batteries will significantly reduce the sound quality. Approx. 10 minutes before the batteries are completely discharged, an acoustic warning signal is produced (two long beeps, see table).
Turning the transmitter on and off (Fig. 5)

Turn on the sound source. This automatically activates the transmitter and the green LED "ON/OFF" lights up. If the sound source is turned off, the transmitter is automatically deactivated after approx. 3 minutes (the LED "ON/OFF" goes off).
Note: The automatic level control only functions if the volume of the sound source is sufficient.
Turning the headphones on and off (ON/OFF, Fig. 5)
Move the "ON/OFF" switch on the headphones to the position "ON". The headphones then start the transmitter search-tuning.
Adjusting the volume (VOLUME, Fig. 6)

Use the "VOLUME" control to adjust the volume on the headphones.
Auto-tuning – automatic transmitter search-tuning with memory function (TUNE, Abb. 7)

Note: The transmitter must be activated (green LED "ON/OFF" lit) and the headphones must be turned on.
By pressing the TUNE button or after turn-on, the headphones start scanning the whole frequency range for a transmitter signal. If a transmitter signal is found, the transmitter search-tuning stops and the headphones produce – depending on the selected channel – one, two or three beeps. The audio transmission then starts.
If, for some reason, the signal found is not the correct one (e.g. from another nearby system), press the TUNE button again and the transmitter search-tuning is continued. When turning on the headphones, they automatically start the transmitter search-tuning on the last selected channel.
If no transmitter signal is received for an extended period of time (e.g. the range is exceeded or the transmitter is deactivated), six short beeps are produced. After approx. 10 minutes, the headphones automatically turn off. By pressing the TUNE button, the headphones can be turned on again.
Self-learning automatic level control with memory function
The transmitter is equipped with an automatic level control which ensures that the headphones always receive an optimum signal. The level is continuously adjusted during operation and remains stored as long as the transmitter is connected to the mains.
Under-modulation (audio signal too low)
With under-modulation, the yellow LED "INPUT LEVEL" flashes slowly. If this happens, gradually increase the volume of the sound source. If the audio signal remains too weak, an optimum transmission is not possible. It could be that the transmitter is deactivated after some time.
Over-modulation (audio signal too high)
With over-modulation, the yellow LED "INPUT LEVEL" flashes rapidly. If this happens, gradually reduce the volume of the sound source.
Enhancement of the 3D and the bass portion of the stereo signal (Fig. 8)


The RS 130 system is equipped with the so-called sound retrieval system (SRS), which significantly enhances the three-dimensional and the bass portion of the stereo signal. To activate the sound retrieval system, move the slide switch "SURROUND" on the transmitter to the right. The yellow LED "SURROUND" lights up.
Automatic noise reduction
In addition, the transmitter features a "Noise Gate" function, which reduces hissing noise when no audio signal is transmitted (e.g. during pauses).
Meanings of the LEDs and acoustic signals
| Transmitter, LED | Status | Meaning |
| ON/OFF (green) | lit | Audio signal is present, transmitter is activated |
| CHARGE (red) | lit | Rechargeable batteries are being charged |
| flashes slowly | Rechargeable batteries are fully charged, transmitter has switched to trickle charging | |
| SURROUND INPUT LEVEL (yellow) | lit | "SURROUND" function is activated |
| flashes slowly | Audio signal too low | |
| flashes rapidly | Audio signal too high | |
| Headphones, acoustic signals | Meaning | Commentary |
| 6 short beeps | No audio signal (transmitter is not activated, out of range) | Automatic turn-off after approx. 10 minutes |
| 2 long beeps | Rechargeable batteries are flat | Automatic turn-off after approx. 10 minutes |
| Sequence of 3 beeps | Manual or automatic turn-off | — |
| 1, 2 or 3 beeps after pressing TUNE | Headphones tuned to channel 1, 2 or 3 | — |
Turning the acoustic signals (beeps) on and off
The acoustic signals of the headphones can be turned on or off as follows:
- Turn the headphones on.
- Press the TUNE button for 5 seconds.
- Turn the headphones off.
- If the acoustic signals are turned on, the headphones produce a sequence of beeps at turn-off. If no beeps are produced, the acoustic signals are now turned off.
If problems occur...
- Check if all jack plugs are connected correctly.
- Make sure that the batteries are charged.
- Check if the batteries are inserted correctly and that the polarity is correct.
- Check if the headphones and sound source are turned on and that the volume of the headphones and sound source is sufficient.
- Move closer to the transmitter.
- Choose a different channel on the transmitter.
- Press the TUNE button again.
- Reset the system:
Remove the rechargeable batteries from the headphones and – at the same time – interrupt the power supply of the transmitter for at least 30 seconds. - Some electronic devices (e.g. televisions) can cause interference, which can be eliminated by increasing the distance between the transmitter and the interference source.
- Try to operate the transmitter with a different sound source.
Should the problem persist, please contact your authorized dealer for assistance.
Accessories
- Additional headphones: HDR 130 (864 MHz) Cat. No. 009932
HDR 130 (926 MHz) Cat. No. 009933 - Replacement ear cushions: Cat. No. 511791
Only use original Sennheiser components and spare parts, otherwise the units can be damaged and the warranty becomes null and void.
Warranty
2-year warranty
Type approval regulations
Please observe the respective country-specific type approval regulations!
Specifications
| Modulation | FM stereo |
| Frequency range | see type plate on the bottom of transmitter |
| AF frequency response | 18 Hz–21 kHz |
| Signal-to-noise ratio | typ. > 68 dBA |
| TR 130 transmitter | |
| RF output power | < 10 mW (864 MHz variant) < 0.75 mW (926 MHz variant) |
| Power supply | 9 V DC via NT-RS 100 mains unit |
| Current consumption | < 1.8 VA |
| Channels | 3 |
| Connector | 3.5 mm jack plug (864 MHz variant) RCA plug (926 MHz variant) |
| Weight | approx. 430 g (incl. audio connecting cable) |
| Dimensions | width: 85 mm, depth: 133 mm, height: 225 mm (incl. charging cradle) |
| HDR 130 headphones | |
| Transducer principle | dynamic, circum-aural, open |
| Max. SPL at 1 kHz | 104 dB |
| THD | < 0.5% |
| Power supply | 2 AAA size Ni-MH rechargeable batteries (LR 03) |
| Charging time | approx. 16 h (full charge) |
| Operating time | approx. 22 h (with fully charged batteries) |
| Weight | approx. 275 g incl. batteries |

Documents / ResourcesDownload manual
Here you can download full pdf version of manual, it may contain additional safety instructions, warranty information, FCC rules, etc.
Advertisement
Thank you! Your question has been received!


Need Assistance?
Do you have a question about the RS 130 that isn't answered in the manual? Leave your question here.