ViewSonic N2060w User Manual
Hide thumbs
Also See for N2060w:
- Guida dell'utente (32 pages) ,
- User manual (24 pages) ,
- Specifications (2 pages)

Related Manuals for ViewSonic N2060w


Summary of Contents for ViewSonic N2060w
- Page 1 ViewSonic ® N2060w LCD TV - User Guide - Guide de l’utilisateur - Bedienungsanleitung - Guía del usuario - Guida dell’utente - Användarhandbok - Käyttöopas - Руководство пользователя اﻠ ﻤﺴ ﺘ ﺨ ﺪﻢ ﺪﻠﻴﻞ Model No. : VS11287-1E...
-
Page 2: Table Of Contents
CONTENTS Compliance information ------------------------------------------------1 Important Safety Instructions ----------------------------------------- 2 Copyright Information -------------------------------------------------- 3 Product Registration ---------------------------------------------------- 3 Antenna Installation Instructions------------------------------------- 4 Clean the LCD display-------------------------------------------------- 4 GETTING START Package Contents------------------------------------------------------- 5 Front view of Product --------------------------------------------------- 6 Rear View of Product -------------------------------------------------- 6 Assembly ---------------------------------------------------------------- 6 How to connect SCART ------------------------------------------------8 How to connect HEADPHONE----------------------------------------9... -
Page 3: Compliance Information
ViewSonic N2060w... -
Page 4: Important Safety Instructions
ViewSonic moving the cart/apparatus N2060w... -
Page 5: Copyright Information
Purchase Date: Product disposal at end of product life ViewSonic is concerned about the preservation of our environment. Please dispose of this product properly at the end of its useful life. Your local waste disposal company may provide information about proper disposal. -
Page 6: Antenna Installation Instructions
LCD TV screen or ® case. Some chemical cleaners have been reported to damage the screen and/or case of the LCD TV. ViewSonic will not be liable for damage resulting from use of any ammonia or alcohol-based cleaners. -
Page 7: Getting Start
GETTING STARTED Congratulations on your purchase of a ViewSonic LCD TV display. Important !Save the original box and all packaging material for future shipping needs. Package Contents Please confirm that the following accessories are present when you unpack the box:... -
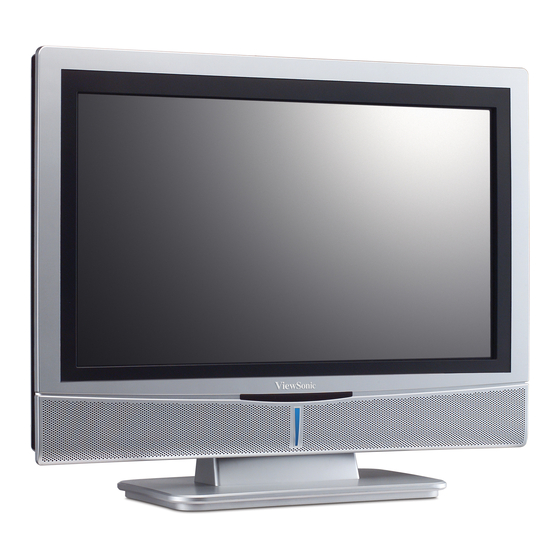
Page 8: Front View Of Product
Rear View of the Product Pb/Cb Pr/Cr HDTV Audio Input AV Audio Input S-video There is a wide range of video and audio equipment that can be connected to your TV. The following connection diagrams show you how to connect them. ViewSonic N2060w... -
Page 9: Assembly
Take out TV and base from carton, assembled by three pieces screws, which you could find from the accessory box. Shown in the figures below: ViewSonic Place the base on a solid surface Note: Lock the screw middle first, then the others, to avoid holes aiming incorrectly N2060w... -
Page 10: How To Connect Scart
R ports and to the L and R AUDIO AV p orts on the TV. Prise SCART (SCART IN) (PERITEL) To connect a VCR, a camcorder, a DVD player, satellite receiver, decoder games console. SCART socket is an in p ut/out p ut socket. N2060w... -
Page 11: How To Connect Headphone
How to connect PC input .Connect a D-sub cable to D-sub port which is located at bottom of TV as Graph. .Connect an audio cable to PC audio port which is located at bottom of TV as Graph. ViewSonic N2060w... - Page 12 To display images from the connected appliance, select the input source (HDMI) by pressing the AV button on the remote control. HDMI, the HDMI logo and "High-Definition Multimedia Interface" are trademarks or registered trademarks of HDMI Licensing LLC”. ViewSonic N2060w...
-
Page 13: Notes On The Remote Control
Select your input source: press repeatedly to select TV, PC, SCART, S-VIDEO,HDTV or HDMImode, according to where you connected your external source. SOUND To select Mono/ Stereo /Dual from TV RF input. PIP/POP Press this key to display PIP/POP screen N2060w... - Page 14 HOLD Press HOLD to hold the Teletext page when viewing information. Press again to return to automatic page update. REVEAL Press REVEAL to display reveal hidden words e.g. quiz page answers. Press again to hide. N2060w...
-
Page 15: Remote Control Battery Installation
Follow the steps below to insert the batteries. 1.Open the remote control’s rear battery compartment cover . 2.Insert two AAA (1.5v) batteries. Ensure that the positive and negative ends match as indicated on the bottom of the battery compartment. 3.Replace the battery compartment cover . ViewSonic N2060w... -
Page 16: Preparation Of Beginning To Watch Tv
Insert the power cord in the wall socket having an AC power supply . 4.Turn the TV on: Press the power button of the TV to turn it on. When the TV is ON, the indicator turns Blue. ViewSonic N2060w... -
Page 17: To Use The Menus
When you adjust a menu option (Balance for example), the menu is replaced by a sub-menu as illustrated. Press the OK button to return to the Sound menu are registered trademarks of SRS Labs, Inc. button. buttons. buttons. N2060w... - Page 18 Select the PIP/POP menu using the button. Press the OK button to confirm. Use the option. buttons activate (PIP/POP) or deactivate (Off) the buttons to change the position of the PIP frame on buttons to select each buttons to N2060w...
- Page 19 Select the TV set up menu using the button. Press the OK button to confirm. Use the buttons to select each option. Select Auto Search using the Press the OK button to display the Auto Search menu. Use the buttons to select each option. buttons. button. N2060w...
- Page 20 Repeat the procedure for each letter field. BUTTON AVAILABLE CHARACTERS Space ViewSonic Select Manual search using the Press the OK button to display the Manual search menu. Use the buttons to select each option. buttons, enter desire frequency and press the — • & button. N2060w...
- Page 21 Manual Search, select Store Prog. option using as indicated above to save your modification. Press the MENU button to exit the PIP menu. ViewSonic buttons. or to Insert a (the channel previously saved button to select the buttons and proceed N2060w...
- Page 22 (to modify Main picture source) or PIP source (to modify PIP source). Press the OK button to display the selection menu in PIP mode . Use the buttons to select the input source. Press the OK button to display the desire input source. N2060w...
- Page 23 Display the Main menu by pressing MENU button. Select the Set up menu using the Press the OK button to confirm Use the buttons to select each option. buttons, select the character set that wil be button. buttons buttons select Off N2060w...
-
Page 24: Pc Mode Osd Adjust
Display the Main menu by pressing MENU button. Select the PC menu using the Press the OK button to confirm. Use the option. buttons to move the picture horizontally on the buttons to move the picture vertically on the screen. button. buttons to select each N2060w... -
Page 25: Appendix Tips
At the end of its life specialized companies can dismantle the discarded receiver to concentrate the reusable materials and to minimize the amount of materials to be disposed of. Please ensure you dispose of your old receiver according to local regulations. ViewSonic N2060w... -
Page 26: Product Specification
PAL B/G,D/K,I and SECAM L/L’(Multi-Europe) Nicam/a2 (RGB+CVBS) x1,CVBS x1 RCA(Composite) x 1 S-Video x 1 YPbPr x 1 D-sub(15pin) Speaker (built-in):3W+3W speakers Headphone Mini-jack for stereo (3.5ø) Line Output (RCA L/R) (WXGA) Audio L/R x 1 (Share) Audio L/R x 1 N2060w... - Page 27 Warning: Do not set the graphics card in your computer to exceed these refreshing rates. Doing so may result in permanent damage to the LCD. Note: Product Specifications are subject to change without further notice. ViewSonic AC100V~240V, 50/60Hz <70W 522 x 424 x 185mm , VGA cable, PC audio cable. N2060w...
-
Page 28: Support Timing Table(D-Sub/Hdmi)
800x600@72hz(VESA) 800x600@75hz(VESA) 832x624@75hz(MAC II ,Apple ) 1024x768@60hz(VESA) 1024x768@70hz(VESA) 1024x768@75hz(VESA) 1152x864@75hz(VESA ) ViewSonic CEA Timing (HDMI) 480p/60Hz 4:3 480p/60Hz 16:9 720p/60Hz 16:9 1080i/60Hz 16:9 480i/60Hz 4:3 480i/60Hz 16:9 579p/50Hz 4:3 579p/50Hz 16:9 720p/50Hz 16:9 1080i/50Hz 16:9 576i/50Hz 4:3 576i/50Hz 16:9 N2060w... -
Page 29: Troubleshooting
• CATV is connected improperly or not connected; please check all the CATV connections. • The cable TV service is interrupted; please contact your cable operator. Picture is cut off/with sidebar screen • Is the image positioned correctly? • Are screen mode adjustments such as picture size set correctly? ViewSonic N2060w... -
Page 30: Customer Support
35 25 65 12 09 2311 3413 03 8717 1616 0696 630 8051 01 411 8936 02 4527 9033 40 6661 5618 053 484 9308 22 57 77 38 21359 1423 800-200-8439 913 496 534 08 5792 9045 0207 949 0307 N2060w... -
Page 31: Limited Warranty
How long the warranty is effective: ViewSonic LCD TVs are warranted for one (1) year for all parts excluding the light source and one (1) year for labor from the date of the first customer purchase.