
Related Manuals for Haier I-Link HADG6DS2XWIFI


Summary of Contents for Haier I-Link HADG6DS2XWIFI
- Page 1 ENGLISH INSTALLATION AND USER'S MANUAL INSTRUKCJA MONTAŻU I OBSŁUGI POLSKI ESPAÑOL MANUAL DE INSTALACIÓN Y USO...
-
Page 3: Table Of Contents
INSTALLATION AND USER’S MANUAL CONTENT INTRODUCTION SAFETY PRECAUTION ELECTRICAL INSTALLATION SPECIFICATION INSTALLATION (VENT OUTSIDE) INSTALLATION (VENT INSIDE) DESCRIPTION OF COMPONENTS OPERATION MAINTENANCE TROBULESHOOTING CONFORMITY WITH DIRECTIVES ENVIRONMENTAL PROTECTION... -
Page 4: Introduction
INTRODUCTION Thank you for choosing this cooker hood. This instruction manual is designed to provide you with all required instructions related to the installation, use and maintenance of the appliance. In order to operate the unit correctly and safety, please read this instruction manual carefully before installation and usage. - Page 5 - Children should be supervised to ensure that they do not play with the appliance. - Do not flambé under the range hood. - he range hood is not intended to be installed over a hob having more than four hob elements Electrical Shock Hazard Only plug this unit into a properly earthed outlet.
-
Page 6: Electrical Installation
Electrical Installation All installation must be carried out by a competent person or qualified electrician. Before connecting the mains supply ensure that the mains voltage corresponds to the voltage on the rating plate. Direct Connection The appliance must be connected directly to the mains using an omnipolar circuit breaker with a minimum opening of 3mm between the contacts. -
Page 7: Specification
Standard Installation Accessories List Spec. Illustration Picture Hood body Lower chimney (500mm) Upper chimney (500mm) Upper chimney bracket Lower chimney bracket Cooker hood bracket φ8 rawl plugs φ8×φ6 white color Screw (ST4 * 30 mm) Screw (ST4 * 8 mm) Air outlet Carbon filter... -
Page 8: Installation (Vent Outside)
INSTALLATION (wall mounting) If you have an outlet to the outside, your cooker hood can be connected as below picture by means of an extraction duct (enamel, aluminum, flexible pipe non flammabe with an interior diameter of 150mm) Before installation, turn the unit off and unplug it from the outlet. The cooker hood should be placed at a distance of 65~75cm above the cooking plane for best effect. - Page 9 INSTALLING THE HOOD Position the hood at the desired height respecting the minimum height above the hob. Mark the location of the wall bracket.(Placed the holes between 700 and 800 mm above the worktop) Remove the hood and position the wall bracket to mark the locations of the holes on the wall.
- Page 10 INSTALLING THE HOOD Once the hood is in place, locate the location of the 4 additional wall mount screws as shown in the following diagram. Remove the hood to puncture the wall and install wall plugs. Secure the body of the hood with 4 screws of 4 mm in diameter using dowels adapted to your wall.
- Page 11 INSTALLING THE HOOD Attach the lower chimney support to the lower chimney as shown. Use 2 screws ST4x8mm. (Do not over tighten the screws, make sure the upper chimney can slide easily into the lower chimney) Insert the upper chimney into the lower chimney. Position the bottom chimney in the appliance, then mark the holes on the wall.
- Page 12 INSTALLING THE HOOD Install the lower chimney, then screw it to the wall with 2 screws of diameter Φ 8 mm Then pull the upper chimney upwards to the desired height. Mark the locations of the mounting holes of the upper chimney support.
- Page 13 INSTALLING THE HOOD Secure the wall bracket of the upper chimney to the wall using the selected dowels (8 mm screws recommended). Reassemble the upper chimney and fix it to the wall bracket with 2 screws ST4x8mm Fasten the lower chimney to the lugs of the kitchen hood using 2 screws ST4x8mm.
- Page 14 Standard Installation Accessories List Spec. Illustration Picture Air Deflector Bracket φ8 rawl plugs φ8×φ6 white color Screws ST4.0×30 Screws ST3.5×12...
- Page 15 INSTALLATION(AIR DEFLECTOR FOR T-SHAPE,CURVED GLASS,FLAT GLASS MODELS): Air deflector is mentioned as included and not optional. 1. Fix the bracket to the T-shaped plastic outlet with 2pcs ST3.5x12mm screws provided as shown below: Drill 2 holes on the wall to accommodate the wall plugs,then screw and tighten the bracket onto the wall with 2pcs ST4x30mm screws provided.
- Page 16 Install the chimney to the unit and fix it. “Please kindly be noted: T-shaped plastic outlet and v-flaps can not be use d at the same time. You can use them in two ways: 1) Add v- flap on existing o utlet; 2) Use T-shaped plastic outlet, no add v-flap.” “Note: The product is provided with v-flap accessory.
-
Page 17: Installation (Vent Inside)
INSTALLATION (VENT INSIDE) If you do not have an outlet to the outside, exhaust pipe is not required and the installation is similar to the one show in section “INSTALLATION (VENT OUTSIDE)”. Activated carbon filter can be used to trap odors. In order to install the activated carbon filter, the grease filter should be detached first. -
Page 18: Description Of Components
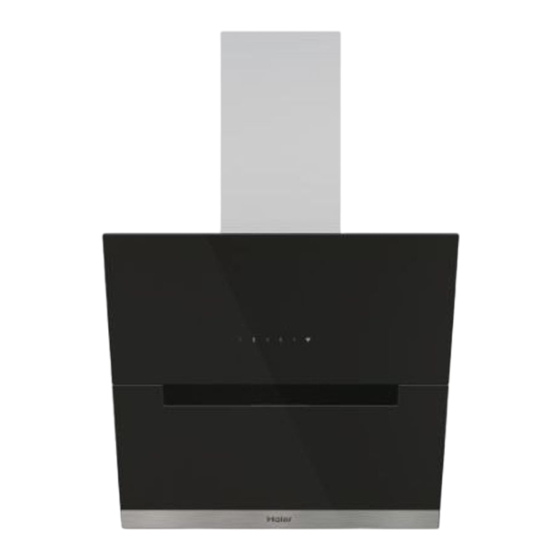
DESCRIPTION OF COMPONENTS CONFIGURATION 1 OPERATION Low Speed button It’s used for Ventilation on the kitchen. It is suitable for simmering and cooking which do not make much steam. Medium Speed button Airflow speed is ideally for ventilation in standard cooking operation. High Speed button When high density of smoke or steam produced, press high-speed button for high effective ventilation. - Page 19 CONFIGURATION 2 STANDBY MODE. After plug in, all lighting, system in STANDBY MODE. Low Speed button It’s used for Ventilation on the kitchen. It is suitable for simmering and cooking which do not make much steam. Medium Speed button Airflow speed is ideally for ventilation in standard cooking operation. High Speed button When high density of smoke or steam produced, press high-speed button for high effective ventilation.
- Page 20 First of all, you should download hOn APP and install to your portable device. Then enroll your hood. NOTE ENROLLMENT HAIER HOOD The image of the hood has the only purpose of presenting it. May not be perfectly representative. 1- Press the WiFi button until the icon starts blinking When the pairing is...
-
Page 21: Maintenance
MAINTENANCE Before cleaning switch the unit off and pull out the plug. I. Regular Cleaning Use a soft cloth moistened with hand-warm mildly soapy water or household cleaning detergent. Never use metal pads, chemical, abrasive material or stiff brush to clean the unit. II. -
Page 22: Trobuleshooting
Refit the hood glass and fasten the glass screws. Make sure the screws are fully tightened. TROBULESHOOTING Fault Cause Solution Light on, but The fan blade is Switch off the unit and repair by fan does not jammed. qualified service personnel only. work The motor is damaged. - Page 23 CUSTOMER ASSISTANCE SERVICE If you cannot identify the cause of the operating anomaly, switch off the appliance and contact the Assistance Service. PRODUCT SERIAL NUMBER. Where can I find it? It is important you to inform the Assistance Service of your product code and its serial number (a 16 character code which begins with the number 3);...
- Page 25 INSTRUKCJA MONTAŻU I OBSŁUGI SPIS TREŚCI WSTĘP ŚRODKI OSTROŻNOŚCI INSTALACJA ELEKTRYCZNA SPECYFIKACJA INSTALACJA (WENTYLACJA ZEWNĘTRZNA) INSTALACJA (WENTYLACJA WEWNĘTRZNA) OPIS ELEMENTÓW OBSŁUGA KONSERWACJA ROZWIĄZYWANIE PROBLEMÓW ZGODNOŚĆ Z DYREKTYWAMI OCHRONA ŚRODOWISKA...
-
Page 26: Wstęp
WSTĘP Dziękujemy za wybranie naszego okapu kuchennego. Niniejsza instrukcja obsługi zawiera wszystkie wymagane instrukcje dotyczące montażu, użytkowania i konserwacji urządzenia. Aby zapewnić prawidłową i bezpieczną obsługę urządzenia, przed jego instalacją i użytkowaniem należy dokładnie zapoznać się z niniejszą instrukcją obsługi. Okap wykonany jest z wysokiej jakości materiałów i cechuje się... - Page 27 Należy pilnować dzieci, aby nie bawiły się urządzeniem. Nie należy zbliżać płomienia do okapu kuchennego. Okap kuchenny nie jest przeznaczony do montażu nad płytą grzewczą posiadającą więcej niż cztery elementy płyty grzewczej W przypadku gdy okapy używane są w tym samym czasie co urządzenia spalające gaz lub inne paliwa, musi być...
-
Page 28: Instalacja Elektryczna
INSTALACJA ELEKTRYCZNA Wszelkie instalacje muszą być wykonane przez kompetentną osobę lub wykwalifikowanego elektryka. Przed podłączeniem zasilania sieciowego upewnij się, że napięcie sieciowe odpowiada napięciu na tabliczce znamionowej. Bezpośrednie połączenie Urządzenie musi być podłączone bezpośrednio do sieci za pomocą wyłącznika wielobiegunowego z minimalnym otwarciem 3 mm między stykami. Instalator musi upewnić... - Page 29 Lista standardowych akcesoriów instalacyjnych Spec. Zdjęcie ilustracji Ilość Korpus kaptura Dolny komin (500mm) Górny komin (500mm) Uchwyt górnego komina Uchwyt dolnego komina Wspornik okapu kuchennego Ø8 kołki rozporowe Ø8xØ6 kolor biały Śruby (ST4 * 30 mm) Śruby (ST4 * 8 mm) Wylot powietrza Filtr węglowy...
- Page 30 INSTALACJA (Montaż naścienny) Jeśli dostępny jest wylot na zewnątrz, okap można połączyć przewodem odpływowym (emalia, aluminium, elastyczna rura materiał niepalny średnicy wewnętrznej 150 mm) Przed montażem należy wyłączyć urządzenie i odłączyć je od źródła zasilania. Aby uzyskać optymalny efekt, okap należy umieścić w odległości 65~75 cm nad płaszczyzną...
- Page 31 MONTAŻ OKAPU Ustaw okap na żądanej wysokości, przestrzegając minimalnej wysokości nad płytą grzejną. Zaznacz położenie wspornika ściennego. (Umieść otwory między 700 a 800 mm nad blatem) Zdejmij okap i umieść wspornik ścienny, aby zaznaczyć położenie otworów na ścianie. Wywierć 3 otwory w ścianie, aby wstawić odpowiedni system mocowania (śruba ST4x30mm).
- Page 32 MONTAŻ OKAPU Po założeniu okapu zlokalizuj położenie 4 dodatkowych śrub do montażu na ścianie, jak pokazano na poniższym schemacie. Zdejmij kaptur, aby przebić ścianę i zainstaluj kołki. Przymocuj korpus okapu 4 śrubami o średnicy 4 mm za pomocą kołków dopasowanych do Twojej ściany. Jeśli wybrano tryb wyciągu, umieść...
- Page 33 MONTAŻ OKAPU Przymocuj dolny wspornik komina do dolnego komina, jak pokazano na rysunku. Użyj 2 śrub ST4x8mm. (Nie dokręcaj zbyt mocno śrub, upewnij się, że górny komin może łatwo wsunąć się w dolny komin) Włóż górny komin do dolnego komina. Górny komin (wewnętrzny) Uchwyt dolnego komina Dolny komin (zewnętrzny)
- Page 34 MONTAŻ OKAPU Zamontuj dolny komin, a następnie przykręć go do ściany 2 śrubami o średnicy Ø 8 mm Następnie pociągnij górny komin do góry na żądaną wysokość. Zaznacz położenie otworów montażowych górnej podpory komina. Opuść górny komin, a następnie wywierć otwory w ścianie.
- Page 35 MONTAŻ OKAPU Przymocuj wspornik ścienny górnego komina do ściany za pomocą wybranych kołków (zalecane wkręty 8 mm). Zamontuj górny komin i przymocuj go do wspornika ściennego za pomocą 2 śrub ST4x8mm Przymocuj dolny komin do uch okapu kuchennego za pomocą 2 wkrętów ST4x8mm.
- Page 36 Lista standardowych akcesoriów instalacyjnych Spec. Zdjęcie ilustracji Ilość Deflektor powietrza Wspornik φ8 kołków rozporowych φ8xφ6 kolor biały Śruby ST4.0x30 Śruby ST3,5x12...
- Page 37 MONTAŻ (ODWIEWKA POWIETRZA DO MODELI W KSZTAŁCIE T, SZKŁA GIĘTEGO, SZKŁA PŁASKIEGO): Deflektor powietrza jest wymieniony jako dołączony, a nie opcjonalny. 1. Zamocuj wspornik do plastikowego wylotu w kształcie litery T za pomocą 2 szt. śrub ST3,5x12mm dostarczonych, jak pokazano poniżej: 2.
- Page 38 4. Zamontuj komin do urządzenia i zamocuj go. „Proszę zauważyć: Wylot plastikowy w kształcie litery T i klapki w kształcie litery V nie mogą być używane jednocześnie. Możesz ich użyć na dwa różne sposoby: 1) Dodaj klapkę w kształcie litery V na istniejącym wylocie;...
-
Page 39: Instalacja (Wentylacja Zewnętrzna)
INSTALACJA (WENTYLACJA WEWNĘTRZNA) Jeśli nie ma wyprowadzenia na zewnątrz, rura odprowadzająca nie jest wymagana, a instalacja jest podobna do tej pokazanej w rozdziale „INSTALACJA (WENTYLACJA ZEWNĘTRZNA)”. Filtr z węglem aktywnym służy do neutralizowania zapachów. Aby zainstalować filtr z węglem aktywnym, należy najpierw wymontować filtr tłuszczu. -
Page 40: Opis Elementów
OPIS ELEMENTÓW KONFIGURACJA 1 OBSŁUGA Przycisk niskich obrotów Służy do wentylacji kuchni. Odpowiedni do gotowania na wolnym ogniu i innych czynności wytwarzających niewielką ilość pary. Przycisk średnich obrotów Ta prędkość zasysania powietrza jest idealna do wentylacji przy standardowym gotowaniu. Przycisk wysokich obrotów Jeżeli wydobywa się... - Page 41 KONFIGURACJA 2 TRYB CZUWANIA. Po podłączeniu oświetlenie, system w TRYBIE CZUWANIA Przycisk niskich obrotów Służy do wentylacji kuchni. Odpowiedni do gotowania na wolnym ogniu i innych czynności wytwarzających niewielką ilość pary. Przycisk średnich obrotów Ta prędkość zasysania powietrza jest idealna do wentylacji przy standardowym gotowaniu.
- Page 42 Przede wszystkim należy pobrać APLIKACJĘ hOn i zainstalować ją na swoim urządzeniu przenośnym. Następnie zarejestruj swój okap. UWAGA REJESTRACJA OKAPU HAIER Obraz okapu ma na celu jedynie jego przedstawienie. Może nie być idealnie reprezentatywny. 1- Naciśnij przycisk WiFi, aż ikona zacznie migać. Po zakończeniu parowania...
-
Page 43: Konserwacja
KONSERWACJA Przed czyszczeniem wyłączyć urządzenie i wyjąć wtyczkę z gniazdka. I. Regularne czyszczenie Używać miękkiej ściereczki zwilżonej ciepłą wodą z mydłem lub domowego środka czyszczącego. Nigdy nie używać do czyszczenia metalowych łopatek, materiałów ściernych ani sztywnej szczotki. II. Comiesięczne czyszczenie filtra tłuszczu WAŻNE: Czyszczenie filtra co miesiąc zapobiega ryzyku pożaru. -
Page 44: Rozwiązywanie Problemów
Ponownie zamontuj szybę okapu i dokręć śruby. Upewnij się, że śruby są w pełni dokręcone. ROZWIĄZYWANIE PROBLEMÓW Usterka Przyczyna Rozwiązanie Żarówka Łopatka wentylatora jest Wyłącz urządzenie i powierz włączona, ale zaklinowana. naprawę wyłącznie wentylator nie wykwalifikowanej osobie. Silnik jest uszkodzony. działa Przepalona żarówka Zarówno... - Page 45 SERWIS OBSŁUGI KLIENTA Jeśli nie można zidentyfikować przyczyny nieprawidłowości w działaniu, należy wyłączyć urządzenie i skontaktować się z serwisem obsługi. NUMER SERYJNY PRODUKTU. Gdzie go znajdę? Ważne jest, abyś poinformował serwis obsługi o swoim kodzie produktu i jego numerze seryjnym (kod 16 znaków, który zaczyna się od cyfry 3); można go znaleźć...
- Page 47 MANUAL DE INSTALACIÓN Y USO ÍNDICE INTRODUCCIÓN PRECAUCIONES DE SEGURIDAD INSTALACIÓN ELÉCTRICA ESPECIFICACIONES INSTALACIÓN (VENTILACIÓN EXTERIOR) INSTALACIÓN (VENTILACIÓN INTERIOR) DESCRIPCIÓN DE LOS COMPONENTES FUNCIONAMIENTO MANTENIMIENTO RESOLUCIÓN DE PROBLEMAS CONFORMIDAD CON LAS DIRECTIVAS PROTECCIÓN DEL MEDIO AMBIENTE...
-
Page 48: Introducción
INTRODUCCIÓN Gracias por elegir esta campana extractora. Este manual de instrucciones está diseñado para proporcionarle todas las instrucciones necesarias relacionadas con la instalación, el uso y el mantenimiento del aparato. Para poder manejar la unidad de forma correcta y segura, lea atentamente este manual de instrucciones antes de la instalación y el uso. - Page 49 Deben cumplirse las normativas relativas a la extracción de aire. En presencia de niños, vigile el aparato para evitar que los niños jueguen con él. No haga flambeados debajo de la campana extractora. La campana extractora no debe instalarse sobre una placa de cocción con más de cuatro quemadores.
-
Page 50: Instalación Eléctrica
Instalación eléctrica Toda la instalación debe realizarla una persona competente o un electricista cualificado. Antes de conectar la red eléctrica, asegúrese de que la tensión de red corresponde a la tensión de la placa nominal. Conexión directa El electrodoméstico debe conectarse directamente a la red eléctrica utilizando un disyuntor omnipolar con una abertura mínima de 3 mm entre los contactos. - Page 51 Lista de accesorios de instalación estándar Especificación Ilustración Cantidad Cuerpo de la campana Chimenea inferior (500 mm) Chimenea superior (500 mm) Soporte de la chimenea superior Soporte de la chimenea inferior Soporte de la campana extractora ϕ8 tapones ϕ8×ϕ6 color blanco Tornillo (ST4 * 30 mm) Tornillo (ST4 * 8 mm) Salida de aire...
- Page 52 INSTALACIÓN (montaje en pared) Si tiene una salida hacia el exterior, su campana extractora puede conectarse por medio de un conducto de extracción (esmalte, aluminio, tubo flexible o material no inflamable con un diámetro interior de 150 mm), tal como se muestra en la siguiente imagen. Antes de la instalación, apague la unidad y desenchúfela de la toma de corriente.
- Page 53 INSTALACIÓN DE LA CAMPANA Coloque la campana a la altura deseada respetando la altura mínima sobre la placa de cocción. Marque la ubicación del soporte de pared (los agujeros deben estar a una distancia de entre 700 y 800 mm sobre la encimera). Retire la campana y coloque el soporte de pared para marcar las posiciones de los agujeros en la pared.
- Page 54 INSTALACIÓN DE LA CAMPANA Una vez colocada la campana, localice la ubicación de los 4 tornillos adicionales de montaje en pared tal y como se muestra en la siguiente figura. Retire la campana para perforar la pared y coloque los correspondientes tacos.
- Page 55 INSTALACIÓN DE LA CAMPANA Fije el soporte de la chimenea inferior a la chimenea inferior tal como se muestra. Utilice 2 tornillos ST4x8 mm. (No apriete demasiado los tornillos, asegúrese de que la chimenea superior pueda deslizarse fácilmente dentro de la chimenea inferior). Inserte la chimenea superior en la chimenea inferior.
- Page 56 INSTALACIÓN DE LA CAMPANA Instale la chimenea inferior y, a continuación, atorníllela a la pared con 2 tornillos de 8 mm de diámetro. A continuación, tire de la chimenea superior hacia arriba hasta la altura deseada. Marque las ubicaciones de los agujeros de montaje del soporte de la chimenea superior.
- Page 57 INSTALACIÓN DE LA CAMPANA Fije el soporte de pared de la chimenea superior a la pared utilizando las clavijas seleccionadas (se recomienda usar tornillos de 8 mm). Vuelva a montar la chimenea superior y fíjela al soporte de pared con 2 tornillos ST4x8 mm Fije la chimenea inferior a las orejetas de la campana extractora mediante 2 tornillos...
- Page 58 Lista de accesorios de instalación estándar Especificación Ilustración Cantidad Deflector de aire Soporte tacos φ8 φ8×φ6 color blanco Tornillos ST4.0×30 Tornillos ST3.5×12...
-
Page 59: Instalación (Ventilación Exterior)
INSTALACIÓN (DEFLECTOR DE AIRE PARA MODELOS EN FORMA DE T, CRISTAL CURVO, CRISTAL PLANO): El deflector de aire está incluido y no es opcional. 1. Fije el soporte a la salida de plástico en forma de T con los 2 tornillos ST3.5x12 mm suministrados como se muestra a continuación: 2. - Page 60 4. Instale la chimenea en la unidad y fíjela. o Nota: La salida de plástico en forma de T y las aletas en V no pueden utilizarse al mismo tiempo. Puede utilizarlas de dos maneras: 1) Colocando la aleta en V en la salida existente; 2) Utilizando la salida de plástico en forma de T sin colocar la aleta en V.
-
Page 61: Instalación (Ventilación Interior)
INSTALACIÓN (VENTILACIÓN INTERIOR) Si no dispone de salida al exterior, el conducto de escape no es necesario y la instalación es similar a la mostrada en el apartado "INSTALACIÓN (VENTILACIÓN EXTERIOR)". El filtro de carbón activado se puede usar para atrapar los olores. Para instalar el filtro de carbón activado, primero se debe desmontar el filtro de grasa. -
Page 62: Descripción De Los Componentes
DESCRIPCIÓN DE LOS COMPONENTES CONFIGURACIÓN FUNCIONAMIENTO Botón de velocidad baja Se utiliza para la ventilación en la cocina. Es adecuado para cocinar a fuego lento y para cocciones que no generen mucho vapor. Botón de velocidad media Esta velocidad del flujo de aire es ideal para la ventilación en la cocción normal. - Page 63 CONFIGURACIÓN MODO DE ESPERA. Después de enchufar, se encienden todas las luces, y el sistema se encuentra en el MODO DE ESPERA. Botón de velocidad baja Se utiliza para la ventilación en la cocina. Es adecuado para cocinar a fuego lento y para cocciones que no generen mucho vapor. Botón de velocidad media Esta velocidad del flujo de aire es ideal para la ventilación en la cocción normal.
- Page 64 Descarga de la aplicación hOn En primer lugar, descargue e instale la aplicación hOn en su dispositivo portátil. A continuación, registre en ella su campana. NOTA REGISTRO DE LA CAMPANA La imagen de la campana tiene como único objetivo presentarla. Es posible que no sea una representación exacta.
-
Page 65: Mantenimiento
MANTENIMIENTO Antes de limpiar, apague la unidad y desconecte el enchufe. I. Limpieza regular Utilice un paño suave humedecido con agua tibia ligeramente jabonosa o detergente de limpieza del hogar. Nunca utilice rejillas metálicas, productos químicos, abrasivos o cepillos rígidos para limpiar la unidad. II. -
Page 66: Resolución De Problemas
RESOLUCIÓN DE PROBLEMAS Solución Fallo Causa La luz está La pala del ventilador Apague la unidad y solicite está atascada. su reparación únicamente a encendida, pero un técnico cualificado. El motor está dañado. el ventilador no funciona. La bombilla halógena Ni la luz ni el Sustituya la bombilla por otra está... - Page 67 SERVICIO DE ATENCIÓN AL CLIENTE Si no puede identificar la causa de la anomalía de funcionamiento, apague el aparato y póngase en contacto con el Servicio de Asistencia. NÚMERO DE SERIE DEL PRODUCTO. ¿Dónde lo puedo encontrar? Es importante que proporcione al Servicio de Asistencia su código de producto y su número de serie (un código de 16 caracteres que comienza con el número 3);...