Table of Contents
Advertisement
Available languages
Available languages
Quick Links
Advertisement
Chapters
Table of Contents

Related Manuals for Olivetti OLIBOARD-T

Summary of Contents for Olivetti OLIBOARD-T
- Page 1 User Manual Manuel del l’utilisateur Benutzerhandbuch Manuale utente Manual del usuario OLIBOARD – T INTERACTIVE WHITEBOARDS - TABLEAUX INTERACTIFS – INTERAKTIVE TAFELN - LAVAGNE INTERATTIVE - PIZARRAS INTERACTIVAS...
- Page 2 Oliboard whiteboard and of the documentation written in this manual; nevertheless Olivetti S.p.A. disclaims any liability of any kind for any damages whatsoever resulting from the use of the software and of the manual. The same thing can be said for any person or company involved in the creation, realization, production and verification of the software and of the manual.
- Page 3 INSTRUCTION: provides additional software instructions. NOTE: describes problems that could occur when using the whiteboard and how to avoid and resolve them. WARNING: draws attention to the danger of personal injury or product damage if improperly used. Caution Warning In order to avoid electric shocks, do not install the interactive whiteboard in •...
- Page 4 Important notes The interactive whiteboard can be used with fingers, hand and with the • pens equipping the whiteboard. Do not use marker pens, pencils or other types of pen. If necessary, clean the whiteboard using alcohol. Make sure that the whiteboard is correctly connected to the computer and •...
- Page 5 Warning FURTHER WARNINGS FOR INSTALLATIONS IN SCHOOL ENVIRONMENTS The warnings and precautions for using the whiteboard and projector must be recommended to students as well. The following in particular must be stressed: Do not look directly at the beam of light emitted by the projector onto the •...
- Page 6 Page left intentionally blank OLIBOARD – Interactive Whiteboard...
-
Page 7: Table Of Contents
TABLE OF CONTENTS TABLE OF CONTENTS................VII INTRODUCTION ..................1 Overview ......................1 System Requirements..................2 Unpacking the Interactive Whiteboard and accessories........3 Main Features ...................... 6 External View ....................6 Technical Specifications..................7 Hardware Installation ................... 8 WINDOWS SOFTWARE INSTALLATION ........... 9 Express Installation .................... - Page 8 Page left intentionally blank VIII OLIBOARD - Interactive Whiteboards...
-
Page 9: Introduction
INTRODUCTION VERVIEW The Interactive Whiteboard is an input peripheral device that, thanks to the application of stable, advanced technologies, allows an interactive environment to be created that, by connecting a computer and a video-projector, can be used for teaching and demos. Features •... -
Page 10: System Requirements
YSTEM EQUIREMENTS The whiteboard must be connected to a computer that displays images on the whiteboard by means of a video-projector. Minimum Configuration Recommended Configuration CPU: Dual Core processor CPU: Dual Core Processor 3600+ 1.9 GHz 4000+2.11 GHz or higher RAM: 1 GB RAM: 2 GB or higher USB port (for connecting... -
Page 11: Unpacking The Interactive Whiteboard And Accessories
NPACKING THE NTERACTIVE HITEBOARD AND ACCESSORIES The standard Interactive Whiteboard kit contains the following components: Interactive Whiteboard • (the colour of the product could vary) Accessories • OLIBOARD - Interactive Whiteboards... - Page 12 The standard accessories provided include: Description Quantity Purpose Image Wand Whiteboard pen Colours can vary Pen holder Cable for connecting the USB special cable, computer to the about 10-meter Interactive Whiteboard Drivers and Oliboard application Installation Disk software for Windows User Manual User Guide Installation...
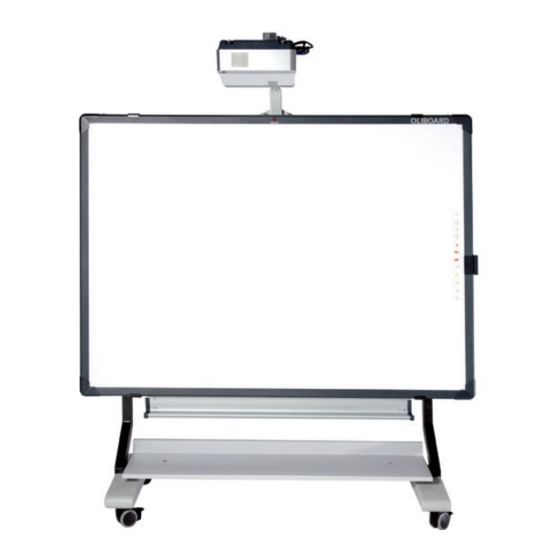
- Page 13 • Optional Accessories Instead of wall installation, you can also choose to install the Interactive Whiteboard on a special floor stand, available on order. In the following, the model B5848. Optional floor stand (mod. B5848) Floor stand dimensions (without whiteboard or projector) model B5848: width: 127 cm;...
-
Page 14: Main Features
EATURES External View (The colour varies according to the model). OLIBOARD - Interactive Whiteboards... -
Page 15: Technical Specifications
ECHNICAL PECIFICATIONS Hardware Platform Peripheral device for computer, notebook. Operating Principle CCD and infrared Interface and Power Supply Operating Temperature +20 °C ÷ +55 °F Operating Humidity RH 30% ÷ 80% Power capability < 2W Models OLIBOARD 78S External area - diagonal 85"(2158 mm) - dimensions... -
Page 16: Hardware Installation
NSTALLATION Wall or stand installation must be carried out by authorised personnel according to the requirements stated in the Olivetti documentation. The cable for connecting the whiteboard must be connected to the USB port of the computer. The VGA (or HDMI) cable of the video-projector must be connected to the VGA (or HDMI) port of the computer. -
Page 17: Windows Software Installation
WINDOWS SOFTWARE INSTALLATION The Oliboard software provides two types of installation: “Express installation” and “Step-by-step installation”. Express installation is suggested the first time. Step-by-step installation allows the software to be installed one step at a time. XPRESS NSTALLATION Do not connect the cable of the whiteboard to the computer (if the USB cable is already connected to the computer, disconnect it). -
Page 18: Step-By-Step Installation
STEP NSTALLATION This type of installation is recommended only when upgrading the software provided with the whiteboard. Insert the Oliboard Software disk. Click the program logo. The Installation Guide window opens. Click “Install Step By Step” . Installing the Oliboard Software Driver Click to install the driver for the Interactive Whiteboard. -
Page 19: Installing The Oliboard Software
Installing the Oliboard Software Click Choose the language you want to install. Select the installation path. The software installation starts. When installation completes a message appears; click on “Finish”. Installing the USB Software Driver Normally it is not necessary to execute this procedure if the “Express installation” has already been performed. -
Page 20: Running The Software
Starting the Driver of the Interactive Whiteboard Click “Start“ → “All programs“ → “Olivetti“ → “Oliboard Software “ and start the Oliboard Driver. The driver icon appears in the lower right corner of the Status bar on the desktop. -
Page 21: Orienting The Interactive Whiteboard (Windows 7)
Orienting the Interactive Whiteboard (Windows 7) This function serves to tune the whiteboard for the image to be projected onto it. 1. Using the mouse left button, click on the Oliboard Driver icon in the control bar at the bottom. Select “Orientation“ in the popup menu, then select “IR Touch Oliboard Touch”. -
Page 22: Orienting The Interactive Whiteboard (Windows Xp)
Orienting the Interactive Whiteboard (Windows XP) This function serves to tune the whiteboard for the image to be projected onto it. Using the mouse left button, click on the Oliboard Driver icon in the control bar at the bottom. Select “Orientation“ in the popup menu, then select the type of orientation required (see the INSTRUCTION note at the end of this paragraph). - Page 23 Wth the mouse left button click on “Re-orientation“ to open the popup window for Orientation. With the electronic pen, click on the mid-point of the flashing cross “+“ on the whiteboard. Repeat this same operation for all the other orientation points (there are six in all), being careful to canter well the mid-point of the flashing cross with the electronic pen.
-
Page 24: Starting The Whiteboard Application Software
Starting the Whiteboard Application Software Click “Start” → “All programs” → “Olivetti” → “Oliboard Software” and start the application program. A Logon window opens in which you can enter the user name and the password. To start the software using the default account, click simply on the “Login”... -
Page 25: Creating A Personal Account And Password
Creating a Personal Account and Password Click “Start” → ”All Programs” → ”Olivetti” → ”Oliboard Software” → “User Manager” to display the following window: Key-in the administrator account data to access the software. The default administrator account is Administrator and the Password is oliboard. - Page 26 Select “Edit” → ”New User” to create a personal account. Key-in the user name and password and select “Create”. When the process completes, the new user appears in the window: OLIBOARD - Interactive Whiteboards...
-
Page 27: Software Registration
SOFTWARE REGISTRATION First time Oliboard software runs on a computer not connected to the whiteboard, the registration of the software is requested. It is possible to immediately execute the procedure, or it is possible to postpone the registration. When the number of execution without registration is finished, it is necessary to remove the software. -
Page 28: Troubleshooting
TROUBLESHOOTING 1. If a message is displayed: “Failed to verify the whiteboard, the program can't run further!“, check whether there is a good connection between whiteboard and the computer. • Make sure that the special-purpose connection cable of the whiteboard has been used, and that the cable has been connected correctly. - Page 29 Generally speaking, the image can be adjusted by using a remote control • device or by correcting the height of the projector. For detailed information, refer to the User Manual provided with the projector. Rectangle Trapezium 7. What type of projector must be used with the Interactive Whiteboard? The projector must satisfy the three following requisites.
- Page 30 Page left intentionally blank OLIBOARD - Interactive Whiteboards...
- Page 31 électronique ou mécanique, y compris la photocopie, enregistrement ou autres, et ce, sans autorisation écrite préalable d'Olivetti S.p.A. Le contenu de ce manuel peut être modifié sans préavis. Le plus grand soin ayant été apporté lors de la création, du contrôle et de la documentation du logiciel associé...
- Page 32 INSTRUCTION : constitue une instruction supplémentaire relative au logiciel. REMARQUE : décrit d'éventuels problèmes susceptibles de surgir durant l'utilisation du tableau ainsi que les solutions permettant de les résoudre et d'en prévenir la survenance. ATTENTION : attire l'attention de l'utilisation sur les risques de blessures ou dommages au produit en cas d'usage inapproprié.
- Page 33 Remarques importantes Le tableau interactif ne peut être utilisée avec les doits, la main ou les • stylos fournis Ne pas utiliser de marqueurs, crayons ou d'autres types de stylos. Si nécessaire, nettoyer le tableau avec de l'alcool. Contrôler que le tableau ait été branché correctement à l'ordinateur et au •...
- Page 34 Avertissement AUTRES AVERTISSEMENTS SE RAPPORTANT À L'INSTALLATION DANS UN ENVIRONNEMENT SCOLAIRE Il est nécessaire que les élèves soient informés des avertissements et précautions d'usage se rapportant au tableau et au projecteur. Comme, entre autres : Ne pas regarder directement le rayon de lumière émis par le projecteur sur •...
- Page 35 Page laissée blanche intentionnellement OLIBOARD - Tableaux interactifs...
- Page 36 SOMMAIRE SOMMAIRE ....................VII INTRODUCTION ..................1 Préambule......................1 Configuration minimale du système ..............2 Déballage et accessoires ..................3 CARACTÉRISTIQUES PRINCIPALES ..............6 Aspect extérieur ....................6 Informations techniques ..................7 Installation......................8 INSTALLATION DU LOGICIEL SOUS WINDOWS........9 Installation rapide ....................9 Installation guidée ....................
- Page 37 Page laissée blanche intentionnellement VIII OLIBOARD - Tableaux interactifs...
-
Page 38: Introduction
INTRODUCTION REAMBULE Le tableau interactif est un appareil périphérique d'entrée qui, grâce à l'application de technologies avancées et d'une haute fiabilité, permet de disposer, en le branchant à un PC et à un vidéoprojecteur, d'un environnement interactif pour un usage didactique ou démonstratif. Caractéristiques •... -
Page 39: Configuration Minimale Du Système
ONFIGURATION MINIMALE DU SYSTEME Le tableau doit être branché à un ordinateur en mesure d'afficher les images sur le tableau par le biais d'un vidéoprojecteur. Configuration minimale Configuration conseillée Unité centrale : Dual Core Unité centrale : Dual Core Processor 4000+2.11 GHz ou processor 3600+ 1.9 GHz supérieur RAM : 1 GB... -
Page 40: Déballage Et Accessoires
EBALLAGE ET ACCESSOIRES Le tableau interactif comprend normalement les composants suivants : Tableau interactif • (la couleur du produit peut varier) Accessoires • OLIBOARD - Tableaux interactifs... - Page 41 Le kit d'accessoires normal comprend : Description Quantité Fonction Position Stylet extensible Stylet pour tableau 2 Les couleurs peuvent varier Porte stylos Câble pour Câble spécial USB brancher de 10 mètres l'ordinateur au tableau interactif CD d'installation Pilote et logiciel Oliboard pour Windows Guide...
- Page 42 • Accessoires en option En alternative à l'installation murale, il est possible de placer le tableau interactif sur un piédestal spécial qui peut être commandé séparément. Ci-après, le modèle B5848. Piédestal en option (mod. B5848) Dimensions piédestal (sans tableau ni projecteur) modèle B5848 : largeur : 127 cm ;...
-
Page 43: Caractéristiques Principales
CARACTÉRISTIQUES PRINCIPALES Aspect extérieur (La couleur peut varier en fonction du modèle) OLIBOARD - Tableaux interactifs... -
Page 44: Informations Techniques
NFORMATIONS TECHNIQUES Plateforme informatique Dispositif périphérique pour PC portable. Principe de fonctionnement CCD et infrarouge Interface et alimentation Température de fonctionnement de 20°C à +55 Taux d'humidité de Taux d'humidité : de 30% à 80% fonctionnement Puissance < 2W Modèles OLIBOARD 78T Zone extérieure - diagonale... -
Page 45: Installation
NSTALLATION L'installation murale ou sur piédestal doit être effectuée par un personnel agréé conformément aux dispositions visées dans la documentation Olivetti. Le câble de branchement du tableau doit être branché à la porte USB de l'ordinateur. Le câble BGA (ou HDMI) du vidéoprojecteur doit être branché à la porte VGA (ou HDMI) de l'ordinateur. -
Page 46: Installation Du Logiciel Sous Windows
INSTALLATION DU LOGICIEL SOUS WINDOWS Le logiciel Oliboard prévoit deux types d'installation : une « installation rapide » et une « installation guidée ». L'installation rapide est proposée la première fois. L'installation guidée permet d'installer le logiciel étape par étape. NSTALLATION RAPIDE Ne jamais brancher le câble du tableau à... -
Page 47: Installation Guidée
NSTALLATION GUIDEE Ce type d'installation est recommandé uniquement en cas de nécessité de mise à jour du logiciel fourni avec le tableau. Insérer le CD Logiciel Oliboard. Cliquer sur l'icône du programme. Une fenêtre pour l'installation guidée s'affichera. Cliquer sur « Installation guidée » . Installation du pilote du logiciel Oliboard Cliquer sur pour installer le pilote du tableau interactif. -
Page 48: Installation Du Logiciel Oliboard
Installation du logiciel Oliboard Cliquer sur Sélectionner la langue voulue. Sélectionner la destination de l'installation du logiciel. L'installation du logiciel commencera. Lorsque le message de conclusion de l'installation s'affichera, cliquer sur « Fin ». Installation du pilote du USB Normalement, il n'est pas nécessaire d'exécuter cette procédure si l'installation rapide a déjà... -
Page 49: Exécution Du Logiciel
Cliquer sur « Démarrer » → « Tous les programmes » → « Olivetti »→ « Logiciel Oliboard » et lancer le pilote Oliboard. Dans le coin inférieur à droite de la barre des tâches du bureau, l'icône du module devrait être affichée. -
Page 50: Orientation Du Tableau Interactif (Windows 7)
Orientation du tableau interactif (Windows 7) Cette fonction permet de régler le tableau pour ce qui est de l'image projetée sur ce dernier. 1. Cliquer sur la touche gauche de la souris sur l'icône du Pilote Oliboard dans la barre des tâches en bas ; sélectionner « Orientation » dans le menu déroulant puis sélectionner “IR Touch Oliboard Touch”. -
Page 51: Orientation Du Tableau Interactif (Windows Xp)
Orientation du tableau interactif (Windows XP) Cette fonction permet de régler le tableau pour ce qui est de l'image projetée sur ce dernier. Cliquer sur la touche gauche de la souris sur l'icône du Pilote Oliboard dans la barre des tâches en bas ; sélectionner « Orientation » dans le menu déroulant puis sélectionner la modalité... - Page 52 En cliquant sur la touche gauche de la souris sur « Réorientation », un menu déroulant intitulé Orientation s'ouvrira. Cliquer, à l'aide du stylet électronique, au centre de la croix clignotante « + » sur le tableau. Puis, répéter l’opération pour les autres points d'orientation (soit six au total), tout en veillant à...
-
Page 53: Lancement Du Logiciel Du Tableau
Lancement du logiciel du tableau Cliquer sur « Démarrer » → « Tous les programmes » → « Olivetti » → « Logiciel Oliboard » et lancer le programme. Une fenêtre d'accès s'ouvrira : celle-ci permettra de saisir le nom utilisateur et le mot de passe. -
Page 54: Création D'un Compte Et D'un Mot De Passe Personnels
Création d'un compte et d'un mot de passe personnels Cliquer sur « Démarrer » → « Tous les programmes » → « Olivetti » → « Logiciel Oliboard » → « Gestionnaire utilisateur » pour afficher la fenêtre suivante : Saisir les données du compte administrateur afin de pouvoir accéder au logiciel. - Page 55 Sélectionner « Modifier » → « Nouvel utilisateur » pour créer un compte personnel. Saisir le nom utilisateur et le mot de passe puis sélectionner « Créer ». À la fin, le nouvel utilisateur sera affiché dans la fenêtre : OLIBOARD - Tableaux interactifs...
-
Page 56: Enregistrement Du Logiciel
ENREGISTREMENT DU LOGICIEL Lors de la toute première exécution du logiciel Oliboard sur un ordinateur non branché à un tableau, il est demandé de procéder à l'enregistrement du logiciel. Il est possible ou de procéder à l'enregistrement immédiatement ou bien de le faire plus tard. -
Page 57: Recherche Des Pannes
RECHERCHE DES PANNES 1. Si le message « Échec contrôle tableau, le programme ne peut plus fonctionner ! », contrôler le branchement entre le tableau et l'ordinateur. • Contrôler que le câble spécial ait été utilisé pour brancher le tableau à l'ordinateur et qu'il ait été... - Page 58 En général, il est possible de régler l'image en utilisant un manipulateur à • distance ou en corrigeant la hauteur du projecteur. Pour plus d'informations, consulter le Manuel de l'utilisateur fourni en dotation avec le projecteur. Rectangle Trapèze 7. Quel type de projecteur doit être utilisé avec le tableau interactif ? Le projecteur doit satisfaire la configuration suivante : le projecteur doit être de type frontal ;...
- Page 59 Page laissée blanche intentionnellement OLIBOARD - Tableaux interactifs...
- Page 60 Der Inhalt dieses Handbuches kann ohne vorherige Ankündigung geändert werden. Die Software der Oliboard-Tafel sowie der Inhalt des vorliegenden Handbuches wurden mit größter Sorgfalt konzipiert, ausgearbeitet und überprüft; trotzdem kann die Fa. Olivetti S.p.A. keinerlei Haftung für jegliche Schäden übernehmen, die durch den Gebrauch der Software und der Bedienungsanleitung entstanden sind.
- Page 61 ANWEISUNG: Zusätzliche Software-Anweisungen stehen zur Verfügung. HINWEIS: Beschreibung von Fehlern, die beim Gebrauch der Tafel auftreten können, sowie Tipps zur Vermeidung und Behebung. VORSICHT: Hinweis auf Verletzungsgefahr oder Beschädigung des Produkts bei unsachgemäßer Benutzung. Sicherheitshinweise Um Stromschläge zu vermeiden, stellen Sie die interaktive Tafel nicht in •...
- Page 62 Wichtige Hinweise Die interaktive Tafel kann mit den Fingern, der Hand und mit den • mitgelieferten Stiften benutzt werden.Benutzen Sie keine Textmarker, Bleistifte oder sonstige Stifte. Falls nötig, reinigen Sie die Tafel mit Alkohol. Vergewissern Sie sich, dass die Tafel korrekt am Rechner und an der •...
- Page 63 Vorsicht WEITERE HINWEISE FÜR DEN AUFBAU IN SCHULEN Die Warnhinweise und Vorsichtsmaßnahmen für den Gebrauch der Tafel und des Projektors müssen auch den Schülern mitgeteilt werden. Insbesondere wird auf Folgendes hingewiesen: Nicht direkt in den Lichtstrahl schauen, der vom Projektor auf die Tafel •...
- Page 64 Beabsichtigte Leerseite OLIBOARD – Interaktive Tafeln...
- Page 65 INHALT INHALT .......................VII EINLEITUNG ....................1 Vorwort......................... 1 Systemanforderungen..................2 Auspacken der Tafel und der Zubehörteile ............3 Hauptmerkmale....................6 Vorderansicht ....................6 Technische Daten ....................7 Aufbau........................8 SOFTWARE FUR WINDOWS INSTALLIEREN ........... 9 Schnellinstallation ....................9 Schrittweise Installation..................10 Oliboard-Software-Treiber installieren............
- Page 66 Beabsichtigte Leerseite VIII OLIBOARD - Interaktive Tafeln...
-
Page 67: Einleitung
EINLEITUNG ORWORT Die interaktive Tafel ist eine Eingabe-/Ausgabeeinheit, die dank des Einsatzes fortschrittlicher und zuverlässiger Technologie und durch den Anschluss an einen PC und an einen Videoprojektor eine interaktive Umgebung für Schulunterricht und Demonstrationszwecke schafft. Eigenschaften • Die Oliboard-Tafel zeichnet sich durch ihre harte Oberfläche aus, die widerstandsfähig gegen Abnutzung und unsachgemäße Handhabung ist. -
Page 68: Systemanforderungen
YSTEMANFORDERUNGEN Die Tafel muss an einen Rechner angeschlossen werden, der die Bilder mit Hilfe eines Videoprojektors auf der Tafel anzeigt. Mindest- Empfohlene anforderungen Konfiguration CPU: Dual Core processor 3600+ CPU: Dual Core Processor 1.9 GHz 4000+2.11 GHz oder höher RAM: 1 GB RAM: 2 GB oder höher USB-Port (für den Anschluss der USB-Port (für den Anschluss der... -
Page 69: Auspacken Der Tafel Und Der Zubehörteile
USPACKEN DER AFEL UND DER UBEHÖRTEILE Im Lieferumfang der interaktiven Tafel sind folgende Komponenten enthalten: • Interaktive Tafel (Die Farbe des Produktes kann variieren) • Zubehörteile OLIBOARD – Interaktive Tafeln... - Page 70 Standardmäßig werden folgende Zubehörteile mitgeliefert: Bezeichnung Menge Funktion Abbildung Ausziehbarer Zeigestock Stift für die Tafel Die Farben können variieren Stifthalter Kabel, um die USB Spezialkabel interaktive Tafel von 10 Meter Länge 1 an einen Rechner anzuschließen Treiber und Oliboard Anwendungs- Installations-CD software für Windows...
- Page 71 • Optionale Zubehörteile Alternativ zur Wandmontage kann die interaktive Tafel auf einem speziellen Ständer (lieferbar auf Bestellung) aufgestellt werden. Nachfolgend Modell B5848. Optionaler Tafelständer (Mod. B5848) Abmessungen des Ständers (ohne Tafel und Projektor) Modell B5848: Breite: 127 cm; Tiefe: 75 cm; Höhe: 246 cm (max.
-
Page 72: Hauptmerkmale
AUPTMERKMALE Vorderansicht (Die Farbe kann je nach Modell variieren) OLIBOARD - Interaktive Tafeln... -
Page 73: Technische Daten
ECHNISCHE ATEN Hardware-Oberfläche Peripherie-Gerät für Anschluss an PC, Notebook. Funktionsprinzip CCD und Infrarot Interface und Stromversorgung Betriebstemperatur 20 °C ÷ +55 °C RH : 30% ÷ 80% Luftfeuchtigkeit Stromleistung < 2W Modelle OLIBOARD 78T Kompletter Bereich - diagonal 85"(2158 mm) - Abmessungen 1690 x 1342 mm Aktiver Bereich... -
Page 74: Aufbau
UFBAU Die Tafel darf nur von zugelassenem Fachpersonal unter Beachtung der in der Olivetti-Dokumentation angegebenen Anweisungen an die Wand oder auf dem Ständer montiert werden. Das Verbindungskabel der Tafel muss am USB-Anschluss des Rechners angeschlossen werden. Das VGA-Kabel (oder HDMI) des Videoprojektors muss am VGA-Anschluss (oder HDMI) des Rechners angeschlossen werden. -
Page 75: Software Fur Windows Installieren
SOFTWARE FUR WINDOWS INSTALLIEREN Die Oliboard-Software bietet zwei Installationsarten: Die "Schnellinstallation" und die "schrittweise Installation". Die Schnellinstallation ist für die Erstinstallation zu bevorzugen. Bei der schrittweisen Installation kann die Software Schritt für Schritt installiert werden. CHNELLINSTALLATION Schließen Sie das Kabel der Tafel noch nicht an den Rechner an (wenn das USB-Kabel bereits am Rechner angeschlossen ist, ziehen Sie es heraus). -
Page 76: Schrittweise Installation
CHRITTWEISE NSTALLATION Diese Installationsart sollte nur verwendet werden, um die mit der Tafel mitgelieferte Software zu aktualisieren. Legen Sie die Oliboard-Software CD ein. Klicken Sie auf das Programm-Logo. Das Fenster mit der Installationsbedienerführung erscheint. Klicken Sie auf “Schrittweise Installation”. Oliboard-Software-Treiber installieren Klicken Sie auf , um die Treiber der interaktiven Tafel zu installieren. -
Page 77: Oliboard-Software Installieren
Oliboard-Software installieren Klicken Sie auf Wählen Sie die Sprache aus, die installiert werden soll. Wählen Sie den Installationspfad. Die Software-Installation beginnt. Wenn die Installation abgeschlossen ist, erscheint eine Meldung; klicken Sie auf “Beenden”. Software-Treiber für USB installieren Im Regelfall ist diese Installation nicht nötig, wenn die Schnellinstallation bereits ausgeführt wurde. -
Page 78: Software Starten
Sie dann die Software der Tafel. Treiber der interaktiven Tafel starten Klicken Sie auf “Start“ → “Alle Programme“ → “Olivetti“ → “Oliboard Software“ und starten Sie den Oliboard Treiber. In der Ecke, unten rechts, auf der Desktop- Statusleiste erscheint das Icon des Kommunikationsmoduls HINWEIS: Erscheint die Meldung “Gerät starten fehlgeschlagen”, prüfen Sie, ob... -
Page 79: Kalibrieren Der Interaktiven Tafel (Windows 7)
Kalibrieren der interaktiven Tafel (Windows 7) Mit dieser Funktion kann das Bild, das auf die Tafel projiziert wird, ausgerichtet werden. 1. Klicken Sie mit der linken Maustaste auf das Oliboard Treiber Icon in der unteren Steuerleiste. Wählen Sie im Aufklappmenü “Kalibrierung” und wählen Sie dann die gewünschte Kalibrierung (siehe Anweisungshinweis am Ende dieses Abschnitts). -
Page 80: Kalibrieren Der Interaktiven Tafel (Windowsxp)
Kalibrieren der interaktiven Tafel (WIndowsXP) Mit dieser Funktion kann das Bild, das auf die Tafel projiziert wird, ausgerichtet werden. Klicken Sie mit der linken Maustaste auf das Oliboard Treiber Icon in der unteren Steuerleiste. Wählen Sie im Aufklappmenü “Kalibrierung” und wählen Sie dann die gewünschte Kalibrierung (siehe Anweisungshinweis am Ende dieses Abschnitts). - Page 81 Klicken Sie mit der linken Maustaste auf “Neu Kalibrierung ”, um das Kalibrierungsfenster zu öffnen. Klicken Sie mit dem elektronischen Stift in die Mitte des blinkenden Kreuzes “+” auf der Tafel. Wiederholen Sie dann diese Bedienschritte für alle anderen Kalibrierungspunkte (insgesamt sind es sechs) und achten Sie darauf den elektronischen Stift genau in die Mitte des blinkenden Kreuzes zu setzen.
-
Page 82: Anwendungssoftware Der Tafel Starten
Anwendungssoftware der Tafel starten Klicken Sie auf “Start” → “Alle Programme” → “Olivetti” → “Oliboard Software” und starten Sie das Anwendungsprogramm. Es wird ein Zugangsfenster geöffnet, in dem der Benutzername und das Passwort einzutragen sind. Um die Software mit dem voreingestellten Benutzerkonto zu starten, klicken Sie einfach auf die Schaltfläche “Anmelden”, ohne Daten einzugeben;... -
Page 83: Persönliches Benutzerkonto Und Passwort Einrichten
Persönliches Benutzerkonto und Passwort einrichten Klicken Sie auf “Start” → ”Alle Programme” → ”Olivetti” → “Oliboard Software” → “Benutzer Manager”, folgendes Fenster erscheint: Geben Sie die Daten für das Administrator-Konto ein für den Zugriff auf die Software. Voreingestellt ist als Administrator-Konto Administrator und als Passwort oliboard. - Page 84 Wählen Sie “Bearbeiten” → ”Neuer Benutzer”, um ein persönliches Benutzerkonto einzurichten. Geben Sie den Benutzernamen und das Passwort ein und wählen Sie “Erstellen”. Nach dem Einrichten wird der neue Benutzer im Fenster angezeigt: OLIBOARD - Interaktive Tafeln...
-
Page 85: Software Registrieren
SOFTWARE REGISTRIEREN Beim ersten Starten der Oliboard-Software auf einem nicht an der Tafel angeschlossenen Rechner, werden Sie aufgefordert die Software zu registrieren. Die Registrierung kann sofort oder später erfolgen. Wenn die Anzahl der ohne Registrierung zulässigen Aufrufe erreicht ist, muss die Software deinstalliert werden. -
Page 86: Problembehebung
PROBLEMBEHEBUNG 1. Erscheint die Meldung “OLIBOARD-Verbindung fehlgeschlagen, das Programm kann nicht fortgesetzt werden!”, prüfen Sie die Steckverbindungen zwischen Tafel und Rechner. • Prüfen Sie, ob das Spezialkabel für den Anschluss der Tafel benutzt wurde und, ob das Kabel korrekt angeschlossen ist (Das spezielle USB-Kabel hat zwei Markierungen an den Enden die zeigen welches Ende an den PC und welches an die Tafel angeschlossen werden muss). - Page 87 • Ein trapezförmiges Bild ist ein verzerrtes Bild und muss eingestellt werden, bis eine normale Projektion erfolgt. • Im Regelfall kann das Bild eingestellt werden, indem eine Fernbedienung verwendet wird oder die Höhe des Projektors geändert wird. Für nähere Informationen schlagen Sie in der mit dem Projektor mitgelieferten Bedienungsanleitung nach.
- Page 88 Beabsichtigte Leerseite OLIBOARD - Interaktive Tafeln...
- Page 89 Il contenuto di questo manuale può essere modificato senza preavviso. Ogni cura è stata posta nella creazione, realizzazione, verifica e documentazione del software abbinato alla lavagna Oliboard e della documentazione contenuta in questo manuale; tuttavia Olivetti S.p.A. non può assumersi alcuna responsabilità, di qualsiasi natura, derivante dall’utilizzo del software e della documentazione. Lo stesso dicasi per ogni persona o società...
- Page 90 ISTRUZIONE: fornisce un'istruzione aggiuntiva relativa al software. NOTA: descrive eventuali problemi che possono insorgere durante l'uso della lavagna e i rimedi per risolverli e prevenirli. ATTENZIONE: richiama l'attenzione sul pericolo di subire lesioni fisiche o di arrecare danni al prodotto in caso di uso improprio.
- Page 91 Note importanti La lavagna interattiva può essere utilizzata con le dita, la mano e le penne • in dotazione alla lavagna. Non usare evidenziatori, matite o altri tipi di penne. Se necessario, pulire la lavagna con alcool. Assicurarsi che la lavagna sia correttamente collegata al computer e alla •...
- Page 92 Avvertenza ULTERIORI AVVERTENZE PER INSTALLAZIONI IN AMBIENTE SCOLASTICO E’ necessario che le avvertenze e le precauzioni di utilizzo della lavagna e del proiettore siano raccomandate anche agli studenti. In particolare si evidenziano le seguenti: Non guardare direttamente il fascio di luce emesso dal proiettore sulla •...
- Page 93 Pagina lasciata intenzionalmente bianca OLIBOARD - Lavagne interattive...
- Page 94 INDICE INDICE......................VII INTRODUZIONE................... 1 Premessa......................1 Requisiti di sistema ....................2 Disimballaggio e accessori................... 3 CARATTERISTICHE PRINCIPALI............... 6 Aspetto esteriore ..................... 6 Dati tecnici ......................7 Installazione fisica ....................8 INSTALLAZIONE SOFTWARE PER WINDOWS......... 9 Installazione rapida ....................9 Installazione passo-passo.................. 10 Installazione driver software Oliboard ............
- Page 95 Pagina lasciata intenzionalmente bianca VIII OLIBOARD - Lavagne interattive...
-
Page 96: Introduzione
INTRODUZIONE REMESSA La lavagna interattiva è un’apparecchiatura periferica di input che, grazie all'applicazione di tecnologie avanzate e affidabili, permette di disporre, in collegamento ad un PC e ad un video-proiettore, un ambiente interattivo ad uso didattico o dimostrativo. Caratteristiche • La lavagna Oliboard è... -
Page 97: Requisiti Di Sistema
EQUISITI DI SISTEMA La lavagna deve essere collegata a un computer che visualizzi immagini sulla lavagna per mezzo di un video-proiettore. Configurazione minima Configurazione consigliata CPU: Dual Core processor CPU: Dual Core Processor 3600+ 1.9 GHz 4000+2.11 GHz o superiore RAM: 1 GB RAM: 2 GB o superiore Porta USB (per il collegamento... -
Page 98: Disimballaggio E Accessori
ISIMBALLAGGIO E ACCESSORI La dotazione della lavagna interattiva comprende normalmente i seguenti componenti: Lavagna interattiva • (Il colore del prodotto può variare) • Accessori OLIBOARD - Lavagne interattive... - Page 99 Il corredo normale di accessori comprende: Descrizione Quantità Funzione Figura Bacchetta estendibile Penne per lavagna 2 I colori possono variare Porta penne Cavo per la Cavo speciale connessione tra USB da circa 10 computer e metri lavagna interattiva Disco di Driver e software installazione applicativo per...
- Page 100 • Accessori opzionali In alternativa all'installazione a parete è possibile installare la lavagna interattiva su uno speciale piedistallo ordinabile a richiesta. Di seguito il modello B5848. Piedistallo opzionale (mod. B5848) Dimensioni piedistallo (senza lavagna e proiettore) modello B5848: larghezza: 127 cm; prof. 75 cm; altezza: 246 cm (max altezza del supporto proiettore montato).
-
Page 101: Caratteristiche Principali
CARATTERISTICHE PRINCIPALI Aspetto esteriore (Il colore può variare in funzione del modello) OLIBOARD - Lavagne interattive... -
Page 102: Dati Tecnici
ATI TECNICI Piattaforma hardware Dispositivo periferico per PC, notebook. Principio di funzionamento CCD e infrarossi Interfaccia e alimentazione Temperatura di esercizio 20℃ ÷ +55℃ RH : 30% ÷ 80% Umidità di esercizio Assorbimento < 2W Modelli OLIBOARD 78T Area esterna - diagonale 85"(2158 mm) - dimensioni... -
Page 103: Installazione Fisica
NSTALLAZIONE FISICA L'installazione a parete o su piedistallo deve essere eseguita da personale autorizzato nel rispetto di quanto prescritto dalla documentazione Olivetti. Il cavo di collegamento della lavagna deve essere connesso alla porta USB del computer. Il cavo VGA (o HDMI) del video-proiettore deve essere connesso alla porta VGA (o HDMI) del computer. -
Page 104: Installazione Software Per Windows
INSTALLAZIONE SOFTWARE PER WINDOWS Il software Oliboard prevede due tipi di installazione: "installazione rapida" e "installazione passo-passo". L'installazione rapida è consigliata la prima volta. L’installazione passo-passo permette di installare il software un passo alla volta. NSTALLAZIONE RAPIDA Non collegare il cavo della lavagna al computer (qualora il cavo USB sia già stato collegato al computer, scollegarlo). -
Page 105: Installazione Passo-Passo
NSTALLAZIONE PASSO PASSO Questo tipo di installazione è consigliato soltanto per aggiornare il software in dotazione alla lavagna. Inserire il disco Oliboard Software. Fare clic sul logo del programma. Apparirà la finestra della guida all'installazione. Fare clic su “Install Step By Step”. Installazione driver software Oliboard Fare clic su per installare il driver sw della lavagna interattiva. -
Page 106: Installazione Del Software Oliboard
Installazione del software Oliboard Fare clic su Selezionare la lingua che si desidera installare confermare con “Next”. Selezionare il percorso di installazione e poi confermare con “Next”. L'installazione del software avrà inizio. Alla visualizzazione del messaggio di completamento dell’installazione, fare click su “Finish”. -
Page 107: Esecuzione Del Software
Avvio del driver della lavagna interattiva Fare clic su “Start“ → “Tutti i programmi“ → “Olivetti“ → “Oliboard Software “ e avviare Oliboard Driver. Nell'angolo inferiore destro della barra di stato del desktop comparirà l'icona del driver NOTA: se compare il messaggio “Avvio dispositivo fallito”, verificare che il... -
Page 108: Orientamento Della Lavagna Interattiva (Windows 7)
Orientamento della lavagna interattiva (Windows 7) Questa funzione serve a tarare la lavagna rispetto all’immagine proiettata su di essa. 1. Fare clic con il pulsante sinistro del mouse sull'icona dell’Oliboard Driver nella barra dei comandi in basso; selezionare “Orientamento” nel menu a comparsa e quindi selezionare “IR Touch Oliboard Touch”. -
Page 109: Orientamento Della Lavagna Interattiva (Windows Xp)
Orientamento della lavagna interattiva (Windows XP) Questa funzione serve a tarare la lavagna rispetto all’immagine proiettata su di essa. Fare clic con il pulsante sinistro del mouse sull'icona dell’Oliboard Driver nella barra dei comandi in basso; selezionare “Orientamento” nel menu a comparsa e quindi selezionare la modalità... - Page 110 Facendo clic con il pulsante sinistro del mouse su “Ri-orientamento” si aprirà la finestra a comparsa Orientamento. Fare clic con la penna elettronica al centro della croce lampeggiante “+” sulla lavagna. Successivamente ripetere l’operazione per gli altri punti di orientamento (in totale sono sei), avendo cura di centrare bene con la penna elettronica il centro della croce lampeggiante.
-
Page 111: Avvio Del Software Applicativo Della Lavagna
Avvio del software applicativo della lavagna Fare clic su “Start” → “Tutti i programmi” → “Olivetti” → “Oliboard Software” e avviare il programma applicativo. Si aprirà una finestra di accesso nella quale potranno essere digitati il nome utente e la password. -
Page 112: Creazione Di Un Account E Di Una Password Personali
Creazione di un account e di una password personali Fare clic su “Start” → ”Tutti i programmi” → ”Olivetti” → “Oliboard Software” → “User Manager” apparirà la finestra seguente: Digitare i dati dell’account amministratore per accedere al software. L’account amministratore predefinito è: Administrator, Password: oliboard. - Page 113 Selezionare “Modifica” → ”Nuovo utente” per creare un account personale. Digitare il nome utente e la password e selezionare “Crea”. Al termine del processo, nella finestra comparirà il nuovo utente: OLIBOARD - Lavagne interattive...
-
Page 114: Registrazione Del Software
REGISTRAZIONE DEL SOFTWARE La prima volta che il software Oliboard viene eseguito su un computer non collegato ad una lavagna, viene richiesta una registrazione del software. E’ possibile eseguire subito la registrazione, oppure la si può eseguire in tempi successivi. Quando si è... -
Page 115: Ricerca Guasti
RICERCA GUASTI Se viene visualizzato il messaggio “Verifica lavagna fallita, il programma non può proseguire!”, controllare la connessione tra la lavagna e il computer. • Verificare che sia stato utilizzato il cavo speciale di collegamento della lavagna e che tale cavo sia stato collegato correttamente ( il cavo speciale USB ha due etichette ai suoi lati che indicano il lato PC e il lato Lavagna). - Page 116 Un'immagine trapezoidale è un'immagine distorta e deve essere • regolata fino ad ottenere le normali condizioni di proiezione. • Generalmente è possibile regolare l'immagine utilizzando un manipolatore remoto o correggendo l'altezza del proiettore. Per informazioni dettagliate fare riferimento al Manuale Utente in dotazione al proiettore.
- Page 117 Pagina lasciata intenzionalmente bianca OLIBOARD - Lavagne interattive...
- Page 118 Oliboard y de la documentación escrita en este manual; no obstante Olivetti S.p.A. rechaza cualquier responsabilidad de cualquier tipo por cualesquiera daños resultantes del uso del software y del manual. Lo mismo se aplica a cualquier persona o compañía implicada en la creación, realización, producción y verificación del...
- Page 119 INSTRUCCIONES: ofrece instrucciones adicionales acerca del software. NOTA: describe problemas que podrían producirse durante el uso de la pizarra y cómo evitarlos y resolverlos. ADVERTENCIA: llama la atención acerca del peligro de lesiones o daños en el producto si se utiliza incorrectamente. Advertencia Con el fin de evitar descargas eléctricas, no instale la pizarra interactiva en •...
- Page 120 Notas importantes La pizarra interactiva se puede utilizar con los dedos, la mano y los lápices • suministrados No utilice rotuladores, bolígrafos ni ningún otro tipo de lápiz. Si es • necesario, limpie la pizarra usando alcohol. Asegúrese de que la pizarra esté conectada correctamente al ordenador y •...
- Page 121 Advertencia ADVERTENCIAS ADICIONALES PARA INSTALACIONES EN CENTROS EDUCATIVOS Las advertencias y precauciones relativas al uso de la pizarra y el proyector deben darse a conocer también a los alumnos. En concreto debe ponerse énfasis en las siguientes: No mire directamente al haz de luz que emite el proyector hacia la •...
- Page 122 Esta página se ha dejado en blanco intencionadamente OLIBOARD – Pizarra interactiva...
- Page 123 ÍNDICE ÍNDICE......................VII INTRODUCCIÓN ..................1 Descripción general ..................... 1 Requisitos del sistema ..................2 Desembalaje de la Pizarra interactiva y los accesorios ........3 Características principales ................... 6 Vista exterior ....................6 Especificaciones técnicas ..................7 Instalación del hardware ..................8 INSTALACIÓN DEL SOFTWARE EN WINDOWS ........
- Page 124 Esta página se ha dejado en blanco intencionadamente VIII OLIBOARD - Pizarras interactivas...
-
Page 125: Introducción
INTRODUCCIÓN ESCRIPCIÓN GENERAL La Pizarra interactiva es un dispositivo de entrada periférico que, gracias a la aplicación de tecnologías estables y avanzadas, permite crear un entorno interactivo que, al conectar un ordenador y un proyector de vídeo, se puede utilizar para la enseñanza y para realizar demostraciones. -
Page 126: Requisitos Del Sistema
EQUISITOS DEL SISTEMA La pizarra debe estar conectada a un ordenador que muestra imágenes en la pizarra por medio de un proyector de vídeo. Configuración mínima Configuración recomendada CPU: Dual Core processor CPU: Dual Core Processor 3600+ 1.9 GHz 4000+2.11 GHz o superior RAM: 1 GB RAM: 2 GB o superior Puerto USB (para conectar la... -
Page 127: Desembalaje De La Pizarra Interactiva Y Los Accesorios
ESEMBALAJE DE LA IZARRA INTERACTIVA Y LOS ACCESORIOS El kit estándar de la Pizarra interactiva contiene los siguientes componentes: • Pizarra interactiva (el color del producto puede variar) • Accesorios OLIBOARD - Pizarras interactivas... - Page 128 Los accesorios estándar suministrados son: Cantida Descripción Función Imagen Vara extensible Lápiz para pizarra 2 Los colores pueden variar Porta Lápiz Cable para conectar el Cable especial ordenador a la USB de 10 metros Pizarra interactiva Controladores y Disco de software de la instalación de aplicación para...
- Page 129 • Accesorios opcionales En lugar de la instalación en la pared, también puede elegir instalar la Pizarra interactiva en un soporte especial de suelo, disponible bajo pedido. A continuación, se muestra el modelo B5848. Soporte especial de suelo (mod. B5848) Dimensiones del soporte de suelo (sin pizarra ni proyector), modelo B5848: - anchura: 127 cm;...
-
Page 130: Características Principales
ARACTERÍSTICAS PRINCIPALES Vista exterior (El color varía según el modelo). OLIBOARD - Pizarras interactivas... -
Page 131: Especificaciones Técnicas
SPECIFICACIONES TÉCNICAS Plataforma de hardware Dispositivo periférico para ordenador o portátil. Principio de funcionamiento CCD e infrarojos Interfaz y fuente de alimentación Temperatura de funcionamiento +20 °C ÷ +55 °F Humedad de funcionamiento 30% ÷ 80% HR Capacidad de potencia <... -
Page 132: Instalación Del Hardware
La instalación en la pared o en un soporte debe ser realizada por personal autorizado de acuerdo con los requisitos establecidos en la documentación de Olivetti. El cable para conectar la pizarra debe conectarse al puerto USB del ordenador. El cable VGA (o HDMI) del proyector de vídeo debe conectarse al puerto VGA (o... -
Page 133: Instalación Del Software En Windows
INSTALACIÓN DEL SOFTWARE EN WINDOWS El software Oliboard ofrece dos tipos de instalación: "Instalación exprés" e "Instalación paso a paso". La Instalación se recomienda en una primera instalación. La Instalación paso a paso permite instalar el software paso por paso. NSTALACIÓN EXPRÉS No conecte el cable de la pizarra al ordenador (si el cable USB ya está... -
Page 134: Instalación Paso A Paso
NSTALACIÓN PASO A PASO Este tipo de instalación sólo se recomienda al actualizar el software suministrado con la pizarra. Introduzca el disco Oliboard Software. Haga clic en el icono del programa. Se abre la ventana de guía de instalación. Haga clic en "Instalación paso a paso" . Instalación del controlador del software Oliboard Haga clic en para instalar el controlador de la Pizarra... -
Page 135: Instalación Del Software Oliboard
Instalación del software Oliboard Haga clic en Seleccione el idioma que desee instalar. Seleccione la ruta de instalación. Se inicia la instalación del software. Una vez completada la instalación, aparece un mensaje; haga clic en "Finalizar". Instalación del controlador de software para USB Normalmente, no es necesario ejecutar este proceso si ya se ha realizado la "Instalación exprés". -
Page 136: Ejecución Del Software
Inicio del controlador de la Pizarra interactiva Haga clic en "Inicio" → "Todos los programas" → "Olivetti" → "Oliboard Software" e inicie el controlador de Oliboard. El icono del módulo contralador aparece en la esquina inferior derecha de la barra de estado del escritorio. -
Page 137: Orientación De La Pizarra Interactiva (Windows 7)
Orientación de la Pizarra interactiva (Windows 7) Esta función sirve para ajustar la pizarra en relación a la imagen que se va a proyectar en ella. 1. Con el botón izquierdo del ratón, haga clic en el icono del controlador de Oliboard en la barra de control situada en la parte inferior. -
Page 138: Orientación De La Pizarra Interactiva (Windows Xp)
Orientación de la Pizarra interactiva (Windows XP) Esta función sirve para ajustar la pizarra en relación a la imagen que se va a proyectar en ella. Con el botón izquierdo del ratón, haga clic en el icono del controlador de Oliboard en la barra de control situada en la parte inferior. - Page 139 Con el botón izquierdo del ratón, haga clic en "Reorientación" para abrir la ventana emergente de Orientación. Con el lápiz electrónico, haga clic en el centro del cursor intermitente "+" de la pizarra. Repita esta misma operación para el resto de puntos de orientación (seis en total), con cuidado de centrar bien el cursor intermitente con el lápiz electrónico.
-
Page 140: Inicio Del Software De La Aplicación Oliboard
Inicio del software de la aplicación Oliboard Haga clic en "Inicio" → "Todos los programas" → "Olivetti" → "Oliboard Software" e inicie el programa de la aplicación. Se abre una ventana de Inicio de sesión en la que puede introducir su nombre de usuario y contraseña. -
Page 141: Creación De Una Cuenta Personal Y Una Contraseña
Creación de una cuenta personal y una contraseña Haga clic en "Inicio" → "Todos los programas" → "Olivetti" → "Oliboard Software" → "Administrador de usuarios" para que aparezca la siguiente ventana: Introduzca los datos de la cuenta del administrador para acceder al software. La cuenta de administrador predeterminada es Administrador y la contraseña... - Page 142 Seleccione "Editar" → "Nuevo usuario" para crear una cuenta personal. Introduzca un nombre de usuario y contraseña y seleccione "Crear". Cuando se haya completado el proceso, el nuevo usuario aparece en la ventana: OLIBOARD - Pizarras interactivas...
-
Page 143: Registro Del Software
REGISTRO DEL SOFTWARE La primera vez que se ejecute el software Oliboard en un ordenador no conectado a la pizarra, se le pide que registre el software. Es posible ejecutar este procedimiento inmediatamente o posponer el registro. Cuando finalice el número de ejecuciones sin registro, es necesario desinstalar el software. -
Page 144: Resolución De Problemas
RESOLUCIÓN DE PROBLEMAS 1. Si aparece este mensaje: "Imposible verificar la pizarra. ¡El programa no se puede ejecutar!", compruebe si la conexión entre la pizarra y el ordenador es correcta. • Asegúrese de que se haya utilizado el cable de conexión especial de la pizarra y que el cable esté... - Page 145 • Una imagen trapezoidal es una imagen distorsionada y debe ajustarse hasta conseguir una proyección normal. • En general, la imagen se puede ajustar con un dispositivo de control remoto o corrigiendo la altura del proyector. Para obtener información detallada, consulte el Manual del usuario suministrado con el proyector.
- Page 146 Esta página se ha dejado en blanco intencionadamente OLIBOARD - Pizarras interactivas...
- Page 147 - L’apparecchiatura, quando sarà giunta a fine vita, deve essere portata in centri di raccolta attrezzati e deve essere trattata separatamente dai rifiuti urbani; - Olivetti garantisce l’attivazione delle procedure in materia di trattamento, raccolta, riciclaggio e smaltimento della apparecchiatura in conformità alla Direttiva 2002/96/CE (e succ.mod.).
- Page 148 - Au terme de sa durée de vie, l'équipement doit être remis à un centre de collecte approprié, et doit être traité séparément des déchets municipaux non triés ; - Olivetti garantit l'activation des procédures de traitement, de collecte, de recyclage et de mise au rebut de l'équipement, conformément à la Directive 2002/96/CE (et modifications successives).
- Page 149 - Olivetti garantiza la activación de los procedimientos en materia de tratamiento, recogida, reciclaje y eliminación de los equipos, de conformidad con la Directiva 2002/96/CE (y suces.
- Page 150 Det viste symbol, som findes på udstyret, betyder: - At, brugt udstyr skal afleveres på særlige opsamlingssteder og bortskaffes separat; - at, Olivetti garanterer at procedurerne for behandling, opsamling, genbrug og bortskaffelse af udstyret i henhold til EU-direktiv 2002/96/EF (og efterfølgende tilføjelser) efterleves.
- Page 151 Cod: 537096G-01...