Lenovo ThinkCentre neo 50q Gen 4 User Manual
Hide thumbs
Also See for ThinkCentre neo 50q Gen 4:
- User manual (52 pages) ,
- Hardware maintenance manual (78 pages)
Table of Contents
Advertisement
Quick Links
Advertisement
Table of Contents

Related Manuals for Lenovo ThinkCentre neo 50q Gen 4


Summary of Contents for Lenovo ThinkCentre neo 50q Gen 4
- Page 1 ThinkCentre neo 50q Gen 4 User Guide...
- Page 2 • Setup Guide First Edition (April 2023) © Copyright Lenovo 2023. LIMITED AND RESTRICTED RIGHTS NOTICE: If data or software is delivered pursuant to a General Services Administration “GSA” contract, use, reproduction, or disclosure is subject to restrictions set forth in Contract No. GS-...
-
Page 3: Table Of Contents
Enter the BIOS menu... . . Call Lenovo ....Navigate in the BIOS interface .. - Page 4 ThinkCentre neo 50q Gen 4 User Guide...
-
Page 5: Discover Your Lenovo Computer
Discover your Lenovo computer ® Thank you for choosing a Lenovo computer! We are dedicated to delivering the best solution to you. Before starting your tour, please read the following information: • Illustrations in this documentation might look different from your product. - Page 6 ThinkCentre neo 50q Gen 4 User Guide...
-
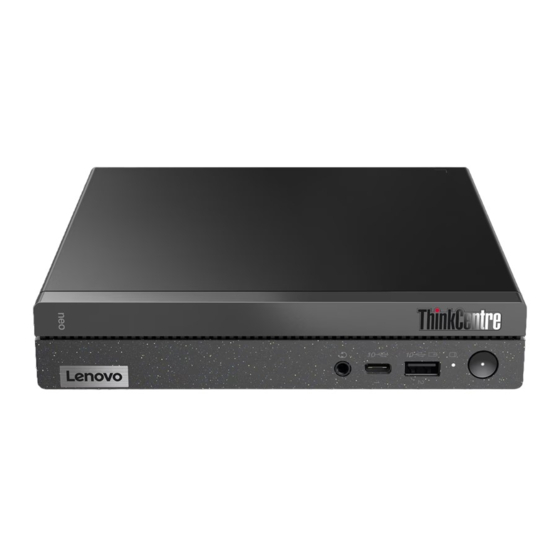
Page 7: Chapter 1. Meet Your Computer
Always On USB-A 3.2 Gen 2 connector With the Always On USB feature enabled, the Always On USB-A 3.2 Gen 2 connector can charge a USB-A compatible device when the computer is on, off, in sleep mode, or in hibernation mode. © Copyright Lenovo 2023... -
Page 8: Rear
• “Lock the computer” on page 7. • “Connect an external display” on page 7. • “USB specifications” on page 3. • “Enable or disable the smart power-on feature (for selected models)” on page 16. ThinkCentre neo 50q Gen 4 User Guide... -
Page 9: Features And Specifications
Features and specifications Specification Description • Width: 179 mm (7 inches) Dimensions • Height: 34.5 mm (1.4 inches) • Depth: 182.9 mm (7.2 inches) Weight (without packaging) Maximum configuration as shipped: 1.3 kg (2.8 lb) Type Device Manager in the Windows search box and then press Enter. Type the Hardware configuration administrator password or provide confirmation, if prompted. -
Page 10: The Vantage App
• Scan your computer hardware and diagnose hardware problems. • Look up warranty status (online). • Access User Guide and helpful articles. Notes: • The available features vary depending on the computer model. ThinkCentre neo 50q Gen 4 User Guide... - Page 11 • The Vantage app makes periodic updates of the features to keep improving your experience with your computer. The description of features might be different from that on your actual user interface. Chapter 1 Meet your computer...
- Page 12 ThinkCentre neo 50q Gen 4 User Guide...
-
Page 13: Chapter 2. Get Started With Your Computer
2. Select the display that you want to configure and change display settings of your preference. Lock the computer Note: Lenovo makes no comments, judgments, or warranties about the function, quality, or performance of the locking device and security feature. You can purchase computer locks from Lenovo. -
Page 14: Transfer Data
You can connect all types of Bluetooth-enabled devices to your computer, such as a keyboard, a mouse, a smartphone, or speakers. Place the device that you are attempting to connect to less than 10 meters (33 feet) from the computer. ThinkCentre neo 50q Gen 4 User Guide... -
Page 15: Diagnostics
If you are unable to isolate and resolve the problem after running the Vantage app, save and print the log files created by the program. You might need the log files when you speak to a Lenovo technical support representative. - Page 16 • Use Windows recovery options. 1. Go to https://pcsupport.lenovo.com 2. Detect your computer or manually select your computer model. 3. Navigate to the troubleshooting menu to diagnose the operating system for recovery instructions. ThinkCentre neo 50q Gen 4 User Guide...
-
Page 17: Chapter 3. Advanced Configurations
• Antivirus programs Lenovo preinstalls a full-version antivirus software on selected models of computer. It helps defend the computer against viruses, safeguard your identity, and keep your personal information secured. • Absolute Persistence Absolute Persistence technology is embedded in firmware. - Page 18 • Read Only: You cannot copy data from the computer to the USB storage devices. However, you can access or modify data on the USB storage devices. • No Access: You cannot access the USB storage devices from the computer. ThinkCentre neo 50q Gen 4 User Guide...
-
Page 19: Uefi Bios Passwords
You should record your passwords and store them in a safe place. If you forget the passwords, contact a Lenovo-authorized service provider to have the passwords removed. Note: If the hard disk password is forgotten, Lenovo cannot remove the password or recover data from the storage drive. -
Page 20: What Is Uefi Bios
1. Restart the computer. When the logo screen is displayed, press F1 or Fn+F1. 2. Select Main ➙ System Time & Date and press Enter. 3. Set the system date and time as desired. ThinkCentre neo 50q Gen 4 User Guide... -
Page 21: Change The Boot Priority Order
4. Press F10 or Fn+F10 to save the changes and exit. Change the boot priority order If the computer does not boot from a device as expected, you can change the boot priority order permanently or select a temporary boot device. Change the boot priority order permanently 1. -
Page 22: Enable Or Disable The Automatic Power-On Feature
4. Press F10 or Fn+F10 to save the changes and exit. Enable or disable the ErP LPS compliance mode Lenovo computers meet the eco-design requirements of the ErP Lot 3 regulation. For more information, go https://www.lenovo.com/us/en/compliance/eco-declaration You can enable the ErP LPS compliance mode to reduce the consumption of electricity when the computer is off or in sleep mode. -
Page 23: Change The Its Performance Mode
Microsoft constantly makes updates to the Windows operating system. Before installing a particular Windows version, check the compatibility list for the Windows version. For details, go to: https://support.lenovo.com/us/en/solutions/windows-support To change the BIOS settings: 1. Restart the computer. When the logo screen is displayed, press F1 or Fn+F1. -
Page 24: Customize Bios Defaults
4. Move the jumper from the standard position to the maintenance position. 5. Reconnect the power cords for the computer and the monitor to electrical outlets. 6. Turn on the computer and the monitor. When the computer beeps, the recovery process begins. ThinkCentre neo 50q Gen 4 User Guide... -
Page 25: Clear Cmos
7. After the recovery process is completed, the computer will be turned off automatically. Note: Depending on the computer model, the recovery process will take two to three minutes. 8. Disconnect all power cords from electrical outlets. 9. Move the jumper back to the standard position. 10. - Page 26 ThinkCentre neo 50q Gen 4 User Guide...
-
Page 27: Chapter 4. Cru Replacement
If you intend on installing the CRU, Lenovo will ship the CRU to you. CRU information and replacement instructions are shipped with your product and are available from Lenovo at any time upon request. You might be required to return the defective part that is replaced by the CRU. -
Page 28: Power Adapter And Power Cord (Without Bracket)
Before you start, read Generic Safety and Compliance Notices, and print the following instructions. For access, do the following: 1. Turn off the computer and remove all connected devices and cables. 2. Disconnect the computer from ac power and all connected cables. Removal steps ThinkCentre neo 50q Gen 4 User Guide... -
Page 29: Vertical Stand
Vertical stand Prerequisite Before you start, read Generic Safety and Compliance Notices, and print the following instructions. For access, do the following: 1. Turn off the computer and remove all connected devices and cables. 2. Disconnect the computer from ac power and all connected cables. Removal step Power adapter and power cord (with bracket) Prerequisite... - Page 30 ThinkCentre neo 50q Gen 4 User Guide...
- Page 31 • Type-2 Chapter 4 CRU replacement...
- Page 32 ThinkCentre neo 50q Gen 4 User Guide...
- Page 33 Chapter 4 CRU replacement...
-
Page 34: Vesa Mount Bracket
Before you start, read Generic Safety and Compliance Notices, and print the following instructions. For access, do the following: 1. Turn off the computer and remove all connected devices and cables. 2. Disconnect the computer from ac power and all connected cables. ThinkCentre neo 50q Gen 4 User Guide... -
Page 35: External Wi-Fi Antenna
Removal steps External Wi-Fi antenna Prerequisite Before you start, read Generic Safety and Compliance Notices, and print the following instructions. For access, do the following: 1. Turn off the computer and remove all connected devices and cables. 2. Disconnect the computer from ac power and all connected cables. Removal steps Chapter 4 CRU replacement... -
Page 36: Top Cover
• Before replacing the internal storage drive, make a backup copy of all the data that you want to keep. • Do not touch the contact edge of the internal storage drive. Otherwise, the internal storage drive might get damaged. ThinkCentre neo 50q Gen 4 User Guide... - Page 37 • Do not apply pressure to the internal storage drive. • Do not make the internal storage drive subject to physical shocks or vibration. Put the internal storage drive on a soft material, such as cloth, to absorb physical shocks. For access, do the following: 1.
-
Page 38: Coin-Cell Battery
To dispose of the coin-cell battery, refer to the “Lithium coin-cell battery notice” in the Safety and Warranty Guide. For access, remove the following parts in order, if any: • “Computer cover” on page 30. • “Hard disk drive and hard disk drive bracket” on page 30 Removal steps ThinkCentre neo 50q Gen 4 User Guide... -
Page 39: M.2 Solid-State Drive
Note: After installing a new coin-cell battery, reset the system date and time in the UEFI BIOS menu. M.2 solid-state drive Prerequisite Before you start, read Generic Safety and Compliance Notices, and print the following instructions. Attention: The M.2 solid-state drive is sensitive. Inappropriate handling might cause damage and permanent loss of data. -
Page 40: System Fan
2. Detach the internal speaker from system fan. See “Internal speaker” on page 33. 3. Detach the ThinkCentre LED bracket with the LED from system fan. 4. Disconnect the system fan cable from the system board. ThinkCentre neo 50q Gen 4 User Guide... -
Page 41: Memory Module
Replacement procedure Memory module Prerequisite Before you start, read Generic Safety and Compliance Notices, and print the following instructions. Ensure that you follow the installation order for memory modules shown in the following illustration. For access, remove the following parts in order: •... - Page 42 • “System fan” on page 34 Replacement procedure ThinkCentre neo 50q Gen 4 User Guide...
-
Page 43: Chapter 5. Help And Support
How to access? • https://www.lenovo.com/tips Troubleshooting and frequently asked questions • https://forums.lenovo.com Accessibility information https://www.lenovo.com/accessibility • Use Lenovo recovery options. 1. Go to https://support.lenovo.com/ HowToCreateLenovoRecovery 2. Follow the on-screen instructions. • Use Windows recovery options. Reset or restore Windows 1. Go to https://pcsupport.lenovo.com... -
Page 44: Call Lenovo
• Microsoft support Web site: https://support.microsoft.com Call Lenovo If you have tried to correct the problem yourself and still need help, you can call Lenovo Customer Support Center. Before you contact Lenovo Prepare the following before you contact Lenovo: 1. -
Page 45: Certification-Related Information
During the warranty period, you can call Lenovo Customer Support Center for help. Telephone numbers For a list of the Lenovo Support phone numbers for your country or region, go to: https://pcsupport.lenovo.com/supportphonelist Note: Phone numbers are subject to change without notice. If the number for your country or region is not provided, contact your Lenovo reseller or Lenovo marketing representative. -
Page 46: Purchase Accessories
Purchase accessories Lenovo has a number of hardware accessories and upgrades to help expand the capabilities of your computer. Options include memory modules, storage devices, network cards, power adapters, keyboards, mice, and more. To shop at Lenovo, go to https://www.lenovo.com/accessories... -
Page 47: Appendix A. Notices And Trademarks
Lenovo representative for information on the products and services currently available in your area. Any reference to a Lenovo product, program, or service is not intended to state or imply that only that Lenovo product, program, or service may be used. Any functionally equivalent product, program, or service that does not infringe any Lenovo intellectual property right may be used instead. - Page 48 Actual results may vary. Users of this document should verify the applicable data for their specific environment. This document is copyrighted by Lenovo and is not covered by any open source license, including any Linux agreement(s) which may accompany software included with this product. Lenovo may update this document at any time without notice.