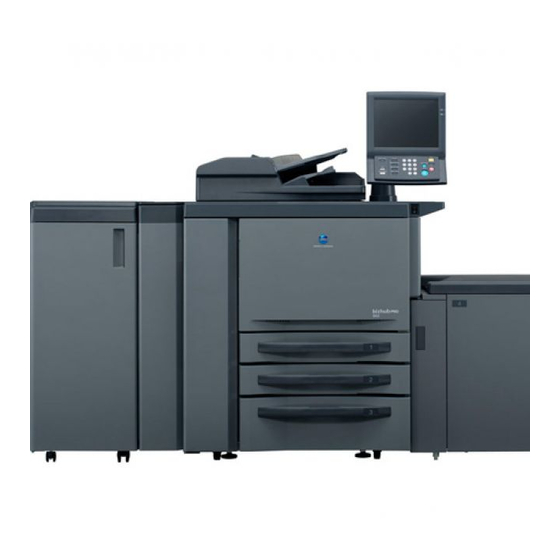
Konica Minolta bizhub pro 950 Installation Manual
Hide thumbs
Also See for bizhub pro 950:
- User manual (458 pages) ,
- Quick manual (122 pages) ,
- Troubleshooting manual (50 pages)
Advertisement
Quick Links
<Important>
Be sure to correctly follow the procedures in order as explained in this Installation Manual.
If you do not follow the procedure in order, the image trouble may occur.
I. Installation space
<Main body + Finisher +LU>
116
150
675
1203
990
410
2066
2366
950
1930
Machine weight: Approx. 285 kg
II. Confirmation prior to installation
1. Select a flat and stable place that can sustain the
machine's weight.
2. Confirm that the voltage and the frequency meet
the product specifications, and that the current
capacity of the outlet meets or exceeds the
capacity specified.
3. Connect the machine directly to a dedicated
power outlet. (Do not use an extension cord.)
4. Do not plug or unplug the power cord with a wet
or dirty hand. (May cause an electrical shock.)
5. Do not install the machine in a place with high
temperatures or high humidity, or in direct sun-
light.
6. Do not install the machine in a dusty place, and/
or near volatile flammable substances.
7. Do not install the machine in a poorly ventilated
place.
INSTALLATION MANUAL
(Unit: mm)
150
183
980
295
1420
690
840
435
A0Y5IXC038CA
200
780
A0Y5IXC039CA
950
III. How to bring down the machine onto the floor
1. Using the spacers and the spanner, lower the
adjuster feet and remove the cushions.
2. Raise the adjust feet again, to let the machine
descend onto the pallet. In this case, be sure to
extremely raise the adjuster feet.
* Be sure to work on the above procedure in succession,
respectively for the right side and left side of the machine.
1603
Spanner
3. Fix the veneer with its beveled portion turned
upward, to the right end face of the pallet by two
nails as illustrated below.
Corrugated fiberboard
4. Set the 2 cushions removed from the machine,
below the veneer as illustrated below.
E-1
Applied Machine:
Spacers
Nail: 2 pcs.
Veneer
Corrugated fiberboard
Veneer
Cushions
Cushions
950
A0Y5IXC033CA
57AEIXE044SA
57GEIXE043SA
A0Y5961111
Advertisement

Related Manuals for Konica Minolta bizhub pro 950


Summary of Contents for Konica Minolta bizhub pro 950
- Page 1 INSTALLATION MANUAL Applied Machine: <Important> Be sure to correctly follow the procedures in order as explained in this Installation Manual. If you do not follow the procedure in order, the image trouble may occur. I. Installation space III. How to bring down the machine onto the floor (Unit: mm) 1.
-
Page 2: Installation Procedures
V. Installation procedures 5. Let two persons gently bring down the machine onto the floor with the right side coming first. Note: * Do not hold the arm in the step 5. Do not plug in the power cord until you are instructed to do so. - Page 3 4. Open the ADF, and remove the original glass pro- (2) Remove the locking tapes first and then at the tecting cushion and the original glass protecting end locking guide tape of the Tray 1. paper. Locking guide tape Original glass protecting paper Locking tapes Original glass protecting cushion A0Y5IXC005CA...
- Page 4 (7) Remove the Protection paper and the Protec- (12) Check the position of the end of the fusing roller pressure spring. If it is not in the appropriate tion material from the Toner supply unit. position, turn the springs on both sides of the Note: fusing unit so that the ends of the springs are Also make sure to remove the thick paper from the...
- Page 5 8. Install the Control panel. 2. Remove the arm cover /1 and /2. (Truss screw (1) Install the operation panel as the following picture. M4x6: 4 pcs.) (TP screw M4x6: 4 pcs.) Arm cover /2 Arm cover /1 TP screws M4x6 Truss screws M4x6 Truss screws M4x6 A0Y5IXC014CA...
- Page 6 (4) Install the arm cover /4. (Truss screws M4x6 5. ADF can not be opened depending on the (Black): 2 pcs. ) position of the Control panel. It can be avoided by the following steps. • Install the screws at the positon shown in the following picture.
- Page 7 12. Apply the setting powder on the Photo conduc- (3) Turn the Release lever to the right, and remove tor. the 2 screws (A) on the Photo conductor unit (1) Remove the 2 screws (A) and loosen the and the screw (B) on the Coupling. Use a screw (B) securing the Toner supply unit.
- Page 8 (5) Release the Developing unit pressure lever as (9) Rotate the Developing gear counterclockwise shown in the figure. to coat the Developer around the Developing roller completely. Note: Do not rotate the Developing gear clockwise. Developing roller 57GAIXC017SA (6) Hold both ends of the Developing unit and remove it carefully from the Photo conductor unit.
- Page 9 (13) Disconnect the connector and the clamp from (15) Loosen the screw (A) and remove the screw the Stay, and release the Cleaning unit by (B) of the Sensor cover. Then move one end turning the Cleaning unit lock levers in the of the Sensor cover away from the Photo con- direction of the arrow.
- Page 10 (18) Clean the surfaces of the IDC sensor and the (21) Reinstall the Stay, connect the connector (3 JAM detection sensor with alcohol and a cot- pcs.), and fasten the wire bundle of connector ton swab. where it located in front of the Photo conduc- tor unit, on the clamp.
- Page 11 (23) Check the warp of the Toner leakage preven- (27) Insert a Phillips screwdriver in the cross tive guide sheet of the Cleaning unit. recess (A) in the Coupling and rotate it clock- wise one rotation or more until the notch on Note: the Coupling (B) is flush with the level of the Toner may leak if the guide sheet at the both ends...
- Page 12 (29) Reinstall the Developing unit. 13. Execute the Photo conductor peculiarity adjust- ments. Reinstall the Developing unit on the Photo (1) Enter [Service mode]. conductor unit. Note: Make sure that the Stopper roller contacts Refer to procedures in the Service Manual to enter the Stopper plate and cannot rotate.
- Page 13 14. Non-image area erase check (3) Set date and time. Step Step 1. Turn the Sub power switch ON. 1. Touch the “Return” key and “Service Mode“ key to return to the [Service Mode] screen. 2. Press the [Utility/Counter] button. 2.
- Page 14 (3) Shake the Toner bottle slightly left and right, 18. ADF opening angle change and remove its cap. Set the Toner bottle while The opening angle of the ADF can be set at 70 meeting the position of the clear tape and the or 32 degrees.
- Page 15 VI. Copy quality check IX. Make backup for machine adjustments/ setting data to the PC 1. Set paper in the Trays and make sample copies. 2. Inspect the copy quality with the test chart fed It is recommendable to make backup copy of machine from the ADF.
-
Page 16: Network Connection And Setup
[LED] Step Both the Controller NIC (outside) and the Machine 3. Loosen the Monitor adjusting knob/1 and NIC (inside) have two LEDs (LED1 and LED2), determine the vertical position of the moni- each of which represent the following conditions. tor. LED 1 (top): Displays communication speed Tighten the Monitor adjusting knob/1 to Orange (1Gbps) -
Page 17: Tandem Setting
XII. Tandem setting Step Note 1: 5. After the settings are done, be sure to turn Two machines must be the same on the following the Sub power switch and the Main power points. switch OFF first and then turn them ON. •... - Page 18 Step 12. Touch the “Machine NIC Setting” key and “TCP/IP Setting“ key. Set the appropriate IP address/subnet mask/gateway address and other items according to your network administrator’s instructions. If you use a cross cable to connect, you can use the default values. 13.