
Related Manuals for HANNspree WT0C-15A1


Summary of Contents for HANNspree WT0C-15A1
- Page 1 15" Liquid Crystal Display Television WT0C-15A1 Batman visit NTSCTVTWEN1203 MAC-001153...
-
Page 2: Table Of Contents
Table of Contents 1. Warranty and Service ............ 3 2. Preface ................. 4 3. Description of Warning Symbols ........5 4. Safety Notices ............... 6 5. Regulatory Information ..........14 6. Introducing the TV ............16 Features ..............16 7. Checking Package Contents ........17 8. - Page 3 Table of Contents Mute ..............39 Video Setting ............40 Hue ..............41 Saturation ............42 Sharpness ............43 Color Temperature ..........44 TV Setting ............... 45 TV/CATV ............46 MTS ..............47 Auto Program ............49 Manual Program ..........50 Channel Add/Erase ..........
-
Page 4: Warranty And Service
TV). With this product, you will be able to enjoy superior audio and video while enriching your lifestyle with advanced technology. The Hannspree TV is warranted for one year limited service from the date the product is received (as shown on the Warranty and Service Manual);... -
Page 5: Preface
No part of this documentation may be reproduced in any form by any means without prior written authorization of Hannspree, Inc., and its licensors, if any. -
Page 6: Description Of Warning Symbols
Description of Warning Symbols Warning Caution This symbol is used to remind This symbol is used to remind users to pay attention to users to pay attention to the important descriptions regard- danger of electric shocks due ing usage and maintenance to dangerous internal non- (repair) or additional impor- insulated components. -
Page 7: Safety Notices
Safety Notices Power Supply Safety Notes 1. To avoid electric shocks, do not use an extended power cord or an outlet that does not match this product's plug or leaves the plug exposed. 2. This product has a 3-pin grounded plug. The third pin connects to ground;... - Page 8 Before You Proceed 1. Read the Safety Notices and the User’s Manual carefully before turning the product on. 2. Keep your User’s Manual in a safe place for future reference. Keep the box and packaging in case the product needs to be shipped in the future.
- Page 9 Optimal Viewing Distance...
- Page 10 Important Safety Instructions 1. Read these instructions. 2. Keep these instructions. 3. Heed all warnings. 4. Follow all instructions. 5. Do not use this apparatus near water. 6. Clean only with a dry cloth. 7. Do not block any ventilation openings. Install in accordance with the manufacturer’s instructions.
- Page 11 10. Protect the power cord from being walked on or pinched particularly at the plug, conve- nience receptacles, and the point where they exit from the apparatus. 11. Use only with a cart, stand, tripod, bracket, or table specified by the manufacturer, or sold with the apparatus.
- Page 12 Personal Safety To avoid overloading the power supply, do not plug too many electrical devices into an outlet or extension cable. Dangerous high-voltage electric power compo- nents are located inside the TV. To avoid electric shock, do not disassemble the casing. Do not place or drop metals, small objects, or flammable materials in the vent to avoid an elec- tric shock or a fire.
- Page 13 Installation To avoid damage to power circuits, do not place the TV in locations where there is excessive steam or dust. Do not place the TV on a bed, sofa, carpet, or in a sealed cabinet to avoid blocking the product's vents.
- Page 14 Operation This product is designed for power sources as labeled on the casing. Avoid using any other power accessories to avoid electric shock or other damage. The plug can be inserted into an outlet in only one direction. Notify a qualified service techni- cian if you cannot plug it in correctly.
-
Page 15: Regulatory Information
Regulatory Information FCC Compliance Statement This device complies with part 15 of the FCC Rules. Operation is sub- ject to the following two conditions: (1) This device may not cause harm- ful interference, and (2) this device must accept any interference received, including interference that may cause undesired operation. - Page 16 DOC Compliance Notice This digital apparatus does not exceed the Class B limits for radio noise emissions from digital apparatus as set out in the Radio Interference Regulations of the Canadian Department of Communications.This device complies with Canada ICES-003 Class B. CE Conformity Statement This device complies with the requirements set out in the Council Direc- tive on the approximation of the Laws of the Member States relating to...
-
Page 17: Introducing The Tv
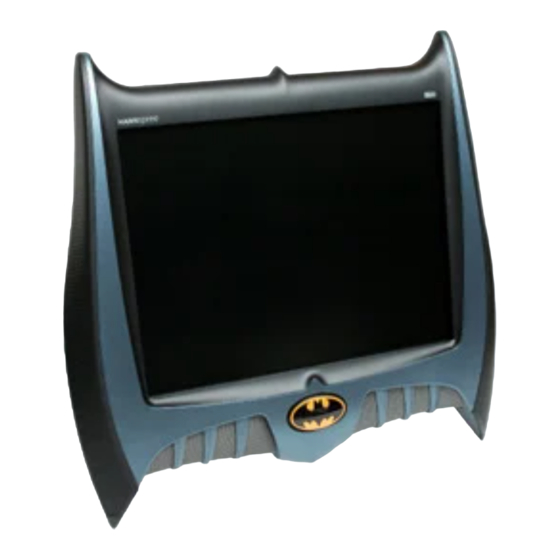
Introducing the TV Thank you for purchasing this 15-inch Liquid Crystal Display TV. Your LCD TV is designed to be safe, versatile, and easy to use. The design of the product is based on Gotham City, which makes it a fun addition to any room. -
Page 18: Checking Package Contents
Checking Package Contents Make sure the following components are included in the box. Contact your vendor immediately if anything is missing or damaged. Warranty and User’s Manual Quick Start Guide Service Manual Wire Material Package VGA Cable Power Cord Power Adapter 4-IN-1 cable RCA Jack x 3 S Jack x 1... -
Page 19: Getting To Know Your Tv
Getting to Know Your TV Front View Signal sensor Description Function Turns the TV on and off. Power/ Green LED indicates power on. Power LED Changes channels. Press CH to increase the channel number. Press CH to decrease Select channel the channel number. -
Page 20: Input And Output Ports
Input and Output Ports LINE-OUT LINE-IN R-AUDIO-L VIDEO DC-IN Description Function Connects to external amplifier or LINE OUT speakers. Connects to the included power DC 12V adapter. LINE IN Connects to a PC's line out port. - Page 21 Use the included 4-IN-1 Audio/Video cable to connect external devices, such as a VCR, VCD, or DVD player. Audio Input: AV connectors white and red audio cables. Video Input: AV connector video (yellow) or S-Video cables. HEADPHONE Connects to headphones. R-AUDIO Connects to a right audio (red) cable Connects to a PC.
-
Page 22: Getting Started
Getting Started Connecting to an Antenna or Cable TV Connect one end of the UHF or CATV cable to ANT Jack (VHF/UHF IN Jack) on the back of the TV. Connect the other end of the VHF/UHF (Antenna) or CATV cable to the antenna socket or CATV cable. -
Page 23: Connecting To Av Devices
Connecting to AV Devices Connect external devices such as a VCR, VCD or DVD player, or video game to the TV using the 4-IN-1 cable. Connecting to a VCR/VCD/DVD Player The illustration presented here shows how to connect the TV to a VCR, VCD or DVD player. -
Page 24: Connecting To A Video Camera
Connecting to a Video Camera The instructions presented here are a general guide to connecting the TV to a camcorder or other type of digital camera. Actual connec- tions may vary according to the make and model of the device. Refer to the user’s manual included with the camcorder or camera for more detailed instructions. -
Page 25: Connecting To A Game Device
Connecting to a Game Device The instructions presented here are a general guide to connecting the TV to a game device using the RCA Jacks provided (some game devices may require a unique adapter that is not provided). Actual connections may vary according to the make and model of the game device. -
Page 26: Connecting External Speakers Or Headphones
Connecting External Speakers or Headphones External speakers or headphones may be used to listen to the TV rather than using the built-in speakers. Connect external speakers or headphones to the speaker or headphone line out port as illustrated. Headphones LINE-OUT LINE-IN R-AUDIO-L VIDEO... -
Page 27: Connecting To A Pc
Connecting to a PC You can connect the TV to a PC and use it as an external monitor. Connect the TV’s VGA port to the PC’s VGA port. Connect the TV’s line in port to the PC’s line out port to listen to the PC’s audio output on the TV’s speakers. -
Page 28: Connecting The Power Adapter
Connecting the Power Adapter Connect the power cord to the power adapter as illustrated. Plug the power adapter connector into the DC-IN input jack on the rear panel of the TV. Insert the three-pronged plug at the other end of the power cord into a power outlet. -
Page 29: Using The Tv
Using the TV Using the Remote Control For best results, use the remote control within a distance of 5 meters from the front of the TV’s signal sensor. Do not exceed an angle of 30 degrees when pointing at the signal sensor. Refer to the following illustration. -
Page 30: Turning The Tv On And Off
Turning the TV On and Off Press the POWER button on the remote control (or control panel). The power LED on the side of the TV changes from red to green, indicating that the power has been turned on. Press the POWER button again; Power button/ the power LED changes from Power LED... -
Page 31: Switching Source Signals
Switching Source Signals Press the SOURCE button to select the in coming source TV:40 signal. The current source setting (TV/CATV, AV1, AV2 or PC ) appears on the upper left corner of the screen. Source Note The TV supports S-Video input in addition to normal video and audio sig- nals. -
Page 32: Adjusting On-Screen Display (Osd) Settings
Adjusting On-Screen Display (OSD) Settings The On-Screen Display (OSD) menu system provides a quick and simple method to adjust your TV’s settings. This chapter describes how to change each of the available settings. The OSD can be used with either the remote control or the control panel. -
Page 33: Brightness
Brightness Press MENU to enter the OSD menus. Brightness&Contrast Brightness Press the CH UP button or CH Contrast DOWN button to select Brightness & Contrast. Return Adjust Menu Next Press MENU to enter the Bright- ness & Contrast menu. Press the CH UP button to increase the brightness. -
Page 34: Contrast
Contrast Press MENU to enter the OSD menus. Brightness&Contrast Brightness Press the CH UP button or CH Contrast DOWN button to select Brightness & Contrast. Return Adjust Menu Next Press MENU to enter the Bright- ness & Contrast menu. Press MENU to select Contrast. Press the CH UP button to increase the contrast. -
Page 35: Audio Setting
Audio Setting Audio Setting Treble Bass Balance Mute Return Select Menu Press the MENU button to enter Press the CH UP button or CH the OSD menus. DOWN button to select Audio Setting. Press MENU to enter the Audio Setting menu. -
Page 36: Treble
Treble Press MENU to enter the OSD menus. Audio Setting Treble Press the CH UP button or CH Bass Balance DOWN button to select Audio Mute Setting. Return Adjust Menu Next Press MENU to enter the Audio Setting menu. Press the CH UP button to increase the treble. -
Page 37: Bass
Bass Press MENU to enter the OSD menus. Audio Setting Treble Press the CH UP button or CH Bass Balance DOWN button to select Audio Mute Setting. Return Adjust Menu Next Press MENU to enter the Audio Setting menu. Press MENU to select Bass. Press the CH UP button to increase the bass. -
Page 38: Balance
Balance Press MENU to enter the OSD menus. Audio Setting Treble Press the CH UP button or CH Bass Balance DOWN button to select Audio Mute Setting. Return Adjust Menu Next Press MENU to enter the Audio Setting menu. Press MENU to select Balance. Press the CH UP button to change the balance to the right speaker. -
Page 39: Srs
This option enables the 3D Surround Sound feature. Press MENU to enter the OSD menus. Audio Setting Treble Press the CH UP button or CH Bass Balance DOWN button to select Audio Mute Setting. Return Adjust Menu Next Press MENU to enter the Audio Setting menu. -
Page 40: Mute
Mute Press MENU to enter the OSD menus. Audio Setting Treble Press the CH UP button or CH Bass Balance DOWN button to select Audio Mute Setting. Return Adjust Menu Next Press MENU to enter the Audio Setting menu. Press MENU to select Mute. Press the CH DOWN button to turn the mute on. -
Page 41: Video Setting
Video Setting Video Setting Saturation Sharpness Color Temp Standard Return Select Menu Press the MENU button to enter Press the CH UP button or the OSD menus. CH DOWN button to select Video Setting. Press MENU to enter the Video Setting menu. -
Page 42: Hue
Press MENU to enter the OSD menus. Video Setting Press the CH UP button or CH Saturation Sharpness DOWN button to select Video Color Temp Standard Setting. Return Adjust Menu Press MENU to enter the Video Setting menu. Press the CH DOWN button to increase the red hue. -
Page 43: Saturation
Saturation Press MENU to enter the OSD menus. Video Setting Press the CH UP button or CH Saturation Sharpness DOWN button to select Video Color Temp Standard Setting. Return Adjust Menu Next Press MENU to enter the Video Setting menu. Press MENU to select Saturation. -
Page 44: Sharpness
Sharpness Press MENU to enter the OSD menus. Video Setting Press the CH UP button or CH Saturation Sharpness DOWN button to select Video Color Temp Cold Setting. Return Adjust Menu Next Press MENU to enter the Video Setting menu. Press MENU to select Sharpness. -
Page 45: Color Temperature
Color Temperature Press MENU to enter the OSD menus. Video Setting Press the CH UP button or CH Saturation DOWN button to select Video Sharpness Color Temp Cold Setting. Return Press MENU to enter the Video Adjust Menu Next Setting menu. Press MENU to select Color Temp. -
Page 46: Tv Setting
TV Setting TV Setting TV/CATV CATV STD Dual Auto Program Manual Program Return Select Menu Press the MENU button to enter Press the CH UP button or CH the OSD menus. DOWN button to select TV Setting. Press MENU to enter the TV Setting menu. -
Page 47: Tv/Catv
TV/CATV Press MENU to enter the OSD menus. TV Setting Press the CH UP button or CH TV/CATV AIR TV Dual DOWN button to select TV Setting. Auto Program Manual Program Press MENU to enter the TV Set- Return Adjust Menu Next ting menu. -
Page 48: Mts
Press MENU to enter the OSD menus. TV Setting TV/CATV CATV STD Press the CH UP button or CH Main Auto Program DOWN button to select TV Setting. Manual Program Press MENU to enter the TV Set- Return Adjust Menu Next ting menu. - Page 49 DUAL Press the CH UP button or CH TV Setting DOWN button to select Dual, which TV/CATV CATV STD Dual enables broadcast of the main signal Auto Program Manual Program on one speaker, and the alternate audio signal on the other speaker. Return Adjust Menu...
-
Page 50: Auto Program
Auto Program Press MENU to enter the OSD menus. TV Setting TV/CATV CATV STD Press the CH UP button or CH Dual Auto Program DOWN button to select TV Setting. Manual Program Press MENU to enter the TV Set- Return Adjust Menu Next... -
Page 51: Manual Program
Manual Program This function allows you search present channels and erase channels. Press MENU to enter the OSD menus. TV Setting TV/CATV CATV STD Press the CH UP button or CH Dual Auto Program DOWN button to select TV Setting. Manual Program Press MENU to enter the TV Set- Return... -
Page 52: Channel Add/Erase
Channel Add/Erase After you have found a channel using Manual Program, follow the following instruction to add or erase the channel. Press MENU to select Add/Erase. Select one of the following options. Manual Program 2 Manual Program Down Add/Erase Erase Erase Add Channel Press the CH DOWN button to... -
Page 53: Pc Setting
PC Setting PC Setting H.Position V.Position Phase Clock 1688 More Option Return Select Menu Press the MENU button to enter Connect product to a PC. the OSD menus. Press SOURCE to select PC. Press the CH UP or CH DOWN button to select PC. Press MENU to enter the PC menu. -
Page 54: Horizontal Position
Horizontal Position Press MENU to enter the OSD menus. PC Setting H.Position Press the CH UP button or CH V.Position Phase DOWN button to select PC Setting. Clock 1688 More Option Press MENU to enter the PC Set- Return Adjust Menu Next ting menu. -
Page 55: Vertical Position
Vertical Position Press MENU to enter the OSD menus. PC Setting H.Position Press the CH UP button or CH V.Position Phase DOWN button to select PC Setting. Clock 1688 More Option Press MENU to enter the PC Set- Return Select menu Menu ting menu. -
Page 56: Phase
Phase Press MENU to enter the OSD menus. PC Setting H.Position Press the CH UP button or CH V.Position Phase DOWN button to select PC Setting. Clock 1688 More Option Press MENU to enter the PC Set- Return Adjust Menu Next ting menu. -
Page 57: Clock
Clock Press MENU to enter the OSD menus. PC Setting H.Position Press the CH UP button or CH V.Position Phase DOWN button to select PC Setting. Clock 1688 More Option Press MENU to enter the PC Set- Return Adjust Menu Next ting menu. -
Page 58: Color Temperature
Color Temperature Press MENU to enter the OSD menus. PC Setting H.Position Press the CH UP button or CH V.Position Phase DOWN button to select PC Setting. Clock 1688 More Option Press MENU to enter the PC Set- Return Select menu Menu ting menu. - Page 59 User More Option The User option enables users to DOS Mode Text make their own color settings. Color Temp User User R : Press the CH UP button to select User G : User B : User. The user menu appears. Return Adjust Menu...
-
Page 60: Miscellaneous Setting
Miscellaneous Setting Miscellaneous English Language Sleeper OSD Display Time Setting More Option Return Select Menu Press the MENU button to enter Press the CH UP button or CH the OSD menus. DOWN button to select Miscellaneous. Press MENU to enter the Mis- cellaneous menu. -
Page 61: Language
Language Press MENU to enter the OSD menus. Miscellaneous English Language Press the CH UP button or CH Sleeper OSD Display DOWN button to select Time Setting More Option Miscellaneous. Return Select Menu Press MENU to enter the Miscella- neous menu. Press the CH UP button or CH DOWN button to select Chinese or English. -
Page 62: Sleeper
Sleeper The sleeper turns the TV off automatically after a set period of time. Press MENU to enter the OSD menus. Miscellaneous English Press the CH UP button or CH Language Sleeper OSD Display DOWN button to select Time Setting More Option Miscellaneous. -
Page 63: Osd Display
OSD Display When set to Off, the OSD display (source data on top left corner of the TV screen) turns off after approximately 5 seconds. When set to On, the OSD does not turn off automatically. Press MENU to enter the OSD menus. -
Page 64: Time Setting
Time Setting This setting allows you to set the TV clock. Press MENU to enter the OSD menus. Miscellaneous English Language Press the CH UP button or CH Sleeper OSD Display DOWN button to select Time Setting More Option Miscellaneous. Return Adjust Menu... -
Page 65: Osd Background
OSD Background This setting allows you to make the OSD background transparent or opaque. Press MENU to enter the OSD menus. Miscellaneous English Language Press the CH UP button or CH Sleeper OSD Display DOWN button to select Time Setting More Option Miscellaneous. -
Page 66: Reset
Reset The Reset function returns all of your TV’s user settings to their fac- tory defaults. Warning: The reset function will erase all of your custom and favorite channel settings, and will reset all display settings (such as contrast, bright- ness, etc.) to the factory default values. - Page 67 By default, OFF is already selected (highlighted in yellow). The TV immediately resets when Reset ... ON is selected and you see the message on the screen. Press MENU to select Return. Press the CH DOWN button to exit the More Option menu.
-
Page 68: Taking Care Of Your Tv
Taking Care of Your TV Turn the power off before you begin cleaning the For best results, use a clean lens cloth to remove dust and fingerprints from the screen. Do not wipe the shell of the TV with alcohol, methanol, gasoline or oil products to avoid dam- aging the finish. -
Page 69: Troubleshooting
Troubleshooting Situation Solution • Connect the power cord properly. • Press the POWER button on the control panel or remote control. • Press the SOURCE button to cycle through connected video sources. No picture and sound. • Press CH UP or CH DOWN to switch to other TV stations. - Page 70 Situation Solution • Make sure the source device is functioning properly. • Set the volume to a higher level. No sound but have image. • Make sure the audio cable is connected securely. • Turn the mute off. • Make sure the video signal cable is con- Screen image turns over.
-
Page 71: Specifications
Specifications WT0C-15A1 LCD Panel Size 15-inch TFT Aspect Ratio Best Resolution 1024 (horizontal) x 768 (vertical) Maximum Display Area 304.1 mm (H) x 228.1 mm (W) TV System NTSC VGA input (15 pin D-SUB), S-Video Input and Compos- Video System... -
Page 72: Glossary
Glossary Aspect Ratio The ratio of width to height of a film, image or display screen. Broadcast TV Broadcasting video signals using high-frequency electromagnetic waves to distribute television channels to viewers (standard TV broadcast). CATV Community Antenna Television, the original name for cable TV. A television distribution system that uses coaxial cable instead of the traditional radio broad- casting (over-the-air) method to deliver television, FM radio, and other services to consumers. - Page 73 is a trademark of SRS Labs, Inc. SRS technology is incorpo- rated under license from SRS Labs, Inc.