
Related Manuals for Husqvarna 5525PW


Summary of Contents for Husqvarna 5525PW
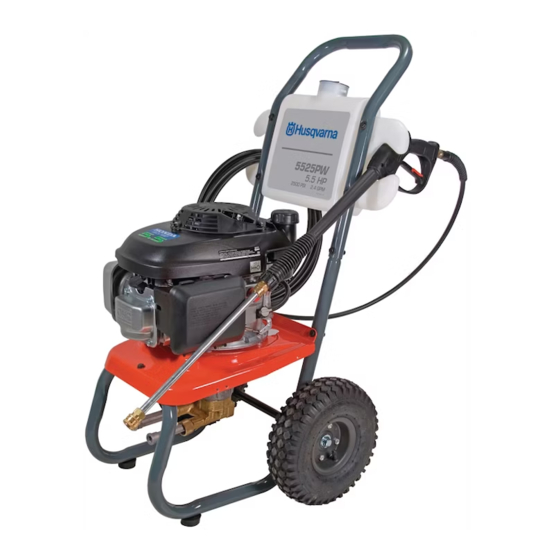
- Page 1 Operator's 2008-02 Manual O0807301 Pressure Washer 5525PW, 6027PW, 9032PW, 1340PW Operator's Manual...
-
Page 2: Table Of Contents
CART PARTS LIST .....23 5525PW Cart ......23 PRE-OPERATION . -
Page 3: Key To Symbols
KEY TO SYMBOLS Safety Guidelines Symbols in the Operator’s Manual Please read the operator’s manual This manual contains information that is very carefully and make sure you important to know and understand. This understand the intructions before information is provided for SAFETY and to PREVENT using the tool. -
Page 4: Introduction
Husqvarna River to create the water-powered plant. During the more than 300 years of being, the Husqvarna factory has produced a lot of different products, from wood stoves to modern kitchen appliances, sewing machines, bicycles, motorcycles, etc. In 1956, the first motor driven lawn mowers appeared, followed by chain saws in 1959, and it is within this area Husqvarna is working today. -
Page 5: What Is What
WHAT IS WHAT? 1340PW 5525PW 6027PW 9032PW Serial Number/ Product Decal Engine Oil Fill Tip Holder with Spray Tips Engine switch - On/Off Injection Tube Barb 10 Air Filter Gun with Trigger 11 Choke Lance 12 Fuel Tank Inlet Connection for High Pressure Hose... -
Page 6: Frequently Asked Questions
1. After turning off the pressure washer and the See Page 17 for pump oil types and quantities. water, depressurize the hose by triggering the Please note the 5525PW model has a pump that is gun. sealed and does not require service. -
Page 7: Safety Guidelines
SAFETY GUIDELINES Important Safety Instructions • ALWAYS engage the trigger safety latch in the safe position when spraying is stopped even if only for a few moments. SAVE THESE INSTRUCTIONS The engine exhaust from • ALWAYS follow detergent manufacturer’s label WARNING this product contains chemicals recommendations for proper use of detergents. - Page 8 SAFETY GUIDELINES • Use only the nozzle supplied with this machine. • NEVER leave the wand unattended while the machine is running. • NEVER tamper with the engine governor or attempt to alter factory settings. Altering factory settings could damage the unit and will void the warranty.
-
Page 9: Pre-Operation
ASSEMBLY Use 1/2” (13 mm) wrench to assemble pressure washer. On model 5525PW use two adjustable or 7/16” wrenches. 1. Slide the handle assembly over the lower legs of the cart base. Use the standard nut and bolt to Garden Hose secure the legs. - Page 10 PRE-OPERATION 4. Connect the high pressure hose to the pump outlet For models 5525PW: Insert spray tips into the (See Figure 4). rubber tip holder. Then attached the tip holder to handle by wrapping around and inserting tail end 5. Attach the lance with nozzle to the gun (See through hole to secure (See Figure 7).
-
Page 11: Trigger Safety Latch
PRE-OPERATION TRIGGER SAFETY LATCH In the engaged position, the trigger safety latch prevents the gun from being triggered accidentally. Pull the latch up to engage it (See Figure 9). ALWAYS engage the trigger safety latch when the unit is not in use. -
Page 12: Operation
Set the trigger safety latch. cleaning techniques mentioned in the following section. 6. On model 5525PW: Honda GC Engine: Open the fuel shutoff valve by turning the knob Before starting a pressure washer cleaning job, counterclockwise until it stops. Close the choke prepare the surface you intend to clean. -
Page 13: Pressure Adjustment
ADJUSTING THE SPRAY FAN ANGLE Your unit has quick connect tips that have a range of spray fan angles. Model 5525PW includes the black detergent and yellow 15° quick connect tips only. Figure 11 - Installing Quick Connect Tip... -
Page 14: Distance From Cleaning Surface
OPERATION Spray water against a surface at a 45 degree angle 3. Vary the fan pattern spray angle and the to achieve the most beneficial impact force and to distance to the cleaning surface until optimum efficiently remove debris. cleaning efficiency is achieved without damaging the surface. -
Page 15: General Cleaning Tips
OPERATION GENERAL CLEANING TIPS 1. Apply the detergent so that it thoroughly covers PRESSURE RELIEF the cleaning surface. Apply the detergent from PROCEDURE bottom to top to prevent the detergent from sliding down and streaking. Wait a couple of minutes for the detergent to break down the To reduce the risk of bodily injury or property dirt and grime. -
Page 16: Tips For Extending The Life Of Your Pressure Washer
OPERATION 3. Disconnect the water supply and high pressure hose Never store the pressure washer CAUTION with gasoline in the tank inside from the pump. a building where fumes may reach an open flame or 4. Allow the engine to cool. spark. -
Page 17: Maintenance
Engine Oil Type SAE 10W-30 SAE 30W (Above 60 °F/15.7° C) Engine Oil Capacity 5525PW - Honda GCV160 - 18.6 fl. oz. (0.550 L) 6027PW - Honda GX160 - 20 fl. oz. (0.591 L) 9032PW - Honda GX270 - 37 fl. oz. (1.090 L) 1340PW - Honda GX390 - 37 fl. -
Page 18: Check Pump Oil And Pump Oil Changing
[See Figure 19 (B)]. Pump Oil Type 5525PW - Lavor Pump - Special. See pump parts list. 6027PW, 9032PW, 1340PW - CAT Pumps - Special CAT pump oil. Use 531 30 74-83. -
Page 19: Maintenance Schedule
Each use • Check water inlet screen and filter. • Check engine and pump oil levels. Fill as necessary. Cannot check pump oil on the 5525PW. • Check gasoline level. Fill as necessary. After first 5 hours of operation • Change engine break-in oil. Use SAE30 or 10W-30 detergent oil if below 60°... - Page 20 SAE 10W-30 Pump Oil Capacity SAE 30W (Above 60 °F/15.7° C) 5525PW - AR RM Pump - 3.5 fl.oz. (0.103 L) 6027PW - CAT 3DNX Pump - 8.5 fl.oz. (0.251 L) Engine Oil Capacity 9032PW - CAT 66DX Pump - 10.15 fl.oz. (0.532 L) 5525PW - Honda GCV160 - 18.6 fl.
-
Page 21: Troubleshooting Chart
TROUBLESHOOTING CHART Troubleshooting Chart - Gasoline Powered Pressure Washers Only Symptom Possible Cause(s) Corrective Action(s) Engine will not start No gasoline in fuel tank or Fill the tank with gasoline,open fuel or is hard to start carburetor shut off valve. Check fuel line and carburetor Low oil Check oil level. - Page 22 TROUBLESHOOTING CHART Symptom Possible Cause(s) Corrective Action(s) Oil leakage Worn oil seals and/or o-ring Replace oil seals and/or o-ring. See service between the engine center and the pump Fluctuating pressure Low engine oil Add oil. Pump valve worn, dirty or stuck Check and replace Pump drawing in air Ensure hoses and fittings are tight.
-
Page 23: Service Record
SERVICE RECORD Date Maintenance performed Replacement components required 22 — English... -
Page 24: Cart Parts List
5525PW 531 30 74-96 531 30 74-97 505 27 16-01 531 30 75-35 531 30 74-69 531 30 74-77 (Soap) 531 30 74-78 (0°) * 531 30 74-79 (15°) 531 30 74-80 (25°) * 531 30 74-81 (40°) * 531 30 74-72... -
Page 25: 6027Pw Cart
6027PW 505 19 45-40 531 30 74-82 531 30 74-87 505 27 16-02 505 19 45-42 531 30 75-44 531 30 74-86 531 30 74-77 (Soap) 531 30 74-78 (0°) 531 30 74-68 531 30 74-79 (15°) 531 30 74-80 (25°) 531 30 74-81 (40°) 531 30 74-72 531 30 74-84... -
Page 26: 9032Pw Cart
9032PW & 1340PW 505 19 45-41 531 30 74-82 531 30 74-87 505 27 16-03 (9032PW) 505 27 16-04 (1340PW) 505 19 45-42 531 30 75-44 531 30 74-86 531 30 74-68 531 30 74-72 531 30 74-84 531 30 74-77 (Soap) 505 19 45-43 (0°) 505 19 45-44 (15°) 505 19 45-45 (25°) -
Page 27: Pump Part List
Pump for 5525PW 505 27 18-01 Pump Assembly Complete 505 19 45-22 505 19 45-12 505 19 45-01 P/O 505 19 45-09 505 19 45-11 P/O 505 19 45-09 P/O 505 19 45-06 P/O 505 19 45-02 505 19 45-20... -
Page 28: 6027Pw Pump
Pump for 6027PW 505 27 18-02 Pump Assembly Complete 530 30 75-77 531 30 75-88 530 30 75-78 530 30 75-79 P/O 505 19 45-35 530 30 75-80 531 30 75-87 530 30 75-81 505 19 45-38 530 30 75-82 505 19 45-25 530 30 75-84 505 19 45-27... -
Page 29: 9032Pw Pump
Pump for 9032PW 505 27 18-03 Pump Assembly Complete 530 30 75-77 505 19 45-47 530 30 75-79 505 19 45-53 P/O 505 19 45-60 505 19 45-48 (x3) P/O 505 19 45-35 505 19 45-52 505 19 45-49 505 19 45-55 P/O 505 19 45-60 505 19 45-29 505 19 45-56... -
Page 30: 1340Pw Pump
Pump for 1340PW 505 27 18-04 Pump Assembly Complete 531 30 75-19 P/O 531 30 75-64 P/O 531 30 75-64 505 19 45-63 P/O 531 30 75-65 505 19 45-79 505 19 45-62 505 19 45-62 531 30 75-27 531 30 75-22 P/O 531 30 75-65 505 19 45-68 P/O 531 30 75-62... - Page 31 NOTES 30 — English...
-
Page 32: Product Registration Notice
Register your Husqvarna product on-line quickly and easily. Paper registration forms will not be accepted. There will be a grace period for products built prior to January 1, 2007. All Husqvarna products can be registered online regardless of their model year. Register products online at www.usa.husqvarna.com ,... -
Page 33: Warranty
32 — English...