Panasonic KX-DT333 Quick Reference Manual
Digital proprietary telephone
Hide thumbs
Also See for KX-DT333:
- Quick reference manual (64 pages) ,
- User manual (11 pages) ,
- User quick reference manual (8 pages)
Table of Contents
Advertisement
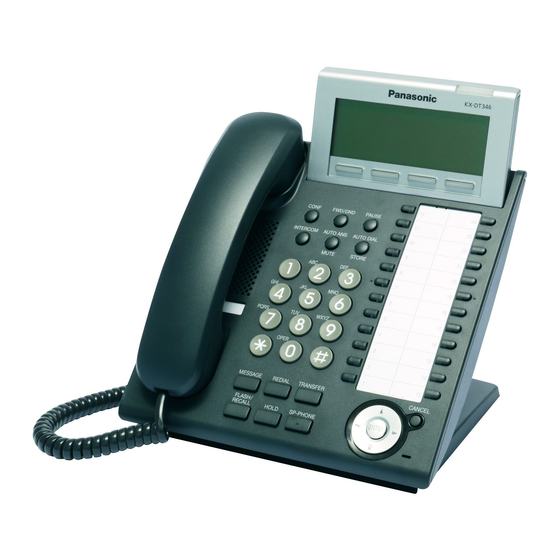
<KX-DT346>
Model No.
Thank you for purchasing a Digital Proprietary Telephone (DPT).
Please read this manual carefully before using this product and
save this manual for future use. For more details, please refer to the
manuals of the PBX.
Accessories (included)
Handset: 1
Screws for wall: 2
*1
For extra orders for the accessories, call toll-free: 1-800-332-5368.
*2
This telephone comes with the wall mounting adaptor already attached.
To remove the adaptor, refer to step 1 on page 17.
Document Version 2009-03
Quick Reference Guide
Digital Proprietary Telephone
KX-DT333/KX-DT343/KX-DT346
*1
Handset Cord: 1
Telephone Line
Cord: 1
Wall Mounting
*2
Adaptor
: 1
Advertisement
Table of Contents

Related Manuals for Panasonic KX-DT333


Summary of Contents for Panasonic KX-DT333
-
Page 1: Quick Reference Guide
Handset: 1 Screws for wall: 2 For extra orders for the accessories, call toll-free: 1-800-332-5368. This telephone comes with the wall mounting adaptor already attached. To remove the adaptor, refer to step 1 on page 17. Document Version 2009-03 Quick Reference Guide... - Page 2 When connecting DPTs via Digital XDP, this optional device cannot be used. Trademark: ® The Bluetooth word mark and logos are owned by the Bluetooth SIG, Inc. and any use of such marks by Panasonic Corporation is under license. KX-DT333 KX-DT343 KX-DT346 Features 3-Line Options ®...
-
Page 3: Location Of Controls
<KX-DT346> A LCD (Liquid Crystal Display) B PAUSE: Used to insert a pause when storing a telephone number. This button is also used for programming this unit. C FWD/DND (Call Forwarding/ Do Not Disturb): Used to set Call Forwarding or Do Not Disturb on your extension. - Page 4 Location of Controls H TRANSFER: Used to transfer a call to another party. I REDIAL: Used to redial the last dialed number. J MESSAGE: Used to leave a message waiting indication or call back the party who left the message waiting indication.
-
Page 5: Settings
Settings Speaker volume While in a hands-free conversation Handset/Headset While using the handset or volume headset Ringer volume While on-hook or receiving a call LCD Contrast While on-hook Ring Tone LCD Backlight While on-hook If you hear your own voice through the handset or headset, decrease the volume. -
Page 6: Icon Meanings
Features List Features List Icon Meanings = Flexible button (CO) = Feature number Making Calls To an extension extension no. REDIAL quick dialing no. To store PAUSE (CO) To dial (One-touch Dialing) To store dialing no. (2 digits) To dial AUTO DIAL STORE = Off-hook... -
Page 7: During A Conversation
To dial AUTO DIAL STORE During a Conversation To hold HOLD C. Tone To retrieve an outside call from another extension (CO) TRANSFER C. Tone Useful Features To add other parties during a conversation (i.e., conference) CONF desired phone no. C. -
Page 8: Before Leaving Desk
Features List Setting the Telephone According to Your Needs To set Once Daily C. Tone To cancel Before Leaving Your Desk All calls Busy No answer Busy/ No answer Cancel Do Not Disturb Both Calls Outside Calls Intercom Calls Timed Reminder... -
Page 9: Making Use Of The Voice Mail Service
Making Use of the Voice Mail Service From your own extension VPS extension no. Mailbox Password* * If you have no password, you can skip the last step. Note: VPS = Voice Processing System From someone else’s extension VPS extension no. mailbox no. -
Page 10: Using Lcd Display
Features List Repeat Voice Guidance Exit • Consult your dealer for more details regarding feature numbers. • It is possible to assign flexible buttons as feature buttons. • Control panel/button names and descriptions can be found in "Location of Controls" on page 3. Accessing Features Using the Display Using the LCD Display It is possible to access the following directories, logs, and menus by... - Page 11 Accessing Features Using the Display Accessing Features Using the Display Table 1 (Standard mode) Times Buttons " (space) — & Table 2 (Option mode) Times Buttons " (space) — & Document Version 2009-03 ’ < > £ ä ö ü À...
-
Page 12: Operation Board Angle Adjustment
Operation Board Angle Adjustment Operation Board Angle Adjustment The angle of the operation board can be set to one of eight angles (level 1 = 0°, level 8 = 45°). CAUTION: Hold the operation board until the operation board is secured at the desired angle. - Page 13 • Ensure the cords are inserted in the grooves, and are clamped to prevent damage to the connectors. Document Version 2009-03 Connection Connect to: a digital proprietary telephone — Digital XDP connection a single line telephone — XDP or parallel connection The telephone line cord (included) Connect to a PBX.
- Page 14 Installing KX-DT301/KX-NT303 Installing KX-DT301/KX-NT303 CAUTION: • To prevent damage to the telephone, be sure to unplug the extension line before you set up or remove the KX-DT301 (USB Module) or the KX-NT303 (Add-on 12 Key Module). • Connect the KX-NT303 first when installing both the KX-DT301 and the KX-NT303.
- Page 15 KX-DT301 The USB Module can be connected between the DPT and the personal computer through USB interface to implement personal CTI (Computer Telephony Integration). 1. Open the cover. 3. Close the cover. Document Version 2009-03 Installing KX-DT301/KX-NT303 2. Plug the flat cable into the connector as shown.
- Page 16 Installing KX-DT301/KX-NT303 5. Insert the protrusions on the KX-DT301 into the 2 holes in the unit. 7. Install the USB driver. Refer to Installation Manual on the CD-ROM included with KX- DT301. 6. Attach the KX-DT301 to your unit with the screws (included with KX-DT301).
-
Page 17: Wall Mounting
2. Set the operation board to level 1, then connect and secure the telephone line cords. • The cords can also be run from the top of the unit (page 13). 3. Attach the wall mounting adaptor as shown. - Page 18 If the known working telephone operates properly, have the defective telephone repaired by an authorized Panasonic factory service center. If the known working telephone does not operate properly, check the PBX and the internal extension wiring.
-
Page 19: Important Notice
DO NOT send the product to the Executive or Regional Sales offices. They are NOT equipped to make repairs. Product service: Panasonic factory service centers for this product are listed in the service center directory. Consult your authorized Panasonic dealer for detailed instructions. -
Page 20: Important Safety Instructions
12.Avoid using a wired telephone during an electrical storm. There is a remote risk of electric shock from lightning. 13.Do not use a telephone in the vicinity of a gas leak to report the leak. SAVE THESE INSTRUCTIONS Document Version 2009-03... -
Page 21: Fcc And Other Information
FCC Declaration of Conformity Trade Name: Panasonic Model Number: KX-DT343/KX-DT346 Responsible Party: Panasonic Corporation of North America One Panasonic Way Secaucus, NJ 07094 U.S.A. Telephone No.: 1-800-211-PANA (7262) This device complies with Part 15 of the FCC Rules. -
Page 22: Customer Information
US: ACJKXNANKX-DT346 If requested, this number must be provided to the telephone company. If trouble is experienced with this equipment KX-DT333, KX-DT343, and KX-DT346, for repair or warranty information, please contact: Panasonic Service and Technology Company-BTS Center 415 Horizon Drive Bldg. 300 Ste. 350-B... -
Page 23: Wall Mounting Template
wall WALL MOUNTING TEMPLATE 1. Drive the screws into the wall as indicated. 2. Hook the unit onto the screw heads. Note: Make sure to set the print size to correspond with the size of this page. If the dimensions of the paper output still deviate slightly from the measurements indicated here, use the measurements... - Page 24 One Panasonic Way Secaucus, New Jersey 07094 http://www.panasonic.com/csd Copyright: This material is copyrighted by Panasonic Communications Co., Ltd., and may be reproduced for internal use only. All other reproduction, in whole or in part, is prohibited without the written consent of Panasonic Communications Co., Ltd.