Compaq PRESARIO Presario 2700 User Manual
Presario 2700 series mobile internet pc
Hide thumbs
Also See for PRESARIO Presario 2700:
- Frequently asked questions manual (7 pages) ,
- User manual (25 pages)
Table of Contents
Advertisement
Advertisement
Table of Contents

Related Manuals for Compaq PRESARIO Presario 2700


Summary of Contents for Compaq PRESARIO Presario 2700
- Page 1 Presario 2700 Series Document Part Number: 243871-001 September 2001...
- Page 2 Microsoft Corporation. All other product names mentioned herein may be trademarks of their respective companies. Compaq shall not be liable for technical or editorial errors or omissions contained herein. The information in this document is provided “as is” without warranty of any kind and is subject to change without notice. The warranties for Compaq products are set forth in the express limited warranty statements accompanying such products.
-
Page 3: Table Of Contents
1 Introduction Where Can I Find Information? ....1–2 Documentation......1–2 Viewing or Printing a Guide on the CD . -
Page 4: Table Of Contents
Contents 3 Using Your Notebook Power On! ........3–2 Plugging and Unplugging AC Power . -
Page 5: Table Of Contents
Using the FutureBay II/Modular Bay ... . 5–5 Audio CDs and DVD Video Discs....5–7 Playing Audio CDs . -
Page 6: Table Of Contents
Backup Utilities ......8–2 Compaq Help and Support ....8–3 Helpful Hints . -
Page 7: Where Can I Find Information?
Congratulations! As the owner of a new Compaq Notebook computer, you have joined the worldwide community of mobile computer users. After your Notebook is set up and connected to the Internet, you can explore vast regions of information, entertainment, and services online. -
Page 8: Documentation
If you have access to the Internet, you can also view these and other documents on the Compaq Web site. See the “Online Help and Support” section in Chapter 8 for specific Web site information. The Warranty Statement and Poster are included in your kit. -
Page 9: Cd Or Dvd Drive.
Solutions for computer problems Compaq service and support tools Did you know... Safety and Comfort Guide are also available on the Compaq Web Site. See the “Online Help and Support” section in Chapter 8 for specific Web site information. This document explains how to protect your equipment from damage, protect yourself from injury, and ensure your comfort while using your Notebook. - Page 10 Introduction documents on the Documentation Suite CD. You will also use Acrobat Reader to view and print some documents available on the Internet.) 4. For information about closing Acrobat Reader or using it to view or print a document on the Documentation Suite CD, click the Help button near the top of the Adobe Acrobat Reader window.
- Page 11 The following words and symbols have special meaning in this guide and in the electronic documentation: Å WARNING: Text set off in this manner indicates that failure to follow directions in the warning could result in bodily harm or loss of life. Ä...
- Page 12 Introduction Å WARNING: To reduce the risk of electric shock and damage to the equipment, read the Safety and Comfort Guide. Did you know... plug all power cords into a high-quality surge protector. If you have a dedicated telephone line for the modem, buy a surge protector with a telephone jack.
- Page 13 During an electrical storm, you should take the following precautions to protect your Notebook from damage. You should immediately disconnect your Notebook from the power source. After your Notebook is safely disconnected from AC power, you can run your Notebook on battery power. If you are not using a surge protector, unplug all power cords from the wall outlets.
-
Page 14: Front Of Your Notebook
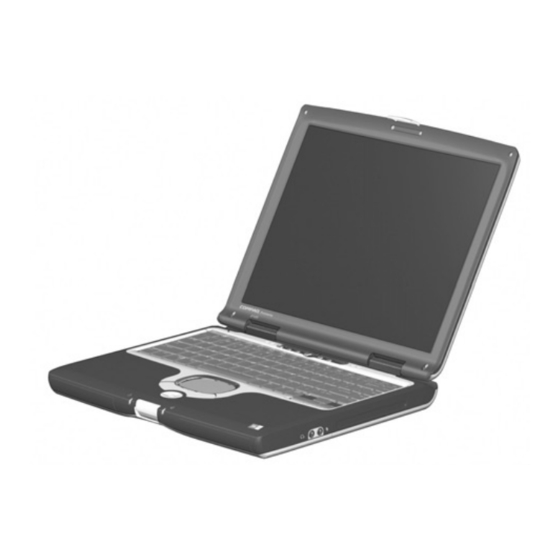
Before you begin using your new Notebook computer, you’ll want to look at some of the basic components. To help you locate your Notebook’s components, this chapter covers the following main topics: Front of Your Notebook, 2-2 Left and Right Panels, 2-7 Back Panel, 2-9 Underside, 2-10 To open your new Notebook, push the Display Release Latch 1... - Page 15 Your Notebook at a Glance Open your Notebook and take a look at these components. “Turning Your Notebook On and Off” in Chapter 3 of See also this guide to learn more about how to start and shut down your Notebook.
- Page 16 “Using Keyboard and Pointing Device” in Chapter 3 See also of this guide for more information on using the TouchPad. Power Light Mobile Internet PC User’s Guide Presario 2700 Series Your Notebook at a Glance 2 Battery Charge Light 2–3...
- Page 17 Your Notebook at a Glance 1 AC Adapter Light 2 Caps Lock Light 3 Instant Internet Access Button 4 Instant E-Mail Button 5 Search Button 6 Power Button “Reprogramming the Easy Access Buttons” in See also Chapter 3 of this guide to learn how to program the Easy Access buttons to suit your needs.
- Page 18 Provides you with instant access to news and information on the Internet. Search for topics including shopping, images, music, and videos. Compaq Web Connects instantly to Compaq for Site product information, helpful hints, performance updates, service, and more. Help and...
- Page 19 Your Notebook at a Glance The following (FN+function) keys have already been assigned. Button 2–6 cad goes here Description Compaq Support Web site launch key Help launch key Switch between the display and external monitor in the following order: Display External monitor...
- Page 20 Take a look at the left and right sides of your Notebook. The PC card slot and the removable floppy drive are located on the left side panel. The microphone jack, headphone jack, and optical drive are located on the right side panel. Did you know...
- Page 21 Your Notebook at a Glance Did you know... FutureBay II (Modular Bay). The FutureBay II/Modular Bay feature allows you to swap storage drives (CD, DVD, CD-RW, DVD/CD-RW, or diskette drive), extra batteries, and a weight saver in your Notebook. Headphone Jack Microphone Jack * A CD, DVD, CD-RW, DVD/CD-RW, or extra battery is available on selected models.
- Page 22 Take a look at the back of your Notebook. This is where you connect external hardware such as a printer or external monitor. “Installing Hardware Devices” in Chapter 4 of this See also guide for more information on attaching external devices. Modem 10/100 Ethernet Port Air Vents...
- Page 23 The memory compartment, main battery, battery release switch, FutureBay II/Modular Bay quick release handle and the pop-up feet are located on the underside of your Notebook. Before contacting Compaq Customer Support, you will need the serial number from the underside of your Notebook. Pop-up Feet...
-
Page 24: Power On!
Your Notebook computer is designed for easy setup, use, and upgrading. In this chapter, you’ll become familiar with your Notebook features. This chapter helps you to use your Notebook right out of the box, by covering the following main topics: Power On!, 3-2 Using Keyboard and Pointing Device, 3-9 Easy Access Buttons, 3-13... -
Page 25: Plugging And Unplugging Ac Power
WARNING: To reduce the risk of electrical shock, fire, or damage to the equipment, do not use converter kits sold for appliances to power your Notebook. Use only the Compaq adapter that came with your Notebook or a Compaq replacement part. - Page 26 Ensure that you can reach the electrical outlet easily. Unplug the AC adapter from the electrical outlet when you want to disconnect AC power from your Notebook. When unplugging from the electrical outlet, grasp the cord by the plug. Do not leave the AC adapter plugged into the electrical outlet when it is not connected to your Notebook.
- Page 27 Using Your Notebook When you’re not on the go, you’ll want to use your Notebook’s AC adapter as your power source. This ensures that the battery is always charged. When your Notebook does not have a charged battery, you should save your work and turn off your Notebook before unplugging it from the AC power supply.
- Page 28 When your Notebook is on, pressing the Power your Notebook in Hibernation mode. Did you know... When your Notebook enters this mode, the contents of the memory are saved to the hard disk and your Notebook powers off. The settings for the Power Press and release the Power Hibernation mode.
- Page 29 140° F (60° C). Replace only with the Compaq battery pack specified for your Notebook. Did you know... on or off. It continues charging until the battery is fully charged or the AC power is disconnected.
- Page 30 3. Insert the battery, front-edge first, into the keyed battery compartment. 4. Gently push down on the battery door until it snaps into place. “Components on the Underside” in Chapter 2 of this See also guide for help in locating the Battery Release Switch. To remove the battery, complete the following steps: 1.
-
Page 31: Battery Care
This ensures that the battery is fully charged. If you will not be using your Notebook for an extended Note period of time, Compaq recommends that you unplug the electrical cord from the outlet and remove the battery while your Notebook is not in use. 3–8 light is no longer Mobile Internet PC User’s Guide... -
Page 32: Using The Touchpad Instead Of A Mouse
In this section you’ll learn how to select, click, and double-click with the TouchPad: Using the TouchPad Instead of a Mouse Tapping and Double-Tapping Edge Motion “External Care of Your Notebook” in Chapter 7 of this See also guide for tips on keeping your TouchPad clean. “Installing Hardware Devices”... - Page 33 Using Your Notebook The Right TouchPad button works as the context menu or special drag button. Move the pointer over the item and press the Right TouchPad button to get context-sensitive options. The Easy Scroll button is the equivalent of the right, left, up, and down buttons of the scroll bars on the side and bottom of your screen.
- Page 34 2. Double-click the Mouse icon Properties dialog box. 3. Click the Touch tab. 4. Select Tap to Click to turn on the tapping feature. 5. Click OK to accept the changes and close the dialog box. Did you know... typing, drag the PalmCheck slider toward maximum. Mobile Internet PC User’s Guide Presario 2700 Series to open the Mouse...
-
Page 35: Edge Motion
Using Your Notebook Edge Motion allows you to continue to scroll when your finger reaches the edge of the TouchPad. When this feature is turned on, the window continues to scroll until you lift your finger. To turn on Edge Motion, complete the following steps: 1. -
Page 36: Easy Access Buttons
The Easy Access buttons, located above your Notebook’s keyboard, automatically connect you to the Internet. These buttons give you one-touch access to Internet activities or to software applications. Until your Internet or network services are configured, all buttons launch the Internet Setup Wizard. After your Internet/network services are set up, each button opens your default Web browser and connects to pre-programmed applications. -
Page 37: Storage Drives
Using Your Notebook Your Notebook stores your files and programs in the storage drives. This section helps you in the following area: Identifying Your Storage Drives Your floppy drive, hard drive, and CD, DVD, CD-RW, or DVD/CD-RW drive are designated with letters of the alphabet, as well as with icons. -
Page 38: Security
To protect your files and programs, your Notebook provides several security features. This section will cover: Using the Security Slot Power-On Password To use the security slot found on the side of your Notebook, complete the following steps: 1. Insert a locking device (such as a Kensington lock) into the security slot. - Page 39 To set the power-on password, complete the following steps: 1. Press the Power 2. After the Compaq logo is displayed, a cursor is shown in the upper right corner of the screen for a few seconds. While the cursor is visible, press the F10 key.
- Page 40 To remove a power-on password, complete the following steps: 1. Press the Power 2. Access F10 Setup as described in ‘Setting the Password’, type your current password, and press the Enter key. 3. From the Main option on the menu bar, use your arrow keys to move to the Security menu bar item.
-
Page 41: Common Features
Now that your Notebook computer is set up and running, you may want to explore and learn about some of the common tasks performed by your Notebook. To help you take advantage of your Notebook’s common features, this chapter covers the following main topics: S-Video Connection, 4-2 Software and Hardware, 4-5 Modem, 4-12... -
Page 42: S-Video Connection
Common Tasks With an S-Video connection, you can play games on a bigger screen or watch DVD movies on TV instead of on a Notebook display. This section helps you complete the following tasks: Switching Between Displays (Function Key method) Connecting and Enabling S-Video (Manual method) You can switch between your television and your display or external monitor by pressing Fn+F3. - Page 43 Did you know... See your local electronics store dealer for an S-Video adapter. To connect your Notebook and your television, you need an S-Video cable to plug into your TV, VCR, or other device. These cables can be purchased from a retail TV store or a computer store.
- Page 44 Common Tasks 7. Click the top left corner of the TV button to enable S-Video. S-Video is enabled if the button next to Primary is blue. 8. Click Apply to accept the changes and then click OK to exit both dialog boxes. 9.
-
Page 45: Adding And Removing Software
Discover how easy it is to add and remove software, attach new hardware devices, or reinstall deleted hardware drivers. With easy-to-follow instructions, you can completely and safely install or remove software programs and hardware devices with no worries. This section covers: Adding and Removing Software Installing Hardware Devices Software can be installed from a CD or a floppy disk or... - Page 46 Common Tasks 5. Click the CD or Floppy button. 6. Insert the CD or floppy disk into the proper drive when prompted by Windows, and click the Next button. Windows finds the CD or floppy disk and begins the installation process.
-
Page 47: Upgrading Your Notebook's Memory
You can easily upgrade your Notebook’s memory to take full advantage of the latest applications and games. Your Notebook can be upgraded to 384 MB of memory using PC 133 memory modules, available from any Compaq retailer. Ä CAUTION: Electrostatic discharge can damage many electronic components, including memory upgrade modules. - Page 48 Common Tasks 3. Turn your Notebook bottom side up. 4. Remove the retaining screw 1 from the memory compartment cover and lift the cover 2 . 4–8 cad goes here Mobile Internet PC User’s Guide Presario 2700 Series...
- Page 49 5. Determine the location of the memory modules. 1 Memory Modules* 2 Video Ram * Depending on the model of your Notebook, one or both memory banks may be populated with memory. Mobile Internet PC User’s Guide Presario 2700 Series cad goes here 3 Internal Mini PCI Device Common Tasks...
- Page 50 Common Tasks 6. Gently pry outward the tabs that hold the memory module in place. The memory module will dislodge and pop up at a 45° angle. 7. Grasp the edges of the memory module and remove it from its socket. 8.
- Page 51 Did you know... module are keyed. When inserting the memory module into its socket, ensure that the module is correctly aligned with the socket. 9. If replacing both memory modules, repeat Steps 6 through 8 for thte remaining memory module. 10.
-
Page 52: Modem
Common Tasks The physical connection of a computer to the Internet is typically through a telephone line. Your computer contains hardware called a modem that sends and receives information over a standard telephone line. On-screen instructions are provided that you must follow when you set up your modem. - Page 53 Å WARNING: To reduce the risk of electrical shock, fire, or damage to the equipment, do not plug a telephone cable into the RJ-45 jack. 3. For international use, plug the modem cable into the country-specific modem adapter, as shown in the following figure.
- Page 54 Common Tasks A network cable has an 8-pin RJ-45 connector at each end: 1. Plug the network cable into the RJ-45 port on the computer. 2. Plug the other end of the cable into a network jack. 4–14 Mobile Internet PC User’s Guide Presario 2700 Series...
- Page 55 Who would ever have thought that your home entertainment center could fit in your lap or on a desktop? Your Notebook computer allows you to listen to your favorite music and (on selected models) watch your favorite movies almost anywhere you go.
-
Page 56: Inserting A Disc
Using the CD or DVD Drive In this section, you will learn how to insert and remove CDs and DVDs. This section covers: Inserting a Disc Removing a Disc Manually Ejecting a Disc To load a disc into the disc drive, complete the following steps: Ä... - Page 57 Ä CAUTION: Before closing the disc tray, ensure that the disc snaps onto the spindle in the center of the tray. You can damage the disc and your Notebook if the disc is not seated properly. 4. Push the tray back into the drive until the drive locks into place.
- Page 58 Using the CD or DVD Drive Did you know... able to eject a disc from the CD or DVD drive. To remove a disc without powering up your Notebook, you must eject the disc from the drive manually. If you need to eject a disc when the power is off, complete the following steps to eject the disc manually: 1.
-
Page 59: Futurebay Ii/Modular Bay
1. Make sure that the FutureBay II/Modular Bay device you wish to unplug is not running. To avoid losing data, Compaq recommends that you use the operating system to completely stop a FutureBay II/Modular Bay drive from running before you remove the drive from your Notebook. - Page 60 Using the CD or DVD Drive 3. Remove the FutureBay II device and insert the next FutureBay II device. Your Notebook will automatically detect that its FutureBay II devices have been swapped. 5–6 Mobile Internet PC User’s Guide Presario 2700 Series...
-
Page 61: Playing Audio Cds
In this section you’ll learn how to play audio and video discs with your Notebook. This section covers: Playing Audio CDs Playing Non-DVD Video Discs Did you know... audio CD. These keys are shown in “Function Key Combinations” in Chapter 2 of this guide. To play an audio CD, insert the disc into the CD or DVD drive. - Page 62 Using the CD or DVD Drive To play a video disc, insert the disc into the CD or DVD drive. After a few seconds, the disc automatically starts playing. If disc play does not start automatically, complete the following steps: 1.
-
Page 63: Using The Dvd Player
In this section you’ll learn how to play DVD discs with your Notebook. This section covers: Using the DVD Player On-Screen Controls Identifying Your DVD Region Setting Your Notebook’s DVD drive reserves the best seat in the house for you, so you can watch all your favorite movies anytime, anywhere. - Page 64 Using the CD or DVD Drive The on-screen controls allow you to quickly and easily access the features of the WinDVD Player. After the WinDVD Player is launched and active, use the controls shown on the WinDVD Player panel to navigate through the DVD titles.
- Page 65 Most DVD discs have a “region” setting that limits the playback of the disc to specific geographical regions. The region code on the DVD drive must match the region code on the DVD disc. To change the DVD drive region, complete the following steps: 1.
- Page 66 Using the CD or DVD Drive Did you know... DVD drive five times. The fifth setting change you make becomes the permanent region on the player. Each time you make a change to the drive’s region setting, the remaining number of changes allowed on the DVD drive is displayed.
-
Page 67: Installing Cd-Rw Software
If your Notebook has a CD-RW drive and the Easy CD Creator Kit, you can create your own audio and data CDs. This section covers: Installing CD-RW Software Accessing CD-RW Software Using CD-RW Software Preventing Buffer Underrun Errors Did you know... own CDs. - Page 68 Using the CD or DVD Drive Did you know... before installing CD-RW software. To install CD-RW Software, complete the following steps: 1. After the CD is inserted, the CD-RW software installation dialog box is displayed. Click the Next button to begin the installation process.
- Page 69 CDs are created using the Easy CD Creator Kit (available on select models). Various uses of the CD-RW drive are shown in the following table: Media Audio Data Direct CD CD Copier Jewel Case Creator Confirm that the Easy CD Creator software has been Note installed before you begin creating CDs.
- Page 70 Using the CD or DVD Drive Did you know... disc unusable. If this occurs, it may be necessary to start over with a new disc and then properly dispose of the old disc. A buffer underrun is an error that occurs when the flow of data to the CD-Recorder is interrupted.
- Page 71 When you’re on the go, AC wall outlets are not always available and sometimes you’ll want to use battery power. This chapter shows you how to maintain and recharge your battery properly so that your Notebook computer has the power necessary to continue running.
-
Page 72: Storing The Battery
See also inserting, removing, and charging your battery. For safety reasons, when operating under AC power, Compaq recommends that you keep a battery installed. This ensures that you have a charged battery when you need it. 6–2 Mobile Internet PC User’s Guide... - Page 73 1 Main Battery To determine the amount of remaining battery power, double-click the Battery Status or Power Meter icon located on the right side of the Windows taskbar. Did you know... optional FutureBay II/Modular Bay battery installed on your Notebook, the FutureBay II/Modular Bay battery discharges before the main battery.
- Page 74 Caring for Your Battery Your Notebook uses a Li-Ion (lithium-ion) battery. If you will not be using your Notebook for an extended period of time (2 weeks), you must take precautions to ensure that your battery is stored correctly. Use your Notebook until the battery is drained to 50 percent. Remove the battery and store it separately.
- Page 75 Do not dispose of batteries with general household waste. Dispose of or recycle them by using a public collection system or returning them to Compaq, your authorized Compaq partners, or their agents. “Government Approvals” section of the Safety and See also Comfort Guide for more information on recycling.
-
Page 76: Calibrating The Battery
Caring for Your Battery All batteries lose their charge if they have not been used for a long period of time. In this section you will become familiar with the following: Calibrating the Battery Maximizing Battery Operating Time Recalibrating the battery simply means recharging the battery to its maximum capacity and resetting the battery gauge to display the level of... - Page 77 Steps 5 through 8 prevent your Notebook from entering Note Sleep mode. These steps also allow the battery to drain faster. 5. Use the Windows Start menu to open the Control Panel. 6. Click the Power Options Options Properties dialog box. You can use your Notebook while the battery is draining or charging.
-
Page 78: Power Management
Caring for Your Battery 8. From the Running on batteries column: a. In the Turn off monitor drop-down list, select Never. b. In the Turn off hard disks drop-down list, select Never. c. In the System standby drop-down list, select Never. d. - Page 79 Select a screen saver that does not generate a lot of graphics or motion. Reduce audio volume or use headphones. Exit modem programs when you are not using them. Remove PC Cards when you are not using them. Remove CDs or DVDs when you are not using them. Use Sleep or Hibernation mode to turn off your Notebook when you are not using it.
- Page 80 Caring for Your Battery Did you know... protect your data and conserve battery and monitor life. This section explains the following main topics: Understanding Power Management Starting and Ending Power Modes Power management lets you reduce your Notebook power consumption. Your Notebook has two power management modes: Hibernation is an energy-saving feature and safeguard that saves information to the hard drive, then turns off your Notebook.
- Page 81 Did you know... takes longer than returning to information saved in Sleep but is faster than returning to your information manually after restarting your Notebook. Ä CAUTION: Although Sleep mode maintains system information and open files, you will lose any unsaved information if you turn off your Notebook before you end the Sleep mode.
- Page 82 Caring for Your Battery If you want to... Put your Notebook into Hibernation manually Wake your Notebook from Hibernation manually * This feature is not available on all operating system platforms. 6–12 Then... ª Press the Power button once. To use Windows to put your Notebook into Hibernation, click the Start button and select the...
- Page 83 If you will not be using your Notebook for an extended period of time, Compaq recommends that you unplug the electrical cord from the outlet and remove the battery while your Notebook is not in use. A low-battery condition exists when the battery has less than 10 percent of its power remaining.
- Page 84 Caring for Your Battery This solution allows you to continue working without being interrupted and simultaneously charges the drained battery. You don’t have to turn off your Notebook before connecting the AC adapter. Your Notebook automatically switches to AC power when you connect the AC adapter.
- Page 85 If you cannot plug in the AC adapter and you do not have a charged replacement battery, start Hibernation by pressing the ª Power button. When a power source (AC or battery) becomes available, press the Power resume your work. Did you know...
- Page 86 Maintaining your Notebook by keeping it clean and keeping the vents free from dust promotes longevity and higher performance. If Notebook components are not cleaned periodically, the probability of system failure increases. The information in this chapter provides helpful instructions for the maintenance and care of your Notebook.
-
Page 87: Cleaning The Exterior Of Your Notebook
Preventive Maintenance This section covers: Cleaning the Exterior of your Notebook Cleaning the Keyboard Cleaning the Display Screen Cleaning the TouchPad Cleaning the External Mouse Caring for Your Notebook Ä CAUTION: When you shut down your Notebook, the power turns off. - Page 88 blow air in and around the keys. Cleaning the keyboard prevents keys from sticking and jamming. It also makes typing a more pleasant experience. Ä CAUTION: Do not use liquids of any kind on the keyboard, because they may permanently damage your keyboard. Ä...
- Page 89 Preventive Maintenance The surface of your display screen may look fuzzy or smudged. You can use a soft, damp, lint-free cloth to wipe the screen clean. If the display screen requires any additional cleaning, use an antistatic screen cleaner or pre-moistened antistatic wipes. Ä...
- Page 90 Å WARNING: Always disconnect the power from your Notebook and disconnect any other peripherals before attempting to clean your Notebook or any of its components. Give your Notebook a safe home. If your Notebook is consistently exposed to direct sunlight, consider moving it. The heat from the sun shining on the display screen can reduce its performance and cause glare.
- Page 91 Your Notebook computer is designed as a durable product. However, when you transport it, Compaq recommends that you put it in a portable notebook carrying case. To enhance the life of your system, follow these Do’s and Don’ts.
- Page 92 Keep your Notebook away from extreme temperatures (for example, in parked cars, near heaters, or near open windows). Extreme temperatures can damage your Notebook or cause it to perform poorly. Use your Notebook only on a solid, flat surface and make sure that no walls or objects are close enough to the vents to reduce airflow.
-
Page 93: Backup Utilities
Basic Solutions, 8-2 Backup Utilities, 8-2 Compaq Help and Support, 8-3 Solution Tables, 8-7 If you cannot solve a problem yourself, you can contact Compaq support for all the help you’ll need. Mobile Internet PC User’s Guide Presario 2700 Series... -
Page 94: Helpful Hints
If you still need help, this section tells you how to quickly find the solution. In this section: Backup Utilities Compaq Help and Support Helpful Hints Finding Solutions Quickly To retrieve files that may have been lost or damaged, you should back up your files regularly with a backup utility. - Page 95 Your Notebook is equipped with Compaq Help and Support, an integrated help and assistance tool from Microsoft and Compaq that provides the following services: Easy access to your Notebook’s built-in product information Preventive care and maintenance assistance for your Notebook...
- Page 96 Compaq Customer Communities or to open a service request online for a Compaq support specialist. To post your question to the Compaq Customer Communities, open Compaq Help and Support and click Join the Compaq Customer Communities. You may want to visit the following Compaq Web sites: www.compaq.com/...
- Page 97 Your online service request will be handled using e-mail between you and your assigned Compaq support specialist. Did you know... Internet for online technical support, you can contact Compaq by telephone. See your Warranty Statement for details. If you encounter minor problems with your Notebook, display, or...
- Page 98 If the listed solution does not fix your problem, try another solution for the symptom or try the solution a second time. If a problem persists and you are unable to resolve it, contact a Compaq authorized service provider. Refer to your Warranty Statement for details. 8–6 Mobile Internet PC User’s Guide...
-
Page 99: Audio And Video
In this section you will find information on: Audio and Video Battery and Power Mass-Storage Games and Internet Keyboard and TouchPad Memory and PC Cards Symptom No sound. Sound is too low. Mobile Internet PC User’s Guide Presario 2700 Series Audio Problem Volume has been... - Page 100 Solutions Symptom Sound is distorted. • Volume missing from the Windows taskbar. 8–8 Audio (Continued) Problem Volume is set too high. icon is The Place volume control icon in the taskbar option has not been selected. Solution Click the Volume icon on the taskbar, then click the Volume slider and...
- Page 101 Symptom Screen is blank. Display only fills part of the screen. Mobile Internet PC User’s Guide Presario 2700 Series Video or Display Problem Your Notebook is in Sleep mode. This is identified when the ª Power light is flashing. The external monitor display is selected.
- Page 102 Solutions Symptom Characters are garbled or the display flashes when your Notebook is connected to an external monitor. Symptom The digital camcorder or 1394 device is not working. 8–10 Video or Display (Continued) Problem The external monitor’s resolution is set too high for your Notebook.
- Page 103 Symptom Battery gauge is not accurate. Battery charging indicator does not display and battery does not charge. Battery charge does not last as long as expected. Battery charge does not last as long as expected. Mobile Internet PC User’s Guide Presario 2700 Series Battery Problem...
- Page 104 Solutions Did you know... DVDs, DVD/CD-RWs, floppies, and the hard disk. Symptom CD/DVD drive cannot read a disc or takes too long to start. DVD player performance is poor when running other programs simultaneously. Display is corrupted when playing some DVD movies.
- Page 105 Symptom Floppy drive is continually active. Floppy drive cannot read a floppy. Mobile Internet PC User’s Guide Presario 2700 Series Floppy Drive Problem The floppy disk is improperly inserted. Floppy diskette is not formatted. Solutions Solution Remove the floppy diskette and reinsert it as follows: 1.
- Page 106 Notebook, and restart the game. Solution Verify Internet settings or contact your ISP for assistance. Reconnect the modem, verifying the telephone line to wall jack connection. Refer to the Compaq Getting Started poster. Presario 2700 Series...
- Page 107 Symptom Mobile Internet PC User’s Guide Presario 2700 Series Internet (Continued) Problem If no dial tone is found, another telephone handset on the same line is not on the receiver. Solutions Solution Verify that all telephone handsets on the same line are on the receiver.
- Page 108 Solutions Symptom Keyboard commands or keystrokes are not recognized by your Notebook. Fn+Num Lk or Shift+Num Lk does not turn the internal NumLock on. When typing, some of the letter keys return numbers to the screen. Cursor does not respond to Touchpad 8–16 Keyboard and TouchPad Problem...
- Page 109 Symptom Cursor does not respond to Touchpad Cursor does not respond. Mobile Internet PC User’s Guide Presario 2700 Series Keyboard and TouchPad (Continued) Problem Program in use has stopped responding to commands. The TouchPad sensitivity settings may need adjustment. The PageUp, PageDown, Home, or End keys were accidentally pressed...
- Page 110 Solutions Symptom Insufficient memory message is displayed. Symptom Your Notebook does not recognize the PC Card. 8–18 Memory Problem All available memory is used by open programs and memory is needed for the desired task. PC Cards Problem PC Card is not fully inserted in the slot or is upside down.
- Page 111 Copy of a file that is kept in case the original is lost or damaged. Backups can be kept on the hard disk, a floppy diskette, an LS Compaq drive, or even a CD. bit The smallest possible piece of computer information—a...
- Page 112 Glossary boot To start or restart the computer. During the startup process, information necessary for the computer to operate is loaded into memory. See also main memory. browser Software that searches for, displays, and downloads text, graphics, sound, and video from the Internet.
- Page 113 CD Compact Disc. Media used in a CD-ROM drive. The disc is a circular piece of plastic that stores digital data on one side, using laser technology. CD-ROM A compact disc with read-only data. You cannot erase or record over the data. CD-RW A compact disc with rewritable data.
- Page 114 Glossary dedicated line A telephone line that is always connected to the modem (inside the computer) to provide constant access to the Internet. A separate telephone line is used for phone calls. See also modem. default The option that the software automatically chooses for you when you do not indicate a choice yourself.
- Page 115 Internet. drive A device that reads and sometimes writes to storage media. Examples are the CD drive, DVD drive, LS Compaq drive, floppy drive, and hard drive. driver Software that enables the operating system to recognize...
- Page 116 Glossary encrypt To translate data into a secret code. You must have access to a secret key or password to read an encrypted file. See also secure Web site. Ethernet The most widely installed local area network technology. An Ethernet LAN (local area network) typically uses coaxial cable or special upgrades of twisted pair wires.
- Page 117 game port A connector on the back of the computer for plugging in a joystick. See also joystick. GIF Pronounced “giff.” A file format for graphics displayed on the Internet. It is easily identified by the file extension .gif. See also JPEG. graphical interface Communication between a person and a computer by means...
- Page 118 Glossary HTML The standard language for documents designed for viewing on the Internet with a browser. Tags embedded in the documents mark the location of other electronic files—including text, graphics, audio, and video files. Click on the links to jump from one document to another.
- Page 119 Internet keyboard A keyboard that resembles a typewriter keyboard, but is equipped with special buttons programmed to connect to the Internet. Internet phone A video telephone that allows you to make long-distance calls over the Internet. ISP Internet Service Provider. A company that provides access to the Internet.
- Page 120 Windows programs. You can insert extra memory (visit the following Web site for more information: www.compaq.com/consumersupport See also RAM and byte. microprocessor A silicon chip inside your computer that processes the instructions and data from input devices (such as...
- Page 121 MIDI Pronounced “middy.” Musical Instrument Digital Interface. An interface that allows the computer to record sounds created by a synthesizer and then manipulate the data to produce new sounds, such as changing the key of a composition. See also interface and digital.
- Page 122 Glossary MP3 The file extension for MPEG, audio layer 3, sound files. This format compresses sound data from a stereo music CD to one-half of its original size without sacrificing sound quality. Because of their small size, MP3 files can easily be transferred over the Internet.
- Page 123 news server A server that receives the Usenet news feed (all the individual messages collected from 100,000 news servers around the world). You access the news server through your Internet Service Provider. See also Usenet and newsgroup. NIC Network Interface Card. An expansion card or other device used to connect a computer to a local area network.
- Page 124 Glossary parallel port A connector on the back of the computer for plugging in a parallel cable attached to a parallel device, such as a printer. Data is transferred, one byte at a time, through eight data wires (one for each bit in the byte).
- Page 125 pop-up menu A list of options that pops up when you right-click an icon on the desktop or taskbar, the vacant part of the desktop, a selection in a document, or a file in Windows Explorer. See also right-click. processor Short for microprocessor.
- Page 126 Glossary RAM Random Access Memory. The main memory of the computer. It holds a copy of the operating system, any programs that are running on the computer, and any data that is being processed. RAM is temporary memory; turning off the computer clears RAM.
- Page 127 scroll mouse A mouse with a scroll wheel (between the two mouse buttons) for automatic scrolling through long documents or Web pages. search engine A program, accessed on the Internet, that allows you to search large databases for information, using keywords or phrases.
- Page 128 Glossary shortcut menu A menu that pops up when you right-click an icon on the Windows desktop or taskbar, the vacant part of the desktop, a selection in a document, or a file in Windows Explorer. The options on the pop-up menu are the most commonly used commands that relate to the item you...
- Page 129 URL Uniform Resource Locator. The address of a Web site, such as: www.compaq.com Mobile Internet PC User’s Guide Presario 2700 Series USB port Universal Serial Bus port. A connector for plugging in multiple, ultra-high-speed peripherals.
- Page 130 Glossary V.90 standard A standard adopted in 1998 to resolve two competing technologies for 56Kbps modems. (If your modem does not conform to the V.90 standard, you can visit the manufacturer’s Web site and download a software upgrade.) V.92 standard A standard adopted in 2000 to improve the V.90 standard in three ways: reduced startup time (time...
- Page 131 Windows desktop The main screen you see when your computer completes startup. The desktop displays icons (small pictures) that represent items in the operating system (such as My Computer and Recycle Bin), shortcuts to programs installed on your computer, and shortcuts to folders or files.
- Page 132 Glossary zipped file A file that has been squeezed to a smaller size by compression software, such as WinZip. An archive (group of related files that are zipped together) can be transmitted as an e-mail attachment much faster than individual files. An archive takes up less storage space on your disk.
- Page 133 1394, troubleshooting 8–10 AC adapter connecting 6–6 connector 2–9 plugging/unplugging 3–3 Audio features digital audio 2–4 troubleshooting 8–7 Back panel components 2–9 Backup procedure 8–2 Battery calibrating 6–6 care of 6–2 charging 3–8 6–8 checking 6–3 connecting AC adapter 6–14 draining 6–7 extra battery 2–8 FutureBay II 2–8...
-
Page 134: Lower Front Panel
Index Cleaning procedures display screen 7–4 exterior 7–2 external mouse 7–5 keyboard 7–2 TouchPad 7–4 Compaq Help and Support 8–3 Components backpanel 2–9 display release latch 2–1 function keys 2–6 Internet Zone buttons and lights 2–4 left panel 2–7 lower front panel 2–3 right panel 2–8... - Page 135 software 4–5 Installing memory 4–7 Internet Zone buttons 3–13 Kensington lock. See Security Keyboard cleaning 7–2 function keys 2–6 Keys, function 2–6 Left panel components 2–7 Li-Ion battery storage 6–4 lock, Kensington. See Security Low battery condition 6–13 Lower front panel 2–3 Maintenance guidelines 7–1 Manual ejection 5–4 Mass-storage sources 3–14...
-
Page 136: Symbols And Graphics
Index function key 2–6 Software, adding and removing 4–5 Solution tables See also Compaq Help and Support audio and video 8–7 battery and power 8–11 keyboard and TouchPad 8–16 mass-storage 8–12 memory and PC cards 8–18 Standby 6–11 Storage drives, identifying 3–14 Storing batteries 6–4...