Table of Contents
Advertisement
Quick Links
Advertisement
Table of Contents

Related Manuals for Palm Tungsten Tungsten W


Summary of Contents for Palm Tungsten Tungsten W
- Page 1 Palm Tungsten W Handheld ™ ™ Getting Started...
- Page 2 In order to comply with FCC radio frequency (RF) exposure guidelines, users must use a Palm™ brand body-worn accessory during body-worn operation. Use of accessories that are not provided by Palm or that were not tested for RF exposure compliance with this product may not comply with the FCC RF exposure safety guidelines and should not be used.
- Page 3 Explosive Atmosphere • Users are advised not to use the equipment when at a refueling station. • Users are reminded of the need to observe restrictions on the use of radio equipment in fuel depots, chemical plants or where blasting operations are in progress.
-
Page 5: Table Of Contents
Establishing a wireless connection ..... . 25 Installing Palm™ Desktop software ..... 26... - Page 6 Contents Performing HotSync operations ......28 Using e-mail on your handheld......30 Identifying incompatible third-party applications .
-
Page 7: Start Here
This version contains important applications that must be present for your handheld to operate correctly. Do not use a Palm™ SD Backup Card to restore your backup data from your previous handheld. You must follow the procedure in “Step 7: Install Palm™... -
Page 8: Understand How Your Wireless Service Works
You cannot use the same username on your new Tungsten W Mac: handheld as you used on your old handheld. When you install Palm Desktop software in Step 7, you must create a new username. If (1) you used the VersaMail™ application on your new IMPORTANT... -
Page 9: Get To Know Your Handheld
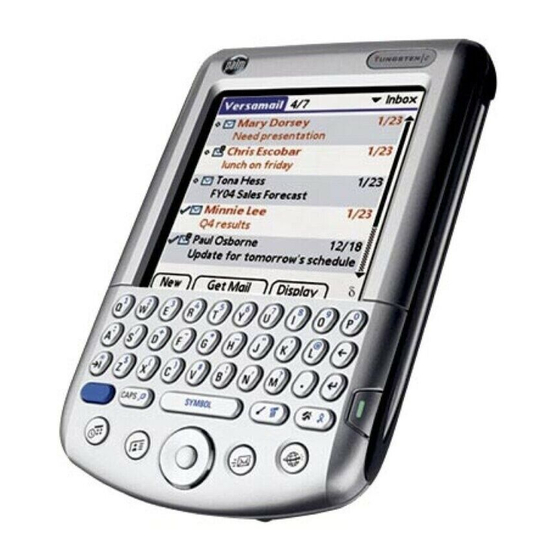
5-way navigator www.palm.com/support/intl HotSync cradle SIM card (optional)* IR port Indicator light Stylus E-mail Wireless/Mobile on & off Start here Power adapter Two CD-ROMs: Palm Desktop software Software Essentials Keyboard Power button/ backlight on & off Expansion card slot Home key... -
Page 10: Charge And Set Up Your Handheld
Charge and set up your handheld Step 1: Connect the adapter and charge your handheld If you are upgrading from another Palm™ handheld and have a Palm cradle already connected, be aware that not all cradles are compatible with your new handheld. We recommend that you use the cradle included in the package with your handheld. -
Page 11: Step 2: Set Up Your Handheld
Step 2: Set up your handheld After you charge your handheld, carefully remove it from the cradle. To remove the handheld from the cradle: Tilt the handheld forward, and then lift it up. To set up your handheld: Press the power button to turn on the handheld, and remove the stylus. -
Page 12: Connect To The Wireless Network
Any other carrier network requires a different device configuration and is not supported by Palm. Most likely, the SIM card either is in your package or was handed to you by a representative of your wireless service provider. In some cases, however, the SIM card is already installed in your handheld. -
Page 13: Step 4: Turn On The Mobile Application
On the back panel of your handheld, slide a thin, flat edge (similar to your thumbnail) into the indent and under the access door until the access door opens. Do one of the following: – If a sample SIM card is present (look for the Sample SIM label), remove it. - Page 14 Connect to the wireless network To turn on the Mobile application: Hold down the Wireless button until the Mobile dialog box appears. If prompted, enter the personal identification number (PIN) given to you by your wireless service provider. Tap On in the Mobile dialog box. The application searches for a connection to the wireless service in your area.
-
Page 15: Step 5: Make A Phone Call From Your Handheld
Confirm that your handheld is connected to the wireless service. Press Home Tap the Mobile icon The name of your wireless service provider appears above the keypad in the Mobile application. Step 5: Make a phone call from your handheld When Mobile is on and within coverage (indicator light is blinking green), insert the headset connector into the voice jack. - Page 16 Connect to the wireless network Mobile opens and displays the onscreen keypad used for dialing. GPRS coverage indicator Place the earpiece comfortably in your ear. Tap the number you want to dial. You can also enter a phone number using the handheld keyboard. Just press the numbers;...
-
Page 17: Install Software
Install software Step 6: Install software from the expansion card If your package does not include an expansion card or if the software on the expansion card was already installed by your wireless service provider, skip this step. Remove the placeholder card: Push lightly against the card with your thumb. -
Page 18: Step 7: Install Palm™ Desktop Software
If you are upgrading from another Palm™ handheld, do not IMPORTANT begin this procedure until you read “Follow guidelines for upgrading from another Palm™ handheld” in “Start here, ” at the beginning of this guide. If (1) you used the VersaMail™ application on your new IMPORTANT Tungsten™... -
Page 19: Step 8: Set Up Your Handheld To Access Your E-Mail
Palm Desktop Installer icon. Mac users, keep these points in mind: – If you are upgrading from another Palm handheld that has a username, you cannot use that old username on your new Tungsten W handheld. So when the Installer asks you to select your old username or create a new one, you must create a new username. - Page 20 Install software To set up an e-mail account: Press the E-mail button. The VersaMail e-mail application opens. From the VersaMail main screen, press Command Stroke + W. Alternately, press Function Account Setup on the Accounts menu. From the Account Setup screen, tap New. Enter the following: Enter a descriptive name for the account, such as Account Name:...
-
Page 21: Learn More About Your Handheld
For more information on setting up your e-mail account, see IMPORTANT the Handbook for Palm™ Tungsten™ W Handhelds. The handbook includes information on filtering, sorting, deleting, and synchronizing; and also on signatures, icons, folders, and attachments. For information on how to locate your handbook, see “Read the Handbook, ” in “Learn more about your handheld. -
Page 22: Learn How To Use The Navigator
Learn more about your handheld Function twice to lock it. Function lock makes it easy to enter long strings of numbers like credit card numbers and phone numbers. Press Function again to unlock it. To review the Keyboard tutorial, press Home the Applications Launcher. - Page 23 Navigator: navigation basics To go to the Applications Launcher anytime To insert a highlight To view a highlighted item To move in the direction of an onscreen arrow To close a dialog box Learn more about your handheld Hold down Select until the Applications Launcher appears.
- Page 24 Learn more about your handheld Navigator: special features To see the note attached to the highlighted Date Book event To check off a completed To Do List item To use Quick Look Up in Address Book To use Quick Connect to dial numbers and initiate SMS or e-mail messages Press Select.
-
Page 25: Enter And Synchronize Your Information
Enter and synchronize your information This section explains how to enter information into both Palm™ Desktop software and your handheld, and then how to synchronize the two with a HotSync entered in one place shows up in both places. Users of Microsoft Outlook: If you chose to synchronize with... -
Page 26: Read The Handbook
The electronic Handbook contains comprehensive information about all aspects of your handheld. The Handbook opens in Adobe Acrobat Reader. If you do not have Acrobat Reader, you can install it from the Palm Desktop software CD-ROM. To open the Handbook: : In Palm Desktop software, click Help in the menu bar. -
Page 27: Take The Quick Tour
: Open the Palm folder, and then open the Documentation folder. Double-click Handbook.pdf. The Bookmarks tab displays the table of contents. Click a topic, and it appears in the right window pane Click Index to search an alphabetical listing of information... -
Page 28: Use Your Handheld Safely
Learn more about your handheld Use your handheld safely For more safety information, see the reverse of the title IMPORTANT page of this guide. When you are using your handheld while driving, be sure to obey the rules of the road: Keep your hands on the wheel and your eyes on the road. -
Page 29: Troubleshooting
Upgrading from another Palm These problems may occur if your are upgrading from another Palm™ handheld. Problem: You upgraded using your username from your old Palm handheld and you ™ used the VersaMail e-mail application on your Tungsten ®... -
Page 30: Charging The Handheld
Problem: Upgrading from a Palm m515 handheld is incomplete. When upgrading from a Palm m515 handheld, if the memory on the m515 handheld is almost full, you may not be able to transfer all applications and data to your Tungsten™ W handheld. -
Page 31: Turning On The Handheld
Turning on the handheld This problem may occur during Step 2. Problem: Handheld does not turn on. If your handheld has been charged for at least two hours and it seems not to turn on when you press the power button, try the following: Press the Date Book application button button to ensure your handheld is turned on. -
Page 32: Installing Palm™ Desktop Software
If you’re outdoors, move away from overhead electrical wires. Move from under trees. Installing Palm™ Desktop software These problems may occur during Step 7. Problem: On a Windows computer, Palm Desktop Installer does not automatically appear. Do the following: Click the Start button. - Page 33 Problem: On a Mac computer, you need to complete the installation of files to your handheld. Do the following: Open Palm Desktop software and in the User pop-up menu on the toolbar, select your username. From the HotSync menu, select Install Handheld Files.
-
Page 34: Performing Hotsync Operations
Problem: Dialog box appears prompting for permission to install a driver that has not been digitally signed. Answer Yes to this dialog box. The Palm USB driver does not have a digital signature. Problem: HotSync operation does not execute during installation. - Page 35 Then press the HotSync button on the cradle. If the HotSync icon is not in the system tray, click the Start button and select Programs. Select Palm Desktop, and then select HotSync Manager. HotSync Manager starts and the icon appears in the system tray. Follow the instructions in Step a.
-
Page 36: Using E-Mail On Your Handheld
If you are using a serial-port connection, double-click the HotSync Manager icon in the Palm folder, and then click the Connection Settings tab. Make sure that PalmConnect is selected and that the port selection matches the port to which you connected the HotSync cradle/cable. - Page 37 Check with your ISP or e-mail service provider for e-mail account settings and policies before calling Palm Customer Support. Palm Customer Support representatives do not know the settings or policies, so you must supply that information before the support representatives can help you.
-
Page 38: Identifying Incompatible Third-Party Applications
Palm handheld. Some third-party applications, however, may not have been upgraded to be compatible with your new Palm handheld, or they may not have been designed to incorporate all the features available in your handheld. - Page 39 . On that page, click the link leading to information on tungstenw the compatibility of third-party applications. Read the readme file for your handheld. After you install Palm Desktop software on your computer, open the Palm folder. The readme file is located in the Helpnote folder. Troubleshooting www.palm.com/support/...
- Page 40 Troubleshooting...