JVC pandora KD-X470BHS Instruction Manual
Digital media receiver
Hide thumbs
Also See for pandora KD-X470BHS:
- Quick start manual (33 pages) ,
- Instruction manual (152 pages)

Related Manuals for JVC pandora KD-X470BHS


Summary of Contents for JVC pandora KD-X470BHS
- Page 1 KD-X470BHS / KD-X370BTS / KD-X37MBS / KD-X270BT / KD-SX26BT DIGITAL MEDIA RECEIVER INSTRUCTION MANUAL...
-
Page 2: Table Of Contents
Contents Before Use ....................3 References ....................37 Basics ......................4 Maintenance More information Getting Started ..................5 Change the display information 1 Cancel the demonstration Troubleshooting ..................40 2 Set the clock and date Installation/Connection ............... 43 3 Set the basic settings HD Radio™... -
Page 3: Before Use
Before Use IMPORTANT • Depending on the types of cars, the antenna will automatically extend when you turn on the unit with the antenna control wire connected • To ensure proper use, please read through this manual before using this (page 45). -
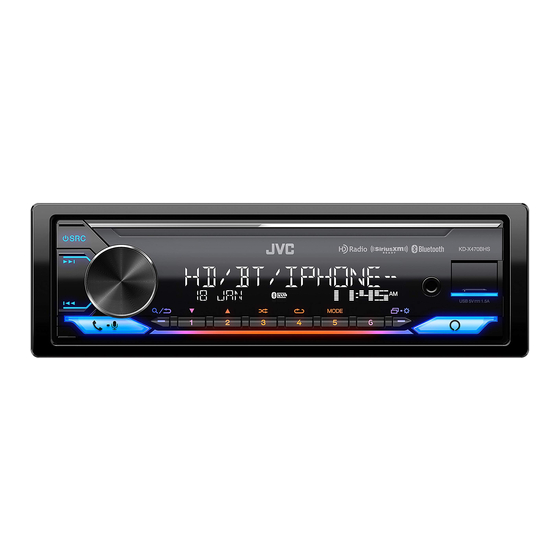
Page 4: Basics
Basics Faceplate Attach KD-X470BHS/KD-X370BTS/KD-X37MBS: Volume knob Display window* Detach Detach button KD-X270BT/KD-SX26BT: How to reset Reset the unit within 5 seconds after detaching the faceplate. * Only for illustration purpose. On the faceplate Turn on the power Press B SRC. •... -
Page 5: Getting Started
Getting Started Basics Remote control (RM-RK52) (except for KD-SX26BT) This unit can be remotely controlled with an optionally purchased remote control. Remote sensor (Do not expose to bright sunlight.) Cancel the demonstration When you turn on the power for the first time (or [FACTORY RESET] is set to [YES], see page 6), the display shows: “CANCEL DEMO”... -
Page 6: Set The Basic Settings
Getting Started Press to exit. [F/W UPDATE] To return to the previous setting item, press [UPDATE SYSTEM]/[UPDATE HD] [F/W UP xxxx]/ [YES]: Starts upgrading the firmware. ; [NO]: Cancels (upgrading is not Set the basic settings [F/W UP Vxx] activated). Press and hold Turn the volume knob to select an item (see the following table), then press the knob. -
Page 7: Hd Radio™ Tuner
HD Radio™ Tuner (for KD-X470BHS) You can tune in to both conventional and HD Radio broadcasts. Turn the volume knob to select a preset number, then press the knob. “MEMORY” appears once the station or channel is stored. Select a stored station or channel Press one of the number buttons (1 to 6). - Page 8 HD Radio™ Tuner (for KD-X470BHS) Display received emergency alert messages 4 Set the activation day*2 and time. “M” indicator lights up when complete. The received emergency alert messages are stored in the Alert Message List, and you can check them later. Radio Timer will not activate for the following cases.
-
Page 9: Radio
Radio (for KD-X370BTS/KD-X37MBS/KD-X270BT/KD-SX26BT) Select a stored station Press one of the number buttons (1 to 6). (or) Press Turn the volume knob to select a preset number, then press the knob. Other settings Search for a station Press and hold Press B SRC repeatedly to select FM or AM. Turn the volume knob to select an item (see the following table), then Press S / T (or press H / I on the remote control) to search for a press the knob. -
Page 10: Usb/Ipod
USB/iPod Radio (for KD-X370BTS/KD-X37MBS/KD-X270BT/KD-SX26BT) Connect a USB device [SSM] [SSM 01–06]/[SSM 07–12]/[SSM 13–18]: Automatically presets up to 18 stations for FM. “SSM” stops flashing when the first 6 stations are stored. Select [SSM 07–12]/[SSM 13–18] to store the following 12 stations. USB input terminal USB 2.0 cable* (commercially available) [IF BAND] [AUTO]: Increases the tuner selectivity to reduce interference noises from... - Page 11 USB/iPod Basic operations Select music drive While in USB source, press 5 MODE repeatedly. Stored songs in the following drive will be played back. • Selected internal or external memory of a smartphone (Mass Storage Class). • Selected drive of a multiple drive device. Select control mode Selectable source: •...
-
Page 12: Aux
USB/iPod You can listen to music from a portable audio player via the auxiliary input Quick search (applicable only for USB source) jack. If you have many files, you can search through them quickly. Preparation: Press Select [ON] for [BUILT-IN AUX] in [SOURCE SELECT]. (Page 6) Turn the volume knob to select a folder/list, then press the knob. -
Page 13: Pandora
Pandora® You can listen to Pandora on the following device: On the faceplate On the remote control • KD-X470BHS/KD-X370BTS/KD-X37MBS: iPhone/iPod touch (via Bluetooth Press d. Play back/pause Press the volume knob. or via USB input terminal) or Android device (via Bluetooth) Press T. -
Page 14: Spotify
Spotify Pandora® You can listen to Spotify on the following device: Bookmark current song information • KD-X470BHS/KD-X370BTS/KD-X37MBS: iPhone/iPod touch (via Bluetooth Press and hold the volume knob. or via USB input terminal) or Android device (via Bluetooth) “BOOKMARKED” appears and the information is stored to your device. •... - Page 15 Spotify Search for a song or station On the faceplate On the remote control Press d. Play back/pause Press the volume knob. Press Turn the volume knob to select a list type, then press the knob. Press S*1 / T. Press H*1 / I.
-
Page 16: Siriusxm® Radio
SiriusXM® Radio (for KD-X470BHS/KD-X370BTS/KD-X37MBS) Only SiriusXM® brings you more of what you love to listen to, all in one place. Start listening Get over 140 channels, including commercial-free music plus the best sports, news, talk, comedy and entertainment. Welcome to the world of satellite Press B SRC repeatedly to select SIRIUS XM. - Page 17 SiriusXM® Radio (for KD-X470BHS/KD-X370BTS/KD-X37MBS) Select a stored channel SmartFavorites and TuneStart™ Press one of the number buttons (1 to 6) (or press J / K on the remote User preset channels are initially assigned as the SmartFavorites channels. control). SmartFavorite channel is available with SXV200 or later SiriusXM tuner (or) models.
- Page 18 SiriusXM® Radio (for KD-X470BHS/KD-X370BTS/KD-X37MBS) TuneScan™ On the faceplate Select a stored Press one of the number buttons (1 to 6). You can get a short preview of the songs that you have missed on each of SmartFavorite your SmartFavorites music channels or a music channel currently tuned into. Press channel Turn the volume knob to select PRESET, then press...
-
Page 19: Using Other Applications
1 Press the volume knob to enter [NEW CODE]. 2 Turn the volume knob to select a number. You can control the JVC car receiver from the following device using 3 Press S / T to move to the entry position. -
Page 20: Bluetooth
Bluetooth® Using Other Applications Repeat step 2 until the desired item is selected or activated. • Depending on the Bluetooth version, operating system and the Press to exit. firmware version of your mobile phone, Bluetooth features may not work with this unit. To return to the previous setting item, press •... - Page 21 Bluetooth® • This unit supports Secure Simple Pairing (SSP). Pair and connect a Bluetooth device for the first time • Up to five devices can be registered (paired) in total. Press B SRC to turn on the unit. • Once the pairing is completed, the Bluetooth device will remain registered in the unit even if you reset the unit.
-
Page 22: Bluetooth - Mobile Phone
Bluetooth® Bluetooth — Mobile phone The following operations may differ or be unavailable depending on the connected phone. On the faceplate On the remote control First incoming call... Answer a call Press J / K / H / I. Press or the volume knob. - Page 23 Bluetooth® *1 This adjustment will not affect the volume of the other sources. Default: [XX] *2 Press and hold VOL + to continuously increase the volume to 15. [SETTINGS] *3 Operations may vary according to the connected Bluetooth device. [AUTO ANSWER] [01 SEC] to [30 SEC]: Answers an incoming call automatically in the selected time (in seconds).
- Page 24 Bluetooth® Store a contact in memory [RECENT CALL] (Applicable only if the phone supports PBAP.) 1 Press the volume knob to select a name or a phone number. You can store up to 6 contacts into the number buttons (1 to 6). •...
- Page 25 Bluetooth® Default: [XX] Bluetooth compatibility check mode [BT MODE] You can check the connectivity of the supported profile between the [PHONE SELECT] Selects the phone or audio device to connect or disconnect. Bluetooth device and the unit. “ ” appears in front of the device name when connected. •...
- Page 26 Bluetooth® The connectivity result flashes on the display. Bluetooth — Audio “PAIRING OK” and/or “HANDS-FREE OK”*1 and/or “AUD.STREAM OK”*2 and/ or “PBAP OK”*3: Compatible *1 Compatible with Hands-Free Profile (HFP) *2 Compatible with Advanced Audio Distribution Profile (A2DP) *3 Compatible with Phonebook Access profile (PBAP) After 30 seconds, “PAIRING DELETED”...
-
Page 27: Bluetooth Audio
AMAZON ALEXA Bluetooth® (for KD-X470BHS/KD-X370BTS/KD-X37MBS) Alexa is the cloud-based voice service developed by Amazon. You can ask On the faceplate On the remote control Alexa to play music, get weather reports, traffic information, control smart Press 4 B repeatedly. Repeat play home devices, shop on Amazon, search the internet, set reminders and more. - Page 28 AMAZON ALEXA (for KD-X470BHS/KD-X370BTS/KD-X37MBS) Option B: Manual Pairing Start up the Alexa mobile application and go to the “Devices” tab. Tap the “ + “ icon at the top right corner. Tap “Add Device”. Tap “Automotive Accessory” or “Headphones” from the list of device types.
-
Page 29: Audio Settings
Audio Settings AMAZON ALEXA (for KD-X470BHS/KD-X370BTS/KD-X37MBS) Start listening While in Alexa idle state... Press on the unit to activate Alexa. The display shows: “LISTENING...”. Communicate with Alexa via the connected microphone. (Page 20) During music playback in ALEXA source, you can perform the following operations: Press and hold Turn the volume knob to select an item (see the following table), then... - Page 30 Audio Settings [PRO EQ] Adjusts your own sound settings for each source. [FADER] (Not applicable when 3-way crossover is selected.) • The settings are stored to [USER] in [PRESET EQ]. [POSITION R15] to [POSITION F15] ([POSITION 00]): Adjusts the front • The settings made may affect the current settings of [EASY EQ]. and rear speaker output balance.
- Page 31 Audio Settings Speaker output settings [SOUND EFFECT] [SPK/PRE OUT] [SPACE ENHANCE] (Not applicable for FM/AM source.) (Applicable only if [X ' OVER TYPE ] is set to [2-WAY]) (page 30) [SMALL]/[MEDIUM]/[LARGE]: Virtually enhances the sound space. ; Select the output setting for the speakers [SPK/PRE OUT], based on the speaker [OFF]: Cancels.
- Page 32 Audio Settings Connection via speaker leads Crossover settings You can also connect the speakers without using an external amplifier Below are the available setting items for 2-way crossover and 3-way but still being able to enjoy the subwoofer output with these settings. crossover.
- Page 33 Audio Settings 2-way crossover setting items [SUBWOOFER [SW LPF FRQ] [30HZ]/[40HZ]/[50HZ]/[60HZ]/[70HZ]/[80HZ]/ LPF]*2*3 [90HZ]/[100HZ]/[120HZ]/[150HZ]/[180HZ]/ [SPEAKER SIZE] [220HZ]/[250HZ]/[THROUGH] [FRONT] [SIZE] [3.5"]/[4"]/[4.75"]/[5"]/[6.5"]/[6.75"]/[7"]/ [SW LPF SLOPE] [–06DB]/[–12DB]/[–18DB]/[–24DB] [4×6]/[5×7]/[6×8]/[6×9]/[7×10] [SW LPF PHASE] [REVERSE] (180°)/ [NORMAL] (0°) [TWEETER] [SMALL]/[MIDDLE]/[LARGE]/[NONE] (not [SW LPF GAIN] [–08DB] to [00DB] connected) [REAR]*1 [3.5"]/[4"]/[4.75"]/[5"]/[6.5"]/[6.75"]/[7"]/[4×6]/[5×7]/[6×8]/...
- Page 34 Audio Settings Digital Time Alignment settings [MID RANGE] [HPF FRQ] [30HZ]/[40HZ]/[50HZ]/[60HZ]/[70HZ]/[80HZ]/[90HZ]/ [100HZ]/[120HZ]/[150HZ]/[180HZ]/[220HZ]/[250HZ]/ Digital Time Alignment sets the delay time of the speaker output to create a [THROUGH] more suitable environment for your vehicle. [HPF SLOPE] [–06DB]/[–12DB] • For more information, see “Determining the delay time automatically” on page 35.
-
Page 35: Display Settings
Display Settings Audio Settings Zone identification for brightness settings Determining the delay time automatically If you specify the distance from the currently set KD-X470BHS/KD-X370BTS/KD-X37MBS: listening position to every speaker, the delay time will be automatically calculated. 1 Set [POSITION] and determine the listening position as the reference point (the reference point for [FRONT ALL] will be the center between the right and left in the front seats). - Page 36 Display Settings *1 The illumination control wire connection is required. (Page 45) Press and hold *2 Some characters or symbols will not be shown correctly (or will be blank). Turn the volume knob to select an item (see the following table), then *3 Functionality depends on the type of phone used.
-
Page 37: References
Detach the faceplate and clean the connector gently • You cannot operate iPod if “JVC” or “ ” is displayed on iPod. with a cotton swab. Be careful not to damage the • Depending on the version of the operating system of the iPod/iPhone, some functions may not connector. -
Page 38: Change The Display Information
References About AMAZON ALEXA Change the display information • Alexa is a third party service, therefore the specifications are subject to change without prior Each time you press , the display information changes. notice. Accordingly, compatibility may be impaired or some or all of the services may become •... - Page 39 References Source name Display information: Main (Supplementary) BT AUDIO/ALEXA Song title (Artist) Song title (Artist) with Music Synchronization Effect*2 Song title (Album title) Song title (Date) Playing FM or AM (For KD-X370BTS/KD-X37MBS) time (Date) back to the beginning Frequency (Date) Frequency (Date) with Music Synchronization Source name (Date) Source name (Date) with Music...
-
Page 40: Troubleshooting
Troubleshooting References Source name Display information: Main Symptom Remedy SPOTIFY BT Context title Context title with Music Synchronization Effect* Sound cannot be heard. • Adjust the volume to the optimum level. Song title Artist Album title Playing Time Date back •... - Page 41 Troubleshooting Symptom Remedy Symptom Remedy “UNSUPPORTED DEVICE” • Check whether the connected USB device is compatible “ADD ERROR” New station creation is unsuccessful. appears. with this unit and ensure the file systems are in “CHK DEVICE” Check the Pandora application on your device. supported formats.
- Page 42 Troubleshooting Symptom Remedy Symptom Remedy “CH LOCKED LOCK CODE?” The selected channel is locked. Enter the correct pass code Echo or noise is • Adjust the microphone unit’s position. (Page 20) to unlock. (Page 18) heard during a phone • Check the [ECHO CANCEL] setting. (Page 23) conversation.
-
Page 43: Installation/Connection
Installation/Connection Troubleshooting Symptom Remedy This section is for the professional installer. For safety’s sake, leave wiring and mounting to professionals. Consult the car audio dealer. “H/W ERROR” Reset the unit and try the operation again. If “H/W ERROR” appears again, consult your nearest service center. WARNING “SWITCHING NG”... - Page 44 Installation/Connection Part list for installation Installing the unit (in-dash mounting) (A) Faceplate (×1) (B) Trim plate (×1) Do the required wiring. (Page 45) (C) Mounting sleeve (×1) (D) Wiring harness (×1) Hook on the top side Orientate the trim Dashboard of plate as illustrated your car before fitting.
- Page 45 Installation/Connection Wiring connection IMPORTANT We recommend installing the unit with a commercially available custom wiring harness specific for your car and leave this job to professionals for your safety. Consult your car audio dealer. Antenna terminal Vehicle Fuse (10 A) dashboard Factory wiring harness (vehicle)
- Page 46 Installation/Connection Connect external components Connect external amplifiers via output terminals Signal cord (not supplied) JVC Amplifier* Output terminals Remote wire (not supplied) To remote lead (blue/white) of the No Part wiring harness. (Page 45) For KD-X470BHS: MIC (Microphone input terminal) (page 20) * Firmly connect the ground wire of the amplifier to the car’s chassis to avoid damaging the unit.
-
Page 47: Specifications
Specifications KD-X470BHS: KD-X370BTS/KD-X37MBS/KD-X270BT/KD-SX26BT: Frequency Range 87.9 MHz — 107.9 MHz (200 kHz step) Frequency Range 87.9 MHz — 107.9 MHz (200 kHz step) 87.5 MHz — 108.0 MHz (50 kHz step) 87.5 MHz — 108.0 MHz (50 kHz step) Usable Sensitivity (S/N = 26 dB) 7.2 dBf (0.63 μV/75 Ω) Usable Sensitivity (S/N = 26 dB) 8.2 dBf (0.71 μV/75 Ω) - Page 48 Specifications Signal-to-Noise Ratio (1 kHz) KD-X470BHS: 98 dB Maximum Output Power 50 W × 4 or 50 W × 2 + 50 W × 1 (Subwoofer = 4 Ω) KD-X370BTS/KD-X37MBS/KD-X270BT/KD-SX26BT: 99 dB Full Bandwidth Power 22 W × 4 (at less than 1 % THD) Dynamic Range 93 dB Speaker Impedance...