Advertisement
Quick Links
TASKalfa 3554ci/6054ci/7004i Device Setup Procedure
[Introduction]
This document describes an overview of device setup installation.
Please refer to the Service Manual for detailed instructions.
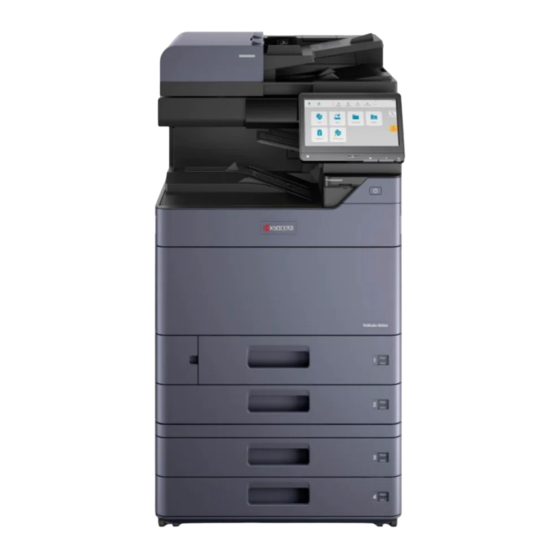
The device is divided into three boxes.
・
Main Body :
・
Document Processor :
・
Option Cassette :
The Additional device is also divided into three boxes for each.
・
Main Body :
・
Document Processor :
・
Option Cassette :
・
Main Body :
・
Document Processor :
・
Option Cassette :
You don't need to reuse the wooden frame, but please keep the cardboard box
because you need it if you send it again. (However, you don't need to return this device
to us.)
[Setup Procedure 3554ci]
STEP1
First of all, connect the Main Body and the Option Cassette. The Option Cassette has
rollers, so it will be easier to move if you connect it first.
Please open the Option Cassette cardboard. This is the base. (It's a medium size
cardboard.)
For information about opening, refer to
Please open the Main Body cardboard. (Largest size cardboard.)
TASKalfa 3554ci
DP-7140
PF-7150
TASKalfa 6054ci
DP-7160
PF-7150
TASKalfa 7004i
DP-7150
PF-7150
2-40 (page 92)
2021-06-04 V1.7
Kyocera Document Solutions Inc.
in the Service Manual.
Masaki Sone
Advertisement

Summary of Contents for Kyocera TASKalfa 3554ci
- Page 1 TASKalfa 3554ci/6054ci/7004i Device Setup Procedure 2021-06-04 V1.7 Kyocera Document Solutions Inc. Masaki Sone [Introduction] This document describes an overview of device setup installation. Please refer to the Service Manual for detailed instructions. The device is divided into three boxes. ・...
- Page 2 For information about opening, refer to 2-4 (page 56) in the Service Manual. After opening each one, connect the option cassette under the main body. Refer to 9-55 (page 1786) in the Service Manual for installation instructions. Basically, it is possible to connect by just putting the main body on the option cassette. However, be careful not to break the connector when putting the main body on the option cassette.
- Page 3 [Document Processor] Place the document on the Document Processor and start a single copy. If the document is scanned from the Document Processor, it is working properly. [Option Cassette] Set only the Option Cassette with A4 Paper. Place the document on the Document Processor and start a single copy. If the paper is fed from the Option Cassette, it is working properly.
- Page 4 STEP2 Next, connect the Document Processor on the Main Body. Please open the Document Processor cardboard. (It's a minimum size cardboard.) For information about opening, refer to 2-5 (page 106) in the Service Manual. After opening one, connect the document processor on the main body. Refer to 9-168 (page 2248) in the Service Manual for installation instructions.
- Page 5 This completes the setup as a device. There is a limit to the amount of Toner, so please refrain from large printing/coping as much as possible. [Setup Procedure 7004i] STEP1 First of all, connect the Main Body and the Option Cassette. The Option Cassette has rollers, so it will be easier to move if you connect it first.
- Page 6 STEP3 When the above steps are completed, the physical connection is finished. [Note:] This device is for 100V, so be sure to connect it to 100V (or 120V) power supply. If connect it to 200V by mistake and press the main switch, there is high risk of device broken.
- Page 7 [for the Security Test] Make sure the hard disc is installed or not before starting the test by viewing [Device Information] on the home screen of the device operation panel. If the hard disc is installed, “Large Capacity Storage: HDD320GB” is displayed. If not, “Large Capacity Storage:Not Installed”...
- Page 8 [Other setup information] ・ Command Center RX default password From this product, the default password to access from Command Center RX (Web browser) has been changed. ID: “Admin” Pass: Serial Number of each device You can confirm the serial number to open the Configuration page of CommandCenter RX or Device Information screen of Operation Panel.
- Page 9 If the certificate is not imported correctly, an error message is displayed here. Please try again to install the certificate 10. Select [Kyocera] and TASKalfa **** If the installation is successful, when open the printer icon → right-click → Properties of the printer, the properties screen will be displayed.
- Page 10 2. The optional function screen is displayed. Select “Data Security Kit 10” and press [Activate]. 3. The license key screen is displayed. Enter the following license key and press [Official]. TASKalfa 3554ci : 1310-7825-4801-9031-9939 TASKalfa 6054ci : 0738-1335-0037-7277-9222 TASKalfa 7004i : 1069-1544-7708-2848-6869...
- Page 11 4. Turn the power switch on again following to the indication in the panel screen. 5. Confirm that Data Security Kit 10 is enabled by the [Device Information] > [Option/Application]. “Data Security Kit 10: Installed” in the Software area. [Firmware Update] Perform the Firmware update as following steps: 1.
- Page 12 1. Open the [Right Cover] of the device. If open the right cover, the engine (motor) will not drive. It needs to be opened to stop driving the engine, so please make sure to open it. 2. Update the following special firmware. * When you unzip the ZIP file, a folder is created, but please copy all files such as ‘.bin’...
- Page 13 6. The next turn-on may cause another error, but please update the system firmware accordingly. 3554ci: 2XD_S000.002.266 6054ci: 2XC_S000.002.333 7004i: 2XF_S000.002.333 7. Close the [Right Cover] of the device and turn on.
- Page 14 [How to change SSD model] To change to the SSD model, you must first disable “encryption/overwrite function”. To disable this function, perform the following steps:. 1. Update the “special firmware” for changing. 2. After Update, turn the power off/on and boot the device. 3.


