Table of Contents
Advertisement
Available languages
Available languages
Quick Links
Advertisement
Chapters
Table of Contents

Related Manuals for Britax Willow Aspen


Summary of Contents for Britax Willow Aspen
- Page 1 Willow Car Seat with Aspen Base User Guide Guía del usuario...
- Page 2 WILLOW , ASPEN , ReboundReduce , CLICKTIGHT®, and BRITAX® are trademarks owned by Britax. All rights reserved. ©2022 Britax Child Safety, Inc. This product and its components are subject to change without notice. Printed in China. WILLOW , ASPEN , ReboundReduce , CLICKTIGHT®, y BRITAX®...
-
Page 3: Table Of Contents
Child Restraint Overview �������������������������������������������������������������������������������������������3 Safety Information �������������������������������������������������������������������������������������������������������� 6 Important Notes .............................9 Certification ���������������������������������������������������������������������������������������������������������������������� 11 Registration ................................12 Child Fit Information ..........................13 Using with the Base ����������������������������������������������������������������������������������������������������14 Overhang ................................14 Adjusting the Recline Angle ......................14 ClickTight Indicator ............................ 16 Lap-Shoulder Belt Installation ......................17 Lap Belt Installation ..........................20 Lower Connector Installation ......................23 Attaching the Child Restraint to the Base ................. - Page 4 Adjusting the Buckle Position ........................47 Adjusting the Hip Slots .............................50 Carry Handle Position ............................53 Head Pad & Infant Positioning Pillow ....................54 Britax Strollers ................................55 Using the Lower Anchors ..........................56 Vehicle Compatibility ��������������������������������������������������������������������������������������������������������57 Care and Maintenance��������������������������������������������������������������������������������������������������� 60 Cleaning ������������������������������������������������������������������������������������������������������������������������������������ 69 Warranty ������������������������������������������������������������������������������������������������������������������������������������70...
-
Page 5: Child Restraint Overview
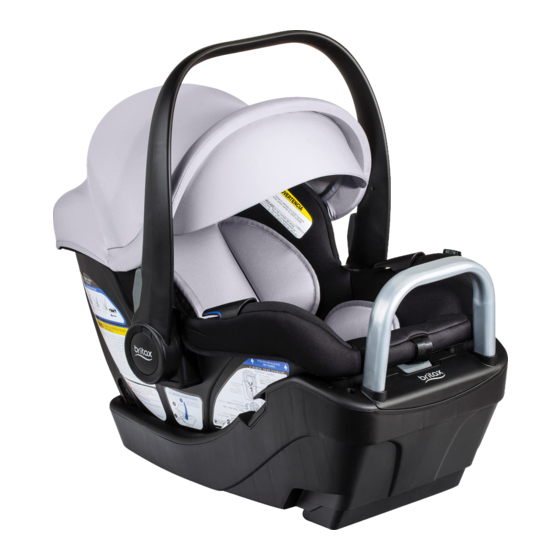
Child Restraint Overview Aspen Infant Seat Base Recline Button 8. ClickTight Indicator Window 2. ClickTight Locking Point 9. Lower Connectors 3. Recline Angle Indicator (2) 10. Lower Connectors Storage 4. Recline Foot (under base) Compartment Lid 5. Belt Guides (2) 11. - Page 6 Willow Carrier Carry Handle 9. Serial Number & Manufacture Date Label 2. Carry Handle Adjustment Buttons 10. Harness Straps 3. Canopy 11. Harness Yoke 4. European Belt Guide 12. Harness Slots 5. SafeCell ® 13. Hip Slots 6. Seat Cover 14.
- Page 7 15. Head Restraint 23. Harness Buckle 16. Infant Positioning Pillow (optional) 24. Comfort Pads (optional) 17. Harness Adjuster Lever 25. Harness Straps (under cover) 26. Buckle Strap 18. Harness Adjuster Strap 27. Belly Pad (optional) 19. Head Pad Pillow (optional) 20.
-
Page 8: Safety Information
Safety Information WARNING! Failure to follow all warnings and instructions could result in SERIOUS INJURY OR DEATH. Read these instructions before use of the child restraint. • Follow all instructions on this child restraint and in the written instructions located in the base storage compartment. Keep the instructions with the restraint for future use. - Page 9 • NEVER leave child unattended. • The use of non-Britax covers, inserts, toys, accessories, or tightening devices is not approved by Britax. Their use could cause this child seat not to perform as intended in a crash.
- Page 10 • ALWAYS lift infant car seat by both sides of carry handle after installation in base to verify that it is secure. • DO NOT use the infant carrier if it is damaged or broken. • To prevent injury due to deterioration or hidden damage, DO NOT use this infant car seat and base if it is older than six (6) years or has been in a moderate or severe crash.
-
Page 11: Important Notes
Important Notes • Discontinue use of this child seat if it has been in a moderate or severe crash. It is not necessary to replace a car seat after a minor crash defined by the U.S. National Highway Traffic Safety Administration (NHTSA) as: a. - Page 12 • Do not allow children to play with this child seat. • Do not use anything to raise the child seat off vehicle seat except as described in these instructions. In a crash, this could cause the child seat not to perform as intended. •...
-
Page 13: Certification
Certification Motor Vehicles This child restraint system conforms to all applicable Federal Motor Vehicle Safety Standards (FMVSS 213). This Restraint is Certified For Use in Motor Vehicles and Aircraft. Certified for Aircraft Travel Aircraft - Baseless Installation with Lap Belt (see page 40) ‐... -
Page 14: Registration
Send your name, address, e-mail address if available and the restraint’s model number and manufacturing date to Britax Child Safety, Inc. P.O. Box 91167 Allentown, PA 18109-9925, or call 1-888-427-4829 or 1-704-409-1699, or register online at us.britax.com/registration. -
Page 15: Child Fit Information
Child Fit Information Use rear-facing only with children: • who weigh between 4 and 30 lbs (1.8 and 13.6 kg) • who are 32” (81.3 cm) in height or less and • when the top of the head is 1” (2.5 cm) or more below the top of the child restraint and •... -
Page 16: Using With The Base
Using with the Base Before installing the child restraint: ‐ Check that your vehicle seat belt is compatible with the child restraint by referring to your vehicle owner’s manual and page 59 in this user guide. Overhang It is important that the base of the child restraint rests completely flat on the vehicle seat with no side overhang. - Page 17 3. Move the base up or down until the entire blue marker is completely visible between the two lines on the recline angle indicators. IMPORTANT: After the child is secured in the child restraint and the child restraint is attached to the base, ensure that the entire blue marker is completely visible between the two lines on the recline angle indicator.
-
Page 18: Clicktight Indicator
ClickTight Indicator ENTIRELY GREEN The ClickTight indicator window will be (a) when the ClickTight is fully open and (b) when it is closed correctly. When ClickTight is fully open, the indicator window will be entirely green. CLICKTIGHT OPEN CLICKTIGHT CLOSED When ClickTight is closed correctly, the indicator window will be entirely green. -
Page 19: Lap-Shoulder Belt Installation
Lap-Shoulder Belt Installation NOTE: Do not lock/switch the vehicle belt retractor. The ClickTight replaces the need for a locked/switched vehicle belt. Do not route belt(s) through ClickTight handle opening. Place the base on the vehicle seat. 2. Open the ClickTight. a. - Page 20 4. Tuck the vehicle belt under the ClickTight and belt guides and buckle the vehicle belt. NOTE: Ensure the lap and shoulder belts are both tucked under the ClickTight completely. 5. Remove slack from the vehicle belt. NOTE: Overtightening the belt may CLICKTIGHT OPEN CLICKTIGH prevent the ClickTight from closing.
- Page 21 Base Installation with Lap-Shoulder Belt 9 The base is secure when it moves less than 1” (2.5 cm) front-to- back or side-to-side at the vehicle belt path. 9 The entire blue marker is completely visible between the two lines on the recline angle indicators. 9 Lap and shoulder belt are both routed under both belt guides and the ClickTight.
-
Page 22: Lap Belt Installation
Lap Belt Installation IMPORTANT: Vehicle belt MUST be locked according to your vehicle owner’s manual. Place the base on the vehicle seat. 2. Open the ClickTight. a. Grab the ClickTight handle and squeeze the button. b. Lift the ClickTight handle. NOTE: When ClickTight is fully open the ENTIRELY GREEN. - Page 23 4. Tuck the vehicle belt under the ClickTight and belt guides and buckle the vehicle belt. NOTE: Ensure the vehicle belt is tucked under the ClickTight completely. 5. Lock the vehicle belt according to your vehicle owner’s manual. CLICKTIGHT OPEN CLICKTIGH NOTE: Overtightening the vehicle belt may prevent the ClickTight from closing.
- Page 24 Base Installation with Lap Belt 9 The base is secure when it moves less than 1” (2.5 cm) front-to- back or side-to-side at the vehicle belt path. 9 The entire blue marker is completely visible between the two lines on the recline angle indicators. 9 Lap belt is routed under both belt guides and the ClickTight.
-
Page 25: Lower Connector Installation
Lower Connector Installation Place the base on the vehicle seat. 2. Open the ClickTight. a. Grab the ClickTight handle and squeeze the button. b. Lift the ClickTight handle. NOTE: When ClickTight is fully open ENTIRELY the indicator window will be GREEN. - Page 26 4. Tuck the lower connector strap under the ClickTight and belt guides. NOTE: Ensure the strap is tucked under the ClickTight completely. NOTE: Ensure the connector strap is not blocking the locking point for the ClickTight. 5. Push the lower connectors onto the vehicle lower anchors until a click is heard.
- Page 27 Close the ClickTight by pushing down on the ClickTight handle. NOTE: Ensure indicator in window ENTIRELY GREEN. NOTE: A click helps confirm the ClickTight is secure.
- Page 28 Base Installation with Lower Connectors 9 The base is secure when it moves less than 1” (2.5 cm) front-to- back or side-to-side at the vehicle belt path. 9 The entire blue marker is completely visible between the two lines on the recline angle indicators. 9 Lower connector strap is routed under both belt guides and the ClickTight.
-
Page 29: Attaching The Child Restraint To The Base
Attaching the Child Restraint to the Base Ensure that the base is securely installed. NOTE: Ensure lower connector storage compartment lid is secure over lower connector storage prior to placing child restraint into the base. 2. Place the child restraint into the base and press down until a click is heard. -
Page 30: Uninstalling The Base
Uninstalling the Base Lap Shoulder Belt Uninstall Unbuckle the vehicle belt. 2. Open the ClickTight. a. Grab the ClickTight handle and squeeze the button. b. Lift the ClickTight handle. 3. Pull the vehicle belt from the base belt routes. Lap Belt Uninstall Unbuckle the vehicle belt. - Page 31 2. Open the ClickTight. a. Grab the ClickTight handle and squeeze the button. b. Lift the ClickTight handle. 3. Pull the vehicle belt from the base belt routes. Lower Connector Uninstall Loosen the lower connector straps. 2. Press each of the red release buttons on the lower connectors and release from vehicle anchors.
-
Page 32: Using Without The Base
3. Open the ClickTight. a. Grab the ClickTight handle and squeeze the button. b. Lift the ClickTight handle. 4. Store the lower connectors in the storage compartment in the base and replace the storage compartment lid. Using without the Base Before installing the child restraint: ‐... -
Page 33: Adjusting The Recline Angle
Adjusting the Recline Angle ‐ When installed, the level line on the label of the child restraint should be level to the ground. If there is a problem achieving the proper recline angle after installing, try another approved seating position in your vehicle or: a. -
Page 34: Lap-Shoulder Belt Installation With European Belt Guide
Check your vehicle owner’s manual to determine how to lock your vehicle belt system. ‐ If you cannot lock your vehicle seat belt you must use a locking clip. Locking clips are available from Britax at 1-888-427-4829 or 1-704-409-1699. Secure your child in the child restraint before installing in the vehicle. - Page 35 4. Wrap the shoulder belt around the child restraint, through the European belt guide. Lock your vehicle belt system as instructed by your vehicle owner’s manual. 5. Push the child restraint firmly into the vehicle seat while removing all slack from the lap portion and then the shoulder portion of the vehicle belt.
- Page 36 Lap-Shoulder Belt Installation with European Belt Guide 9 The child restraint is secure when it moves less than 1” (2.5 cm) front-to-back or side-to-side at the vehicle belt path. 9 Recline angle is correct. The proper recline angle is achieved when the level line on the child restraint is level to the ground.
-
Page 37: Lap-Shoulder Belt Installation
‐ If you cannot lock your vehicle belt you must use a locking clip. Locking clips are available from Britax at 1-888-427-4829 or 1-704-409-1699. Secure your child in the child restraint before installing in the vehicle. See page 41. - Page 38 4. Lock your vehicle belt system as instructed by your vehicle owner’s manual. 5. Push the child restraint firmly into the vehicle seat while removing all slack from the lap portion and then the shoulder portion of the vehicle belt.
- Page 39 Lap-Shoulder Belt Installation 9 The child restraint is secure when it moves less than 1” (2.5 cm) front-to-back or side-to-side at the vehicle belt path. 9 Recline angle is correct. The proper recline angle is achieved when the level line on the child restraint is level to the ground. 9 The carry handle is rotated into any locked position.
-
Page 40: Lap Belt Installation
Lap Belt Installation IMPORTANT: Check your vehicle owner’s manual to determine how to lock your vehicle belt system. Secure your child in the child restraint before installing in the vehicle. See page 41. 2. Place the child restraint rear facing on the vehicle seat. - Page 41 4. Lock your vehicle belt system as instructed by your vehicle owner’s manual. 5. Push the child restraint firmly into the vehicle seat while removing all slack from the vehicle belt.
- Page 42 Lap Belt Installation 9 The child restraint is secure when it moves less than 1” (2.5 cm) front-to-back or side-to-side at the vehicle belt path. 9 Recline angle is correct. The proper recline angle is achieved when the level line on the child restraint is level to the ground. 9 The carry handle is rotated into any locked position.
-
Page 43: Securing Your Child
Securing Your Child IMPORTANT: Remove bulky coats, jackets and / or bulky sports equipment before putting the child in the child restraint. Ensure that you have followed all instructions for adjustment of the harness, buckle, and hip slots into the correct position for your child. - Page 44 4. Release the buckle and attach the harness straps to the harness holders. 5. Place the child in the child restraint as shown. Ensure the child is positioned upright in the child restraint and not slouching. Their Slouching bottom and back must rest flat against the child restraint.
- Page 45 Buckle the harness. NOTE: After inserting each buckle tongue, a click helps confirm the connection is secure. NOTE: Always pull on the harness to ensure it is properly connected. 8. Check for proper harness height in the closest position below the shoulders and pull any excess slack up to the child’s shoulder area before tightening.
- Page 46 10. Fasten the chest clip and place at armpit level. Before traveling, verify that the: 9 Recline angle is correct. 9 Harness straps are not twisted. 9 Harness is snug. 9 Buckle is fastened. 9 Chest clip is at the child’s armpit level.
-
Page 47: Child Restraint Functions
Child Restraint Functions Adjusting the Harness The child restraint is assembled with the harness in the inner loop. ‐ Inner Loop: Maximum 11 lbs (5 kg). Inner Loop ‐ Outer Loop: 4 - 30 lbs (1.8kg - 13.6kg) IMPORTANT: The harness straps should be located in the closest harness height position below the child’s shoulders. - Page 48 2. Locate the harness yoke on the bottom of the child restraint and slide one harness strap off of the yoke. 3. Pull the harness strap through the cover and head pad from the top of the child restraint. NOTE: Do not remove the comfort pad or chest clip 4.
-
Page 49: Adjusting The Buckle Position
5. Reattach the harness strap to the harness yoke from the bottom of the seat. 6. Repeat these steps with the second harness strap and ensure they are at the same slot height. Adjusting the Buckle Position IMPORTANT: Position the buckle in the slot closest to but not under the child. - Page 50 Unbuckle the harness by pressing the red button in the center of the buckle and sliding both harness tongues out of the buckle. 2. Locate the buckle strap retainer on the bottom of the child restraint and pull away from the seat to loosen. 3.
- Page 51 4. Pull the buckle and belly pad out of the slots in the carrier shell and cover. 5. Push the retainer through the slot in the cover and carrier shell for the appropriate buckle position. 6. Pull up on the buckle to ensure that the buckle strap retainer is properly seated.
-
Page 52: Adjusting The Hip Slots
Adjusting the Hip Slots Top Side of Seat ‐ Inner Slot (optional): Maximum Anchor Slot 11 lbs (5 kg) ‐ Outer Slot: 4 - 30 lbs (1.8kg - 13.6kg) ‐ Hip straps should NOT sit under the child. Inner Slot Front View Outer Slot Anchor Slot... - Page 53 3. Locate the hip strap retainer under the cover of the child restraint and pull Top Side away from the seat to loosen. of Seat 4. Turn the hip strap retainer so that the short side will go through the slot in the carrier shell.
- Page 54 6. Push the hip strap through the slot in the carrier shell for the appropriate width to fit the child. IMPORTANT: Do NOT attempt to use center anchor slot as Front View an adjustment point. This slot is for holding the hip strap retainer secure.
-
Page 55: Carry Handle Position
Carry Position & for use in a vehicle. ReboundReduce Always use position 1 to carry. Britax recommends Position 1 for use in a vehicle. The built in ReboundReduce helps reduce the rebound of the child restraint in car accidents. -
Page 56: Head Pad & Infant Positioning Pillow
Head Pad & Infant Positioning Pillow Head Pad: Provides additional support behind your child to achieve head and neck alignment. To use, tuck behind and around shoulder straps. 2. Infant Positioning Pillow: The infant positioning pillow is designed to provide better fit and comfort for infants using this child restraint. -
Page 57: Britax Strollers
Britax Strollers IMPORTANT: Not all strollers are compatible with the Willow child restraint. For stroller compatibility refer to us.britax.com/support/frequently- asked-questions� Attaching the Child Restraint to the Stroller Set the parking brake. 2. Align the child restraint receivers with the stroller adapters and push onto the frame until a click is heard. -
Page 58: Using The Lower Anchors
Using the Lower Anchors The Lower Anchors offer an alternative to vehicle seat belt installation methods. The figure below shows typical locations for lower anchors in a vehicle. See page 3 for lower anchor components on this child seat. Vehicle Seat Head Restraint Vehicle Seat Top Tether... -
Page 59: Vehicle Compatibility
Vehicle Compatibility Vehicle Seating Positions WARNING! DO NOT place rear-facing child seat on front seat with air bag. DEATH OR SERIOUS INJURY can occur. Owners of vehicles with front passenger side airbags should refer to their owner’s manual for child restraint installation instructions. The back seat is the safest place for children 12 and under. - Page 60 WARNING! Some vehicles have no seating positions which are compatible with this child restraint. If in doubt, contact the vehicle manufacturer for assistance. Forward-facing vehicle seats MUST be used with this child restraint. Side-facing or rear-facing seats CANNOT be used. See the diagram below.
- Page 61 NOTE: This Britax child restraint is not compatible with inflatable lap-shoulder belts.
-
Page 62: Care And Maintenance
Care and Maintenance IMPORTANT: Before each use, check the child restraint and its components to make sure they are in good condition and good working order. Removing the Cover Remove the canopy. a. Unhook elastic loops from around the canopy knuckles. - Page 63 3. Remove the harness straps and pull off comfort pads. Set aside comfort pads for replacing the cover. See page 45. 4. Open chest clip. 5. Unbuckle the harness.
- Page 64 6. Remove the buckle and belly pad. See page 46. Detach the two (2) elastic straps and untuck the cover from around the front of the carrier shell. 8. Undo the elastic bands by the carrier belt guides on both sides.
- Page 65 9. Pull out the tips of the plastic snaps securing the cover to the carrier shell on both sides. 10. Undo elastic from around back of seat. 11. Push harness strap, buckle tongue, and chest clip through the hip anchor slot in the cover. Repeat for the other side.
- Page 66 12. Pull the seat cover and lift away from the carrier shell.
- Page 67 Replacing the Cover Pull the harness strap, chest clip, and buckle tongue back through the hip anchor slot in the cover. Repeat for the other side. 2. Fit the cover onto the top of carrier shell, around head restraint, and tuck into the channel around the carrier shell.
- Page 68 4. Pull the elastic band around back of carrier shell. 5. Tuck cover around front of carrier shell and secure the two (2) elastic straps. 6. Secure plastic snaps at side of carrier shell.
- Page 69 Secure elastic straps near carrier belt guides. 8. Replace buckle and belly pad. See page 46. 9. Replace comfort pads and harness straps. See page 44. NOTE: Ensure harness straps are not twisted.
- Page 70 10. Replace head pad. 11. Replace canopy. a. Slide elastic loop over canopy knuckle. b. Slide the canopy into the slot until button pops through the opening. c. Tuck fabric into channel on back of carrier shell.
-
Page 71: Cleaning
• Test the buckle by fastening • If care label indicates machine washable, always refer to and unfastening until a click us.britax.com/faqs for important is heard after inserting each care information. buckle tongue. If clicks are not heard, repeat the cleaning •... -
Page 72: Warranty
Warranty This child restraint was manufactured by Britax Child Safety, Inc. (“Britax”). To the extent allowed by law, Britax warrants this product to the original retail purchaser as follows: LIMITED ONE-YEAR WARRANTY This product is warranted against defective materials or workmanship for one (1) year from the date of original purchase. - Page 73 THE REMEDIES CONTAINED IN THE LIMITED WARRANTY SET FORTH ABOVE ARE THE EXCLUSIVE REMEDIES PROVIDED BY BRITAX. IN NO EVENT SHALL BRITAX BE LIABLE TO YOU FOR ANY INCIDENTAL, SPECIAL, PUNITIVE, EXEMPLARY, OR CONSEQUENTIAL DAMAGES ARISING OUT OF OR RELATING IN ANY WAY TO THE...
-
Page 74: Arbitration Agreement
RELATIONSHIP BETWEEN YOU AND BRITAX (INCLUDING DISPUTES RELATED TO THE MARKETING OR SALE OF BRITAX PRODUCTS), ANY PROVISIONS IN THIS USER GUIDE, AND/OR YOUR PURCHASE OR USE OF ANY PRODUCTS DESIGNED, MANUFACTURED, DISTRIBUTED, MARKETED, OR SOLD BY BRITAX. PLEASE COMPLETE AND MAIL THE OWNER REGISTRATION CARD WITHIN (30) DAYS OF PURCHASE You may also register online at us.britax.com/registration. - Page 75 YOU HAVE THE RIGHT TO OPT OUT OF THIS ARBITRATION AGREEMENT, BUT YOU MUST EXERCISE THIS RIGHT WITHIN THIRTY (30) DAYS OF YOUR PURCHASE OF A BRITAX PRODUCT. If you do not wish to be bound by this Arbitration Agreement, you must notify Britax by mailing or e-mailing...
- Page 76 (30) days of your purchase of a Britax product, to: ATTN: Legal Department, 4140 Pleasant Road, Fort Mill, South Carolina 29708. Your opt-out notice must include your full name, address and/or e-mail address, the model and serial numbers of the purchased product, a copy of your proof of purchase, and a statement that you intend to opt out of this Arbitration Agreement.
- Page 77 The arbitrator shall not consolidate the claims of multiple parties unless you and Britax agree to do so. At the timely request of any party, the arbitrator shall provide a written explanation for the award.
- Page 78 Arbitration Agreement. If for any reason a dispute proceeds in court rather than in arbitration, you and Britax each waive any right to a jury trial.
- Page 79 Descripción general del asiento de seguridad para niños ��������������3 Información de seguridad �������������������������������������������������������������������������������������� 6 Notas Importantes ............................. 10 Certificación �������������������������������������������������������������������������������������������������������������������� 12 Registro ................................. 13 Información para el ajuste del niño ..................14 Uso con la base �������������������������������������������������������������������������������������������������������������15 Saliente .................................. 15 Ajuste del ángulo de reclinación ....................
- Page 80 Ajuste de las ranuras de cadera ......................53 Posición de la manija para el transporte..................56 Almohadilla para la cabeza y almohada de colocación para bebés ..57 Sillas de paseo Britax ............................58 Uso de los anclajes inferiores ........................59 Compatibilidad de vehículos ������������������������������������������������������������������������������������� 60 Cuidado y mantenimiento �������������������������������������������������������������������������������������������...
-
Page 81: Descripción General Del Asiento De Seguridad Para Niños
Descripción general del asiento de seguridad para niños Base de asiento infantil Aspen Botón de reclinación 2. Punto de bloqueo ClickTight 3. Indicador de ángulo de 10. Tapa del compartimento reclinación (2) de almacenamiento LUAS 4. Pie reclinable (debajo de la base) 11. - Page 82 Portabebés Willow Palanca de desbloqueo de la base y la silla de Manija para el transporte paseo Botones de ajuste de la manija para el Etiqueta con fecha de transporte fabricación y número de serie Capota 10. Correas del arnés La guía europea de cinturones Gancho del arnés SafeCell®...
- Page 83 15. Reposacabezas 21. Estructura del portabebés 22. Broche de pecho 16. Almohada de posicionamiento para bebés (opcional) 23. Hebilla del arnés 17. Palanca de ajuste del arnés (debajo 24. Almohadillas para de la cubierta) comodidad (opcional) 18. Correa de ajuste del arnés 25.
-
Page 84: Información De Seguridad
Información de seguridad ADVERTENCIA! De no seguirse todas las advertencias e instrucciones, podrían provocarse LESIONES GRAVES O LA MUERTE. Lea estas instrucciones antes de utilizar el asiento de seguridad para niños. • Siga todas las instrucciones de este asiento de seguridad para niños y las instrucciones escritas que se encuentran en el compartimento de almacenamiento de la base. - Page 85 • NUNCA deje al niño sin supervisión. • El uso de fundas, insertos, juguetes, accesorios, o dispositivos de ajuste no fabricados por Britax no está aprobado por Britax. Su uso podría causar que este asiento para niños no funcione según lo previsto en un choque.
- Page 86 encimeras, mesas o cualquier otra superficie elevada. • Riesgo de caída: el portabebés se puede caer del carro de compras. NO utilizar sobre carros de compras. • Peligro de caída: NUNCA utilice este asiento de seguridad para niños en botes, vehículos de baja velocidad (LSV), vehículos todoterreno (ATV), carros de golf o cualquier otro uso no certificado.
- Page 87 no protegen a un niño cuando un vehículo sufre un impacto grave. Sin embargo, si está correctamente instalado, un asiento para niños mejorará sustancialmente las posibilidades de supervivencia en la mayoría de los accidentes. Asegúrese de que todos los usuarios entiendan completamente las formas correctas de usar este asiento para niños en un vehículo.
-
Page 88: Notas Importantes
Notas Importantes • Suspenda el uso de este asiento para niños si ha sufrido un choque moderado o grave. No es necesario reemplazar un asiento de auto después de un choque menor definido por la Administración Nacional de Seguridad del Tráfico en las Carreteras (National Highway Traffic Safety Administration, NHTSA) de los Estados Unidos como: a. - Page 89 • Nunca deje al niño sin supervisión. • Excepto como se describe en este folleto, no intente desarmar ninguna parte del asiento para niños ni cambiar la manera en que se usa el arnés o los cinturones de seguridad del vehículo. •...
-
Page 90: Certificación
Certificación Vehículos de motor Este sistema de sujeción para niños cumple con todas las Normas Federales de Seguridad para Vehículos Motorizados aplicables. (FMVSS 213). Este asiento está certificado para su uso en vehículos de motor y aviones. Certificado para su uso en aviones Aeronave: instalación sin base con cinturón para cadera (consulte la página 43) ‐... -
Page 91: Registro
Envíe su nombre, dirección, dirección de correo electrónico si está disponible y el número de modelo del asiento y la fecha de fabricación a Britax Child Safety, Inc. P.O. Box 91167 Allentown, PA 18109-9925 o llame al 1-888-427-4829 o 1-704-409-1699, o regístrese en línea en us.britax.com/registration. -
Page 92: Información Para El Ajuste Del Niño
Información para el ajuste del niño Utilice la orientación hacia atrás solo con niños: • que pesen entre 1,8 y 13,6 kg (4 y 30 libras); • que tengan una altura de 81,3 cm (32 pulgadas) o menos; • si la parte superior de la cabeza está a 2,5 cm (1 pulgada) o más por debajo de la parte superior del asiento de seguridad para niños;... -
Page 93: Uso Con La Base
Uso con la base Antes de instalar el asiento de seguridad para niños: ‐ Consulte el manual del propietario del vehículo y la página 62 de esta guía del usuario para comprobar si el cinturón de seguridad del vehículo es compatible con el asiento de seguridad para niños. Saliente Es importante que la base del asiento de seguridad para niños esté... -
Page 94: Ajuste Del Ángulo De Reclinación
Ajuste del ángulo de reclinación IMPORTANTE: El vehículo debe estacionarse sobre una superficie nivelada. Presione el botón de ajuste de reclinación. 2. Coloque la base en el asiento del vehículo en contacto con el respaldo del asiento. 3. Mueva la base hacia arriba o hacia abajo hasta que todo el marcador azul esté... - Page 95 Si hay algún problema para conseguir el ángulo de reclinación adecuado después de la instalación, pruebe con otra posición de asiento aprobada en su vehículo o realice lo siguiente: a. Desinstale la base y baje el pie de ajuste del ángulo de reclinación a la posición más baja.
-
Page 96: Indicador Clicktight
Indicador ClickTight La ventana del indicador ClickTight estará COMPLETAMENTE VERDE (a) cuando ClickTight esté abierto en su totalidad y (b) cuando esté cerrado de manera correcta. Cuando ClickTight esté abierto en su totalidad, la ventana del indicador estará completamente verde. CLICKTIGHT OPEN CLICKTIGHT CLOSED Cuando ClickTight esté... -
Page 97: Instalación Del Cinturón Para Cadera Y Hombros
Instalación del cinturón para cadera y hombros NOTA: No bloquee ni cambie el retractor del cinturón de seguridad. ClickTight reemplaza la necesidad de un cinturón de seguridad bloqueado o cambiado. No pase los cinturones a través de la abertura de la manija ClickTight. - Page 98 4. Introduzca el cinturón del vehículo debajo del ClickTight y las guías del cinturón y abroche el cinturón de seguridad. NOTA: Asegúrese de que los cinturones para caderas y hombros estén completamente introducidos debajo del ClickTight. 5. Elimine la holgura del cinturón del vehículo.
- Page 99 Instalación de la base con el cinturón para cadera y hombros 9 La base está asegurada cuando se mueve menos de 2,5 cm (1 pulgada) de adelante hacia atrás o de lado a lado en la trayectoria del cinturón del vehículo. 9 Todo el marcador azul es completamente visible entre las dos líneas de los indicadores de ángulo de reclinación.
-
Page 100: Instalación Del Cinturón Para Cadera
Instalación del cinturón para cadera IMPORTANTE: El cinturón del vehículo DEBE estar asegurado de acuerdo con el manual del propietario del vehículo. Coloque la base en el asiento del vehículo. 2. Abra el ClickTight. a. Sujete el mango ClickTight y apriete el botón. - Page 101 4. Introduzca el cinturón del vehículo debajo del ClickTight y las guías del cinturón y abroche el cinturón del vehículo. NOTA: Asegúrese de que el cinturón del vehículo esté introducido por completo debajo del ClickTight. 5. Bloquee el cinturón del vehículo como se indica en el manual del propietario CLICKTIGHT OPEN CLICKTIGH...
- Page 102 Instalación de la base con el cinturón para cadera 9 La base está asegurada cuando se mueve menos de 2,5 cm (1 pulgada) de adelante hacia atrás o de lado a lado en la trayectoria del cinturón del vehículo. 9 Todo el marcador azul es completamente visible entre las dos líneas de los indicadores de ángulo de reclinación.
-
Page 103: Instalación Del Conector Inferior
Instalación del conector inferior Coloque la base en el asiento del vehículo. 2. Abra el ClickTight. a. Sujete el mango ClickTight y apriete el botón. b. Levante el mango ClickTight. NOTA: Cuando ClickTight está abierto en su totalidad y se suelta el botón, la ventana del indicador estará... - Page 104 4. Introduzca la correa del conector inferior debajo del ClickTight y las guías del cinturón. NOTA: Asegúrese de que la correa esté introducida por completo debajo del ClickTight. NOTA: Asegúrese de que la correa del conector no bloquee el punto de bloqueo del ClickTight.
- Page 105 Para cerrar el ClickTight, empuje hacia abajo el mango. NOTA: Asegúrese de que la ventana del indicador esté COMPLETAMENTE VERDE. NOTA: Un clic ayuda a confirmar que el ClickTight está asegurado.
- Page 106 Instalación de la base con conectores inferiores 9 La base está asegurada cuando se mueve menos de 2,5 cm (1 pulgada) de adelante hacia atrás o de lado a lado en la trayectoria del cinturón del vehículo. 9 Todo el marcador azul es completamente visible entre las dos líneas de los indicadores de ángulo de reclinación.
-
Page 107: Cómo Colocar El Asiento De Seguridad Para Niños En La Base
Cómo colocar el asiento de seguridad para niños en la base Asegúrese de que la base esté bien instalada. NOTA: Asegúrese de que la tapa del compartimento de almacenamiento conectores inferiores esté asegurada por encima del almacenamiento conectores inferiores antes de colocar el asiento de seguridad para niños en la base. -
Page 108: Cómo Retirar El Asiento De Seguridad Para Niños De La Base
Cómo retirar el asiento de seguridad para niños de la base Tire y sujete la palanca de la parte trasera del asiento de seguridad para niños. 2. Levante el asiento de seguridad para niños de la base con la manija para el transporte. - Page 109 Desinstalación del cinturón para cadera Desabroche el cinturón del vehículo. 2. Abra el ClickTight. a. Sujete el mango ClickTight y apriete el botón. b. Levante el mango ClickTight. 3. Tire del cinturón del vehículo desde las guías del cinturón.
- Page 110 Desinstalación del conector inferior Afloje las correas del conector inferior. 2. Presione cada uno de los botones rojos de liberación en los conectores inferiores y libérelos de los anclajes del vehículo. 3. Abra el ClickTight. a. Sujete el mango ClickTight y apriete el botón.
-
Page 111: Uso Sin La Base
Uso sin la base Antes de instalar el asiento de seguridad para niños: ‐ Asegure al niño en el asiento de seguridad para niños antes de la instalación en el vehículo. ‐ Consulte el manual del propietario del vehículo y la página 62 de esta guía del usuario para comprobar si el cinturón de seguridad del vehículo es compatible con el asiento de seguridad para niños. -
Page 112: Ajuste Del Ángulo De Reclinación
Ajuste del ángulo de reclinación ‐ Una vez instalado, la línea de nivel que aparece en la etiqueta del asiento de seguridad para niños debe estar nivelada con el suelo. Si hay algún problema para conseguir el ángulo de reclinación adecuado después de la instalación, pruebe con otra posición de asiento aprobada en su vehículo o realice lo siguiente:... -
Page 113: Instalación Del Cinturón Para Cadera Y Hombros Con Guía De Cinturón
‐ Si no puede abrochar el cinturón de seguridad de su vehículo, debe utilizar un broche de bloqueo. Los broches de bloqueo están disponibles en BRITAX en 1-888-427-4829 o 1-704-409-1699. Asegure a su hijo en el asiento de seguridad para niños antes de... - Page 114 3. Tire del cinturón del vehículo y pase la parte de la cadera por debajo de la hebilla y las guías del cinturón del asiento de seguridad para niños. NOTA: Verifique que el cinturón del vehículo no esté torcido. 4. Ponga el cinturón para hombros alrededor del asiento de seguridad para niños a través de la guía de cinturón europeo.
- Page 115 Instalación del cinturón para cadera y hombros con guía de cinturón europeo 9 El asiento de seguridad para niños está asegurado cuando se mueve menos de 2,5 cm (1 pulgada) de adelante hacia atrás o de lado a lado en la trayectoria del cinturón del vehículo. 9 El ángulo de reclinación es correcto.
-
Page 116: Instalación Del Cinturón Para Cadera Y Hombros
‐ Si no puede bloquear el cinturón de su vehículo, debe utilizar un broche de bloqueo. Britax dispone de broches de bloqueo en 1-888-427-4829 o 1-704-409-1699. Asegure a su hijo en el asiento de seguridad para niños antes de... - Page 117 4. Bloquee el sistema de cinturón del vehículo según las instrucciones del manual del propietario del vehículo. 5. Presione firmemente el asiento de seguridad para niños en el asiento del vehículo mientras retira todo el sobrante de la parte de la cadera y de la parte del hombro del cinturón del vehículo.
- Page 118 Instalación del cinturón para cadera y hombros 9 El asiento de seguridad para niños está asegurado cuando se mueve menos de 2,5 cm (1 pulgada) de adelante hacia atrás o de lado a lado en la trayectoria del cinturón del vehículo. 9 El ángulo de reclinación es correcto.
-
Page 119: Instalación Del Cinturón Para Cadera
Instalación del cinturón para cadera IMPORTANTE: Revise el manual del propietario del vehículo para determinar cómo bloquear el sistema de cinturón del vehículo. Asegure a su hijo en el asiento de seguridad para niños antes de instalarlo en el vehículo. Consulte la página 44. - Page 120 4. Bloquee el sistema del cinturón de seguridad del vehículo según las instrucciones del manual del propietario del vehículo. 5. Presione el asiento de seguridad para niños firmemente en el asiento del vehículo mientras elimina el sobrante del cinturón del vehículo.
- Page 121 Instalación del cinturón para cadera 9 El asiento de seguridad para niños está asegurado cuando se mueve menos de 2,5 cm (1 pulgada) de adelante hacia atrás o de lado a lado en la trayectoria del cinturón del vehículo. 9 El ángulo de reclinación es correcto. El ángulo de reclinación adecuado se logra cuando la línea de nivel en el asiento de seguridad para niños está...
-
Page 122: Cómo Sujetar Al Niño
Cómo sujetar al niño IMPORTANTE: Retire los abrigos, chaquetas o equipos deportivos voluminosos antes de colocar al niño en el asiento de seguridad para niños. Asegúrese de haber seguido todas las instrucciones del ajuste del arnés, la hebilla y las ranuras de cadera en la posición correcta para su hijo. - Page 123 4. Suelte la hebilla y fije las correas del arnés a los soportes de este. 5. Coloque al niño en el asiento de seguridad para niños como se muestra. Asegúrese de que el Sentado niño esté en posición vertical en el encorvado asiento de seguridad para niños y no encorvado.
- Page 124 Ajuste el arnés. NOTA: Después de insertar cada lengüeta de la hebilla, un clic ayuda a confirmar que el ajuste está asegurado. NOTA: Siempre tire del arnés para asegurarse de que esté conectado correctamente. 8. Compruebe la altura adecuada del arnés en la posición más cercana por debajo de los hombros y tire de cualquier sobrante hasta la zona...
- Page 125 encuentra en una línea relativamente recta sin caerse. No aprieta el cuerpo del niño ni empuja a su cuerpo a una posición antinatural. Usted no debería ser capaz de pellizcar el exceso. 10. Sujete el broche de pecho y colóquelo al nivel de la axila.
-
Page 126: Funciones Del Asiento De Seguridad Para Niños
Funciones del asiento de seguridad para niños Cómo ajustar el arnés El asiento de seguridad para niños se monta con el arnés en el bucle interno. ‐ Bucle interno: máximo 5 kg (11 lb) Bucle interno ‐ Bucle externo: de 1,8 kg a 13,6 kg (4 a 30 lb) IMPORTANTE: Las correas del arnés deben estar ubicadas en la posición de altura del... - Page 127 2. Identifique el gancho del arnés en la parte inferior del asiento de seguridad para niños y deslice una correa del arnés fuera del gancho. 3. Tire de la correa del arnés por la cubierta y la almohadilla para la cabeza desde la parte superior del asiento de seguridad para niños.
-
Page 128: Cómo Ajustar La Posición De La Hebilla
5. Vuelva a conectar la correa del arnés al gancho de este desde la parte inferior del asiento. 6. Repita estos pasos con la segunda correa del arnés y asegúrese de que estén a la misma altura de ranura. Cómo ajustar la posición de la hebilla IMPORTANTE: Use la ranura más cercano pero no debajo del niño. - Page 129 Para desabrochar el arnés, presione el botón rojo del centro de la hebilla y deslice ambas lengüetas del arnés hacia afuera de la hebilla. 2. Ubique el retenedor de la correa de la hebilla en la parte inferior del asiento de seguridad para niños y tire del asiento para aflojarlo.
- Page 130 4. Tire de la hebilla y de la almohadilla para el vientre hacia afuera de las ranuras de la estructura y la cubierta del portabebés. 5. Pase el retenedor por la ranura de la cubierta y la estructura del portabebés para dejar la hebilla en la posición adecuada.
-
Page 131: Ajuste De Las Ranuras De Cadera
Ajuste de las ranuras de cadera Parte superior del asiento ‐ Ranura interior (opcional): máximo 5 kg Ranura del anclaje (11 libras) ‐ Ranura exterior: de 1,8 kg a 13,6 kg (4 a 30 lb) Ranura interior ‐ Las correas de cadera NO deben quedar debajo del niño. - Page 132 3. Ubique el retenedor de la correa de cadera debajo de la cubierta del Parte asiento de seguridad para niños y tire superior del del asiento para aflojarlo. asiento 4. Gire el retenedor de la correa de cadera para que el lado corto pase por la ranura de la estructura del portabebés.
- Page 133 6. Pase la correa de la cadera por la ranura de la estructura del portabebés a fin de obtener la anchura adecuada para el niño. IMPORTANTE: NO intente Vista frontal utilizar la ranura del anclaje central como punto de ajuste. Esta ranura es para sujetar firmemente el retenedor de la correa de la cadera.
-
Page 134: Posición De La Manija Para El Transporte
ReboundReduce bloqueada para su uso en un vehículo. Utilice siempre la posición 1 para transportar. Britax recomienda la posición 1 para el uso en un vehículo. La tecnología ReboundReduce incorporada ayuda a reducir el rebote del asiento de seguridad para niños en accidentes automovilísticos. -
Page 135: Almohadilla Para La Cabeza Y Almohada De Colocación Para Bebés
Almohadilla para la cabeza y almohada de colocación para bebés Almohadilla para la cabeza: Proporciona un apoyo adicional detrás de su hijo para lograr la alineación de la cabeza y el cuello. A fin de usarla, introdúzcala por detrás y alrededor de las correas para los hombros. -
Page 136: Sillas De Paseo Britax
Sillas de paseo Britax IMPORTANTE: No todas las sillas de paseo son compatibles con el asiento de seguridad para niños Willow. Para obtener información sobre la compatibilidad de la silla de paseo, consulte us.britax.com/support/frequently- asked-questions� Cómo instalar el asiento de seguridad para niños en la silla de paseo... -
Page 137: Uso De Los Anclajes Inferiores
Uso de los anclajes inferiores Los anclajes inferiores ofrecen una alternativa a los métodos de instalación del cinturón del vehículo. La siguiente figura muestra lugares típicos para anclajes inferiores en un vehículo. Consulte la página 3 para conocer los componentes de anclajes en este asiento para niños. Reposacabezas del Anclaje asiento del vehículo... -
Page 138: Compatibilidad De Vehículos
Compatibilidad de vehículos Posiciones de asiento del vehículo ADVERTENCIA! NO coloque el asiento para niños orientado hacia atrás en el asiento delantero con airbag. Riesgo de MUERTE o de LESIONES GRAVES. Los propietarios de vehículos con airbags delanteros del lado del pasajero deberán consultar las instrucciones de instalación del asiento de seguridad para niños en el manual del propietario. - Page 139 ADVERTENCIA! Algunos vehículos no tienen posiciones para los asientos que sean compatibles con este asiento de seguridad para niños. En caso de duda, comuníquese con el fabricante del vehículo para obtener ayuda. Los asientos de vehículos orientados hacia delante DEBEN utilizarse con este asiento de seguridad para niños.
- Page 140 NOTA: Este asiento de seguridad para niños Britax no es compatible con todos los cinturones inflables de cadera y hombros.
-
Page 141: Cuidado Y Mantenimiento
Cuidado y mantenimiento IMPORTANTE: Antes de cada uso, revise el asiento de seguridad para niños y sus componentes a fin de asegurarse de que estén en buenas condiciones y que funcionen bien. Cómo retirar la cubierta Retire la cubiert. a. Desenganche los bucles elásticos de los nudillos de la capota. - Page 142 3. Quite las correas de arnés y retire las almohadillas para comodidad. Aparte las almohadillas para comodidad a fin de reemplazar la cubierta. Consulte la página 48. 4. Abra el chip de pecho. 5. Desabroche el arnés.
- Page 143 6. Quite la hebilla y la almohadilla para el vientre. Consulte la página 50. Separe las dos (2) correas elásticas y quite la cubierta de alrededor de la parte delantera de la estructura del portabebés. 8. Desabroche las bandas elásticas mediante las guías del cinturón del portabebés en ambos lados.
- Page 144 9. Saque las puntas de los broches de plástico que fijan la cubierta a la estructura del portabebés por ambos lados. 10. Desabroche el elástico de la parte trasera del asiento. 11. Pase la correa del arnés, la lengüeta de la hebilla y el broche de pecho por la ranura de anclaje de la cadera de la cubierta.
- Page 145 12. Retire la cubierta del asiento y levántela para separarla de la estructura del portabebés.
- Page 146 Reemplazo de la cubierta Tire la correa del arnés, el broche de pecho y la lengüeta de la hebilla hacia atrás a través de la ranura de anclaje de la cadera de la cubierta. Repita el procedimiento en el lado contrario.
- Page 147 4. Pase la banda elástica alrededor de la parte trasera de la estructura del portabebés. 5. Coloque la cubierta alrededor de la parte delantera de la estructura del portabebés y asegure las dos (2) correas elásticas. 6. Asegure los broches de plástico en el lateral de la estructura del portabebés.
- Page 148 Asegure la hebilla y la almohadilla para el vientre. 8. Reemplace la hebilla y la almohadilla para el vientre. Consulte la página 50. 9. Reemplace las almohadillas para comodidad y las correas del arnés. Consulte la página 48. NOTA: Asegúrese de que las correas del arnés no estén torcidas.
- Page 149 10. Reemplace la almohadilla para la cabeza. 11. Reemplace la capota. a. Deslice el bucle elástico sobre el nudillo de la capota. b. Deslice la capota en la ranura hasta que el botón salga por la abertura. c. Inserte la tela en el canal de la parte posterior de la estructura del portabebés.
-
Page 150: Limpieza
• Si la etiqueta de cuidado indica y desabrochando hasta que que se puede lavar a máquina, se escuche un clic después siempre consulte us.britax.com/ de insertar cada lengüeta de faqs para obtener información la hebilla. Si no se oyen los importante sobre el cuidado. -
Page 151: Garantía
Garantía Este asiento de seguridad para niños fue fabricado por Britax Child Safety, Inc. (“Britax”). En la medida en que lo permita la ley, Britax garantiza este producto al comprador minorista original de la siguiente manera: GARANTÍA LIMITADA DE UN AÑO Este producto tiene garantía contra materiales o fabricación... - Page 152 Esta garantía le otorga derechos legales específicos y usted puede tener otros derechos, que varían de un estado a otro. Ni Britax, ni el minorista que venda este producto, autoriza a ninguna persona a crear para él cualquier otra garantía, obligación o responsabilidad en relación con este producto.
-
Page 153: Acuerdo De Arbitraje
LOS RECURSOS CONTENIDOS EN LA GARANTÍA LIMITADA ESTABLECIDA ANTERIORMENTE SON LOS RECURSOS EXCLUSIVOS PROVISTOS POR BRITAX. EN NINGÚN CASO BRITAX SERÁ RESPONSABLE ANTE USTED POR DAÑOS INCIDENTALES, ESPECIALES, PUNITIVOS, EJEMPLARES O CONSECUENTES QUE SURJAN O ESTÉN RELACIONADOS DE CUALQUIER FORMA CON LA RELACIÓN... - Page 154 “disputas” tienen el significado más amplio posible e incluyen todos los reclamos, todas las disputas o controversias que surjan de o se relacionen de alguna manera con la relación entre usted y Britax (incluidas las disputas relacionadas con la comercialización o venta de productos Britax), entre otros, cualquier disposición en esta Guía...
- Page 155 (30) días posteriores a la compra de un producto Britax, a la siguiente dirección: ATTN: Legal Department, 4140 Pleasant Road, Fort Mill, South Carolina 29708.
- Page 156 AAA o visitar la página web www.adr.org. Si usted solicita arbitraje, entonces Britax adelantará su parte de los gastos asociados con el arbitraje, incluidos los honorarios de presentación, administración, audiencia y árbitro (“Honorarios de arbitraje”) en la medida en que...
- Page 157 El árbitro no consolidará los reclamos de varias partes, a menos que usted y Britax acuerden hacerlo. A solicitud oportuna de cualquiera de las partes, el árbitro proporcionará una explicación por escrito para el laudo.
- Page 158 Acuerdo de arbitraje. Si por algún motivo una disputa procede en un tribunal en lugar de en un arbitraje, usted y Britax renuncian a cualquier derecho a un juicio con jurado.
- Page 160 Britax Child Safety, Inc. 4140 Pleasant Road 1-888-427-4829 Fort Mill, SC 29708 USA 1-704-409-1699 us.Britax.com A Britax Childcare company...