Garmin Fishfinder 140 Owner's Manual
Full feature sonar
Hide thumbs
Also See for Fishfinder 140:
- Owner's manual (32 pages) ,
- Manual (6 pages) ,
- Install manual (3 pages)

Related Manuals for Garmin Fishfinder 140


Summary of Contents for Garmin Fishfinder 140
- Page 1 Owner’s Manual Fishfinder 90/140 full feature sonar 190-00582-10_0A.indd 1 12/2/2011 3:08:54 PM...
- Page 2 Information in this document is subject to change without notice. Garmin reserves the right to change or improve its products and to make changes in the content without obligation to notify any person or organization of such changes or improvements. Visit the Garmin Web site (www.garmin.com) for current updates and supplemental information concerning the use and operation of this and other Garmin products.
-
Page 3: Manual Conventions
Fishfinder. The Installing Your Fishfinder section provides instruction on installing the Fishfinder and the Transducer. If you experience difficulty installing the Fishfinder, contact Garmin Product Support or an installation professional in your area. Fishfinder 90/140 Owner’s Manual 190-00582-10_0A.indd 3 The Operating Your Fishfinder section describes the features and operation of the Fishfinder 90/140. -
Page 4: Table Of Contents
Table of Contents Introduction ... iii About This Manual ...iii Manual Conventions ...iii Product Registration ... v Contact Garmin ... v Warning ... vi Getting Started ... 1 Understanding the Fishfinder ...1 Using Simulator Mode ...4 Installing Your Fishfinder ... 5 Installing the Transducer ...6... -
Page 5: Product Registration
Fishfinder 90/140. In the USA, go to www.garmin.com/support, or contact Garmin USA by phone at (913) 397.8200 or (800) 800.1020. In the UK, contact Garmin (Europe) Ltd. by phone at 0808 2380000. In Europe, go to www.garmin.com/support... -
Page 6: Warning
Introduction Warning Failure to avoid the following potentially hazardous situations could result in an accident or collision resulting in death or serious injury. When navigating, carefully compare information displayed on the Fishfinder 90/140 to all available navigation sources, including information from visual sightings, and maps. -
Page 7: Getting Started
Getting Started To get the most out of your new Fishfinder: • Before you install and use your Fishfinder, read the information in this manual. • Assemble and install the hardware • Practice using your Fishfinder in Simulator Mode (page •... - Page 8 Getting Started wave information, and then sends the information to the Fishfinder. The Fishfinder displays the information on the screen for you to see and interpret. The type of transducer and settings you choose determine how the information is shown on the screen. Understanding Dual Beam Transducer Coverage A dual beam transducer can transmit a narrow or a wide...
-
Page 9: Understanding The Fishfinder Screen
Understanding the Fishfinder Screen Experimentation and experience are the keys to successfully interpreting your Fishfinder screen. We recommend that you take your Fishfinder out on familiar water, and spend time learning to interpret what you see on the Fishfinder 90 or 140 screen. -
Page 10: Using Simulator Mode
Getting Started The Fishfinder 90 and 140 include the latest technology in interpreting bottom signals; they can see through fish, structures, and thermoclines (shown in the weakest hues). Even so, large schools of fish or dense structures close to the bottom can affect water depth return readings. NOTE: If the Fishfinder is unable to track the bottom for any reason, the digits which indicate depth flash on and off to alert you that the Fishfinder is not tracking the bottom. -
Page 11: Installing Your Fishfinder
Make sure you completely read and understand all instructions before you install and use your Fishfinder. If you have problems, contact Garmin Product Support, or seek other professional assistance. You can install the Fishfinder hardware on a transom or on a trolling motor. -
Page 12: Installing The Transducer
Installing Your Fishfinder Installing the Transducer Assembling the Transducer 1. Insert the rubber washer (Q) and plastic spacer (P) into the transducer (G) at the same time. DO NOT lubricate the rubber washer. 2. Route the cable toward the back of the transducer. Slide the transducer into the transducer mount (H). -
Page 13: Mounting The Transducer On A Transom
4. Wrap the two ends of the cable tie around the motor body. Place the pointed end of the cable tie through the fastener hole on the opposite end and pull it through until it is snug but not tight. (The cable tie clicks when you pull it.) 5. - Page 14 Installing Your Fishfinder • DO NOT mount the transducer in the path of the prop on single-drive boats. The transducer can cause cavitation that can degrade the boat’s performance and damage the prop. On twin-drive boats, mount the transducer between the drives, if possible.
- Page 15 To mount the transducer on a transom: 1. Position the transducer mount at the selected transom location. Make sure the transducer is parallel with the water line. Mark the center locations of each hole on the transducer mount. (See the figures on the next page.) 2.
-
Page 16: Installing The Fishfinder Unit
Installing Your Fishfinder Drill pilot holes here. Level Align with the transom bottom. The transducer should extend 1/8" below fiberglass hulls or 3/8" below aluminum hulls. Keep it parallel with the water line. 190-00582-10_0A.indd 10 Installing the Fishfinder Unit Selecting a Fishfinder installation Location Select a Fishfinder installation location that allows you to view and operate it easily while operating the vessel. - Page 17 To mount the bracket assembly: 1. Using the tilt mount bracket (Fishfinder 90) or the swivel base (Fishfinder 140; Fishfinder 90 option) as a template, mark the location of the three holes that you use to secure the bracket to the mounting surface. 2.
-
Page 18: Installing The Wiring Harness
Installing Your Fishfinder Installing the Wiring Harness The Fishfinder comes with a wiring harness that connects the Fishfinder to power and the transducer with one easy-to-remove connection. If it is necessary to extend the power wires, use 22 AWG wire. DO NOT cut the transducer cable, because this voids your warranty. -
Page 19: Testing The Transom Mount Installation
Testing the Transom Mount Installation Perform this test after you install the Fishfinder. Because you need water to carry the sonar signal, the Fishfinder does not function properly with the transducer out of the water. When you place your boat in the water, CHECK FOR LEAKS around the screw holes that are below the water line. -
Page 20: Operating Your Fishfinder
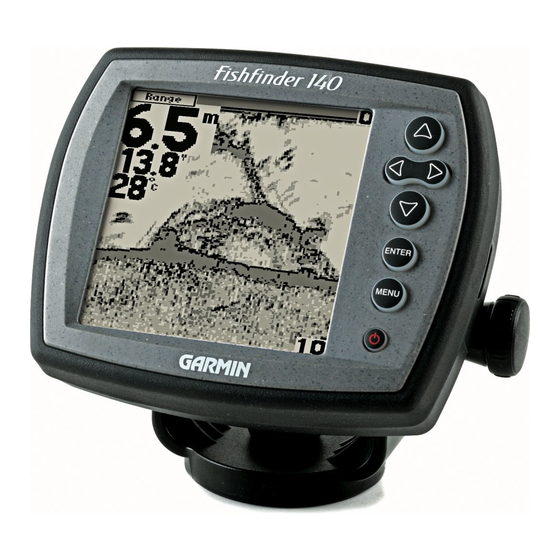
Operating Your Fishfinder Operating Your Fishfinder Arrow keys—the up and down Arrow keys select an item on a menu. Only the Fishfinder 140 has the right and left Arrow key that cycles through the Main menu options. ENTER key—confirms a selection. ENTER MENU key—shows or exits a menu. -
Page 21: Using The Main Menu
3. To select a setting, use the Arrow keys to move the selection arrow, and press ENTER. (When you reach the end of a menu, the selection arrow wraps to the beginning.) Press and hold an Arrow key to rapidly advance the selection speed. -
Page 22: Using The Setup Menu
Operating Your Fishfinder Scroll—sets the rate that the graph scrolls from right to left. If you are sitting still or the graph is moving too fast, slowing or pausing the graph can help. The settings are Ultra, Fast (default), Medium, Slow, and Paused. Zoom—sets the zoom level for the screen. - Page 23 Graphs Fish ID—sets how the Fishfinder shows underwater targets and background information. If you select a fish symbol, the screen shows only the information related to that symbol (large, medium, and small sizes). When using wide beam, fish symbols that are to the sides of the boat appear hollow.
- Page 24 Operating Your Fishfinder Auto Gain—controls the aggressiveness of the Auto Gain. The higher the setting, the greater the number of targets appear on the screen. The lower the setting, the less clutter on the screen. The settings are High, Medium (default), and Low.
-
Page 25: Appendix
Specifications are subject to change without notice. Optional Accessories Purchase the following optional accessories on the Garmin Web site: Swivel mount for the Fishfinder 90—allows your Fishfinder 90 to tilt and swivel on its mounting bracket. -
Page 26: Cleaning The Case
Appendix Cleaning the Case Clean the Fishfinder’s outer casing (except for the screen) using a cloth dampened with a mild detergent solution, and then wipe it dry. Avoid chemical cleaners and solvents that may damage plastic components. Cleaning the Screen The Fishfinder screen should be cleaned using a soft, clean, lint-free cloth. -
Page 27: Software License Agreement
You further acknowledge that the structure, organization, and code of the Software are valuable trade secrets of Garmin and that the Software in source code form remains a valuable trade secret of Garmin. You agree not to decompile, disassemble,... - Page 28 INCIDENTAL OR CONSEQUENTIAL DAMAGES, SO THE ABOVE LIMITATIONS MAY NOT APPLY TO YOU. Garmin retains the exclusive right to repair or replace the unit or software or offer a full refund of the purchase price at its sole discretion. SUCH REMEDY SHALL BE YOUR SOLE AND EXCLUSIVE REMEDY FOR ANY BREACH OF WARRANTY.
-
Page 29: Declaration Of Conformity (Doc)
Hereby, Garmin, declares that this Fishfinder 90/140 is in compliance with the essential requirements and other relevant provisions of Directive 1999/5/EC. To view the full Declaration of Conformity, see the Garmin Web site for your Garmin product: www.garmin.com. Fishfinder 90/140 Owner’s Manual 190-00582-10_0A.indd 23... -
Page 30: Index
Index Index cleaning the case and screen 20 clutter 4 contrast setting 18 accessories 19 alarms 16 battery 16 defaults setting 18 deep 16 depth units 18 fish 17 dual beam 2 shallow 16 Anti-reflective coating 20 enter key 14 arches 4 assembling the transducer 6 fish alarm 17... - Page 31 range 15 temperature number 18 temperature units 18 testing the transom mount scroll 16 installation 13 selecting a transom mount transducer 1 location 7 assembling 6 setting, changing a 14 installing 6 setup menu 16 mounting on a transom 7 setup menu option 14 mounting on a trolling shallow alarm 16...
- Page 32 For the latest free software updates (excluding map data) throughout the life of your Garmin products, visit the Garmin Web site at www.garmin.com. © 2008 Garmin Ltd. or its subsidiaries Garmin International, Inc. 1200 East 151 Street, Olathe, Kansas 66062, USA Garmin (Europe) Ltd.