Table of Contents
Advertisement
Quick Links
CAMPBELL
HAUSFELD
READ CAREFULLY BEFORE ATTEMPTING TO ASSEMBLE, INSTALL, OPERATE OR MAINTAIN THE PRODUCT
DESCRIBED. PROTECT YOURSELF AND OTHERS BY OBSERVING ALL SAFETY INFORMATION. FAILURE TO COM-
PLY WITH INSTRUCTIONS COULD RESULT IN PERSONAL INJURY AND/OR PROPERTY DAMAGE!
RETAIN INSTRUCTIONS FOR FUTURE REFERENCE.
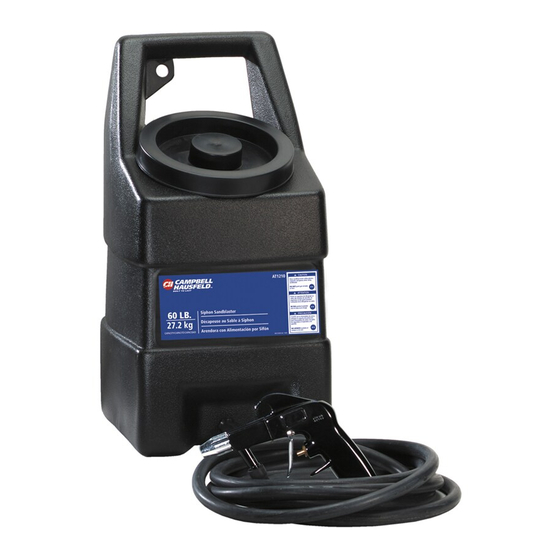
Description
Campbell Hausfeld sandblasting equipment is designed
for cleaning and removing rust, scale, paint, grime and
dirt for stripping, polishing and etching projects. This
equipment can be used with sand, abrasive powders,
or water and other liquids.
Unpacking
After unpacking the sandblasting kit, carefully inspect
for any damage that may have occurred during transit.
Check for loose, missing or damaged parts.
General Safety Information
1. Read this instruction manual before installing this
device to the compressor pump.
2. Safety glasses or face shield, gloves and a respirator
must be worn during operation. Always work in a well
ventilated area.
Figure 1
3. During operation, do not expose the hands or skin
directly in the line of the blast nozzle.
4. After installation, inspect to make sure all compo-
nents seal properly.
5. Keep children away at all times. All visitors must be
kept a safe distance and wear safety glasses, gloves
and a respirator.
6. Do not exceed the maximum operating pressure of
the sandblasting equipment (125 PSI).
WARNING
!
DISCONNECT THE SANDBLASTER FROM THE
AIR SUPPLY BEFORE CHANGING ACCESSORIES
OR ATTEMPTING TO INSTALL, SERVICE, RELO-
CATE OR PERFORM ANY MAINTENANCE.
Copyright 1993, Campbell Hausfeld/Scott Fetzer Company
OPERATING INSTRUCTION MANUAL
SANDBLASTING KITS
MODELS AT125102AJ, AT121002AJ, AND
AT121102AJ
!
__
1
__
7. Check hoses and air lines for weak or worn condition
before each use. Make sure all connections are
secure before use.
WARNING
!
DO NOT POINT THE SANDBLAST GUN AT ANY-
ONE OR OBJECTS OTHER THAN THE INTENDED
WORK OBJECT.
8. Do not depress the trigger when connecting the air
supply hose.
DANGER
!
DO NOT WORK AROUND OILY RAGS OR FLAM-
MABLE LIQUIDS. SAND STRIKING METAL CAN
CAUSE A SPARK AND CREATE A FIRE OR EX-
PLOSION.
Figure 2
WARNING
!
DO NOT SPRAY ACIDS OR CAUSTICS.
Figure 3
!
!
IN241900AV 1/93
Advertisement
Table of Contents

Related Manuals for Campbell Hausfeld AT125102AJ


Summary of Contents for Campbell Hausfeld AT125102AJ
- Page 1 RETAIN INSTRUCTIONS FOR FUTURE REFERENCE. 7. Check hoses and air lines for weak or worn condition Description before each use. Make sure all connections are Campbell Hausfeld sandblasting equipment is designed secure before use. for cleaning and removing rust, scale, paint, grime and WARNING dirt for stripping, polishing and etching projects.
- Page 2 CONNECTOR 4. Attach the air compressor hose to the opening at the Figure 4 _ Model AT125102AJ - 30 LBS bottom of the gun handle. An optional 1/4" NPT quick connector (MP2468) and coupler (MP2883) can be used to attach the hose to the gun.
-
Page 3: Installation
MODELS AT125102AJ, AT121002AJ AND AT121102AJ IN241900AV Installation Operation It is recommended that sandblasting equipment be 1. Always wear a safety shield or safety glasses, used with commonly available sandblast cabinets. How- gloves and a respirator when sandblasting. ever, a temporary sandblasting booth can also be used. -
Page 4: Limited Warranty
8. RESPONSIBILITIES OF PURCHASER UNDER THIS WARRANTY: A. Deliver or ship the Campbell Hausfeld product or component to the nearest Campbell Hausfeld Authorized Service Center. Freight costs, if any, must be borne by the purchaser. -
Page 5: Suggested Uses
MODELS AT125102AJ, AT121002AJ AND AT121102AJ IN241900AV Suggested Uses TYPE OF DISTANCE ABRASIVE APPLICATION FROM SUGGESTIONS (SIEVE/SIZE) WORK Move gun back and forth over the template in a Sand Etching and 1-4" 40-90 brushing manner. Blast at a 90° angle. For fine polish-... -
Page 6: Troubleshooting Chart
MODELS AT125102AJ, AT121002AJ AND AT121102AJ IN241900AV Troubleshooting Chart SYMPTOM POSSIBLE CAUSE(S) CORRECTIVE ACTION Low or no air pressure 1. Regulator set incorrectly 1. Reset regulator 2. Pinched hose 2. Straighten hose 3. Dirty compressor filter 3. Clean or replace filter... -
Page 7: Service Notes
MODELS AT125102AJ, AT121002AJ AND AT121102AJ IN241900AV Service Notes... - Page 8 IN241900AV MODELS AT125102AJ, AT121002AJ AND AT121102AJ Service Notes...