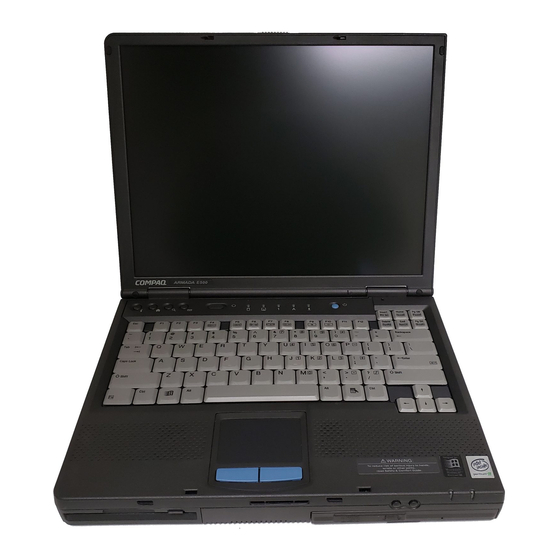
Compaq Armada E500 Series Reference Manual
Compaq laptop pc reference guide armada e500 series
Hide thumbs
Also See for Armada E500 Series:
- Quick reference manual (220 pages) ,
- Maintenance and service manual (162 pages) ,
- Specification (140 pages)
Table of Contents
Advertisement
Quick Links
Compaq Armada E500
Series of Personal Computers
Reference Guide
Getting Started
Taking a Look at the Computer
Using the Keyboard
Using Battery Packs
Managing Power
Working with Removable Drives and
Device Bays
Using an Internal Modem (Available
on Select Models)
Connecting External Devices
Using PC Cards
Using Audio Features
Upgrading the Computer
Maintenance and Travel Guidelines
Security Features
Intelligent Manageability
Computer Setup and Diagnostics
Utilities
Troubleshooting
Customer Support
Regulatory Notices
Electrostatic Discharge
Specifications
Notice / Using this Guide / Index
Advertisement
Table of Contents

Related Manuals for Compaq Armada E500 Series


Summary of Contents for Compaq Armada E500 Series
- Page 1 Compaq Armada E500 Series of Personal Computers Reference Guide Getting Started Taking a Look at the Computer Using the Keyboard Using Battery Packs Managing Power Working with Removable Drives and Device Bays Using an Internal Modem (Available on Select Models)
-
Page 2: Identifying Packing Box Contents
Getting Started Finding Assistance Identifying Packing Box Contents... - Page 3 Taking A Look At the Computer Front Components Left Side Components Right Side Components Rear Components Bottom Components Status Indicator Lights...
- Page 4 Using the Keyboard Using the Pointing Device Using Hotkeys Using the Embedded Numeric Keypad...
- Page 5 Using Battery Packs Learning About Battery Packs Using a New Battery Pack Charging Battery Packs Inserting and Removing the Primary Battery Pack Storing a Battery Pack Maximizing Battery Pack Life Recycling Used Battery Packs System Beeps...
- Page 6 Managing Power Selecting a Power Source Using Suspend (Standby) and Hibernation Managing Low-Battery Conditions Charging a Battery Pack Monitoring the Charge in a Battery Pack Calibrating a Battery Pack Using Power Preferences Conserving Battery Power...
- Page 7 Working with Removable Drives and Device Bays Bay Configuration Caring for Removable Drives Selecting Diskettes DualBay Devices MultiBay Devices...
- Page 8 Using an Internal Modem (Available on Select Models) Connecting the Modem Cable Selecting Communication Software Using Modem Commands and Dial Modifiers Uninstalling the Modem Using the Modem While Traveling Internationally...
- Page 9 Connecting External Devices Connecting an External Enhanced Keyboard Connecting an External Monitor Connecting a Television Monitor Connecting a Mouse or Other External Pointing Device Connecting a Serial Printer Connecting a Parallel Printer Connecting Infrared Equipment Connecting USB Peripherals Connecting to a Docking Device...
- Page 10 Using PC Cards PC Card Types Inserting a PC Card Removing a PC Card PC Card Device Drivers Changing PC Card Settings Managing PC Card Power Zoomed Video Stopping a PC Card...
- Page 11 Using Audio Features Identifying the Audio Components Using Internal and External Microphones Using Internal and External Speakers/Headphones Controlling Audio Volume Speaker Ports...
- Page 12 Upgrading the Computer Upgrading System Memory Upgrading the Hard Drive Attaching a Hard Drive Adapter Adding an Internal Modem...
- Page 13 Maintenance & Travel Guidelines Updating the System Reinstalling Software Caring for the Computer Preparing the Computer for Shipping or Travel Traveling with the Computer...
- Page 14 Security Features Types of Security Using the Cable Lock Using the Power-On Password Using Quick Controls Using the Setup Password Enabling and Disabling Devices DriveLock Overview...
- Page 15 Intelligent Manageability Intelligent Manageability Overview Asset Management Fault Management Security Management Configuration Management...
- Page 16 Computer Setup and Diagnostics Utilities Selecting Computer Setup or Diagnostics for Windows Using Computer Setup Using Compaq Diagnostics for Windows...
- Page 17 Troubleshooting Troubleshooting Checklist Audio Battery CD-ROM Drive and DVD-ROM Drive Diskette Drive and SuperDisk LS-120 Drive Hard Drive Hardware Installation Keyboard Memory Modem PC Card Power Printer Screen Software Application Pointing Device Infrared...
- Page 18 Compaq Computer Corporation. © 1999 Compaq Computer Corporation. All rights reserved. Printed in the U.S.A., Singapore, Taiwan, and U.K. Compaq and Armada are registered in the U.S. Patent and Trademark Office. Microsoft, MS-DOS, and Windows are trademarks or registered trademarks of Microsoft Corporation.
-
Page 19: Table Of Contents
ONTENTS preface SING UIDE chapter 1 ETTING TARTED Finding Assistance ...1-1 Identifying Packing Box Contents ...1-2 chapter 2 AKING A OOK AT THE Front Components ...2-1 Left Side Components ...2-3 Right Side Components...2-4 Rear Components ...2-6 Bottom Components...2-7 Status Indicator Lights ...2-8 chapter 3 SING THE EYBOARD... - Page 20 Using Hotkeys... 3-7 Switching the Image ... 3-8 Adjusting System Volume... 3-8 Initiating Quick Controls ... 3-9 Setting a Power Conservation Level ... 3-9 Viewing Battery Status... 3-9 Adjusting Panel Contrast ... 3-9 Brightness ... 3-10 Displaying System Information... 3-10 Stretching Text ...
- Page 21 Charging a Battery Pack...5-7 Monitoring the Charge in a Battery Pack...5-8 Using the Battery Status Tab ...5-8 Using the Battery Meter or Power Meter Icon ...5-8 Using the Power or Power Meter Tab...5-9 Calibrating a Battery Pack...5-10 Running a Calibration ...5-11 Stopping a Calibration ...5-12 Using Power Preferences ...5-12 Setting Power Preferences in Windows 95 and...
- Page 22 chapter 7 SING AN NTERNAL ODEM Connecting the Modem Cable ... 7-1 Selecting Communication Software ... 7-2 Using Modem Commands and Dial Modifiers... 7-3 Uninstalling the Modem ... 7-3 Using the Modem While Traveling Internationally ... 7-3 Using a Country-Specific Modem Adapter ... 7-3 Selecting a Country-Specific Modem Configuration ...
- Page 23 Updating the System ...12-1 Obtaining Customized Update Information with Info Messenger ...12-1 Obtaining Software Updates and Enhancements by Subscription ...12-1 Obtaining Software Updates from the Compaq Internet Site ...12-2 Ordering Preinstalled Software...12-2 Updating the System ROM ...12-2 Reinstalling Software ...12-4 Caring for the Computer ...12-4...
- Page 24 chapter 13 ECURITY EATURES Types of Security ... 13-1 Using the Cable Lock ... 13-2 Using the Power-On Password ... 13-3 Establishing the Power-On Password... 13-3 Entering a Power-On Password... 13-3 Changing the Power-On Password ... 13-4 Deleting the Power-On Password... 13-5 If You Forget Your Power-On Password ...
- Page 25 15 OMPUTER ETUP AND Selecting Computer Setup or Compaq Diagnostics for Windows ...15-1 Using Computer Setup ...15-2 Selecting from the File Menu ...15-3 Selecting from the Security Menu ...15-4 Selecting from the Advanced Menu ...15-5 Using Compaq Diagnostics for Windows ...15-6 Displaying System Information ...15-6...
- Page 26 preface SING Some or all of the following format conventions are used in this guide to distinguish elements of text: Names of keys are shown in bold type as they appear on the keyboard, for example, Keys that you should press at the same time are represented by the key names and the plus (+) symbol, for example, Ctrl+Alt+Delete.
-
Page 27: Getting Started
View the Armada Reference Guide from the QuickRestore CD-ROM To access additional information about the computer: Select StartÅCompaq Information Center Go to the Compaq Internet site at http://www.compaq.com To contact Compaq customer support, refer to Appendix A in this Reference Guide. TARTED Getting Started 1-1... -
Page 28: Identifying Packing Box Contents
Identifying Packing Box Contents The contents of the packing box vary according to your geographic region and according to the computer hardware configuration that you ordered. The following picture and component list identify the standard components that are included with most computer models. As you unpack the box, make sure you have received all of the standard and optional components that you ordered. - Page 29 3-to-2-prong plug adapter (Japan only) *In Windows 98 the term Standby replaces the term Suspend. Function Compaq Armada Personal Computer. Primary hard drive when used in hard drive bay. Can also be used with an adapter in the MultiBay. Primary battery pack.
- Page 30 WARNING: or damage to the equipment: Do not disable the power cord grounding plug. The grounding plug is an important safety feature. Plug the equipment into a grounded (earthed) electrical outlet that is easily accessible at all times. Disconnect power from the equipment by unplugging the power cord from the electrical outlet.
-
Page 31: Taking A Look At The Computer
chapter Taking OMPUTER Front Components Component Power switch Standby/Suspend switch Look AT THE Front Components Function Slides to turn the computer on or off. While working in Windows, click StartÅShut Down to exit the operating system and turn off the computer. - Page 32 Front Components Component Stereo speakers Battery light Power/Suspend light Volume Control buttons MultiBay Speaker ports TouchPad Left and right TouchPad buttons Pointing Stick Left and right pointing stick buttons (pointing stick models only) DualBay Taking a Look at the Computer Continued Function Built-in speakers for high-quality...
-
Page 33: Left Side Components
Left Side Components Component Tilt foot Battery bay Left Side Components Function Retractable feet on the rear base of the computer that open and lock into place in order to angle the keyboard to a more comfortable position. Holds the primary battery pack. Taking a Look at the Computer 2-3... -
Page 34: Right Side Components
Right Side Components Component PC Card slots Microphone jack Stereo speaker/ headphone jack Lock provision RJ-45 jack RJ-11 jack Taking a Look at the Computer Right Side Components Function Slots that support Type II or Type III PC Cards, such as modem, hard drive, or network cards. - Page 35 Right Side Components Component Infrared port Composite TV-Out jack Tilt foot Continued Function Infrared signals for communicating with another computer. Links to another IrDA-compliant device for wireless communication. Connects a television to the computer. Retractable feet on the rear base of the computer that open and lock into place in order to angle the keyboard to a more comfortable position.
-
Page 36: Rear Components
Rear Components Component Power connector USB connector Serial connector External monitor connector Docking connector Parallel connector Keyboard/Mouse connector Taking a Look at the Computer Rear Components Function Connects to an AC adapter when the battery or charge battery are not operating. -
Page 37: Bottom Components
Bottom Components Component Modem compartment Keyboard security screw Hard drive release latch Hard drive compartment Battery release latch DualBay release latch MultiBay release latch Bottom Components Function Provides access to the internal modem. The modem is available on select models and as an option for other models. -
Page 38: Status Indicator Lights
Status Indicator Lights The five lights located above the keyboard indicate system operations and status. Light Hard drive/CD-ROM drive light indicator Diskette drive light indicator Num Lock Caps Lock Scroll Lock Taking a Look at the Computer Status Indicator Lights Function Turns on when the hard drive, optional CD-ROM drive, or optional... -
Page 39: Using The Keyboard
chapter SING THE Using the Pointing Device The built-in Touch Pad (TouchPad models) and the EasyPoint IV pointing stick (pointing stick models) function with any software that supports a Microsoft-compatible mouse. If you are using software that does not support a Microsoft- NOTE: compatible mouse, select Advanced Device Options in Computer Setup, then select the Disable Multiple Pointing... -
Page 40: Identifying Touchpad Components
Identifying TouchPad Components TouchPad Right TouchPad button Left TouchPad button 3-2 Using the Keyboard... -
Page 41: Navigating With The Touchpad
Navigating with the TouchPad Task Move the cursor Increase or decrease cursor speed Right-, left-, or center-click or double-click Highlight an item* Select text or an object* Activate a selection* Select, then drag and drop an item* *To perform this task exactly as you would with an external mouse, use the left pointing-device button like the left button of an external mouse. -
Page 42: Identifying Pointing-Stick Components
Identifying Pointing-Stick Components EasyPoint IV pointing stick Left pointing-stick button 3-4 Using the Keyboard Right pointing-stick button Scroll pointing-stick button... -
Page 43: Navigating With The Pointing-Stick
Navigating with the Pointing-Stick Task Move the cursor Increase or decrease cursor speed Right-, left-, or center-click or double-click Highlight an item* Select text or an object* Activate a selection* Select, then drag and drop an item* *To perform this task exactly as you would with an external mouse, use the left pointing-device button like the left button of an external mouse. -
Page 44: Setting Pointing-Stick Preferences
Setting Pointing-Stick Preferences EasyPoint IV pointing stick model To access settings common to any Microsoft-compatible mouse, such as mouse trails, cursor speed, double-click pace, and Windows 98 single-click mode, select StartÅSettingsÅControl PanelÅMouse. To access settings and instructions for using additional EasyPoint IV pointing stick features, such as scrolling, magnifying, and selecting an icon without tapping the pointing stick, select StartÅSettingsÅControl... -
Page 45: Using Hotkeys
Using Hotkeys Hotkeys are preset combinations of the key that activate frequently used system functions. The icons on the function keys functions. To use hotkeys on an external keyboard, which does not have key, press the only of the hotkeys combination. For example, to use the hotkeys, press Fn+F10 NOTE:... -
Page 46: Switching The Image
Hotkeys Quick Reference Task Initiate Quick Controls Set a power conservation level View battery status Adjust panel contrast Adjust screen brightness Display system information Stretch text Switching the Image In Windows 95 or Windows NT 4.0 toggle image among the computer display, an external display, and simultaneous display. -
Page 47: Initiating Quick Controls
Initiating Quick Controls Quick Controls are security features that can disable the keyboard and pointing device and clear the screen. Before you can use Quick Controls, set a power-on password and enable Quick Control preferences. For instructions, refer to Chapter 13. To initiate Quick Controls, press To exit Quick Controls, enter your power-on password. -
Page 48: Brightness
Brightness Press to adjust the brightness of the computer screen Fn+F10 with an on-screen slide button or with the arrow keys. Displaying System Information Press to display information about system hardware Fn+Esc components and software version numbers. The number beside System BIOS is the version number of NOTE: your system ROM. -
Page 49: Using The Embedded Numeric Keypad
Using the Embedded Numeric Keypad Toggling the Keypad On and Off To convert the embedded numeric keypad section computer keyboard to a numeric keypad, press When the embedded numeric keypad is enabled, the characters upper-right on the keypad keys are active and the num lock light is on. -
Page 50: Operating The Keypad Keys As Standard Keys
Operating the Keypad Keys as Standard Keys To use the embedded numeric keypad keys as standard keyboard keys while the keypad is enabled: Press and hold lowercase. Press and hold typing in uppercase. Enabling the Keypad at Startup To set the computer to start up with the embedded numeric keypad enabled—... -
Page 51: Using Battery Packs
There is a risk of fire and burns if the battery pack is not handled properly. Do not disassemble, crush, puncture, short external contacts, or dispose of in fire or water. Do not expose to temperatures higher than 60 C. Replace only with the Compaq spare designated for this product. ACKS Your computer contains a lithium-ion battery pack. -
Page 52: Using A New Battery Pack
WARNING: disposed of with general household waste. In order to forward them to recycling or proper disposal, please use the public collection system or return them to Compaq, your authorized Compaq Partners, or other agents. Using a New Battery Pack Charge the battery pack in the computer’s battery bay, a DualBay,... -
Page 53: Inserting And Removing The Primary Battery Pack
The battery charge light is the right light on the front edge NOTE: of the computer. It turns on (solid) when a battery pack (in the battery bay, DualBay, or MultiBay) is charging. It turns off when fully charged. It blinks in a low-battery condition. When the battery charge light turns off, the battery packs are fully charged. -
Page 54: Inserting The Primary Battery Pack
Inserting the Primary Battery Pack CAUTION: source of power to the computer, initiate Hibernation or connect the computer to external power before removing the battery. Insert a battery pack into the battery bay with the large label on the battery pack facing up and the battery contacts facing in. Push the battery pack into the battery bay until it is firmly seated. -
Page 55: Storing A Battery Pack
Storing a Battery Pack CAUTION: high temperatures for extended periods of time. If the computer will be unused and unplugged from an external power source for more than two weeks, remove and store the battery packs. Proper storage procedures reduce the self-discharge rate of a battery pack. -
Page 56: Recycling Used Battery Packs
To find out if the battery pack recycling program is available in your area, check the “Worldwide Telephone Numbers” in Appendix A. If a number for recycling is not listed for your area, contact your Compaq authorized dealer, reseller, or service provider. System Beeps... -
Page 57: Beeps With A Blinking Power/Suspend Light
Beeps with a Blinking Power/Suspend Light When the computer beeps while the Power/Suspend light is blinking, the computer has initiated Suspend. See Chapter 5 for more information on using Suspend. When the computer is in Suspend and a low battery NOTE: condition occurs, you cannot press the power button or suspend button to exit Suspend. -
Page 58: Managing Power
chapter ANAGING Selecting a Power Source Task Work within installed software applications Charge a battery pack inserted in the computer Calibrate a battery pack Modify system software If your external monitor is not Energy Star compliant, NOTE: enabling monitor energy-saving features may cause video distortion when the screen save timeout occurs. -
Page 59: Using Suspend (Standby) And Hibernation
Using Suspend (Standby) and Hibernation You will use the power switch and the power/suspend light or place it in Suspend (Standby) or Hibernation. Suspend, called Standby in Windows 98, is an energy-saving feature that reduces power to system components that are not being used. - Page 60 If the computer will be disconnected from external power for more than two weeks—To extend the useful life of the battery pack, shut down the computer, then remove the battery pack and store it in a cool, dry place. If you plan to resume within two weeks—Initiating Hibernation clears the screen, saves your work to the hard drive, and uses less power than Suspend (Standby).
-
Page 61: Managing Low-Battery Conditions
Using Standby (Suspend) and Hibernation Task Procedure Exit Suspend* Initiate Press Fn + suspend Hibernation button. Restore Slide power switch. from Hibernation *In Windows 98 the term Standby replaces the term Suspend. **In Windows 98 the term sleep button replaces the term suspend button. - Page 62 If the low-battery condition is not resolved, the computer will enter a critical low-battery condition. In a critical low-battery condition, If Hibernation is enabled and the computer is on or in Suspend (Standby)—The computer beeps twice, then initiates Hibernation. Hibernation is enabled by default. If Hibernation is disabled and the computer is on or in Suspend (Standby)—The computer beeps twice, and the power/suspend light...
-
Page 63: Resolving Low-Battery Conditions
Resolving Low-Battery Conditions If external power is available, do one of the following— Connect the computer to an electrical outlet with the AC adapter. Dock the computer in a docking base that is connected to external power. Plug an optional Automobile Power Adapter/Charger into the power connector on the computer and into a vehicle cigarette lighter receptacle. -
Page 64: Charging A Battery Pack
Charging a Battery Pack A battery pack can be recharged wherever external power is available. These locations include the computer battery bay, DualBay, MultiBay, an optional Battery Charger, and the docking base. Charging may be delayed if a battery pack is new, has not NOTE: been used for 2 weeks or more, or is much warmer or cooler than a comfortable room temperature. -
Page 65: Monitoring The Charge In A Battery Pack
Using the Battery Status Tab To access the Battery Status tab, press the StartÅSettingsÅControl PanelÅpower icon (named Power, Power Management, or Compaq Power, depending on your operating system)ÅBattery Status tab. To display the location of a listed battery, select the corresponding battery icon. -
Page 66: Using The Power Or Power Meter Tab
In Windows NT 4.0— Task View the total battery power remaining in the system. Open the Compaq Power Properties window. Using the Power or Power Meter Tab The Power tab, called the Power Meter tab in Windows 98, is available in Windows 95 and Windows 98. -
Page 67: Calibrating A Battery Pack
To view the percent of total power remaining in each battery pack in the system, select the Show the Status of All Batteries check box. The three numbered icons correspond as follows to battery pack locations. Computer battery bay Computer DualBay Computer MultiBay Calibrating a Battery Pack Calibration increases the accuracy of all battery charge displays. -
Page 68: Running A Calibration
In Windows 98 select StartÅSettingsÅControl PanelÅPower ManagementÅBattery Calibration tab. In Windows NT 4.0 select StartÅSettingsÅControl PanelÅCompaq PowerÅBattery Calibration tab. 3. View the calibration reports in the Status column. The battery numbers in the Battery column correspond to the following locations: Battery Number 4. -
Page 69: Stopping A Calibration
Stopping a Calibration Shut down the computer or select the Stop Calibration button on the Battery Calibration tab. The Stop Calibration button is visible only during a calibration. Using Power Preferences You can increase, decrease, and allocate the power used by the computer by setting power preferences. -
Page 70: Setting Power Preferences In Windows 95 And Windows Nt 4.0
Enable/disable low-battery warning beeps. Set Hibernation timeout. Exit Suspend after a user- selected timeout. Procedure from Control Panel Select Power (or Compaq Power)Å Battery Conservation Settings tab, then select a conservation level: High provides maximum battery conservation. Medium balances battery conservation and system performance. - Page 71 Hard drive timeout. Energy-saving monitor timeout. 5-14 Managing Power Procedure from Control Panel Select Power (or Compaq Power)Å Hibernation tab, then select Standby in the Timeout drop-down list. Select Power (or Compaq Power)Å PC-Card Modems tab, then select Turn Off Power to PC Card Modem when not in use check box.
-
Page 72: Setting Power Preferences In Windows 98
Brightness drop-down list. If you are accustomed to running Windows 95 or Windows NT 4.0 on a Compaq portable computer—You will find most of the power preference options you formerly accessed in Power Properties window in the Windows 98 Power Management Properties window. -
Page 73: Turning Auto Insert Notification On Or Off
Properties. Clear the CD-ROM Auto Insert Notification check box. In Windows NT 4.0 select StartÅSettingsÅControl PanelÅCompaq PowerÅBattery Conservation Settings tab. Clear the CD-ROM Auto Insert Notification check box. To turn on auto insert notification, access the CD-ROM Auto Insert Notification check box as instructed above, then select the check box. -
Page 74: Conserving Battery Power In Windows 95
Conserving Battery Power in Windows 95 Select StartÅSettingsÅControl PanelÅPower. Then: On the Battery Conservation Settings tab, select the High battery conservation level or select the Custom battery conservation level, then enter even lower settings. On the Disk Drives tab, set a low When Powered By Batteries timeout for the disk drive. -
Page 75: Conserving Battery Power In Windows Nt 4.0
Conserving Battery Power in Windows NT 4.0 Select the Start buttonÅSettingsÅControl PanelÅCompaq PowerÅBattery Conservation Settings tab. Then: Select the High battery conservation level Select the Custom battery conservation level, then enter even lower settings. 5-18 Managing Power... -
Page 76: Working With Removable Drives And Device Bays
chapter ORKING WITH RIVES AND Bay Configuration The three computer bays support standard as well as optional devices. Some devices can be hot plugged, while others must be inserted after the computer has been turned off. The following table is a list of devices supported in all bays, as well as the computer power state required before inserting the device (see Chapter 2 for bay locations): Functional Bay... -
Page 77: E Lectrostatic D Ischarge
Caring for Removable Drives Removable drives such as the hard drive, CD-ROM or DVD- ROM drive, diskette drive, and LS-120 drive are fragile computer components that must be handled with care. WARNING: allow the internal system components to cool before touching them. CAUTION: or to prevent loss of information, observe the following precautions. -
Page 78: Changing The Startup Sequence With Multiboot
Changing the Startup Sequence with MultiBoot If more than one drive is in the system, the computer selects the drive to start from by searching for (1) a bootable CD-ROM or DVD-ROM; (2) a bootable diskette; and (3) a bootable hard drive. -
Page 79: Selecting Diskettes
Selecting Diskettes The diskette drive, which is housed in the computer DualBay, reads and writes information onto a 3.5-inch/8.89-cm diskette. The MultiBay also accommodates an optional LS-120 drive. Each drive accepts the following diskettes: Type of Drive Diskette Drive LS-120 Drive 6-4 Working with Removable Drives and Device Bays Diskettes Accepted 1.44-MB high-density (HD) -
Page 80: Dualbay Devices
DualBay Devices Inserting a DualBay Device 1. Turn off the computer, if desired. 2. Insert the device into the DualBay until it locks into place. Working with Removable Drives and Device Bays 6-5... -
Page 81: Removing A Dualbay Device
Removing a DualBay Device 1. Turn off the computer, if desired. 2. Press the DualBay release lever to release the device. 3. Remove the device. Second Battery Pack The computer is designed to use up to three battery packs: the primary battery pack is in the computer, the secondary battery pack in the DualBay, and the third battery pack is in the MultiBay. -
Page 82: Multibay Devices
MultiBay Devices The MultiBay supports a CD-ROM drive, DVD-ROM drive, LS- 120 drive, second hard drive, or a third battery pack. CAUTION: Refer to "Bay Configuration" in this chapter to determine if the computer must be on or off before inserting or removing MultiBay devices. -
Page 83: Removing A Multibay Device
Removing a MultiBay Device 1. If your device is not hot-pluggable, turn off the computer. 2. Press the MultiBay release lever to release the device. IMPORTANT: the adapter from the MultiBay, then remove the hard drive from the adapter. 3. Remove the device. Using a Second Hard Drive The computer is designed to use up to two hard drives: one in the computer and one in the computer MultiBay. -
Page 84: Using The Cd-Rom Drive Or Dvd-Rom Drive
Using the CD-ROM Drive or DVD-ROM Drive Inserting a Compact Disc 1. Turn on the computer. 2. Press the eject button on the bezel of the CD-ROM drive to release the CD loading tray. 3. Slowly pull out the CD loading tray until it is fully extended. 4. -
Page 85: Manually Ejecting A Compact Disc
Manually Ejecting a Compact Disc If a compact disc becomes lodged in the CD-ROM drive, remove it by using the following steps: 1. Insert a paper clip or similar thin metal rod into the manual release hole on the front bezel of the CD-ROM drive. Press firmly. -
Page 86: Using An Internal Modem (Available On Select Models)
chapter SING AN VAILABLE ON Connecting the Modem Cable To connect the modem to a standard telephone wall jack: WARNING: that the modem line is disconnected from the telephone network when opening the equipment’s enclosure. WARNING: the equipment, do not plug a telephone cable into the Ethernet RJ- 45 jack. -
Page 87: Selecting Communication Software
2. Plug the opposite end of the cable wall jack. IMPORTANT: standard telephone jacks but are not compatible with analog devices such as modems. Be sure the modem cable is connected to a regular analog phone line. Plugging the modem into a digital line will result in no dial tone and is not recommended. -
Page 88: Using Modem Commands And Dial Modifiers
Windows 95, Windows 98, or Windows NT 4.0: 1. Click StartÅSettingsÅControl Panel. 2. Double-click the Add/Remove Programs icon. 3. Select the Compaq internal model from the list of software. 4. Click the Add/Remove button. 5. Click Yes to confirm. -
Page 89: Selecting A Country-Specific Modem Configuration
Or, for the most up-to-date information, refer to the Compaq Internet Web site at www.compaq.com. 7-4 Using an Internal Modem (Available on Select Models) -
Page 90: Travel Connection Checklist
The internal modem supports a subset of the countries that NOTE: are listed under the Dialing Properties. If you select an unsupported country, a warning will appear and USA will be selected if you don’t choose a different supported country. You can confirm your country selection if running Windows 95, Windows 98, or Windows NT 4.0: Click StartÅSettingsÅControl PanelÅModemsÅDialing... - Page 91 Set the modem to ignore dial tones—If the modem receives a dial tone it does not recognize, it will not dial and will display a No Dial Tone error message. To set the modem to ignore all dial tones before dialing: 1.
-
Page 92: Connecting External Devices
chapter ONNECTING Connecting an External Enhanced Keyboard To connect an external enhanced keyboard to the computer, connect the keyboard cable to the keyboard/mouse connector on the computer. Connecting an External Monitor CAUTION: before connecting it to the computer or disconnecting it from the computer. -
Page 93: Connecting A Television Monitor
Connecting a Television Monitor CAUTION: a television monitor or any other object on top of the computer when the computer is closed. A Composite TV-Out is provided that allows you to switch your screen output from the computer display (panel and/or monitor) to a television monitor. -
Page 94: Connecting A Mouse Or Other External Pointing Device
Connecting a Mouse or Other External Pointing Device A PS/2-compatible mouse or external TouchPad can be connected to the computer. To connect an external pointing device, insert the pointing device cable into the keyboard/mouse connector. External pointing devices need software device drivers to operate. The necessary drivers should be provided by the manufacturer or may be preinstalled with Microsoft Windows. -
Page 95: Connecting Infrared Equipment
Connecting Infrared Equipment Infrared-equipped computers are IrDA-compliant. Infrared NOTE: performance may vary depending on peripherals, distance between infrared devices, and applications used. The infrared port is available only on specific models. The infrared port allows wireless communication between your computer and other infrared-equipped devices. Operating system support for infrared communication is currently available with Microsoft Windows 95 and Windows 98, but not for Windows NT 4.0. -
Page 96: Configuring The Infrared Port
Configuring the Infrared Port As you set up your infrared software, the following information may be helpful. The infrared port default settings are: Port, COM3; address, 3; Interrupt Request (IRQ), 3. If you use Direct Cable Connection and the utility asks you to choose a port for the infrared connection, you can select Serial Cable on COM5 or, if the computer is running a preinstalled Windows 95 or Windows 98 operating system, select Parallel... -
Page 97: Connecting Usb Peripherals
USB support, such as Windows 95 or Windows 98 preinstalled by Compaq. Later versions of the Windows operating systems will add functionality that may allow you to attach any USB device to your computer (for example, a video camera) and allow many USB devices to be connected and working simultaneously. -
Page 98: Using Pc Cards
Inserting a PC Card 1. If you are running Windows NT 4.0 but not CardWare 5.0 provided by Compaq, turn off the computer. If you are running Windows 95, you do not need to turn off the computer or initiate Suspend before inserting a PC Card. - Page 99 2. With the label side up, insert the 68-pin connector side of the PC Card into the PC Card slot, pushing gently until firmly seated. CAUTION: pressure when inserting a PC Card into a PC Card slot. If you are running Windows 95 or Windows 98 and your computer is on, the computer automatically configures a plug and play card and most other PC Cards.
-
Page 100: Removing A Pc Card
Removing a PC Card 1. If you are running Windows 95 or Windows 98, you must stop the PC Card before removing it (see “Stopping a PC Card” later in this chapter). You do not need to turn the computer off or initiate Suspend. If you are running Windows NT 4.0, you must close Windows NT 4.0 and turn off the computer. -
Page 101: Pc Card Device Drivers
PC Cards are powered accessories in a small form factor. When PC Cards are installed in your computer, they draw power from the system even when they are not in use. 9-4 Using PC Cards Compaq has tested the PC Card software preinstalled on... -
Page 102: Zoomed Video
If you are running Windows 95, remove PC Cards when they are not in use to conserve power, or turn off power to the PC Card slots through Power Properties (click StartÅSettingsÅControl PanelÅdouble-click PowerÅPower Properties). If you are running Windows 98 or Windows NT 4.0, remove PC Cards when they are not in use to conserve power. -
Page 103: Using Audio Features
chapter SING UDIO Identifying the Audio Components The computer provides the following internal and external audio capabilities: Component Stereo speakers Speaker ports EATURES Audio Components Function Built-in speakers that provide high- quality stereo and multimedia sound. They also support external audio input devices such as a CD player, tape deck, or stereo tuner connected to the computer. -
Page 104: Using Internal And External Microphones
Audio Components Component Volume button (down) Volume button (up) Microphone jack Stereo speaker/ headphone jack Internal microphone With stereo speakers muted, system beeps are still audible NOTE: unless they have been turned off. WARNING: control before putting on headphones. Using Internal and External Microphones The internal microphone is disabled when an electret condenser microphone with a 3.5-mm plug is plugged into the microphone line-in jack. -
Page 105: Using Internal And External Speakers/Headphones
Using Internal and External Speakers/Headphones External speakers: Provide more separation for the left and right audio channels. Produce more volume with amplified speakers. Produce higher quality sound. CAUTION: speaker/headphone jack. A mono plug can result in damage to the computer. The internal stereo speakers are disabled when external speakers or headphones are connected to the speaker/headphone line-out jack. -
Page 106: Speaker Ports
The volume control on the computer overrides all other volume controls in the software. That is, the volume from the integrated stereo speakers, external speakers, or headphones will never be louder than the sound level selected using the computer volume control. -
Page 107: Upgrading The Computer
Installation is performed easily by lifting the computer keyboard and inserting the memory expansion board. To order a memory expansion board, contact your Compaq authorized reseller. Refer to the instruction card that comes with the option kit for installation procedures. -
Page 108: Obtaining An Optional Memory Expansion Board
Obtaining an Optional Memory Expansion Board For a list of the memory expansion boards available for the computer, refer to Compaq Worldwide Telephone Numbers for the nearest Compaq authorized dealer, reseller, or service provider. The computer only supports SDRAM (synchronous IMPORTANT: DRAM) memory expansion boards. - Page 109 5. Insert the memory expansion board into the empty memory expansion slot at a 45-degree angle. Then slide it gently into place until it is seated while tilted. A memory expansion board is asymmetrically keyed NOTE: (notched) to ensure correct positioning. 6.
-
Page 110: Removing A Memory Expansion Board
Removing a Memory Expansion Board 1. Shut down and turn off the computer. Disconnect any external cables. 2. Remove the security screw from the bottom of the computer. 3. Release the keyboard by successively inserting a paper clip or similar instrument into the four keyboard releases WARNING: allow the internal system components to cool before touching them. - Page 111 5. Pull away the retention clips expansion board to release it. The memory expansion board tilts toward you. 6. Lift the edge of the memory expansion board gently out of the memory expansion slot at a 45-degree angle. 7. Place the memory expansion board in an electrostatic-safe container.
-
Page 112: Upgrading The Hard Drive
Upgrading the Hard Drive Depending on your computer model, the primary hard drive can be upgraded to a larger capacity. Contact your Compaq authorized dealer, reseller, or service provider for the optional hard drives available for your computer. Removing and Inserting the Primary Hard Drive 1. -
Page 113: Maintenance & Travel Guidelines
Updating the System Obtaining Customized Update Information with Info Messenger You can set up a customized search of the Compaq Internet site for new information about the software, firmware, and hardware in your system by registering with Compaq Info Messenger. -
Page 114: Obtaining Software Updates From The Compaq Internet Site
Obtaining Software Updates from the Compaq Internet Site You can obtain all Compaq system software and firmware, with download and installation instructions, from the Compaq Internet site at http://www.compaq.com. Most software is packaged in a compressed file called a NOTE: SoftPaq. - Page 115 To order a system ROM, refer to “Worldwide Telephone Numbers” in Appendix A to contact a Compaq authorized dealer, reseller, or service provider. To download a system ROM from the Compaq Internet site: 1. Obtain a formatted 1.44-megabyte diskette. 2. Go to the Downloadables area at http://www.compaq.com.
-
Page 116: Reinstalling Software
Reinstalling Software The Quick Restore package included with the computer contains the software preinstalled in the computer and instructions for restoring it. CAUTION: drivers install: Before you begin to reinstall system software, ensure that The computer is plugged into an electrical outlet with the AC adapter. -
Page 117: Preparing The Computer For Shipping Or Travel
Preparing the Computer for Shipping or Travel 1. Back up your information. 2. Remove all CD-ROMs, DVD-ROMs, diskettes, or PC Cards. 3. Shut down the computer. 4. If the computer will be disconnected from external power source for more than two weeks, remove all battery packs and store them in a cool, dry place. - Page 118 (Voltage, frequency, and plug configurations vary.) To contact a Compaq authorized dealer, reseller, or service provider near you, refer to “Worldwide Telephone Numbers” in Appendix A.
-
Page 119: Security Features
chapter ECURITY Types of Security Security features protect your computer and the information stored on it from unauthorized access. The power-on password prevents unauthorized use of the computer when it is turned on, restarted, or resumed from Suspend or Hibernation. The setup password prevents unauthorized users from changing your computer’s configuration through Computer Setup. -
Page 120: Using The Cable Lock
3. Insert the lock into the security slot on the computer. 4. Lock with the key. The cable lock can be purchased from Kensington NOTE: Microware Limited or from Compaq authorized dealers, resellers, and service providers worldwide. 13-2 Security Features... -
Page 121: Using The Power-On Password
The power-on password prevents unauthorized use of the computer when it is turned on or resumed from Suspend, Hibernation, or QuickLock/QuickBlank. CAUTION: password. Therefore Compaq recommends that you record your password and put it in a safe place. 1. Select StartÅSettingsÅControl PanelÅ PasswordsÅSecurity tab. -
Page 122: Changing The Power-On Password
If you enter the password incorrectly, an incorrect password prompt displays. Try again to enter the password. After three unsuccessful attempts, you must turn the computer off and back on again before you can continue. The password is not case sensitive. However, you must use NOTE: the same keys each time you enter the password. -
Page 123: Deleting The Power-On Password
Therefore, Compaq recommends that you record your password and put it in a safe place. If you forget your power-on password, the computer must be disassembled and the memory cleared. Contact your Compaq authorized dealer, reseller, or service provider for assistance. Security Features 13-5... -
Page 124: Using Quick Controls
Using Quick Controls Quick Controls establish security measures on your computer when it is on but not in use. QuickLock disables your keyboard and pointing device while the computer is running. It leaves your information on the screen but prevents it from being accessed until a power-on password is entered to enable the keyboard. -
Page 125: Using The Setup Password
Using the Fn+F6 hotkeys, which work only on the computer keyboard. Using the key combination Ctrl+Alt+L, which works on both the computer and external keyboards. To exit QuickLock and QuickBlank once they have been initiated, enter your power-on password. QuickLock on Suspend cannot be initiated from the NOTE: keyboard. -
Page 126: Entering The Setup Password
You will be prompted to enter your setup password the next time you try to change the computer configuration using Computer Setup. Entering the Setup Password After you establish the setup password, you must enter it each time you want to change the computer configuration. 1. -
Page 127: Deleting The Setup Password
The new password takes effect the next time you turn on the computer. Deleting the Setup Password Once your setup password has been established, you can delete it using your computer keyboard. Each computer keyboard is designed to meet specific country requirements. The syntax for changing the password varies according to the keyboard purchased with your computer. -
Page 128: Drivelock Overview
3. Select FileÅSave changes and Exit, then press Enter. 4. When prompted to confirm your action, press F10. Your Computer will restart with the new preferences. Devices disabled in Computer Setup cannot be IMPORTANT: enabled in the operating system. If you are disabling a device as a security measure, use Computer Setup Security Menu. -
Page 129: Establishing Drivelock Protection
In the event you lose the user password, the master password can be used to unlock a protected hard drive and reset the user password. If you forget your user or master password, contact Compaq NOTE: customer support for further instructions before proceeding. -
Page 130: Changing The User Or Master Password
10. Type your new master password. (You may use up to 32 alphanumeric characters, and you may use the same password you are using for the power-on password.) Type carefully because the password does not display NOTE: as you type it. 11. -
Page 131: Removing Drivelock Protection
6. Press F10. 7. Exit Computer Setup. Select FileÅSave changes and exit. Press Enter. When prompted to confirm your choice, press F10. The changes will take effect when you exit Computer Setup. Removing DriveLock Protection CAUTION: Forgetting or losing both the user and master passwords will render the protected hard drive permanently unusable. -
Page 132: Intelligent Manageability
PC management software providers. Configuration Management—optimizes computer performance by providing the latest drivers, utilities, and software, which are available on CD-ROM and the Compaq Web site at www.compaq.com. All Intelligent Manageability features are available on your computer. The features work any time, whether on the road or connected to a network. -
Page 133: Asset Management
Asset Management Asset Control enables the network administrator to remotely retrieve information from any Compaq computer connected to the network. This information can be used to assist in tracking and maintaining the computer and its components. It provides the following information: Inventory information—A network administrator can... -
Page 134: Fault Management
Fault Management The Fault Management utilities minimize downtime and data loss by monitoring system performance and generating the following alerts: Hard drive alert—warns you up to 72 hours in advance of impending hard drive problems and can automatically start optional backup software. System temperature alert—reports overheating. -
Page 135: Security Management
Info Messenger—Provides Internet and email access to the latest software updates and service documentation. Once you register for this free service at the Compaq Web site at www.compaq.com and build your computer profile, Info Messenger will search the Compaq Web site and collect information specific to your computing environment. -
Page 136: Computer Setup And Diagnostics Utilities
To display system information—Use Compaq Diagnostics for Windows whenever possible. To configure a device— In Windows 95 or Windows 98 use Compaq Diagnostics for Windows to configure a device that is not configured by the operating system. It is not necessary to configure a device connected to a... -
Page 137: Using Computer Setup
Using Computer Setup All information and settings in Computer Setup are accessed from the File, Security, or Advanced menus. The items on each of these menus are described in this section. 1. Turn on or restart the computer. When the blinking cursor appears upper-right on the screen, press To change the language, press To view navigation information, press... -
Page 138: Selecting From The File Menu
Selecting from the File Menu Begin here System information Save to floppy Restore from floppy Restore defaults Ignore changes and exit Save changes and exit To do this View identification information about the computer, a docking base, and battery packs. View specification information about the processor, memory and cache size, and system... -
Page 139: Selecting From The Security Menu
Selecting from the Security Menu Begin here Setup password* Power-On password* DriveLock passwords* Password options* NOTE: Password options is selectable only when a power-on password is set. Device security* System IDs *For more information about passwords, QuickLock, DriveLock, and disabling devices, refer to Chapter 13. 15-4 Computer Setup and Diagnostics Utilities To do this Enter, change, or delete a setup... -
Page 140: Selecting From The Advanced Menu
Selecting from the Advanced Menu Begin here Language (or press Boot Options Device Options Change the Computer Setup language. Enable/disable QuickBoot, which starts the computer more quickly by eliminating some startup tests. (If you suspect a memory failure and want to test memory automatically during startup, you may want to disable QuickBoot.) MultiBoot, which enables you to... -
Page 141: Using Compaq Diagnostics For Windows
Using Compaq Diagnostics for Windows When you access Compaq Diagnostics for Windows, a scan of all system components appears on the screen before the Compaq Diagnostics window opens. You can display more or less information from anywhere within Compaq Diagnostics for Windows by selecting Level on the menu bar. - Page 142 Error tab—Lists all errors found on the computer with their error codes. 8. To save Test information—Select the Save button on the Log tab. Error reports—Select the Save button on the Error tab. 9. To close Compaq Diagnostics for Windows, select FileÅExit. Computer Setup and Diagnostics Utilities 15-7...
-
Page 143: Troubleshooting
If the problem appears related to a software application, also check the documentation provided with the software. You may discover something you can resolve easily by yourself. If the condition persists, contact your Compaq authorized service provider or the Customer Support Center. Troubleshooting 16-1... -
Page 144: Solving Audio Problems
Problem Computer does not beep after the Power-On Self-Test (POST) Internal speaker produces no sound 16-2 Troubleshooting Solving Audio Problems Possible Cause System beeps have been turned down. The volume controls on the left side of the computer may be set too low. - Page 145 Solving Audio Problems Problem Possible Cause External microphone You are using the does not work wrong type of microphone or microphone plug for the computer. The microphone may not be connected properly. Sound source not selected. No sound is coming Audio settings are not from the game set correctly.
- Page 146 Solving Audio Problems Problem Volume is too low or too loud 16-4 Troubleshooting Continued Possible Cause Volume and/or mixing controls are set incorrectly. Solution Check the volume and mixer controls in Control PanelÅMultimedia. Adjust volume of stereo speakers using the volume controls on the left side of the computer.
-
Page 147: Solving Battery Problems
Solving Battery Problems Problem Possible Cause Computer is beeping The computer has and battery charge entered a low battery light is blinking condition. Battery charge light Computer entered a is blinking but low battery condition computer does not while low battery beep warning beeps and/or system beeps are... - Page 148 Solving Battery Problems Problem Battery pack will not fast charge Computer shut down and information was lost when replacing a battery pack Battery charge does not last very long Battery gauge appears inaccurate 16-6 Troubleshooting Continued Possible Cause Battery pack was exposed to tempera- ture extremes.
- Page 149 Solving CD-ROM Drive and DVD-ROM Drive Problems Problem Possible Cause CD-ROM drive The CD is not cannot read a properly seated in compact disc the drive. The CD has been loaded upside down. The CD may be dirty or scratched. Cannot eject CD is not properly compact disc...
- Page 150 Solving Diskette and SuperDisk LS-120 Drive Problems Problem Diskette drive cannot write to a diskette 16-8 Troubleshooting Possible Cause Solution Format the diskette. Diskette is not formatted. If you are running Windows NT 4.0, format the diskette by entering format a: at the system prompt.
- Page 151 Solving Diskette and SuperDisk LS-120 Drive Problems Problem Possible Cause Diskette drive cannot Diskette is not read a diskette formatted or is formatted incorrectly. You are using the wrong type of diskette for the drive. Error message Diskette was removed appears while while drive light was information is writing...
-
Page 152: Solving Hard Drive Problems
Hard drive error occurs CAUTION: permanently; be sure to make backup diskettes of your information before reformatting the drive. Compaq also recommends that you order a backup of your preinstalled software before reformatting your hard drive. 16-10 Troubleshooting Solving Hard Drive Problems... -
Page 153: Solving Hardware Installation Problems
Solving Hardware Installation Problems Problem Possible Cause Hardware devices The system did not are not working automatically properly configure the new device. Cable(s) of the new external device may be loose or the power cable may be unplugged. The power switch of the new external device is not turned on or was turned on... -
Page 154: Solving Keyboard Problems
Problem Embedded numeric keypad on the computer keyboard is disabled Screen is on and keyboard is locked External keyboard does not work Problem Memory counting during Power-On Self-Test (POST) is incorrect Insufficient memory error during operation 16-12 Troubleshooting Solving Keyboard Problems Possible Cause Num Lock function is off. -
Page 155: Solving Modem Problems
Solving Modem Problems Problem Possible Cause ERROR message Typing error. Excessive line Modem is connected current sensed to a digital line. message No dial tone, with or You are not in your without NO DIAL home country and the TONE message modem does not recognize the local dial tone. - Page 156 Solving ModemProblems Problem No dial tone, with or without NO DIAL TONE message. Modem sounds are not audible 16-14 Troubleshooting Continued Possible Cause The modem or modem COM port is disabled. The modem is not responding to commands from the computer keyboard.
- Page 157 Disable error correction (&KO) and data compression (&MO) using AT commands. NOTE: To access AT commands and instructions for using them, select StartÅ Compaq Information CenterÅModem Commands. For information about disabling Call Waiting, consult your operating system documentation. To obtain the disable...
- Page 158 Solving Modem Problems Problem Modem does not connect. Fax transmissions do not work. 16-16 Troubleshooting Continued Possible Cause Another device on your telephone line may be causing interference. The telephone line does not support 56K implementation. There is noise on the telephone line.
- Page 159 Disable error correction (&KO) and data compression (&MO) using AT commands. NOTE: To access AT commands and instructions for using them, select StartÅCompaq Information CenterÅ Modem Commands. Continued Troubleshooting 16-17...
- Page 160 Solving Modem Problems Problem Modem loses connection 16-18 Troubleshooting Continued Possible Cause Call Waiting may be interfering with the connection. Another device on your telephone line may be causing interference. Hibernation was initiated; the computer reached a low-battery or critical low-battery condition.
-
Page 161: Solving Pc Card Problems
In such cases, refer to the instructions that came with the PC Card or contact the vendor for more information on installing the correct drivers. Call Compaq Customer Support for a current list of Compaq-qualified PC Cards. Continued Troubleshooting 16-19... - Page 162 Remove the device that has the conflicting resource, then reinsert the PC Card. Call the PC Card vendor or Compaq Customer Support for assistance. Network cards, audio cards, and other types of PC Cards may need software device drivers in order to function properly.
- Page 163 PC Card to work in the network operating system environment. Continued Solution Call Compaq Customer Support for a current list of Compaq-qualified PC Cards. Call the PC Card vendor or Compaq Customer Support for assistance.
-
Page 164: Solving Power Problems
Hibernation was disabled. Solution Load the Microsoft Flash File System. Format the PC Card as you would a diskette. Call Compaq Customer Support for a current list of Compaq-qualified PC Cards. Solution Connect the computer to an external power source. -
Page 165: Solving Printer Problems
Solving Printer Problems Problem Possible Cause Printer will not turn The cables may not be connected properly or the printer is unplugged. Printer will not print Printer is not turned Printer is not online. The printer drivers for the application are not installed. -
Page 166: Solving Screen Problems
Problem Characters on computer display are Screen is blank and the power/suspend light is on Screen is blank and the power/suspend light is blinking Screen is blank and the battery charge light is blinking NOTE: The popup windows used to control brightness display correctly only when you are in an application that supports the popup video mode. - Page 167 Solving Screen Problems Problem Possible Cause Screen is blank and The computer has no lights are on either entered Hibernation or, if Hibernation is disabled, the battery pack has discharged without saving your information. Screen is blank and QuickLock and keyboard is locked QuickBlank were initiated.
-
Page 168: Solving Software Application Problems
Check the documentation that came with the software for memory requirements and install additional memory, if needed. Call Compaq Customer Support for help with memory optimization. Using Windows Notepad, add the application directory with the full path name to the... -
Page 169: Solving Pointing Device Problems
Solving Pointing Device Problems Problem Possible Cause External pointing The external pointing device is not working device was connected to the computer while the computer was on. TouchPad is not Incorrect or no device working driver is installed. Device driver is The wrong mouse is loaded but pointing selected. -
Page 170: Solving Infrared Problems
Problem Cannot communicate with another computer 16-28 Troubleshooting Solving Infrared Problems Possible Cause The required software is not running on both computers. One computer does not have an IrDA- compliant infrared port. The pathway between the infrared ports is obstructed, one port is more than 30 degrees (plus or minus 15 degrees off the center... - Page 171 Solving Infrared Problems Continued Problem Possible Cause Cannot transmit data Direct sunlight, fluorescent light, or flashing incandescent light is close to the infrared connections. There is interference from other wireless devices. A physical obstruction is in the way. One of the devices was moved during data transmission.
-
Page 172: Solving Usb Problems
Problem External device connected to a USB connector does not work External device connected to USB connector does not work during startup (before Windows 95 loads) External devices in lower tiers do not work IMPORTANT: External USB keyboards will not function until the operating system has been booted. -
Page 173: Compaq Customer Support
If you cannot solve a problem using the troubleshooting chapter, you may need to call technical support. To receive the fastest possible solution when you call, follow the instructions in Chapter 15 to run the Compaq diagnostics utilities. Have the following available when you call: The computer... -
Page 174: Worldwide Telephone Numbers
Print or Save configuration and diagnostic information. To obtain, print, or save configuration and diagnostic information, refer to Chapter 15. If you take your computer to a Compaq authorized reseller, NOTE: dealer, or service provider for service, remember to provide the power-on and setup passwords, if they are set. - Page 175 1 800 263 5868 1 281 518 2200 2 200 8100 2 225 9490 10 6831 3399 10 6834 6721 10 6834 6738 10 6834 6709 10 6834 6724 10 6834 6739 10 6831 3399 ext. 5873 Compaq Customer Support A-3 Continued...
- Page 176 QuickLine BBS (RNIS) Germany General Information* General Information Fax* All Products Fax* Portables Hotline* NOTE: Indicates domestic numbers not available internationally A-4 Compaq Customer Support Continued Country Code Telephone Number 1 312 0201 1 523 1800 +420 2 61 108 111...
- Page 177 3 6363 444 +972 3 639 6601 +353 1 402 6833 0 800 859 030 2 69633281 2 89200222 2 69633282 0120 101 589 0120 101 589 0120 505 589 0120 250 589 81 3 5402 0991 Compaq Customer Support A-5 Continued...
- Page 178 General Information Technical Support* Fax* New Zealand General Information Technical Support Customer Support Center NOTE: Indicates domestic numbers not available internationally A-6 Compaq Customer Support Continued Country Code Telephone Number 2 3470 0700 2 523 3575 080 902 7777 +352...
- Page 179 1 412 0654 95 967 1700 95 967 1700 750 3030 750 3030 750 4514 11 356 4444 11 356 4444 11 483 3411 902 10 14 14 902 20 2400 91 634 88 11 Compaq Customer Support A-7 Continued...
- Page 180 United Kingdom General Information* General Information FaxPaq/PaqFax QuickLine BBS NOTE: Indicates domestic numbers not available internationally A-8 Compaq Customer Support Continued Country Code Telephone Number 200 27 00 00 8 730 01 50 (75 SK per call) 9 730 01 62...
- Page 181 Order Software Backup* Battery Pack Recycling* Venezuela General Information Technical Support NOTE: Indicates domestic numbers not available internationally Continued Country Code Telephone Number 1-800-345-1518 1-800-OKCOMPAQ (1-800-652-6672) 1-800-345-1518, Option 1 1-281-518-1418 1-800-952-7689 1-800-524-9859 2 953 0854 2 953 9705 Compaq Customer Support A-9...
-
Page 182: Appendix B Regulatory Notices
EGULATORY Throughout these regulatory notices, Compaq products are referred to by their regulatory agency series numbers. Regulatory Agency Series Numbers Regulatory agencies worldwide use agency series numbers for product identification. Each approved product displays the assigned agency series number. To ensure continued safe and... -
Page 183: Federal Communications Commission Notice
Modifications The FCC requires the user to be notified that any changes or modifications made to this device that are not expressly approved by Compaq Computer Corporation may void the user’s authority to operate the equipment. Cables Connections to this device must be made with shielded cables with metallic RFI/EMI connector hoods to maintain compliance with FCC Rules and Regulations. -
Page 184: Canadian Notice
For questions regarding this declaration, write Compaq Computer Corporation P. O. Box 692000, Mail Stop 510101 Houston TX 77269-2000 or call 281-514-3333 To identify your product, refer to the part, series, or model number found on the product. If you have questions about your product that are not related to... -
Page 185: Japanese Notice
Safety Regulations for Display Work Places in the Office Sector) when used in conjunction with docking bases, keyboards, and monitors that bear the “GS” approval mark. The Compaq Series PP2000 of laptop computers in a standalone mode are not intended for continuous use in an office environment. -
Page 186: Power Cords
Do not attempt to recharge, disassemble, immerse in water, or dispose of it in fire. Replacement should be done by a Compaq authorized service provider using the Compaq spare part for this computer. -
Page 187: Laser Safety
Laser Safety All Compaq systems equipped with laser products comply with appropriate safety standards, including IEC 825. With specific regard to the laser, the equipment complies with laser product performance standards set by government agencies for Class 1 laser products. It does not emit hazardous light; the beam is totally enclosed during all modes of customer operation and maintenance. - Page 188 Only authorized technicians trained by Compaq should attempt to repair this equipment. All troubleshooting and repair procedures are detailed to allow only subassembly/module level repair. Because of the complexity of the individual boards and sub- assemblies, no one should attempt to make repairs at the component level or to make modifications to any printed wiring board.
- Page 189 This equipment may not be used on coin service provided by the telephone company. Connection to party lines is subject to state tariffs. For the Compaq Customer Support Center and your nearest Compaq Authorized reseller in North America, call 1-800-345-1518 or write: Compaq Customer Support Center P.O.
-
Page 190: Telephone Consumer Protection Act Of 1991
Telephone Consumer Protection Act of 1991 The Telephone Consumer Protection Act of 1991 makes it unlawful for any person to use a computer or other electronic device to send any message via a telephone facsimile machine unless such message clearly contains, in a margin at the top or bottom of each transmitted page, or on the first page of the transmission, the date and time it is sent and an identification of the business, or entity, or individual sending the message and the... -
Page 191: New Zealand Modem Statements
The Ringer Equivalence Number (REN) for this device does not exceed 1.0. For the location of the authorized Canadian maintenance facility nearest you, call 1-800-OKCOMPAQ or contact: Compaq Canada, Inc. 45 Vogell Road Richmond Hill, Ontario L4B 3P6 New Zealand Modem Statements... - Page 192 This device is equipped with pulse dialing, while the Telecom standard is DTMF tone dialing. There is no guarantee that Telecom lines will always continue to support pulse dialing. Use of pulse dialing, when this equipment is connected to the same line as other equipment, may give rise to bell tinkle or noise and may also cause a false answer condition.
-
Page 193: Macrovision Corporation Notice
Macrovision Corporation Notice This product incorporates copyright protection technology that is protected by method claims of certain U.S. patents and other intellectual property rights owned by Macrovision Corporation and other rights owners. Use of this copyright protection technology must be authorized by Macrovision Corporation and is intended for home and other limited viewing uses only unless otherwise authorized by Macrovision Corporation. -
Page 194: Electrostatic Discharge
appendix LECTROSTATIC A discharge of static electricity from fingers or other electrostatic conductors may damage electronic components. Before handling electrostatic-sensitive components, discharge static electricity by one of the methods described in this appendix. Preventing Electrostatic Discharge When Handling Removable Drives To prevent electrostatic damage to removable drives, observe these precautions: Before handling a removable drive, discharge static electricity... -
Page 195: Grounding Methods
To provide proper ground, wear the strap snug against the skin. If you need more information about static electricity or NOTE: assistance with product installation, contact your Compaq authorized dealer, reseller, or service provider. C-2 Electrostatic Discharge 10 percent resistance in the ground... -
Page 196: Appendix D Specifications
appendix PECIFICATIONS Temperature Operating Nonoperating Relative Humidity (noncondensing) Operating Nonoperating = 38.7°C max) Altitude Operating Nonoperating Applicable product safety standards specify thermal limits NOTE: for plastic surfaces. This computer operates well within this range of temperatures. Rated Voltage Rated Frequency Rated Input This product is designed for IT power systems in Norway NOTE:... -
Page 197: Index
NDEX AC Adapter, 1-3 Aircraft Power Adapter (optional) as power source, 5-1, 5-6 connecting, 5-6 airport security devices, 12-5 alerts system. See Intelligent Manageability, Fault Management APM battery pack (Windows 98), 5-8 applications. See software Armada Reference Guide, 1-1 Armada Reference Guide, online, 1-1 AT Commands, 7-3 audio controlling volume, 10-3... - Page 198 1-1 Compaq Diagnostics, A-1 Compaq Diagnostics for Windows, 15-1, 15-6 Compaq Information Center, 1-1 Compaq Internet site, 1-1, 7-3, 12-2 Info Messenger, 12-1 system software updates, 12-3 Compaq Internet Web site, 7-5 Compaq Support, A-1 Compaq Support Software CD, 12-1...
- Page 199 display switch, 2-1 docking base (optional) setting device connected to video card in, as primary, 15-5 Docking connector, 2-6 docking device, 8-6 downloadables, 12-3 DriveLock changing user password, 13-12 enabling, 13-11 overview, 13-10 removing, 13-13 user and master passwords overview, 13-10 drives replacing with weight saver, 1-3...
- Page 200 headphone jack, 2-4, 10-2 Hibernate on Suspend setting, in Windows 95, 5-13 Hibernation aborting restoration from, 5-6 defined, 5-2 enabling/disabling, in Windows 95, 5-14 identifying, 5-4, 5-5 initiated during critical low-battery condition, 5-5 initiating, 5-3, 5-4 restoring from, 5-3, 5-4, 5-6 hibernation file changing location of, in Windows 95, 5-14...
- Page 201 Keyboard/Mouse connector, 2-6 keypad, embedded numeric, 3-11 keypad, external numeric, 3-11 language, choosing in Computer Setup, 15-2 left pointing-stick button, 3-4, 3-5 left TouchPad button, 3-2, 3-3, 3-5 light battery, 5-4, 5-7 num lock, 3-11 power/suspend, 5-5 light, affecting computer sunlight, 12-4 ultraviolet, 12-4 local area network (LAN)
- Page 202 online resources, accessing, 1-1 operating system reinstalling, 12-4 overhead projector, 3-7, 3-8 panel contrast adjusting, with hotkeys, 3-9 Parallel connector, 2-6 parallel port, 15-5 passwords changing power-on password, 13-4 changing setup password, 13-8 deleting power-on password, 13-5 deleting setup password, 13-9 entering power-on password, 13-3 entering setup password, 13-8 establishing power-on password, 13-3...
- Page 203 Quick Controls initiating from keyboard, 3-8, 3-9 QuickBoot, 15-5 QuickLock/QuickBlank, 13-3, 13-5, 13-6 QuickRestore CD-ROM, 1-1 QuickRestore CD-ROMs, 12-4 RAM. See random access memory RAM (random access memory), 5-2, 11-1 Reference Guide, Armada, online, 1-1 registration for Info Messenger, 12-1 removable drives caring for, 6-2 prevent electrostatic damage, C-1...
- Page 204 Windows 95, 5-13 system idle timeout setting, in Windows 95, 5-12, 5-13 setting, in Windows NT 4.0, 5-12 system information displaying in Compaq Diagnostics for Windows, 15-1, 15-6 displaying in Computer Setup, 15-1, 15-2, 15-3 displaying with hotkeys, 3-8, 3-10...
- Page 205 USB peripherals, 8-6 USB problems, 16-30 user password. See DriveLock utilities, configuration, diagnostic, and system information, selecting Computer Setup or Compaq Diagnostics for Windows, 15-1 version number of system software displaying in Compaq Diagnostics for Windows, 15-6 displaying in Computer Setup, 12-2...