Advertisement
Quick Links
Download this manual
See also:
Instruction Manual
D-460Z QG 00/1/28
0.1.28 11:41
Page 1
? Having Problems with
Your Olympus Camera ?
Visit Our Web Site at www.olympus.com. for Instant Online Support
®
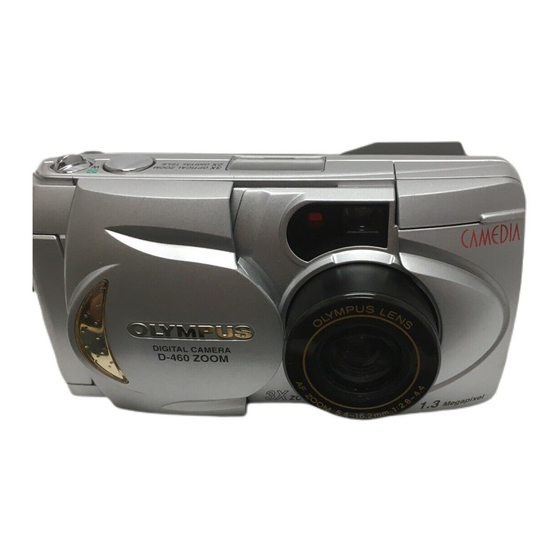
Thank you for choosing the Olympus
D-460 Zoom, the filmless digital camera
that gives you the convenience of a compact point-and-shoot camera, the
flexibility of a zoom camera, plus a host of advanced features and image quality
that only Olympus can provide. For the finest in filmless photography, look to
Olympus. World Leaders in Film and Filmless Photography.
To ensure you are completely satisfied with your D-460 Zoom purchase, we've
prepared this easy-to-follow users' guide. Just follow these simple instructions
to set up and begin using the D-460 Zoom.
For more detailed instructions on
feature use, please refer to the complete Owner's Manual included in your
package.
First, take a moment to familiarize yourself with the key areas of camera
operation by reviewing the illustrations below.
Flash mode button/Erase button
Selftimer button/Print button
Viewfinder
Macro/Digital Tele button/Protect button
Diopter
adjustment
dial
LCD monitor
OK button
Threaded tripod mount
Battery compartment open/close lever (bottom)
Flash mode
Macro mode
White balance
Recording mode
Exposure compensation
Spot metering
mode
Sequential
shooting
Selftimer
Number of storable pictures
Card error/Card function
Writing
Battery check
Taking Pictures with Your Olympus D-460 Zoom
Get Ready...
Before you begin using the D-460 Zoom:
1. Load two CR-V3 battery packs in the compartment at the bottom of the camera as
indicated by the diagram imprinted on the camera body.
For best results, Olympus America Inc. strongly recommends using two CR-V3 lithium
battery packs or four "AA" nickel metal-hydride (NiMH) batteries. Four "AA" lithium or nickel
cadmium (NiCd) batteries may also be used. Do not use manganese batteries. An optional
Olympus AC adapter (C-7AU) is available and is recommended when downloading images
to ensure a consistent power supply voltage.
2. Insert the SmartMedia™ card. With the camera facing you, open the small door to the
left of the lens barrier and slide the card into the slot.
This card is your "film". It stores your images for reviewing, downloading, and printing. To
insert, simply slide the card with the gold contacts facing the back of the camera into the slot
and close the cover. To remove, gently pull the card out of the slot.
3. Turn on the power.
Slide open the lens barrier on the front of the camera until you feel a click. Icons
representing camera default settings appear on the camera control panel, along with the
number of pictures available at the preset memory settings. The lens barrel automatically
extends.
LCD monitor ON/OFF button
Menu button
To turn the camera off, slide the lens barrier halfway closed. The lens barrel retracts. Close
the lens barrier completely.
Jog dial
Shutter release button
Zoom lever
Sharpness
Card compartment
ISO
cover
Flash
Control panel
Connector cover
Lens
Video output
Computer
Lens barrier
connector
connector
AC adapter connector
Focus On Life
Get Set...
Now, perform the D-460 Zoom's initial set-up. These are the default camera settings that will
affect every picture you take.
Note: These settings may be changed at any time.
1. Close the lens barrier and press the LCD monitor ON/OFF button
camera and the LCD monitor on.
2. Press the Menu button
to select the items you want to adjust.
This button is located next to the LCD monitor. Once you've selected the item, use the Jog
dial to scroll through your choices and make your adjustments from the following modes:
SLIDE-SHOW MODE:
To run through all the stored pictures automatically.
FILE NUMBER DISPLAY:
No.
To display the Frame number or File name.
CARD SETUP:
ALL-FRAME ERASE:
To erase all the stored pictures.
CARD FORMAT:
Select this setting by pressing
on the Jog dial, then press the OK button
Note: Formatting a card erases all existing data on the card, even locked images.
These images cannot be recovered.
DATE AND TIME:
Enter the year, month and day.
INDEX VIEW:
Choose the number of images to be shown in the Index-Display mode: 4, 9, or 16.
LCD DISPLAY BRIGHTNESS:
To either increase or decrease the brightness of the LCD monitor, use
Notice how the live preview changes as you make adjustments.
3. Press the OK button
to confirm each setting. When finished, press the LCD monitor
OK
ON/OFF button
to turn off the display. Open the lens barrier to continue set up
procedures for taking individual pictures.
to turn the
.
OK
on the Jog dial.
Advertisement

Related Manuals for Olympus CAMEDIA D-460 Zoom


Summary of Contents for Olympus CAMEDIA D-460 Zoom
-
Page 1: Get Ready
Olympus can provide. For the finest in filmless photography, look to Olympus. World Leaders in Film and Filmless Photography. - Page 2 Optional Accessories For even more photographic creativity and enjoyment, Olympus offers a variety of optional accessories for use with your D-460 Zoom. • P-330N photo printer to print pictures directly from your camera.