Table of Contents
Advertisement
Quick Links
SERVICE MANUAL
Picture tube
0.25 mm aperture grill pitch
17 inches measured diagonally
90-degree deflection
Video image area
(16" maximum viewing image)
Approx. 329.5 x 243 mm (w/h)
(13 x 9
Max. resolution
Horizontal: Max. 1280 dots
Vertical: Max. 1024 lines
(at 75 Hz Refresh Rates)
Standard image area
Approx. 306 x 230 mm (w/h)(Mode 1-13)
Approx. 294 x 231 mm (w/h)(Mode 14-15)
Input signal
Video
Analog RGB (75 ohms typical)
0.7 Vp-p, Positive
Sync
External HD/VD, Composite
Polarity Free TTL
Video Composite (Sync on Green)
0.286 Vp-p, Negative
SPECIFICATIONS
5/8
inches)
N. Hemisphere Model
S. Hemisphere Model
Australian Model
D-1H
Power Consumption
Maximum
Nominal
Deflection frequency
AC input voltage / current
Dimensions
Mass
Design and specifications are subject to change without notice.
COLOR MONITOR
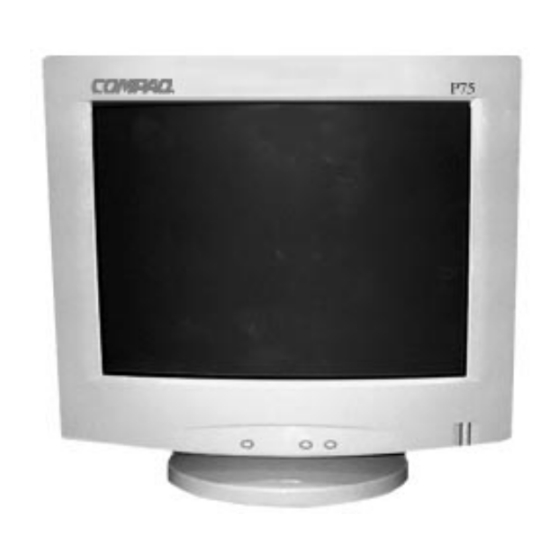
P75
US Model
Canadian Model
UK Model
AEP Model
Chassis No. SCC-L07E-A
CHASSIS
115W
100W, 341 BTU/h
Horizontal: 30 to 85 KHz
Vertical: 50 to150 Hz
100 to 120 V, 50/60 Hz, 1.8 A
220 to 240V, 50/60Hz, 1A
424 x 422 x 428 (w/h/d)
(16.7 x 16.6 x 16.9 inches)
Approx. 18.48 kg (40.8 lb.)
P75
Advertisement
Table of Contents

Related Manuals for Compaq D-1H


Summary of Contents for Compaq D-1H
-
Page 1: Service Manual
Analog RGB (75 ohms typical) 0.7 Vp-p, Positive Sync External HD/VD, Composite Polarity Free TTL Video Composite (Sync on Green) 0.286 Vp-p, Negative N. Hemisphere Model S. Hemisphere Model D-1H SPECIFICATIONS Power Consumption Maximum Nominal Deflection frequency AC input voltage / current Dimensions Mass Design and specifications are subject to change without notice. - Page 2 POWER SAVING FUNCTION This monitor has three Power Saving modes. By sensing the absence of a video signal from the computer, it reduces power consumption as follows: State 1 Normal Operation 2 Standby (1st mode) 3 Suspend (2nd mode) 4 Active-off (3rd mode) 5 Power-off 6 Failure mode TIMING SPECIFICATION...
- Page 3 After correcting the original service problem, perform the following safety checks before releasing the set to the customer: 1. Check the area of your repair for unsoldered or poorly-soldered connections. Check the entire board s u r f a c e f o r s o l d e r s p l a s h e s...
-
Page 4: Table Of Contents
Section 1. GENERAL ... 5 2. DISASSEMBLY 2-1. Cabinet Removal ...8 2-2. Service Position ... 8 2-3. A, D, H, S Board Removal... 8 2-4. Picture Tube Removal ... 9 3. SAFETY RELATED ADJUSTMENT 4. ADJUSTMENTS 5. DIAGRAMS 5-1. Block Diagram ...15 5-2. -
Page 5: General
CAUTION: This USB connector is not designed for use with high speed USB devices such as a video camera, scanner, etc. Compaq recommends connecting high speed devices directly to the computer These USB connectors operate as a pass-through system. Your computer must have a USB host controller installed for any USB-connected devices to operate. - Page 6 On-Screen Display Settings The adjustments for screen settings are located in the on-screen display and can be viewed in one of five available languages. The on-screen Main Menu displays the following ten functions: Size and Position Adjusts width, height, and horizontal and vertical positions of the screen.
- Page 7 Display Resolutions The display resolutions listed below are the most commonly used modes and are set as factory defaults. The monitor automatically recognizes these preset modes when they are requested by a software program and will provide the user with a properly sized and centered display.
-
Page 8: Disassembly
2-1. CABINET REMOVAL Two claws PUSH Cabinet Two screws (BVTP 4 x 16) 2-3. A, D, H, S BOARD REMOVAL S board SECTION 2 DISASSEMBLY 2-2. SERVICE POSITION PUSH A board H board A board Cable stopper Cable bracket Five screws (BVTP 3 x 12) D board D board... -
Page 9: Picture Tube Removal
2-4. PICTURE TUBE REMOVAL REMOVAL OF THE ANODE-CAP NOTE: Short circuit the anode of the picture tube and the anode cap to the metal chassis, CRT shield or carbon painted on the CRT, after removing the anode. REMOVAL PROCEDURES Turn up one side of the rubber cap in the direction indicated by arrow HOW TO HANDLE AN ANODE-CAP Do not use sharp objects which may cause damage to the surface... -
Page 10: Safety Related Adjustment
SAFETY RELATED ADJUSTMENT When replacing parts shown in the table below, the following operational checks must be performed as a safety precaution against X-ray emissions from the unit. D - BOARD Part Replaced ([) RV501 Part Replaced (]) RV501, T501, R545, R546, R548, R550, R547, R549, R552, D517, IC605, IC901, C540, C542, C544, C541, C535, IC501, C558, R567, R564, C555, C553, C554, C561 Allow the unit to warm up for one minute prior to... -
Page 11: Adjustments
Connect the communication cable of the connector located on the D board on the monitor. Run the service software and then follow the instructions. 1-690-391-21 IBM AT Computer as a Jig D-sub (9 Pin [female]) *The parts above ( Allow a 30 minute warm-up period prior to making the following adjustments: Landing Rough Adjustment 1. - Page 12 Receive White cross-hatch. Adjust HMC and VMC at six-pole magnet. < 6 Pole Magnet> Receive R.B. cross-hatch. Adjust H.TILT by swinging the DY neck right and left. Adjust XCV with XCV core. XCV movement Adjust V.TILT with TLV VR. TLV movement Adjust Y.CROSS with YCH VR.
-
Page 13: Circuit Boards Location
5-2. CIRCUIT BOARDS LOCATION 5-3. SCHEMATIC DIAGRAMS AND PRINTED WIRING BOARDS Note: • All capacitors are in F unless otherwise noted. pF: 50 WV or less are not indicated except for electrolytic. • Indication of resistance, which does not have one for rating electrical power, is as follows. - Page 14 B-IN B-OUT +12V G2-CUT OFF CONTROL SPOT KILLER IC005 CN302 Q001 CN303 CN1303 CN1301 CN1302 CN1304 DP GND DP GND (USB2) (USB1) B-#SV9055<COMPAQ-D1H>-U1.. B-#SV9055<COMPAQ-D1H>-U2.. POWER T505 BUFFER Q521 T501 HV-REG Q503 OP2+ PWM-CONT RV501 IC501 HV-OUT Q510 H-DRIVE T504 H.DRIVE H.DRIVE OUT...
- Page 15 (VIDEO) CN307 D301 :S-MICRO C301 1SS226 S T B Y + 5 V FB302 BGND B:CHIP BLUE R301 D201 FB303 IC006 C201 GGND FB202 1SS226 CXA2093S :RN-CP RGB PRE-AMP GREEN B:CHIP S I G N A L R201 FB203 FB102 RGND :RN-CP R 1 _ I N...
- Page 16 4.7k L507 :CHIP C550 C556 220p R568 :CHIP +12V R560 R550 1.8k C547 R562 CN503 R566 C549 0.068 ROTATION- ROTATION+ 5V-2 R563 IC502 :FPRD LA6500-FA ROTATION DRIVE R552 C544 0.01 R558 C513 R559 2.7k -15V CN512 CN513 :TUB :TUB SV9055<COMPAQ-D1H>-D..
- Page 17 VR9101 VR9102 (CONT/BRITE CN9101 FB9101 FB9102 CONT FB9103 BRIGHT CNTL) B-#SV9055<COMPAQ-D1H>-H.. D-BOARD CN9901 & CN990...
- Page 18 (PWR SWITCH AND LED) CN9201 TO D-BOARD GREEN D9201 CN904 D9202 AC LIVE IN CN6601 TO D-BOARD CN603 S901 AC LIVE OUT CN6602 B-#SV9055<COMPAQ-D1H>-S..
- Page 19 CN1301 TO USB PNP DEVICES (USB1) B-#SV9055<COMPAQ-D1H>-U1.. CN1302 TO U2-BOARD CN1303 DP GND...
- Page 20 CN1303 TO U1-BOARD CN1302 DP GND (USB2) B-#SV9055<COMPAQ-D1H>-U2.. CN1304 TO COMPUTER USB PORT...
-
Page 21: Exploded Views
¡ ¡ ¡ ¡ ¡ sont critiques pour la securite. Ne les remplacer que par une piece portant le numero specifie. DESCRIPTION REMARK BADGE, COMPAQ LABEL, INFORMATION S BOARD, MOUNTED D BOARD, COMPLETE TRANSFORMER ASSY, FLYBACK (NX-4400//X4L4) CONNECTOR ASSY. -
Page 22: Chassis (Aep, Uk Models Made In Uk)
¡ ¡ ¡ ¡ ¡ sont critiques pour la securite. Ne les remplacer que par une piece portant le numero specifie. DESCRIPTION REMARK BADGE, COMPAQ LABEL, INFORMATION S BOARD, MOUNTED D BOARD, COMPLETE TRANSFORMER ASSY, FLYBACK (NX-4400//X4L4) CONNECTOR ASSY. -
Page 23: Packing Materials
Note: The components Identified by shading and mark ¡ ¡ ¡ ¡ ¡ are critical for safety. Replace only with part number specified. 6-3. PACKING MATERIALS REF.NO. PART NO. DESCRIPTION REF.NO. 53 ¡ 53 ¡ 53 ¡ Note: Les composants identifies per un trame et une marque ¡... -
Page 24: Electrical Parts List
Note: The components Identified by shading and mark ¡ ¡ ¡ ¡ ¡ Replace only with part number specified. Note: The components Identified by shading REF.NO. PART NO. DESCRIPTION and mark ¡ ¡ ¡ ¡ ¡ a re critical for safety. Replace only with part number specified. - Page 25 Note: The components Identified by shading and mark ¡ ¡ ¡ ¡ ¡ are critical for safety. Replace only with part number specified. REF.NO. PART NO. DESCRIPTION DIODE D001 8-719-109-89 DIODE RD5.6ESB2 D003 8-719-109-89 DIODE RD5.6ESB2 D014 8-719-911-19 DIODE 1SS119-25 D101 8-719-800-76 DIODE 1SS226 D104...
- Page 26 Note: The components Identified by shading and mark ¡ ¡ ¡ ¡ ¡ Replace only with part number specified. REF.NO. PART NO. DESCRIPTION R043 1-216-295-91 SHORT R045 1-216-057-00 RES,CHIP 2.2K R046 1-216-097-91 RES,CHIP 100K R047 1-216-073-00 RES,CHIP R048 1-211-885-21 METAL 2.2M R049 1-216-697-91 METAL CHIP...
- Page 27 Note: The components Identified by shading and mark ¡ ¡ ¡ ¡ ¡ are critical for safety. Replace only with part number specified. REF.NO. PART NO. DESCRIPTION C518 1-117-954-11 FILM 4300PF C519 1-136-538-11 FILM 0.001MF C520 1-164-232-11 CERAMIC CHIP 0.01MF C521 1-107-444-11 CERAMIC 100PF...
- Page 28 Note: The components Identified by shading and mark ¡ ¡ ¡ ¡ ¡ Replace only with part number specified. REF.NO. PART NO. DESCRIPTION C704 1-163-259-91 CERAMIC CHIP 220PF C705 1-130-495-00 FILM 0.1MF C706 1-102-973-00 CERAMIC 100PF C707 1-102-973-00 CERAMIC 100PF C708 1-130-495-00 FILM 0.1MF...
- Page 29 Note: The components Identified by shading and mark ¡ ¡ ¡ ¡ ¡ are critical for safety. Replace only with part number specified. REF.NO. PART NO. DESCRIPTION D601 ¡ 8-719-025-88 DIODE GBU4JL-6088 D602 8-719-911-19 DIODE 1SS119-25 D605 8-719-911-19 DIODE 1SS119-25 D606 8-719-986-73 DIODE RB441Q D607...
- Page 30 Note: The components Identified by shading and mark ¡ ¡ ¡ ¡ ¡ Replace only with part number specified. REF.NO. PART NO. DESCRIPTION IC900 8-759-525-10 IC TC7SET08F(TE85L) IC901 8-759-529-90 IC CXD8757S IC902 8-759-537-27 IC CXA8071AP IC904 8-759-165-81 IC PST600D-T IC905 8-759-370-34 IC ST24C08FB6 CHIP CONDUCTOR JR001...
- Page 31 Note: The components Identified by shading and mark ¡ ¡ ¡ ¡ ¡ are critical for safety. Replace only with part number specified. REF.NO. PART NO. DESCRIPTION R406 1-216-677-11 METAL CHIP R407 1-249-421-11 CARBON 2.2K R408 1-216-073-00 RES,CHIP R409 1-216-671-11 METAL CHIP 6.8K R410 1-215-447-00 METAL...
- Page 32 Note: The components Identified by shading and mark ¡ ¡ ¡ ¡ ¡ Replace only with part number specified. REF.NO. PART NO. DESCRIPTION R603 1-249-403-11 CARBON R604 ¡ 1-202-847-00 SOLID 560K R605 ¡ 1-202-933-61 FUSIBLE R609 1-215-927-00 METAL OXIDE R610 1-215-927-00 METAL OXIDE R611 1-215-445-00 METAL...
- Page 33 Note: The components Identified by shading and mark ¡ ¡ ¡ ¡ ¡ are critical for safety. Replace only with part number specified. REF.NO. PART NO. DESCRIPTION R958 1-216-017-91 RES,CHIP R959 1-216-061-00 RES,CHIP 3.3K R961 1-216-025-91 RES,CHIP VARIABLE RESISTOR RV501¡ 1-241-767-21 RES, ADJ, CERMET 100K 3-710-578-01 COVER, VOLUME, 6 MOLD (for RV501) RV601 1-223-480-11 RES, ADJ, CERMET 5K...
- Page 34 Note: The components Identified by shading and mark ¡ ¡ ¡ ¡ ¡ Replace only with part number specified. REF.NO. PART NO. DESCRIPTION A-1373-669-A U2 BOARD, MOUNTED (US/CANADIAN, AEP, NH, SH, AUS models made in US) A-1394-886-A U2 BOARD, MOUNTED (AEP, UK models made in UK) CONNECTOR CN1303 1-900-802-69 CONNECTOR ASSY, 5P BOARD IN...