Compaq 5500 Reference Manual
Color monitors
Hide thumbs
Also See for 5500:
- Setup and installation manual (169 pages) ,
- Safety information manual (204 pages) ,
- Reference manual (198 pages)

Related Manuals for Compaq 5500

Summary of Contents for Compaq 5500
-
Page 1: Reference Guide
Reference Guide Compaq Color Monitors Series 5500, 7500, 7550, 9500 Document Part Number: 266189-001 January 2002... - Page 2 Compaq and the Compaq logo are trademarks of Compaq Information Technologies Group, L.P. Compaq shall not be liable for technical or editorial errors or omissions contained herein. The information in this document is provided “as is” without warranty of any kind and is subject to change without notice. The warranties for Compaq products are set forth in the express limited warranty statements accompanying such products.
-
Page 3: Table Of Contents
Compaq 7550/17” Flat CRT Monitor........ - Page 4 Contents Agency Regulatory Notices Federal Communications Commission Notice ....... C–1 Modifications .
-
Page 5: Introduction
Your microprocessor-based, digitally controlled color monitor is a high-performance and easy-to-use product. It employs the latest on-screen menu technology. Kit Contents Your monitor kit should contain: CRT monitor Monitor Base (pre-attached on selected models) AC power cord (selected models) Speakers (selected models) Speaker power adapter (selected models) Documentation kit Reference Guide... -
Page 6: Safety And Maintenance Guidelines
Do not open your monitor cabinet or attempt to service this product yourself. If your monitor is not operating properly, or has been dropped or damaged, first unplug your monitor from the power outlet, then contact your Compaq authorized dealer, reseller, or service provider. - Page 7 Safety and Maintenance Guidelines Be sure the total ampere rating of the products connected to the outlet does not exceed the current rating of the electrical outlet, and the total ampere rating of the products connected to the cord does not exceed the rating of the cord. Look on the power label to determine the ampere rating (AMPS or A) for each device.
-
Page 8: Removing The Monitor Base
Removing the Monitor Base In the event that you need to disassemble the base from the monitor, follow these instructions: 1. If you must remove the base attachment, release the catch and slide the base toward the back of your monitor. 2. -
Page 9: Installation
Monitor Base Installation On some monitors, the base must be attached prior to monitor installation. If you need to attach the base, follow these steps: 1. Align the hooks on the base with the sockets on the bottom of the monitor and attach the base. -
Page 10: Monitor Installation
Installation Monitor Installation Before installing your monitor, place it in a convenient, well-ventilated location near your computer. 1. Turn off the power to your computer and other peripheral devices. 2. Connect the video cable (blue connector) 1 from the back of the monitor to the blue 15-pin connector on the back of the computer. -
Page 11: Speaker Installation
Speaker Installation Selected monitors come with speakers which must be installed. If you need to install your speakers, follow these steps: 1. Place the control speaker 1 and the other speaker 2 on either side of your monitor. 2. Attach the speaker power cable 3 to the black connector on the back of the control speaker 1, then connect the AC adapter 4 into an electrical wall outlet. -
Page 12: Attaching The Speakers To The Monitor
Installation Attaching the Speakers to the Monitor To attach the speakers to the sides of your monitor, follow these steps: 1. Rotate the thumbwheel, located on the side of the speaker, up to extend the speaker hook mechanism 2. Align the hooks with the slots in the monitor. 3. -
Page 13: Speaker Security Lock
Speaker Security Lock If your monitor has speakers, the speakers can be locked to the sides of the monitor. To use the Speaker Security Lock, follow these steps: 1. Grasp the front cloth-covered grill firmly at the sides and remove from the speaker, then locate the security lock screw, which can be found in the top inner corner of the speaker. -
Page 14: Operation
1. Insert the Software and Reference Guide CD-ROM in your computer's optical drive. 2. When the CD-ROM menu launches, select Install INF and ICM Files. 3. To get the latest .INF and .ICM files, download them from the Compaq Web site. Access http://www.compaq.com/support/files/monitors/index.html download the appropriate files. -
Page 15: On-Screen Display
Operation Front Panel Controls Item Icon Name Select Left Adjustment Right Adjustment Power/LED On-Screen Display The On-Screen Display (OSD) adjusts the screen image based on your viewing preferences. To access the OSD, do the following: 1. If the monitor is not already on, press the Power button to turn on the monitor. 2. -
Page 16: On-Screen Display Functions
Right-Adjustment makes the image sides convex and Left-Adjustment makes the image concave. Trapezoid Right-Adjustment adjusts the image so the top is larger and Left-Adjustment adjusts the image so that the bottom is larger. Reference Guide Operation 7500 & 5500 7550 9500 4–3... - Page 17 Left-Adjustment decreases the Moire correction. Degauss This control demagnetizes the screen to reduce color impurities. Compaq suggests you not degauss more than once within a 30-minute period of time. Color Temp Right-Adjustment selects the color temperature to the right and Left-Adjustment selects the color temperature to the left.
-
Page 18: Monitor Messages
Monitor Messages No Signal Message If a No Signal message displays on your monitor, check to be sure your video cable is properly connected and ensure that your computer is powered on. Out of Frequency Range Message If an Out of Frequency Range message displays on your monitor, your video resolution and/or refresh rate are set higher than the levels your monitor supports. -
Page 19: Using The Energy Saver Mode
Power Management Status for 5500/15” Series Monitors (CV, MV, S) Power Management Status for 7500 and 7550/17” Series Monitors (CV, MV, S, FS, V) Power Management Status for 9500/19”... - Page 20 Operation Your monitor’s energy saver feature works only when your monitor is connected to a computer that also has energy saver features. The Energy Saver utility, with its energy saving features, is available with all Microsoft Windows operating systems. Some features are also available in DOS. Refer to your computer’s user guide for instructions on setting energy saver features (also referred to as power management features).
-
Page 21: Troubleshooting
Move the object farther away. Press the SELECT button to access the On-Screen Display. Select Degauss to activate. Compaq suggests you not degauss more than once within a 30-minute period of time. Press the SELECT button to access the On-Screen Display. - Page 22 Problem “No Signal” is displayed on screen. “Out of Frequency” is displayed on screen. No speaker power. No sound from speakers. A–2 Possible Cause Solution Vertical position may need Press the SELECT button to adjustment. access the On-Screen Display. Select V. Position to adjust as needed.
-
Page 23: Using The World Wide Web
Using the World Wide Web Support services are available on the Internet through the Compaq Support Forum. You can either browse the postings as a guest, or register as a user and submit your own questions. Compaq responds to questions within one business day. -
Page 24: Technical Specifications
Compaq 5500/15” Series Monitor 5500 CV, MV, S Reference Guide Technical Specifications Screen Size Dot Pitch Display Area Default Display Colors Display Resolutions 640 x 480 640 x 480 640 x 480 720 x 400 800 x 600 800 x 600... - Page 25 Technical Specifications 5500 CV, MV, S (Continued) B–2 Storage Temperature Humidity Altitude TCO’99 MPRII Plug and Play F to 140 C to 60 20% to 80% (non-condensing) Up to 10,000 ft./3048 meters Some models meet TCO’99 Some models meet MPRII...
-
Page 26: Compaq 7500/17" Series Monitor
Compaq 7500/17” Series Monitor 7500 CV, MV, S Reference Guide Screen Size Dot Pitch Display Area Default Display Colors Display Resolutions 640 x 480 640 x 480 640 x 480 720 x 400 800 x 600 800 x 600 1024 x 768... -
Page 27: Compaq 7550/17" Flat Crt Monitor
Technical Specifications Compaq 7550/17” Flat CRT Monitor 7550 FS, V B–4 Screen Size Dot Pitch Display Area Default Display Colors Display Resolutions 640 x 480 640 x 480 640 x 480 720 x 400 800 x 600 800 x 600... - Page 28 7550 FS, V (Continued) Reference Guide TCO’99 MPRII Plug and Play Technical Specifications Some models meet TCO’99 Some models meet MPRII B–5...
-
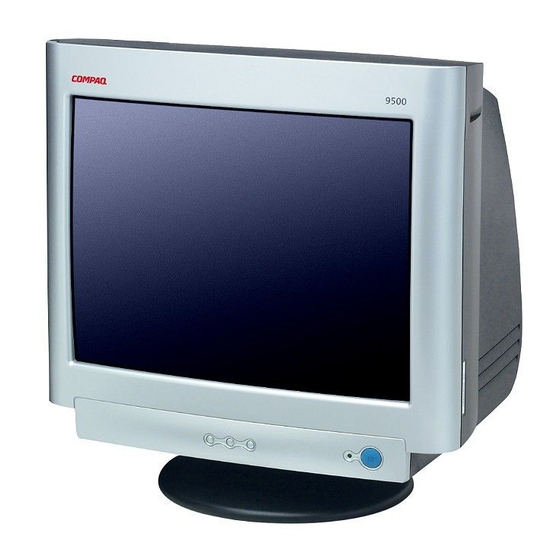
Page 29: Compaq 9500/19" Series Monitor
Technical Specifications Compaq 9500/19” Series Monitor 9500 MV, S B–6 Screen Size Dot Pitch Display Area Default Display Colors Display Resolutions 640 x 480 640 x 480 720 x 400 800 x 600 800 x 600 1024 x 768 1024 x 768... - Page 30 9500 MV, S (Continued) Reference Guide Humidity Altitude TCO’99 MPRII Plug and Play Technical Specifications 20% to 80% (non-condensing) Up to 10,000 ft./3048 meters Some models meet TCO’99 Some models meet MPRII B–7...
-
Page 31: Agency Regulatory Notices
Consult the dealer or an experienced radio or television technician for help. Modifications The FCC requires the user to be notified that any changes or modifications made to this device that are not expressly approved by Compaq Computer Corporation may void the user's authority to operate the equipment. Cables Connections to this device must be made with shielded cables with metallic RFI/EMI connector hoods to maintain compliance with FCC Rules and Regulations. -
Page 32: Canadian Notice
Monitors that are marked with the Energy Star Logo meet the requirements of the EPA Energy Star program. As an Energy Star Partner, Compaq Computer Corporation has determined that this product meets the Energy Star guidelines for energy efficiency. Specific details on using the Energy Saving features can be found in the energy saver or power management section of the computer manual. - Page 33 The power cord set (flexible cord or wall plug) received with the monitor meets the requirements for use in the country where you purchased the equipment. For more information on power cord set requirements, contact your Compaq authorized dealer, reseller or service provider.
-
Page 34: Tco'99 Requirements
TCO‘99 Requirements You have just purchased a TCO'99 approved and labelled product. Your choice has provided you with a product developed for professional use. Your purchase has also contributed to reducing the burden on the environment and also to the further development of environmentally adapted electronics products. -
Page 35: Environmental Requirements
TCO‘99 Requirements The energy requirements include a demand that the computer and/or display, after a certain period of inactivity, shall reduce its power consumption to a lower level in one or more stages. The length of time to reactivate the computer shall be reasonable for the user. Labelled products must meet strict environmental demands, for example, in respect of the reduction of electric and magnetic fields, physical and visual ergonomics and good usability. -
Page 36: Mercury
Mercury Mercury is sometimes found in batteries, relays and switches. It damages the nervous system and is toxic in high doses. The relevant TCO'99 requirement states that batteries may not contain any mercury. It also demands that mercury is not present in any of the electrical or electronics components associated with the labelled unit.