
Related Manuals for TP-Link Kasa Smart KE100 KIT


Summary of Contents for TP-Link Kasa Smart KE100 KIT
- Page 1 User Guide Kasa Smart Thermostatic Radiator Valve Starter Kit KE100 KIT © 2023 TP-Link 1910013320 REV1.0.0...
-
Page 2: Table Of Contents
Contents About This Guide ··························································································1 Introduction ·····································································································2 Appearance-Kasa Hub ··············································································3 Appearance-Thermostatic Radiator Valve ·····································4 Install Your Device ·······················································································7 Set Up Your Kasa Devices ···································································11 Main Device Controls ··············································································13 Manage Device Settings ·······································································25 Voice & 3rd Party Support ····································································34 Authentication ·····························································································38... -
Page 3: About This Guide
Underline Hyperlinks are in teal and underlined. You can click to redirect to a website. More Info • Specifications can be found on the product page at https://www.tp-link.com. • Our Technical Support and troubleshooting information can be found at https://www.tp-link.com/support/. -
Page 4: Introduction
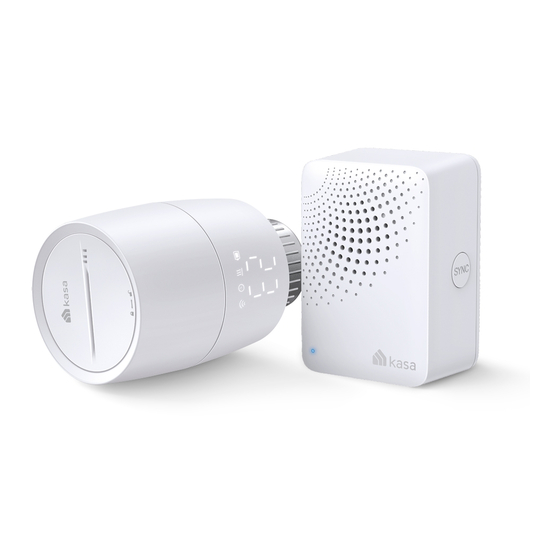
Introduction Kasa Smart Thermostatic Radiator Valve Starter Kit include a Kasa Smart Thermostatic Radiator Valve and a Kasa Smart IoT Hub. Kasa Smart Thermostatic Radiator Valve provides superior temperature control precision from the moment it is installed. Get the exact temperature you set. -
Page 5: Appearance-Kasa Hub
Appearance-Kasa Hub With superior ultra-low-power performance, Kasa Hub connects wirelessly with compatible Kasa accessories. So you can easily control and monitor your home from anywhere. See the detailed explanation below: Speaker SYNC Button Single press Enter pairing mode; Silence when ringing. Status LED Press and hold for 5s Only reset Wi-Fi settings... -
Page 6: Appearance-Thermostatic Radiator Valve
Appearance-Thermostatic Radiator Valve The Kasa Smart Thermostatic Radiator Valve has LEDs to show you the current status of Wi-Fi, Schedule, Heating, Battery and Temperature. It also has a control knob for temperature adjustment and a SYNC/ RESET button. See the detailed explanation below: LED Explanations Appearance LED Status... - Page 7 LED Status Event Blinking twice, then blinking , finally displaying normal temperature Starting up Moving light, then displaying normal temperature Calibrating Switching between and the normal temperature Child lock enabled Switching between and the normal temperature Frost protection Low battery: Displaying Valve can’t work properly Displaying...
- Page 8 Button Explanations Button Operation Result Rotate clockwise Raise temperature. Control Rotate counterclockwise Lower temperature. Knob SYNC/RESET Activate the display. Then Rotate with no shown you can rotate to adjust display the temperature. Control Knob Restore to factory default Press and hold for SYNC/ settings, and enter pairing 5 seconds...
-
Page 9: Install Your Device
Install Your Device Follow the instructions below to install your Kasa Smart Thermostatic Radiator Valve. 01 / Check Compatibility 1. Check existing valve type There are two types of valves: Thermostatic and Manual. Kasa Smart Thermostatic Radiator Valve is only compatible with the thermostatic valve. Manual Valve Thermostatic Valve Note: Manual valves are not compatible with Kasa Smart Thermostatic Radiator Valve, such as the ones in the following pictures. - Page 10 2. Check the connector type If your connector is M30 x 1.5, you can screw the new valve onto the radiator directly. If not, check whether one of the provided adapters fits the connector. If none of them fit your connector, please purchase a proper one yourself. 1.5mm M30 x 1.5 30mm...
- Page 11 02 / Install Requirements Read the following instructions first before installing the new valve: 1. Install the valve first before powering it up. 2. No need to shut off water before changing the radiator valve. Water will not leak. 3. Avoid installing the valve in the same room where you have installed the boiler thermostat. 4.
- Page 12 3. Remove the cover of the valve by rotating counterclockwise using the 4. Open the battery cover and insert two AA LR6 Alkaline batteries. Make provided cover-opener. sure the positive and negative terminals face the correct direction. *Do NOT use rechargeable batteries or 1.2V AA batteries. Note: you can still adjust temperature manually without a hub.
-
Page 13: Set Up Your Kasa Devices
Set up a Kasa smart hub in the Kasa Smart app if you haven’t already Open the app, and log in with your TP-Link ID. If you don't have an done so. You can get the Kasa Smart app from the App Store or Google account, create one first. - Page 14 Step 3. Add Your Hub First Step 4. Add Your Smart Thermostats Radiator Valve Tap the button in the app and select your model. Follow app instructions Tap the + button and select your model. Follow the app instructions to to set up your hub.
-
Page 15: Main Device Controls
Main Device Controls After you successfully set up your smart thermostatic radiator valve, you will see the home page of the Kasa Smart app. Here you can view and manage all devices that you've added to Kasa. Tap a smart thermostatic radiator valve to control and manage it. Home Page Turn on/off the smart thermostatic radiator valve You can see all your Kasa devices listed in the... - Page 16 Increase/Decrease the heating temperature You can check the current temperature and increase/decrease the heating temperature by dragging the point or tap and +.
- Page 17 Smart Control By setting up your own set of rules, turn on/off your radiator valve automatically to control the heating temperature according to your daily routine. 1. Tap your smart thermostatic radiator in 2. Turn on Smart Control and tap Schedule the Home page, and then Tap to set...
- Page 18 3. You can also choose day pattern for your smart control. E.g. I want my smart thermostatic radiator valve to turn on and heat to the temperature of 25℃ between 7:00 AM to 20:30 PM every weekday and 10℃ for weekends. Here I should choose Mon - Fri, Sat, Sun. Make your thermostatic radiator valve heat based on one set of rules every day.
- Page 19 4. For the first set of schedule rules from Monday to Friday, tap Edit Rules and then ADD RULE add an effective time for your Smart Control.
- Page 20 5. To adjust the time, you can drag the end points of the whole 6 . Se t t h e h e a t i n g te m p e ra t u re a t t h e segment or simply roll down and set the time at the button of the page.
- Page 21 Save and your 8. For second set of rules, swipe the page 9. Repeat Step 4 to 8 to set schedule rules smart thermostatic for Sunday. or tap to switch to the schedule setting radiator valve will heat to 25℃ from 7:00 am for Saturday and repeat step 4 to 7 to set to 20:30 pm on weekdays schedule rules.
- Page 22 10. If you want to apply the just added rules 11. Choose the day you like and tap SYNC then the schedule rules can be sync to your chosen to the other day, you can tap Sync to..days.
- Page 23 12. Delete Rules 13. If you want your room temperature reach your set one at the start of your schedule period, you can enable Early Start. Tap and turn it on. Select the time period on the annulus and tap Delete at the button of the page.
- Page 24 Reports In the Report page, you can check your heating and temperature history and device runtime. 1. Tap In the Device page, you can see the statistic of the day. Heating: Your set heating temperature • Solid Line: the set heating temperature is higher than room temperature.
- Page 25 2. Tap the line on the chart, then you can check the current temperature and heating temperature.
- Page 26 3. Tap Previous Next or choose the date directly to shift to the day 4. Tap to check the total heating time when the room temperature is you want to check. lower than the set temperature, which is shown with yellow block. If you want more information, just tap the date to see more in the chart.
-
Page 27: Manage Device Settings
Manage Device Settings Change Device Icon and then choose a Device Icon you like. - Page 28 Change Device Name Device Name in Device Settings page to give your device a name.
- Page 29 Change Device Location Location in Device Settings page to change your device location.
- Page 30 Child Lock When enabled, the temperature can only be adjusted from the Kasa app or connected third-party services. Child Lock then turn on/off Child Lock.
- Page 31 Frost Protection Frost Protection ensures that the internal temperature of your radiator does not drop below your set temperature, thus protecting your pipes from freezing. Frost Protection and then set Minimum Temperature.
- Page 32 Night Mode Night Mode and turn it on to make your thermostatic radiator valve open and close less often to reduce the noise at night while still maintaining a proper temperature. Then tap Effective Time to set the time as your like.
- Page 33 Display Settings Display Setting and choose the installation orientation between Horizontal and Vertical. Your thermostatic radiator valve will adjust its display correspondingly.
- Page 34 Calibration It is recommended to calibrate your thermostatic radiator valve to determine the Open and Closed positions. Note: During calibration, you cannot turn off the smart device or adjust the temperature.
- Page 35 Sleep Mode Remove Device. Sleep Mode and configure its setting to save the battery power of your thermostat. Tap your REMOVE DEVICE at the button to When enabled, you will not be able to check or adjust the temperature. delete your device. Fully Closed: The valve will be fully closed.
-
Page 36: Voice & 3Rd Party Support
Voice & 3rd Party Support Use the Kasa Smart app to pair your smart thermostatic radiator valve with Amazon Alexa or Google Home Assistant, and enjoy a full hands-free experience. Kasa helps manage the rest of your smart home too, working with Samsung SmartThings to trigger changes when you arrive home or leave for the day. - Page 37 1. Set up Amazon Alexa 1. Tap Amazon Alexa. 2. Tap Connect. 3. Sign in with your amazon account.
- Page 38 3. After sign-in, tap LINK. 4. Your TP-Link ID has been successfully linked with your amazon account. You can use Alexa voice commands to control your Smart Wi-Fi Power Strip.
- Page 39 2. Set up Google Assistant 1. Tap Google Assistant. 2. Follow instructions to connect your device to your Google Home. Or find the FAQ at https://www.tp-link.com/en/support/faq/1534/.
-
Page 40: Authentication
863.35/864.35/868.35MHz(25mW e.r.p) EU declaration of conformity TP-Link hereby declares that the device is in compliance with the essential requirements and other relevant provisions of directives 2014/53/EU, 2009/125/EC, 2011/65/EU and (EU)2015/863. The original EU declaration of conformity may be found at https://www.tp-link.com/en/ce RF Exposure Information This device meets the EU requirements (2014/53/EU Article 3.1a) on the limitation of exposure of the general public to electromagnetic fields by way... - Page 41 UK declaration of conformity TP-Link hereby declares that the device is in compliance with the essential requirements and other relevant provisions of the Radio Equipment Regulations 2017. The original UK declaration of conformity may be found at https://www.tp-link.com/support/ukca Продукт сертифіковано згідно с правилами системи УкрСЕПРО на відповідність вимогам нормативних документів та вимогам, що...
- Page 42 Explanation of the symbols on the product label Symbol Explanation Indoor use only AC voltage DC voltage RECYCLING This product bears the selective sorting symbol for Waste electrical and electronic equipment (WEEE). This means that this product must be handled pursuant to European directive 2012/19/EU in order to be recycled or dismantled to minimize its impact on the environment.