Advertisement
Quick Links
Advertisement

Related Manuals for NETGEAR PA301


Summary of Contents for NETGEAR PA301
-
Page 2: Start Here
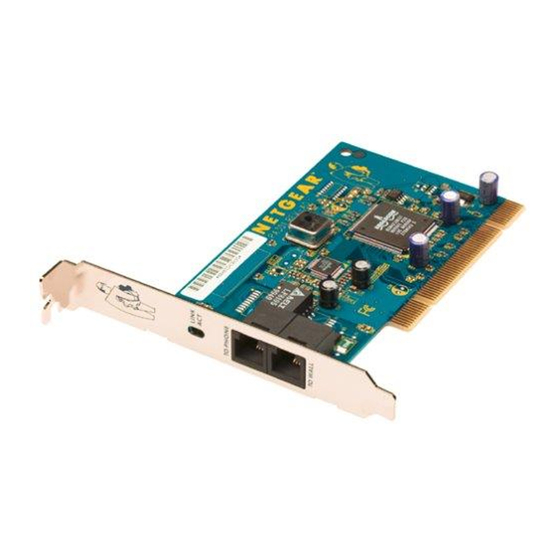
Unpack the package contents and verify that you have the following: Model PA301 Network Card Verify PC Requirements The instructions given in this guide are for using the NETGEAR Model PA301 Network Card in a PC that has a Microsoft Model PA310 Network Card Installation Guide ®... - Page 3 3. Choose an available PCI slot (PCI slots are the shorter slots) and remove the corresponding back plate from the PC chassis. 4. Insert the network card into the PCI slot and fasten the card to the computer chassis by tightening the screw that is on the PC.
- Page 4 If you are using an external analog modem to connect to the Internet, refer to the following illustration that shows the connections for the wall jack, Model PA301 Network card, external modem, and phone. Note that the captions on the modem Card, network card, and modem direct you to the outlets where you connect the cables.
- Page 5 Model PA301 Network Card, and phone. Note that the caption on the modem card and network card direct you to the outlets where you connect the cable from the wall jack and the cable that connects to the phone.
- Page 6 If you have not yet named your PC and your network, before you proceed with the installation steps, decide on a name for your network and for each PC. You will be using these names in section 5, “Install the PA301 Software.” Note: If the “Insert CD” window opens and the “Please insert the CD labeled Windows”...message appears at any time during the...
- Page 7 Insert the NETGEAR Phoneline10X Resource CD and click on Next. Click on Finish to start copying the drivers. It may take several minutes for the operating system to complete the driver installation. Model PA310 Network Card Installation Guide...
- Page 8 • If the following window opens: Make sure the NETGEAR Phoneline10X Resource CD is inserted in the CD drive and click on OK to open the following Copying Files window: Be sure the destination is typed correctly in the Copy files from entry field to point to the root directory of your CD drive (for example, in the...
- Page 9 Click on Yes to Restart your PC. If the System Settings Change window does not open, restart your PC by using the Start menu; select Shut Down, click on Restart your computer, and then click on Yes. Model PA310 Network Card Installation Guide...
- Page 10 files and printers between the Phoneline network and the Ethernet network. After the system restarts, be sure that the NETGEAR Phoneline10X Resource CD is inserted in your CD drive. 1. From the Start menu, select Run and at the prompt, type the following: G:\setup.exe (“G:”...
- Page 11 Click on Next to open the Choose Destination Location window. Click on Browse and, if needed, change the destination folder; then click on Next to open the FirstGear - Installation Wizard window. Model PA310 Network Card Installation Guide...
- Page 12 This window introduces the steps you will go through to set up your home network. Click on Next to open the FirstGear - Computer Name Entry Page window. Note: No two PCs in your home should have the same name. Model PA310 Network Card Installation Guide...
- Page 13 Shared Drives field (shown to the right of the window). • If you do not have any printers installed: Click on Finish and proceed to section 6, “Access the Internet.” Model PA310 Network Card Installation Guide...
- Page 14 Shared Printers field (shown to the right of the window). Click on Finish to open the FirstGear - Internet Sharing Page window and proceed to section 6, “Access the Internet.” Model PA310 Network Card Installation Guide...
-
Page 15: Access The Internet
Click on Next to open the FirstGear - Ethernet Card Detected window. Note: If you do not have an Ethernet card installed in your PC, the FirstGear - Ethernet Card Detected window does not appear. Proceed to step 5, in this section. Model PA310 Network Card Installation Guide... - Page 16 If you don’t have the Internet Dial-up Connection, FirstGear completed the installation and you are prompted to restart your computer. Proceed to section 7. Click on Next to open the FirstGear - Choose Default Phone Entry window. Model PA310 Network Card Installation Guide...
- Page 17 PCs in your home. Click on Finish. Note: If you have only one connection set up, the Choose Default Phone Entry window will not appear. The Restarting Windows window opens. Select Yes to restart your PC, and click on OK. Model PA310 Network Card Installation Guide...
- Page 18 Click on OK to open the Browse for Printer window. Choose the PC that you set up earlier to share printers. 4. Select a network printer. 5. Follow the instructions in the subsequent Window screens. Model PA310 Network Card Installation Guide...
-
Page 19: Technical Specifications
In the interest of improving internal design, operational function, and/or reliability, NETGEAR reserves the right to make changes to the products described in this document without notice. NETGEAR does not assume any liability that may occur due to the use or application of the product(s) or circuit layout(s) described herein. -
Page 20: Support Information
Internet/World Wide Web To get product support, to register your product online, or to obtain product information and NETGEAR product documentation, direct your Web browser to: http://www.NETGEAR.com Customer Support You can contact Customer Support at the following toll free numbers:... - Page 21 NETGEAR, Inc. 4500 Great America Parkway Santa Clara, CA 95054 Phone: 1-888-NETGEAR E-mail: support@NETGEAR.com http://www.NETGEAR.com *M-PA301NA-1* *M-PA301NA-0*...