Pyramid TimeTrax mobile Reference Manual
Hide thumbs
Also See for TimeTrax mobile:
- Datasheet (1 page) ,
- Quick start manual (8 pages) ,
- Quick start manual (8 pages)
Table of Contents
Advertisement
Quick Links
Advertisement
Table of Contents
Troubleshooting

Related Manuals for Pyramid TimeTrax mobile


Summary of Contents for Pyramid TimeTrax mobile
- Page 1 Time and Attendance System REFERENCE GUIDE...
- Page 2 Inside Front Cover Inside Back Cover ARE BLANK...
- Page 3 TIME & ATTENDANCE SYSTEM REFERENCE GUIDE...
- Page 4 General License Grant to Install and Use TimeTrax Mobile software. You may install Portions of this program Copyright © 1999 and use one copy of the TimeTrax Mobile software vbAccelerator.com, and distributed under their on a single computer but only for use in the num- Software License Version 1.0 dated 2002:...
- Page 5 EULA. If the TimeTrax Mobile software is an No rental, leasing or commercial host- upgrade of a component of a package of software ing. You may not rent, lease, lend or provide...
- Page 6 NOLOGIES, LLC.'S ENTIRE LIABILITY UNDER ANY performance of the Support Services. This Limited PROVISION OF THIS EULA SHALL BE LIMITED TO Warranty is void if failure of the TimeTrax Mobile THE AMOUNT YOU ACTUALLY PAID TO PYRA- software has resulted from accident, abuse, or MID TECHNOLOGIES, LLC.
-
Page 7: Table Of Contents
Multiple TimeTrax Mobile Units ........ - Page 8 TIMETRAX MOBILE Setup Tab ............19 Keypad Entry .
-
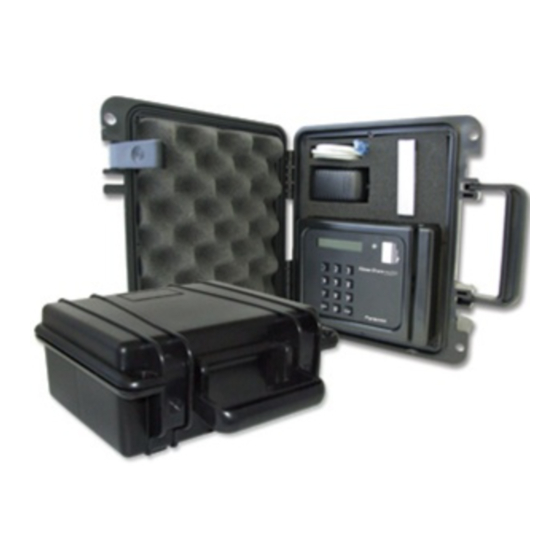
Page 9: What's In The Box
• (1) USB interface w/standard RS232 • Printer (if hard copy reports are adapter desired). • Internet Explorer ® Version 6 or later. (Additional cards, cable extensions and other supplies are available from Pyramid. See pages 72-73 for accessories list.) -
Page 10: Introduction
Congratulations on your purchase of the Pyramid TimeTrax Mobile Time and Attendance System. TimeTrax Mobile takes proven card reader technology and combines it with the powerful TimeTrax Mobile software to create a time and attendance solution that is highly effective, easy to use, and can move from job to job. -
Page 11: Using The Time Recorder
Pyramid recommends frequent recharging. When the TimeTrax Mobile is in Sleep Mode and an employee needs to swipe, the On/Off switch needs to be turned off and then back on to bring the unit back into ready mode. -
Page 12: Using The Car Charger
(Pyramid Part Number 42180) as an optional accessory to charge your battery on the go. Simply plug one end of the car charger into the TimeTrax Mobile charge port and the other end into the car’s 12-volt accessory power outlet/cigarette lighter for an instant charge. -
Page 13: Serial Cable Installation
TIME & ATTENDANCE SYSTEM SERIAL CABLE INSTALLATION OPTION 1 OPTION 2 CLEAR Two available options for connecting the TimeTrax Mobile to your central PC (fig. A). PARTS REFERENCE E. TimeTrax Mobile A. Central PC (PN TTMOBILE) B. RJ45 to DB9 Adapter (PN 41400) F. -
Page 14: Multiple Timetrax Mobile Units
TIMETRAX MOBILE Multiple TimeTrax Mobile Units: Follow the instructions for the Single TimeTrax Mobile unit as described on page 5. In this case, each terminal will have to be connected, one-at-a-time to download the punches. To download punches from multiple TimeTrax Mobile Recorders simultaneously, connect a Pyramid Multiplexer P/N 8050 (sold separately) to the PC and then connect each terminal to the Pyramid Multiplexer as shown below. -
Page 15: Installing The Software
TIME & ATTENDANCE SYSTEM INSTALLING THE SOFTWARE Note: Prior to install, it is recommended that you disable all anti-virus and firewall software so it does not interfere with the software. It can be turned back on immediately after installation. Click NEXT to continue To accept licensing agreement click NEXT to continue... -
Page 16: Log In Window
TIMETRAX MOBILE LOG IN WINDOW When the program is launched, you are presented with the Log In Form. Enter ADMIN into USER NAME field Enter PTI (uppercase) into PASSWORD field Search for Time Records INITIAL COMMUNICATION FORM After you successfully log in, the system initializes communications with the time recorder attached to the PC. -
Page 17: Timetrax Mobile Setup Wizard
TIME & ATTENDANCE SYSTEM TIMETRAX MOBILE SETUP WIZARD Click YES to continue PAYROLL GROUP SETUP Payroll Groups categorize how groups of employees are paid. As an example, Sales Department employees are paid monthly and Production Department employees are paid bi-weekly. Sales and Production would be two different Payroll Groups. -
Page 18: Pay Categories Setup
It also doubles as SAVE. using one. When your selections are complete, click Ensures proper transfer of information from Close to continue. the pay category in TimeTrax Mobile to your payroll service provider. -
Page 19: Employee Group Setup
If an employee goes to the time clock and punches their badge, forgets that they punched it, and punches again, this filter will automatically eliminate the second punch if it is within the filter time defined. Pyramid recommends using 90-seconds. -
Page 20: Advanced Employee Groups Setup
TIMETRAX MOBILE ADVANCED EMPLOYEE GROUPS SETUP Employee Groups Advanced can be used when the standard Employee Groups is not sufficient for an organization. Shift Rounding: Prevents unautho- rized overtime. You can enter the num- ber of minutes prior to and following the end of each shift that overtime will not be paid. -
Page 21: Employee Details Setup
SELECT payroll group employee will belong to and then click ADD to continue CARD 1, 2, 3: TimeTrax Mobile allows up to 3 different card numbers to be assigned to each employee. Card 1 is a required field. ENTER EMP#:... -
Page 22: Changing Payroll Groups
TIMETRAX MOBILE CHANGING PAYROLL GROUPS: TimeTrax does not allow you to move an employee from one payroll group to another. To do so, you must follow the instructions below: • Finish out the current pay period. Note: Changing a payroll group during an existing pay period may impact the integrity of your data. -
Page 23: Vertical Icon Bar
TIME & ATTENDANCE SYSTEM VERTICAL ICON BAR PAYROLL SETUP TAB: CONFIGURE TAB: TAB: Operational Normal working Vertical setup handled one time setup Icon Bar where initially through for systems daily transactions the wizard. administration. occur. These Icons can also be seen on the top menu bar by selecting FILE – Show More Menus. -
Page 24: Configure Tab Including Date/Time Setup
AUTOMATIC BACKUP This screen allows you to select the location that you want to store your system backup. The backup is stored in a folder named PYRAMID. The critical files for restoring your system are Pyramid.mdb, Pyrarchive.mdb, Pyrexport.mdb, PryPolmd.mdb and Pyramid.ini. This is your main backup and the data updates with each backup action. -
Page 25: Timetrax Security
User Names and Passwords, as well as security for anyone that logs into the TimeTrax Mobile Software. The number of users is unlimited. Note: Pyramid strongly recommends you create a user name and password immediately for data security. USER NAME: Enter the desired login name. -
Page 26: Time Source & Sync Standards
TIMETRAX MOBILE Supervisor: Indicates a user who is restricted to viewing the records of only certain Employee Groups. TIME SOURCE & SYNC STANDARDS It is not necessary to make any changes on this screen. TIME SOURCE STANDARD: By default Time Recorder is the most reliable option for time keeping. -
Page 27: Setup Tab
TIME & ATTENDANCE SYSTEM SETUP TAB Employee Groups and Payroll Setup is addressed in initial TimeTrax Mobile Setup Wizard. KEYPAD ENTRY Using the Keypad Punch records can be entered using the keypad on the time recorder if this has been enabled in the software in either of two ways. Certain cards can be designated as “supervisor cards”... -
Page 28: Payroll Tab
PAYROLL TAB Get Punches: At Login you are offered the option to download punches. Pyramid recommends that you do this on a regular basis to prevent data loss. Otherwise, GET PUNCHES allows you to download punches when you are ready for payroll activities. -
Page 29: Payroll Details
TIME & ATTENDANCE SYSTEM PAYROLL DETAILS The Payroll Detail’s section is the location in the program that allows you to enter exceptions to the employee payroll record as well as approving and un-approving employee payroll records. Most fields are pre-populated from both the Punch Detail and Employee Detail screens. -
Page 30: Assert Global Special Pay
TIMETRAX MOBILE ASSERT GLOBAL SPECIAL PAY In the circumstances where you wish to pay all employees or a group of employees the same number of hours, (i.e., Independence Day @ 8 hours), go to FILE – Assert Global Special Pay. -
Page 31: Reports/Exports
TIME & ATTENDANCE SYSTEM REPORTS / EXPORTS REPORTS When generating REPORTS you must select the PAY PERIOD you want included in the report, as well as the EMPLOYEE GROUP or INDIVIDUAL EMPLOYEES you want included in the REPORT. Then, select the REPORT you want to run. Select PAY PERIOD to be included in... -
Page 32: Employee Details
BANDS or BY NAME or BY DATE HIRED. ARCHIVE REPORTS Once a payroll record is approved, it is placed in Archive. Archive Reports allow you to run reports from the date TimeTrax Mobile was installed up to and including the current date. Select who is included in the REPORT. -
Page 33: Importing Employees From Quickbooks
TIME & ATTENDANCE SYSTEM TIMETRAX QUICKBOOKS INTEGRATION REQUIREMENTS: QUICKBOOKS PRO OR HIGHER. U.S. VERSIONS ONLY. STEPS REQUIRED PRIOR TO INTEGRATION STEP 1 IMPORTANT: Before You Integrate TimeTrax with QuickBooks, regardless of the scenario, you must: • Log into QuickBooks as “Administrator” and •... - Page 34 TIMETRAX MOBILE • Select TIMETRACKING from the displayed options and click on COMPANY PREFERENCES tab. • Check the YES option in the DO YOU TRACK TIME field. Select TimeTracking YES option. INITIAL TIMETRAX/QUICKBOOKS COMMUNICATION STEP 3 When TimeTrax attempts to communicate with QuickBooks for the first time,...
- Page 35 TIME & ATTENDANCE SYSTEM • Depending on access requirements select either of the two options: YES, WHENEVER THIS QUICKBOOKS COMPANY FILE IS OPEN, or: YES, ALWAYS; ALLOW ACCESS EVEN IF QUICKBOOKS IS NOT RUNNING. • Make sure to check: ALLOW THIS APPLICATION TO ACCESS PERSONAL DATA SUCH AS SOCIAL SECURITY NUMBERS .
- Page 36 TIMETRAX MOBILE • Make sure that the displayed options are checked: Check these options Required steps to properly integrate TimeTrax and Quickbooks, will vary depending on which product you are currently using and which product you are adding. Please select which of the following scenarios describes...
- Page 37 TIME & ATTENDANCE SYSTEM • Open each respective employee record and select PAYROLL AND COMPENSATION INFO. • Check USE TIME DATA TO CREATE PAYCHECKS Check this option Importing QuickBooks employee records into TimeTrax. In order for TimeTrax and QuickBooks to be in sync, the QuickBooks employee records need to be imported from QuickBooks into TimeTrax.
- Page 38 TIMETRAX MOBILE For optimal integration, the following settings are recommended. Employee Match: Required Employee Match LINK RULES Settings Employee Import: Required Employee Import LINK RULES Settings...
- Page 39 TIME & ATTENDANCE SYSTEM Employee Export: Required Employee Export LINK RULES Settings Important: In order to prevent duplication of employee records in either TimeTrax and/or QuickBooks, please adhere to the following rules: • Select the above LINKING RULES • Always enter new employees in TimeTrax first, and then use the TimeTrax QuickBooks link to export the data from TimeTrax to QuickBooks.
- Page 40 TIMETRAX MOBILE II. ESTABLISHED TIMETRAX USER, FIRST-TIME QUICKBOOKS USER III. NEW USER TO BOTH APPLICATIONS Setting Employee Default in New QuickBooks Company Click on Employee/Employee Center Right Click on Employee Tab and Select EMPLOYEE DEFAULT Select USE TIME DATA TO CREATE...
- Page 41 TIME & ATTENDANCE SYSTEM Employee Match: Required Employee Match LINK RULES Settings Employee Export: Required Employee Export LINK RULES Settings Important: In order to prevent duplication of employee records in either TimeTrax and/or QuickBooks, please adhere to the following rules: •...
- Page 42 TIMETRAX MOBILE TIMETRAX PAY ITEMS AND QUICKBOOKS PAYROLL ITEMS In order for QuickBooks to generate Payroll data, the following steps are required: • The QuickBooks TIME TRACKING OPTION must be enabled. (See Pages 25-26). • QuickBooks Payroll must have been set up.
- Page 43 TIME & ATTENDANCE SYSTEM TimeTrax Payroll Items correspond to QuickBooks Payroll Items. By default TimeTrax provides the following Pay Items: • Regular • Overtime 1.5 • Overtime 2 Existing Quickbooks User New to TimeTrax If employees are paid hourly, various Payroll Items for regular and overtime pay will already exist in QuickBooks and most likely the names for the respective payroll items will vary from the names of the TimeTrax default pay items.
- Page 44 TIMETRAX MOBILE Option #1: RENAMING TIMETRAX PAY ITEMS. Next click on SETUP EXPORT button. Click on SETUP EXPORT Change the displayed TimeTrax Pay Item names to the respective QuickBooks Payroll Item names and click on START EXPORTING TO QUICKBOOKS. 2. Rename to...
- Page 45 TIME & ATTENDANCE SYSTEM Option #2: MERGING PAYROLL ITEMS IN QUICKBOOKS. Do not change the displayed Pay Item names and click on START EXPORTING TO QUICKBOOKS. 1. Click on START EXPORTING TO QUICKBOOKS The following message will be displayed: Click on OK 2.
- Page 46 TIMETRAX MOBILE Next TimeTrax will display the following message. Click OK And QuickBooks will show the new Items in the Payroll Items list TimeTrax Pay Items in QuickBooks list Right click on the QuickBooks Payroll Item that needs to be merged with the TimeTrax Pay Item.
- Page 47 TIME & ATTENDANCE SYSTEM In the displayed editing screen, change the displayed QuickBooks Payroll Item name to OVERTIME HOURLY RATE {2} and click NEXT. 1. Over-write the displayed QuickBooks Payroll Item name with the TimeTrax Pay Item name OVERTIME HOURLY RATE{2} 2.
- Page 48 TIMETRAX MOBILE SETTING UP EMPLOYEES WITH NEW PAYROLL ITEMS IN QUICKBOOKS. Before QuickBooks can process payroll, the required payroll items have to be added to the QuickBooks employees’ payroll information. Edit each employee’s payroll and compensation information: Select PAYROLL AND COMPENSATION INFO from the dropdown in the QuickBooks EDIT EMPLOYEE screen.
- Page 49 TIME & ATTENDANCE SYSTEM Next: assign hourly pay rate. 3. Assign hourly pay rate Important: Repeat for each required payroll item and for each employee. Please note: Pay rates are not exported from TimeTrax to QuickBooks and have to be set up manually for each employee.
- Page 50 TIMETRAX MOBILE ENTERING NEW EMPLOYEES IN TIMETRAX Duplicate employee records can impact data integrity. In order to avoid duplicates please adhere to the following rules: • Always enter unique employee ID numbers. • If two or more employees have identical first and last names, enter a unique middle initial.
-
Page 51: Adp Users
The following are instructions for setting up and using the ADP EXPORT contained in the TimeTrax Mobile. You will have to go into the REPORTS/ EXPORTS tab to proceed with the export. It may also be necessary for you to setup the CATEGORY CODES within the SETUP –... -
Page 52: Generic Text Users
GENERIC TEXT EXPORT The following are instructions for setting up and using the GENERIC TEXT EXPORT contained in the TimeTrax Mobile. You will have to go into the REPORTS/EXPORTS tab to proceed with the export. It may also be necessary for you to setup the CATEGORY CODES within the SETUP –... -
Page 53: Paychex Preview Users
PAYCHEX PREVIEW EXPORT The following are instructions for setting up and using the PAYCHEX PREVIEW EXPORT contained in the TimeTrax Mobile. You will have to go into the REPORTS/EXPORTS tab to proceed with the export. It may also be necessary for you to setup the CATEGORY CODES within the SETUP –... -
Page 54: Paychex Paylink Users
PAYCHEX PAYLINK EXPORT The following are instructions for setting up and using the PAYCHEX PAYLINK EXPORT contained in the TimeTrax Mobile. You will have to go into the REPORTS/EXPORTS tab to proceed with the export. It may also be necessary for you to setup the CATEGORY CODES within the SETUP –... -
Page 55: Prodata Evolution Users
PRODATA EVOLUTION EXPORT The following are instructions for setting up and using the PRODATA EVOLUTION EXPORT contained in the TimeTrax Mobile. You will have to go into the REPORTS/EXPORTS tab to proceed with the export. It may also be nec- essary for you to setup the CATEGORY CODES within the SETUP –... -
Page 56: Department Codes
(or job). Note: Department codes are not a standard feature on all models, but can be purchased separately by calling Pyramid at 888-479-7264. You can access the Department Code feature via. WORK RULES on the vertical icon bar. -
Page 57: Sql
TIME & ATTENDANCE SYSTEM SQL SERVER SOFTWARE INSTALLATION IMPORTANT: Software must be fully installed PRIOR to connecting the hardware. 1. Install SQL Server CD onto the PC that will act as the Server. Close out of the program. 2. Install DB9 and USB adapter to the computer that will act as the Server. 3. - Page 58 TIMETRAX MOBILE Included in your shipment, you should have received (1) CD containing both the Server and Client program. It is important that you do not install the Client program on the same machine as the Server program. HOW TO SELECT YOUR SERVER TIMETRAX SQL_SVR: Install the Server Edition on the one computer that will store the database and respond to database access requests.
- Page 59 TIME & ATTENDANCE SYSTEM When the InstallShield Wizard completes, you will have 3 icons on your Desktop: • TIMETRAX Network Agent – communicates with the client machines. • TIMETRAX – Time and Attendance program. • SQL Server Network Utility – sets the network communication parameters.
- Page 60 TIMETRAX MOBILE Click OK Step 3: Open/Run the Pyramid TimeTrax Program by double clicking on the desktop icon. A small window will flash quickly displaying the message “Starting Microsoft SQL Server”. Note: TIMETRAX – Login Standalone must show on the title bar. The TIMETRAX application will do the required database initializations only in the Standalone mode.
- Page 61 TimeTrax Program is closed on the Server. Then, double click on the TIMETRAX Network Agent icon on the Server’s desktop. An icon in the form of a blue pyramid will appear in the system tray on the lower-right corner of your screen. This starts the Microsoft SQL Server and allows communications with the Client(s).
- Page 62 Client(s). To turn it back on, double click the TIMETRAX Network Agent icon on your desktop. The blue pyramid icon will return to the system tray and the Client(s) can access TIMETRAX from their terminals.
- Page 63 TIME & ATTENDANCE SYSTEM Running TIMETRAX Network Agent as a Background Task The TIMETRAX Network Agent must be running to allow database access over the network. Without the TIMETRAX Network Agent up and running, Client TIMETRAX computers cannot run TIMETRAX. To eliminate this situation, The TIMETRAX Network Agent should be set to run as a background task on the Server computer.
- Page 64 TIMETRAX MOBILE Select: Program Files\ Pyramid\TIMETRAX. Double click on PYRTT.NET.EXE Task Name should pre- populate, however, if it does not, enter PYRFTNET Select: WHEN MY COMPUTER STARTS Click NEXT Enter Windows User Name Enter Windows Password Confirm Windows Password Select NEXT.
- Page 65 Select: APPLY In the “Run:” text field, it will display: “C:\Program Files\Pyramid\TIME- TRAX\PyrFTNet.exe”. Click on the end of the line and add a space and then "-T", as shown in the example above. Click APPLY, then click OK.
-
Page 66: Troubleshooting Guide For Time Recorder
• Create a “TimeTrax Backup” folder on your desktop. • Right-click on the Desktop and select ➞ NEW ➞ FOLDER. • Name this folder DATA. • Navigate to My Computer – C:\ Program Files\Pyramid\TimeTrax folder and locate the following 6 files: Pyramid.mdb Pyrpolmd.mdb... - Page 67 DATA and choose EDIT ➞ SELECT ALL ➞ EDIT ➞ COPY. *All 6 files should copy over. • Navigate to My Computer – C:\ Program Files\Pyramid\TimeTrax and choose EDIT ➞ Paste into the TimeTrax folder. Choose YES TO ALL to replace the existing files.
- Page 68 Port and the adapter are working properly. IIa: Test that the Cable is working properly. • Unplug the 7’ RJ45 flat cable from the TimeTrax Mobile unit and from the back of the PC. • Plug them both back in, in the reverse order.
- Page 69 BACKUP. • This will restore all data from the last backup. If you have punches in the TimeTrax Mobile unit that have not been downloaded, download them as described in the PAYROLL TAB, GET PUNCHES SECTION of this manual. • If you do not have a backup, you will need to reinstall your software and go thru the entire setup process beginning with the TimeTrax Mobile Setup Wizard.
- Page 70 Software section of this manual. Note: Please make sure that you are installing the same version that you are currently running. • You will need to copy the .mdb files and the pyramid.ini file from the TimeTrax folder located in C:\Program Files\Pyramid directory.
- Page 71 4. Transfer files to the new computer. 5. Navigate to the TimeTrax directory and paste the files. Examples of transfer methods are: email attachment (Pyramid does not recommend this method due to the size of the files), Zip Disk, or burn the files onto a CD or DVD.
- Page 72 Error 1609 U.S.A. Home Editions of XP or VISTA Error 1609: An error occurred while applying security settings. Power Users is not a valid user or group. This could be a problem with the package, or a problem connecting to a domain controller on the network.
- Page 73 VISTA Home Right click on desktop and select NEW and then SHORTCUT: Select NEXT and FINISH. Vista will create an icon on your desktop. Right click and Run as Administrator. When you get the box below, type: NET LOCALGROUP “POWER USERS”...
- Page 74 VISTA and USB Adapter Driver TimeTrax Mobile install CD includes a Driver for the USB adapter. If you are running VISTA and receive a message that the software CANNOT FIND THE DEVICE DRIVER, you will need to follow the instructions below.
- Page 75 When it is finished, select FINISH and reboot your computer. After rebooting the computer, log into TimeTrax Mobile software and plug in the USB adapter. Your computer should install the device driver. When installation succeeds, an alert balloon should appear in the lower...
-
Page 76: Troubleshooting Guide For Support Folder
Troubleshooting Support Folder Pyramid enclosed a Support Folder on the Server CD that does not load onto the Server during installation. The Support Folder contains workarounds in the event that your Server requires other programs that need to work with TIMETRAX. To access the Support Folder, put the TIMETRAX or the TIMETRAX SQL_SVR CD into the CD-ROM of the Server computer. - Page 77 MSDE. Use when you get an error at install advising you of this. Note: Execute MSDESetup.exe not setup.exe. PyRmt.exe – Pyramid file allowing for remote communications. QBXMLRP2Installer.exe – Execute when QuickBooks import/export is not working properly.
- Page 78 Documents folder. For customers upgrading from an earlier edition of QuickBooks, you will need to correct the path in the software. To do this, follow the instructions below: • Open the Pyramid time and attendance software. • Select the Reports/Export tab • Under Export Specification, Select QuickBooks 2003+ link from the dropdown box •...
-
Page 79: Warranty Information
Pyramid. • For Return Shipments to Pyramid, the product must be shipped in its original carton or equivalent, fully insured with shipping charges prepaid. Pyramid will not assume any responsibility for loss or damage incurred in shipping. -
Page 80: Parts List
FTEMP500 Software for Additional 500 Employees FTEMP1000 Software for Additional 1000 Employees FTEMPUNL Software Unlimited Employees FTDPT Department Codes FTSQL Network Version of TimeTrax Mobile FTPOL Polling Software and Polling Modem PART NUMBER BADGES 41302 Badges 1-25 41303 Badges 26-50... - Page 81 TIME & ATTENDANCE SYSTEM PART NUMBER BADGES continued 41336 Badges 701-800 41337 Badges 801-900 41338 Badges 901-1000 PART NUMBER WARRANTY & SUPPORT TTW1S 1-Year Software Technical Support + Maintenance Upgrades TTW1H 1-Year Extended Hardware Warranty for Single Terminal TTW1TER 1-Year Extended Hardware Warranty Each Additional Terminal PART NUMBER HARDWARE ACCESSORIES 8050...
-
Page 82: Index
Employee Contact Info ....24 Moving TimeTrax Mobile From Employee Details .....13, 23 One Computer to Another . - Page 83 Time Totals ......16 TimeTrax Mobile Setup Wizard ... . . 9 QuickBooks Communication .
-
Page 84: Technical Support Plan
Pyramid will provide customer support Refusal to provide this access or information Monday through Friday. With the purchase to Pyramid, or inability to do so due to lack of of a Pyramid Time and Attendance system, Internet access or a dial-up connection may... - Page 85 LIMITATION OF LIABILITY: Plan. Pyramid’s liability under this Support Plan is limited to the amounts paid by Customer for the Support Plan ordered by the Customer. In no event shall Pyramid have any liability for any special, punitive, indirect, or conse...
- Page 86 TIMETRAX MOBILE NOTES...
- Page 87 Inside Front Cover Inside Back Cover ARE BLANK...
- Page 88 48 Elm Street, Meriden, CT 06450 www.PyramidTechnologies.com I2084...