Table of Contents
Advertisement
Available languages
Available languages
Quick Links
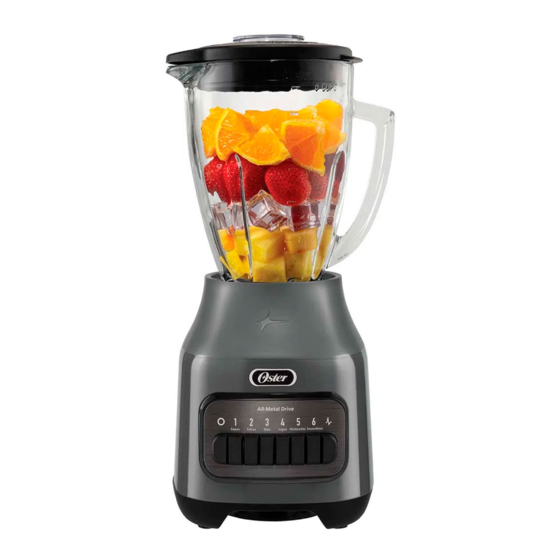
6 CUPS
6 CUPS
5
5
4
4
3
3
2
2
1
1
BLSTPEG-GPB, BLSTPEG-RPB, BLSTPEG-BPB
MODELOS
BLSTPEG-CPB, BLSTPEG-NPB, BLSTPEG-BRT
BLSTPEG-MRT, BLSTPEG-CRT, BLSTPEG-NRT
MODELS
BLSTPEG-BGB, BLSTPEG-BGR
Manual de Instrucciones
LICUADORA
LEA TODAS LAS INSTRUCCIONES ANTES DE USAR ESTE APARATO
Instruction Manual
BLENDER
READ ALL INSTRUCTIONS BEFORE USING THIS APPLIANCE
Manual de Instruções
LIQUIDIFICADOR
LEIA TODAS AS INSTRUÇÕES ANTES DE USAR ESTE APARELHO
Advertisement
Table of Contents

Related Manuals for Oster BLSTPEG-GPB


Summary of Contents for Oster BLSTPEG-GPB
- Page 1 6 CUPS 6 CUPS BLSTPEG-GPB, BLSTPEG-RPB, BLSTPEG-BPB MODELOS BLSTPEG-CPB, BLSTPEG-NPB, BLSTPEG-BRT BLSTPEG-MRT, BLSTPEG-CRT, BLSTPEG-NRT MODELS BLSTPEG-BGB, BLSTPEG-BGR Manual de Instrucciones LICUADORA LEA TODAS LAS INSTRUCCIONES ANTES DE USAR ESTE APARATO Instruction Manual BLENDER READ ALL INSTRUCTIONS BEFORE USING THIS APPLIANCE Manual de Instruções...
- Page 2 No opere ningún electrodoméstico que tenga el cable o enchufe dañado, si no funciona correctamente, se ha dejado caer o está dañado de cualquier otra forma. Lleve el artefacto al Centro de Servicio Autorizado de Electrodomésticos Oster más cercano para su revisión, reparación o ajuste eléctrico o mecánico. ®...
-
Page 3: Precauciones Importantes
No opere ningún electrodoméstico que tenga el cable o enchufe dañado, si no funciona correctamente, se ha dejado caer o está dañado de cualquier otra forma. Lleve el artefacto al Centro de Servicio Autorizado de Electrodomésticos Oster más cercano para su revisión, reparación o ajuste eléctrico o mecánico. ®... - Page 4 18. Si su licuadora está equipada con un enchufe de conexión a tierra, solo conéctela a tomacorrientes diseñados adecuadamente para conexión a tierra. Para modelos con los mini vasos o los vasos portátiles Blend-N-Go: 19. Asegúrese que el vaso esté bien colocado en la base antes de utilizarlo. 20.
-
Page 5: De Sc Ri Pc I Ó N Del Artefa Cto
DE SC RI PC I Ó N DEL ARTEFA CTO Solamente Para Los Modelos De Brasil NOTA: Partes 5 y 6 no son disponibles para Brasil 1. Copa de alimentación / Tapita 7. Motor duradero con el exclusivo sistema de acople 2. - Page 6 CONOCIENDO SU LICUADORA OSTER® 6 CUPS 6 CUPS Para los modelos BLSTPEG-XPB/BGB: Para los modelos BLSTPEG-XRT/BGR: MOTOR POTENTE DE 550 W TECNOLOGÍA REVERSIBLE gira las cuchillas hacia adelante y hacia atrás para ACOPLE METÁLICO procesar completamente todos los ingredientes para máxima durabilidad...
- Page 7 ENSAMBLANDO EL VASO 1. Invierta el vaso de manera que la abertura pequeña quede hacia arriba. (Figura 1) 2. Coloque el anillo sellador sobre la abertura pequeña del vaso. (Figura 2) 3. Coloque la cuchilla en la abertura pequeña del vaso. (Figura 3) 4.
- Page 8 SOLAMENTE PARA LOS MODELOS DE BRASIL: 1. Invierta el vaso de manera que la abertura pequeña quede hacia arriba. (Figura 1) 2. Coloque el anillo sellador sobre la abertura pequeña del vaso. (Figura 2) 3. Invierta la cuchilla integrada con parte inferior enroscable y colóquela sobre el anillo sellador y el vaso.
- Page 9 USANDO SU L I C UA DORA OS TER® PARA LOS MODELOS CON BOTONES – 6 VELOCIDADES + PULSO (BLSTPEG-XPB/BGB) En la tabla de abajo usted encontrará una aplicación típica por velocidad que lo guiará en el uso de su licuadora. VELOCIDAD FUNCIÓN APAGADO...
- Page 10 5. Presione el botón de encendido/apagado ( O ) para apagar la licuadora. Esta licuadora está preprogramada para apagarse automáticamente si no se utiliza durante un período de varios minutos. Todas las luces se apagarán cuando la unidad se detenga automáticamente.
- Page 11 Antes de usar el producto por primera vez, separe todas las piezas y límpielas. Consulte la sección de ‘CUIDADO Y MANTENIMIENTO DE SU LICUADORA OSTER ’ para obtener instrucciones de limpieza – el ® vaso, la tapa, el anillo sellador, la cuchilla y la parte inferior enroscable son aptos para colocarlos en la parte superior de su lavaplatos automático.
- Page 12 RECOMENDACIONES PARA LICUAR • Coloque primero las porciones líquidas en el vaso, a menos que la receta indique lo contrario. • Para triturar hielo: Triture 6 cubos de hielo o aproximadamente 0,5 L (2 tazas) de hielo de cada vez. •...
- Page 13 C UI D AD O Y M ANT EN IMIENTO D E S U L I CU AD OR A OS T ER ® DESPUES DE UTILIZARLA: 1. Levante el vaso y sepárelo de la base, quite la tapa y vacíe el vaso. 2.
- Page 14 Do not disconnect by pulling on cord. Do not operate any appliance with a damaged cord or plug or after the appliance malfunctions, or is dropped or damaged in any manner. Take the appliance to the nearest Authorized Oster Appliance Service Center for examination, repair ®...
-
Page 15: Important Safeguards
Do not disconnect by pulling on cord. Do not operate any appliance with a damaged cord or plug or after the appliance malfunctions, or is dropped or damaged in any manner. Take the appliance to the nearest Authorized Oster Appliance Service Center for examination, repair ®... - Page 16 For containers with no lids or vents (when inserted in the blender), such as personal Blend and Go containers: 19. Make sure the jar is correctly placed onto the base before using the appliance. 20. Do not blend carbonated, hot or boiling liquids and ingredients, as this may create pressure buildup.
-
Page 17: Appliance Description
AP P LI A N C E DES CRIPTIO N For Brazil NOTE: Parts 5 & 6 are Models Only not available for Brazil 1. Filler cap 7. Powerful Motor with exclusive All-Metal Drive ® 2. Lid system for extra durability 3. - Page 18 GETTING TO KNOW YOUR OSTER® BLENDER 6 CUPS 6 CUPS For models BLSTPEG-XPB/BGB: For models BLSTPEG-XRT/BGR: 550 W POWERFUL MOTOR REVERSIBLE TECHNOLOGY turns blades back and forth to completely process all ALL-METAL DRIVE ingredients ® for maximum durability 600 W POWERFUL MOTOR...
- Page 19 ASSEMBLING THE JAR 1. Turn jar upside down so the small opening is at the top. (Figure 1) 2. Place sealing ring over the small opening of the jar. (Figure 2) 3. Place blade into the small opening of the jar. (Figure 3) 4.
- Page 20 FOR BRAZIL MODELS ONLY: 1. Turn jar upside down so the small opening is at the top. (Figure 1) 2. Place sealing ring over the small opening of the jar. (Figure 2) 3. Turn the integrated blade assembly with threaded jar bottom upside down and place into the small opening of the jar.
-
Page 21: Pulse Function
US ING YO U R O STER® B LEN DER FOR MODELS WITH PUSH BUTTONS – 6 SPEEDS + PULSE (BLSTPEG- XPB/BGB) In the chart below, you will find a typical application, which will serve as a guide to use your blender. SPEED FUNCTION SOUPS... -
Page 22: Using The Manual Controls
USING THE MANUAL CONTROLS Manual Controls include: 1 - Low Speed 2 - Medium Speed 3 - High Speed Pulse ( ) Use these controls for personal recipes or to continue blending after an automatic program is finished. 1. Press the ON/OFF power button ( O ) to turn the blender on. The power light will blink, meaning the blender is active and ready for use. - Page 23 Before you use the product for the first time, separate all parts and clean them. Refer to the section ‘CARING FOR AND MAINTENING YOUR OSTER BLENDER’ for cleaning instructions - the ® cup, lid, sealing ring, blade and threaded jar bottom are all top rack dishwasher safe.
-
Page 24: Blending Tips
BLENDING TIPS • Put liquids in the jar fi rst unless the recipe says otherwise. • Crushing Ice: Crush 6 ice cubes or approximately 2 cups of ice at a time. • Do not remove the lid while in use. Remove fi ller cap to add smaller ingredients. •... -
Page 25: After Use
C AR IN G F OR AN D M A INTA INING YOU R O ST ER BLEND E R ® AFTER USE: 1. Lift the jar straight up from the base, remove the lid and empty the jar. 2. If necessary, use a rubber spatula to scrape foods away from the sides of the jar. IMPORTANT: UNPLUG BEFORE CLEANING. - Page 26 Não utilize nenhum eletrodoméstico que esteja com o fio ou o plugue danificado, ou que tenha apresentado algum defeito ou que esteja avariado de alguma maneira. Não tente trocar ou emendar o fio. Leve o aparelho a Assistência Técnica Credenciada Oster mais próxima para revisão, conserto ®...
-
Page 27: Precauções Importantes
Não utilize nenhum eletrodoméstico que esteja com o fio ou o plugue danificado, ou que tenha apresentado algum defeito ou que esteja avariado de alguma maneira. Não tente trocar ou emendar o fio. Leve o aparelho a Assistência Técnica Credenciada Oster mais próxima para revisão, conserto ®... - Page 28 aparelho sempre em superfícies secas, estáveis e niveladas. Nunca encha acima da linha máximo da jarra. 18. Se seu aparelho tiver um plugue com conexão de fio terra, conecte apenas em tomadas com conexão de fio terra. Para modelos com mini jarras ou jarras (copos) portáteis Blend N’ Go: 19.
-
Page 29: Descrição Do Aparelho
DESC RI Ç ÃO DO APARELHO Somente Para Os NOTA: As partes 5 e 6 Modelos Do Brasil não estão disponíveis para o Brasil 1. Copinho de acesso para adicionar ingredientes 6b. SOMENTE PARA OS MODELOS DO BRASIL: em seu liquidifi cador Lâmina integrada com a base com rosca da jarra 2. - Page 30 CONCEITOS BÁSICOS DO SEU LIQUIDIFICADOR OSTER® 6 CUPS 6 CUPS Para os modelos BLSTPEG-XPB/BGB: Para os modelos BLSTPEG-XRT/BGR: MOTOR POTENTE DE 550 W TECNOLOGIA REVERSÍVEL Gira as lâminas para frente e para trás processando ACOPLAMENTO DE METAL completamente todos alimentos para máxima durabilidade...
- Page 31 SOMENTE PARA OS MODELOS DO BRASIL: 1. Vire a jarra de boca para baixo para que a abertura pequena fi que em cima. (Figura 1) 2. Coloque o anel de vedação sobre a abertura da jarra. (Figura 2) 3. Coloque o conjunto da lâmina integrada com a base com rosca da jarra sobre o anel de vedação e a jarra.
- Page 32 USANDO SEU LIQUIDIFICADOR OSTER® PARA OS MODELOS COM BOTÕES – 6 VELOCIDADES + FUNÇÃO PARA PULSAR (BLSTPEG-XPB/BGB) No gráfico abaixo, você encontrará uma aplicação típica, que servirá de guia para usar seu liquidificador. VELOCIDADE FUNÇÃO DESLIGAR SOPAS MOLHOS 6 VELOCIDADES + DIPS FUNÇÃO PARA PULSAR...
- Page 33 USANDO OS CONTROLES MANUAIS Os controles manuais incluem: 1 - Velocidade baixa 2 - Velocidade média 3 - Velocidade alta Botão para pulsar ( ) Use esses controles para preparar suas próprias receitas ou para continuar a bater após o término de um programa automático. 1.
- Page 34 USANDO O ACESSÓRIO COPO BLEND-N-GO (COM MODELOS SELECIONADOS) Antes de usar o aparelho pela primeira vez, separe todas a peças e lave-as. Consulte a seção ‘CUIDANDO E MANTENDO SEU LIQUIDIFICADOR OSTER ’ ® para as instruções sobre a limpeza – copo, tampa, anel de vedação, e conjunto lâmina integrada com base e rosca podem ser lavadas na prateleira superior da...
- Page 35 RECOMENDAÇÕES PARA LIQUIDIFICAR • Coloque primeiramente os líquidos na jarra, a menos que a receita indique o contrário. • Para triturar gelo: Triture 6 cubos de gelo ou aproximadamente 0,5 L (2 xícaras) de gelo por vez. • Não tire a tampa enquanto o liquidifi cador estiver funcionando. Tire o copinho de acesso para adicionar ingredientes pequenos.
- Page 36 CUIDANDO E MANTENDO SEU LIQUIDIFICADOR OSTER ® APÓS O USO: 1. Levante a jarra e separe-a da base, tire a tampa e esvazie a jarra. 2. Caso seja necessário, use uma espátula de borracha para remover os alimentos que fi carem grudados na jarra.
-
Page 37: Notes / Notas
NOTES / NOTAS... - Page 38 NOTES / NOTAS...
- Page 39 NOTES / NOTAS...
- Page 40 The following information is intended for Mexico only. A informação a seguir é somente para o México. LICUADORA OSTER ® MODELOS: BLSTPEG-GPB, BLSTPEG-GPB-013, BLSTPEG-RPB, BLSTPEG-RPB-013, BLSTPEG-BPB, BLSTPEG-BPB-013, BLSTPEG-CPB, BLSTPEG-CPB-013, BLSTPEG-NPB, BLSTPEG-NPB-013, BLSTPEG-BRT, BLSTPEG-BRT-013, BLSTPEG-MRT, BLSTPEG-MRT-013, BLSTPEG-CRT, BLSTPEG-CRT-013, BLSTPEG-NRT, BLSTPEG-NRT-013, BLSTPEG-BGB, BLSTPEG-BGB-013, BLSTPEG-BGR, BLSTPEG-BGR-013 LA SIGUIENTE INFORMACIÓN ES PARA MÉXICO:...