
Related Manuals for Russell Hobbs RHEMN30L


Summary of Contents for Russell Hobbs RHEMN30L
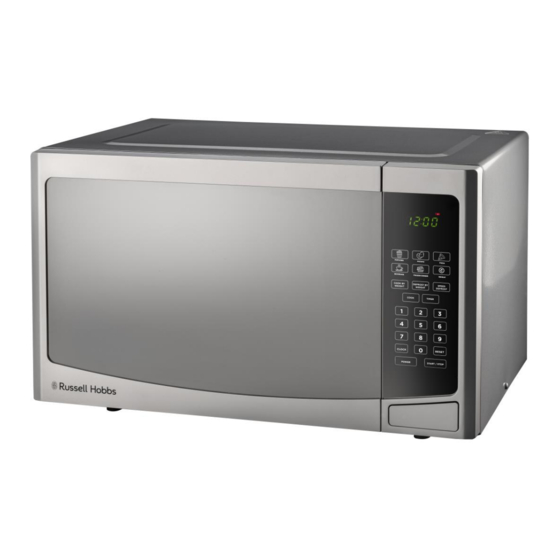
- Page 1 INSTRUCTIONS AND WARRANTY MODEL NO. RHEMN30L RUSSELL HOBBS 30L ELECTRONIC MICROWAVE OVEN...
-
Page 2: Important Safeguards
Congratulations on purchasing our Russell Hobbs 30L Electronic Microwave Oven. Each unit is manufactured to ensure safety and reliability. Before using this appliance for the first time, please read the instruction manual carefully and keep it for future reference. FEATURES OF THE RUSSELL HOBBS 30L ELECTRONIC MICROWAVE OVEN •... - Page 3 2. Incorrect operation and improper use can damage the appliance and cause injury to the user. 3. The appliance is intended for household use only. Commercial use invalids the warranty and the supplier can not be held responsible for injury or damage caused when using the appliance for any other purpose than that intended.
- Page 4 16. Do not fry food in the oven. Hot oil can damage oven parts and utensils and even result in burns. 17. Eggs in their shell and whole hard-boiled eggs should not be heated in microwave ovens since they may explode even after microwave heating has ended. 18.
- Page 5 29. Do not allow the cord to touch hot surfaces and do not place on or near a hot gas or electric burner or in a heated oven. 30. Do not use the appliance on a gas or electric cooking top or over or near an open flame.
- Page 6 SPECIFICATIONS Model: RHEMN30L Rated Voltage: Rated Input Power(Microwave): Rated Output Power(Microwave): 900W Oven Capacity: Turntable Diameter: 315mm External Dimensions: Net Weight: PRECAUTIONS TO AVOID POSSIBLE EXPOSURE TO EXCESSIVE MICROWAVE ENERGY • Do not attempt to operate this oven with the door open since open door operation can result in harmful exposure to microwave energy.
-
Page 7: Installation
INSTALLATION 1. Make sure that all the packing materials are removed from the inside of the door. 2. WARNING: Check the oven for any damage, such as misaligned or bent door, damaged door seals and sealing surface, broken or loose door hinges and latches and dents inside the cavity or on the door. -
Page 8: Turntable Installation
TURNTABLE INSTALLATION PARTS DIAGRAM ⑤ ⑦ ② ① ③ ④ ⑥... - Page 9 1. Door lock - Microwave oven door must be closed properly in order for it to operate. 2. Viewing window - Allow user to see the cooking status. 3. Rotating axis - The glass turntable sits on the axis; the motor underneath it drives the turntable to rotate.
-
Page 10: Beep Sound
‘’ BEEP ’’ SOUND; ONE BEEP: Oven accepts the entry. TWO BEEP’S: Oven does not accept the entry, check and try again. NUMBER PADS (0-9) Number pads are used for selecting the food type and cooking time. RESET Clear all previous settings. START/STOP Touch to start or stop cooking. -
Page 11: Setting The Oven Timer
SETTING THE OVEN TIMER 1) Touch the Timer key. 2) Enter the number you want to count down by touching the number keys. Digit time is in minutes and seconds and set left to right. Set one digit (a 5 for 5 seconds) or up to four digits (2405 for 24 minutes, 5 seconds). - Page 12 Example: To cook at P80 for 10 minutes. Steps Display After power-up, the colon flashes, then : press Reset button once or wait for 30sec Set cooking time by pressing the 10:00 number button of “1”,“0”,“0”,“0” Touch Power once then select the desired microwave power by pressing number “...
- Page 13 Touch Power once 100P Press Cook button once to confirm 20P for 9min Press “9”,“0”,“0” to set cooking time 9:00 Touch Power once then select the desired microwave power by pressing number “ 2” Start cooking by pressing Start/Stop button SPEED DEFROST FUNTION 1) On standby state or clock state, touch Speed Defrost key.
- Page 14 --For speed defrost and one stage cooking, follow the steps above. Before touching the Start/Stop key, touch the Cook key, and enter the time and power level. Then touch the Start/Stop key. --For speed defrost and two stage cooking, follow steps above. Before touching the Start/Stop key, enter two-stage cooking programs.
-
Page 15: Defrost By Weight
DEFROST BY WEIGHT You set the type and weight of food, and the oven automatically sets the defrosting time. Example: To defrost 1.15kg beef Steps Display After power-up, the colon flashes ,then : press Reset button once or wait for 30sec Press Defrost By weight button Set defrosting weight by pressing the 1.15... -
Page 16: Baked Potato
POPCORN 1) In standby state or clock state, touch the Popcorn key which automatically sets the cooking time to microwave popcorn. 2) Touch Start/Stop key. To reset Popcorn time: tap POPCORN key twice. ENTER TIME appears in display. Touch number keys to enter minutes and seconds. Touch Start/Stop key. -
Page 17: Radio Interference
REHEAT 1) In standby state or clock state, touch Reheat key. 2) Touch Start/Stop key. This setting lets you reheat a dinner plate of chilled leftovers with good results. DOOR SAFETY LOCK FEATURE Use this feature to lock the control panel when you are cleaning or so that children cannot use the oven unsupervised. -
Page 18: Microwave Cooking Principles
MICROWAVE COOKING PRINCIPLES • Arrange food carefully. Place thickest areas towards outside of dish. • Watch cooking time. Cook for the shortest amount of time indicated and add more as needed. Food severely overcooked can smoke or ignite. • Cover foods while cooking. Covers prevent spattering and help foods to cook evenly. - Page 19 The list below is a general guide to help you select the correct utensils COOKWARE MICROWAVE Heat–Resistant Glass Non Heat–Resistant Glass Heat–Resistant Ceramics Microwave–Safe Plastic Dish Paper Kitchen Towels Metal Tray Metal Rack Aluminium Foil & Foil Containers Parchment Paper Plastic Wrap Wax Paper Containers containing metal parts...
-
Page 20: Troubleshooting
TROUBLE SHOOTING NORMAL Dim oven light During cooking with low microwave power, the oven light may become dim. It is normal. Steam accumulating on door/ hot air out Foods may generate steam during the of vents cooking process. Most steam will escape via the vents however some may accumulate on the oven door. -
Page 21: Cleaning And Maintenance
CLEANING AND MAINTENANCE • Do not open or change any parts by yourself. Please refer to a qualified electrical service department or return to the supplier if servicing is necessary. • Turn off the oven and remove the power plug from the wall socket before cleaning. -
Page 22: Storing The Appliance
• Remove odors from your oven by combining a cup of water with the juice and rind of one lemon in a deep microwaveable bowl, microwave for 5 minutes. Wipe thoroughly and dry with a soft cloth. • When it becomes necessary to replace the oven light, please consult a dealer to have it replaced. -
Page 23: Changing The Plug
If the appliance still does not work after checking the above: - Consult the retailer for possible repair or replacement. If the retailer fails to resolve the problem and you need to return the appliance, make sure that: • The unit is packed carefully back into its original packaging. •... - Page 24 PLEASE AFFIX YOUR PROOF OF PURCHASE/RECEIPT HERE IN THE EVENT OF A CLAIM UNDER WARRANTY THIS RECEIPT MUST BE PRODUCED. 2 YEAR WARRANTY 1 year retail ⵏ 1 year extended warranty upon registration* visit www.russellhobbs.co.za W A R R A N T Y AND EXTENDED WARRANTY Home of Living Brands (Pty) Limited ("Home of Living Brands") warrants to the original purchaser of this product ("the customer") that this product will be free of defects in quality and workmanship which under normal personal, family or household use and purpose may manifest within a period of...
- Page 25 EXCLUSIONS TO W A R R A N T Y AND EXTENDED WARRANTY 1. Any accessories supplied with the product, including but not limited to, bowls, jugs, mills or carafes made either of glass or plastic and supplied with this appliance (hereinafter referred to as “the accessory or accessories”), is warranted to be free from material and workmanship defects for the duration of the appliance warranty.