Advertisement
Available languages
Available languages
Quick Links
If you don't like the ringer melody, you can choose a new one by
changing the setting as follows:
- Lift the handset.
-E)
- Press
button.
- Press# button.
- Press any button 0 to 9.
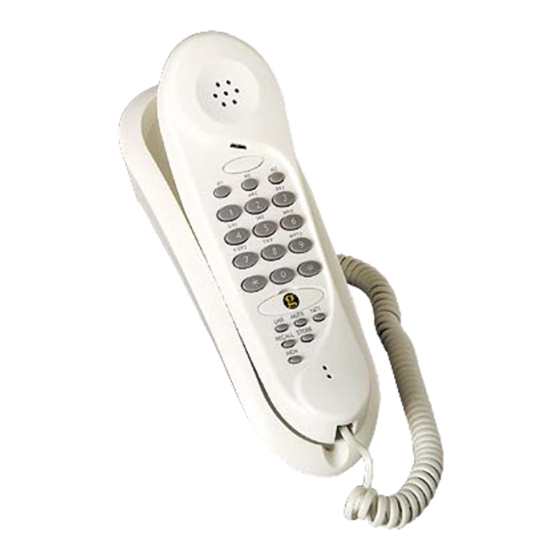
3 -WALL MOUNTING
To keep your handset in vertical position, slide out, turn
around and slide back in the wall mounting handset clip (which can be
found in the base unit, just below where the ear piece locates),this
ensure that the handset stays firmly in position.
USING THE TELEPHONE:
1 -ANSWERING INCOMING CALLS
When an incoming call is received, the telephone will ring. To
answer the call lift the handset and speak.
2 - MAKING A CALL
Lift the handset, await the dial tone and dial required number.
On completion of the call, carefully replace the handset in the cradle.
3 - LAST NUMBER REDIAL
Lift the handset, await the dial tone and press the
button. The previously dialled number will be AUTOMATICALLY RE
DIALLED ( not in use for memory numbers).
4
-
RECALL,
* & #
BUTTONS:
T hese are used with the new seNices provided on digital
exchanges. For details please contact your network operator.
5
-
MUTE BUTTON
If you wish to speak privately to someone else in the room -
without your caller overhearing - press and hold the
caller may still be heard during the MUTE operation. To resume
�
normal conversation , release the
button.
6 - STORING TELEPHONE NUMBERS
- Lift the handset.
-E>
- Press
button.
- Press one of the direct memory buttons, M1, M2, M3 or
VIP.
Or press MEM and any button 0 to 9 on the key pad under which you
wish to store the telephone number.
- Dial the telephone number you wish to store.
-E>
- Press
button.
- Replace handset.
Note if you wish to change a number in a memory location,
simply follow the instructions for storing a number. Entering the new
number will automatically erase the previous number.
5
7 -DIALLING STORED TELEPHONE NUMBER FROM MEMORY
- Lift the handset and await dial tone.
- Press appropriate direct memory button M1, M2, M3 or
VIP. The stored number will be dialled out automatically.
Or press the MEM button followed by the keypad O to 9 button under
which the desired number is stored. The stored number will be dialled out
automatically.
GUARANTEE
From the moment your Geemarc product is purchased, Geemarc Telecom
SA guarantee is for the period of one year. During this time, all repairs
or replacements (at our option) are free of charge.
Should you experience a problem then contact our helpline or visit our
website at www.geemarc.com.
The guarantee does not cover accidents, negligence or breakages to any
parts. The product must not be tampered with or taken apart by anyone
who is not an authorised Geemarc representative.
T he guarantee of Geemarc Telecom SA in no way limits your legal
rights.
IMPORTANT: YOUR RECEIPT IS PART OF YOUR GUARANT EE
AND MUST BE RETAINED AND PRODUCED IN THE EVENT OF
A WARRANT Y CLAIM
Please note: The guarantee applies to the United Kingdom only.
�
button. Your
For product support and help visit our website
DECLARATION: Hereby Geemarc Telecom SA declares that this product
is in compliance with the essential requirements and other relevant provi
sions of the Radio and Telecommunications Terminal Equipment Directive
1999/5/EEC and in particular article 3 section 1 a, 1 b and section 3.
UGSOL4 ED01
{!femarc
at www.geemarc.com
telephone 01707 384438
or fax 01707 372529
6
�emarc
User guide
Notice d1utilisation
SoLAR4
•
INS TALLATION
(Vair dessin)
1 - RACCORDEMENTS
Branchez le conjoncteur telephonique dans la prise
telephonique murale.
2-SONNERIE
Un commutateur situe derriere la plaquette decorative
(voir dessin) permet d'activer ou de desacliver la sonnerie.
: sonnerie activee
: sonnerie desactivee
Le telephone est livre la sonnerie activee.
Si le niveau de la sonnerie ne vous convient pas, selectionnez un
nouveau reglage parmi les 9 proposes ci-dessous:
Faible
Mo en
Fort
Melodie 1
2
3
Melodie 2
4
5
6
Melodie 3
9
7
8
Par defaut la sonnerie est en position 6. Suivez la procedure
decrite ci-dessous pour changer ce reglage :
- Decrochez le combine.
-E).
- Appuyez sur la touche
- Appuyez sur la touche #.
- Appuyez sur un chiffre de 1 a 9.
(Vair dessin)
3 - POSITION MURALE
Pour maintenir votre combine en position verticale, reli
rez I' ergot situe sur la base, le tourner et le reinserer.
Advertisement

Related Manuals for Geemarc SOLAR4


Summary of Contents for Geemarc SOLAR4
- Page 1 When an incoming call is received, the telephone will ring. To who is not an authorised Geemarc representative. answer the call lift the handset and speak. (Vair dessin) T he guarantee of Geemarc Telecom SA in no way limits your legal 1 - RACCORDEMENTS 2 - MAKING A CALL rights.
- Page 2 UTILISATION Wall mounting : slide out, turn around and slide back in the wall mounting 1 - RECEVOIR UN APPEL handset clip. Lorsque le telephone sonne, decrochez le combine pour parler Ergot a retourner pour maintenir le a votre correspondant. telephone en position murale.