Table of Contents
Advertisement
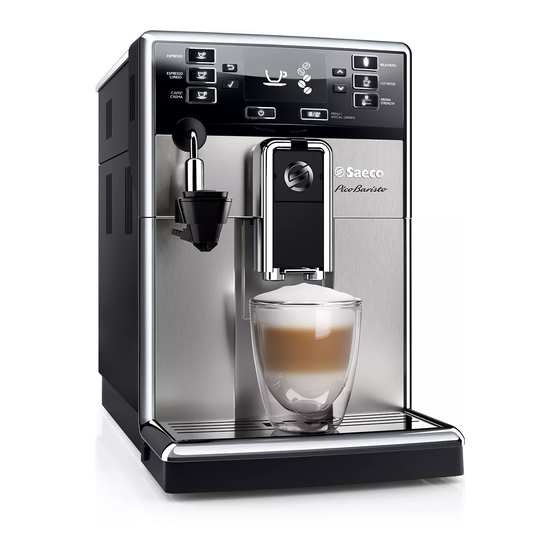
Coffee Machine
Service
General Information
Description
Housing material
Size (w x h x d)
Weight
Power Cord length
Control panel
Cup size
Water tank
Coffee bean hopper capacity
Coffee grounds drawer capacity
Milk carafe capacity
Pump pressure
Boiler
Safety devices
Energy saving mode
Nominal voltage - Power rating - Power supply
All parts of this document are the property of Saeco International Group.
All rights reserved. This document and all the information herein is provided without liability deriving from any errors or omissions. Furthermore, no part may be reproduced, used or
collected, except where express authorisation has been provided in writing or through a contractual agreement.
Published by Saeco International Group
Service Manual
Value
Thermoplastic material
221 x 335 x 430 mm
OTC 8.9 kg AMF 8.5 kg (data may vary depending on the model)
0.8m -1.2m
Front
Up to 152 mm
1.8 litres - Removable type
250 g
15 pucks
500 ml
15 bar
Stainless steel type
Thermal fuse
< 1 Wh
See data on inside of service door
Subject to modification
PICO BARISTO AMF-OTC
Rev. 00 September. 2015
EN 4219 400 00035
10/09/2015
Advertisement
Table of Contents

Related Manuals for Philips PICO BARISTO AMF


Summary of Contents for Philips PICO BARISTO AMF
- Page 1 Coffee Machine PICO BARISTO AMF-OTC Service Service Manual Rev. 00 September. 2015 General Information Description Value Housing material Thermoplastic material Size (w x h x d) 221 x 335 x 430 mm Weight OTC 8.9 kg AMF 8.5 kg (data may vary depending on the model) Power Cord length 0.8m -1.2m...
-
Page 2: Table Of Contents
Coffee grinder adjustment temperature 7.5. Carafe connection and hot/steam water dispenser 7.6. Central plate Brief instructions 7.7. Pin boiler 3.1. Warning icons and error codes PICO BARISTO AMF- 7.8. Gear motor 7.9. Pump 3.2. Meaning of error codes 7.10. Flow-meter 3.3. -
Page 3: Introduction
CHAPTER 1 INTRODUCTION... -
Page 4: Documentation Required
PICO BARISTO 01 INTRODUCTION Documentation required The following documentation is needed for repair procedures: • Instruction booklet for specific model • Technical documentation for specific model (diagrams, exploded view, sympton cure and service manual) Tools and resources As well as the standard equipment, the following is required: Qty. Description Notes Screwdriver Pliers for Oetiker clamps CC -A - Vdc tester Digital thermometer Scale limit > 150°C SSC (Saeco Service Center) Programmer (for programming and diagnostics mode) - Page 5 PICO BARISTO 01 INTRODUCTION When the machine arrives at the Service Center in descaling mode interrupted, or making Descal- ing, be very careful not to come into contact with the Descaler. After the product has been repaired, it should function properly and has to meet the safety require- ments and legal regulations as officially laid down at this moment Water Flowmeter Two-way solenoid valve Two-way solenoid valve Flowmeter Image 1 Hot water /steam From this point circuit in pressure From this point circuit High temperaure Steam and hot water Steam pipe Water tank Water tank Pump...
-
Page 6: Service Policy Grid As Used For Coffee Machines
PICO BARISTO 01 INTRODUCTION Service POLICY grid as used for coffee machines For IN WARRANTY repairs is mandatory to use the single components (not the assembly) avail- able in the exploded views of the coffee machines or of the specific components. If you find the information “SEE THE EXPLODED VIEW E..” in the assembly description field, it means that the single components of the assembly are available in the other pages of the exploded view. It’s possible to use the assembly only if there is a specific Symptom Cure that include this possibility or when the single components are not available for the order. -
Page 7: External Machine Parts (Amf)
PICO BARISTO 01 INTRODUCTION 1.6.1 External machine parts (AMF) User interface ESPRESSO button ESPRESSO MILK FROTH ESPRESSO LUNGO button ESPRESSO CAFFÈ CREMA button HOT WATER LUNGO ESPRESSO CAPPUCCINO ESC button ESPRESSO MILK FROTH CAFFE’ AROMA CREMA STRENGTH ESPRESSO LATTE LUNGO MACCHIATO ESPRESSO HOT WATER... -
Page 8: External Machine Parts (Otc)
PICO BARISTO 01 INTRODUCTION 1.6.2 External machine parts (OTC) User interface ESPRESSO button ESPRESSO CAPPUCCINO ESPRESSO LUNGO button ESPRESSO LATTE CAFFÈ CREMA button ESPRESSO LUNGO CAPPUCCINO MACCHIATO ESPRESSO LATTE LUNGO MACCHIATO ESPRESSO CAPPUCCINO ESC button CAFFE’ AROMA CREMA STRENGTH CAFFE’ AROMA CREMA STRENGTH... -
Page 9: Internal Machine Parts
PICO BARISTO 01 INTRODUCTION 1.6.3. Internal machine parts Grinding adjustment insert Coffee grinder Valve Coffee grinder motor PW/CPU P.C.B. Pump Boiler Safety valve Turbine Boiler pin... -
Page 10: Technical Specifications
CHAPTER 2 TECHNICAL SPECIFICATIONS... -
Page 11: Machine Parameters And Performance
PICO BARISTO 02 TECHNICAL SPECIFICATION 2.1. Technical specifications Power supply and output: 240 V~ 50 Hz 1850 W - 230 V~ 50/60 Hz 1850 W 120 V~ 60 Hz 1500 W Temperature monitoring: (NTC) variable resistor sensor - transmits the value to the electronic card Safety system: 2 thermostats at 190°C one shot... - Page 12 PICO BARISTO 02 TECHNICAL SPECIFICATION Descaling frequency in AQUACLEAN The first activation must make before you've paid up to 5000ml products because mind thinks as if he had the filter Percentual on Percentual on MAX Quanti- display 10% display 0% the ty water, the Hardness Filter number the icon flashes icon flashes icon turns off. slowly. quickly. (replace filter) Replace filter (you can From 1/8 to 7/8 not turn off) Indifferent 8050ml...
-
Page 13: Specification For The Measurement Of The Coffee Products
PICO BARISTO 02 TECHNICAL SPECIFICATION 2.3. Specification for the measurement of the coffee products temperature. The temperature is influenced by the flow from the dispenser and stratification of temperatures in the glass. In order to consider these phenomena and to introduce measures that allow comparisons in controlled conditions, below guidelines must be followed: Conditions: a) Water temperature in tank: 23°C (+/-2°C). b) It must be used a plastic cup (see picture N°1). c) It must be used a thermocouple thermometer (e.g. -
Page 14: Specification For The Measurement Of The Milk Products
PICO BARISTO 02 TECHNICAL SPECIFICATION 2.3.1. Specification for the measurement of the Milk products temperature. Milk evaluation To carry out the test, a partially skimmed UHT milk with a percentage of grease between 1.5-1.8% at a refrigerator temperature Trefr. (between 4 to 10°C) must be used. The milk product must be checked on a beaker of 250 ml of capability and with an inner diameter of 70mm, brewing 100gr of product. - Page 15 PICO BARISTO 02 TECHNICAL SPECIFICATION How to measure the milk cream. The temperature (Trefr or Tamb) of the milk doesn’t affect as much the test result on measuring the milk cream; by convection is assumed to always use milk at refrigerator temperature Trefr.. Manual systems (Pannarello) Pour 100cc.
-
Page 16: Brief Instructions
CHAPTER 3 BRIEF INSTRUCTIONS... -
Page 17: Warning Icons And Error Codes Pico Baristo Amf
PICO BARISTO 03 BRIEF INSTRUCTIONS English 3.1. Warning icons and error codes PICO BARISTO AMF-OTC - The milk carafe is not installed. Insert the milk c INSERT CARAFE - The bean hopper is empty. Put new co ee beans in the bean hopper. -
Page 18: Troubleshooting
PICO BARISTO 03 BRIEF INSTRUCTIONS Remove the water tank from the machine. Check the water tank compartment to check if there are any coffee beans on the bottom. Remove them. Switch the machine on and off. Other error Switch the machine off and switch codes it back on again after 30 seconds. - Page 19 PICO BARISTO 03 BRIEF INSTRUCTIONS The brew group cannot be The brew group is not positioned Close the service door. Switch removed. correctly. the machine off and back on again. Wait for the machine ready screen to appear and then remove the brew group. The coffee grounds container is Remove the coffee grounds not removed.
- Page 20 PICO BARISTO 03 BRIEF INSTRUCTIONS You added milk. Whether the milk you add is warm or cold, it will always decrease the temperature of the coffee to some extent. The machine grinds the coffee The grind is set too fine. Adjust the grinder to a coarser beans, but coffee does not setting.
- Page 21 PICO BARISTO 03 BRIEF INSTRUCTIONS The type of milk used is not Different types of milk result in suitable for frothing. (Only different amounts of froth and AMF) different froth qualities. Semi- skimmed or full-fat cow’s milk give good results. The AquaClean filter cannot be A filter has just been activated.
- Page 22 PICO BARISTO 03 BRIEF INSTRUCTIONS You did not replace the filter when the filter symbol started flashing. The filter does not fit. You need to remove air from Let air bubbles come out of the the filter. filter. There is still water in the water Empty the water tank before tank.
-
Page 23: Operating Logic
CHAPTER 4 OPERATING LOGIC... - Page 24 PICO BARISTO 04 OPERATING LOGIC 4.1 PICOBARISTO AMF-OTC...
-
Page 25: Coffee Cycle
PICO BARISTO 04 OPERATING LOGIC 4.2. Coffee cycle Main switch ON START STOP Time Coffee grinder Pulses (Dosage) Heating approx. 45 sec. Pump Pump operation (flow meter pulses) in accordance with the amount of product selected. Brewing unit gear motor Heating Ready Coffee cycle Status Notes: * Only with Pre-brewing... -
Page 26: Single Microswitch
PICO BARISTO 04 OPERATING LOGIC 4.3. Single microswitch Switching on When the machine is switched on, the gear motor repositions itself as follows: - It acts on microswitch 1 - The gear motor changes its rotation direction and moves upwards again by approx. 1-2 mm. - T he boiler begins to heat the water for approx. 45 sec., at full power, in order to reach the optimal temperature. The temperature will then remain at a constant level. The gear motor is powered by a direct current mo- tor that engages with the smaller double toothed wheel using a worm screw. -
Page 27: Coffee Grinder
PICO BARISTO 04 OPERATING LOGIC 4.4. Coffee grinder The coffee grinder is driven by a direct current motor (1) using a worm screw helicoidal wheel transmission (2). The worm screw (2) drives a plastic gear wheel (3), which turns the lower grinder (4) and the increment pin (5) 4.5. Autodose system description Aroma 4/5 + 200 Aroma 2/3 + 100 Aroma 1 + 55... -
Page 28: Coffee Lack Detection And Coffee Grinder Blocked
PICO BARISTO 04 OPERATING LOGIC 1) When the system get the stability (i.e. the system got the current target) the coffee doses should be: A2/3 A4/5 7,5 9,0 10 ±1,5 grams with medium grinding (500±60μm) and using coffee of test. 2) the 3 grinding times are always: <T <T beside, every grinding time is, respectively: 4,0s ≤T ≤10s (10000ms) 3,5s ≤T ≤9s (9000ms) 3,0s ≤T... -
Page 29: Water Level Detection (Water Tank)
PICO BARISTO 04 OPERATING LOGIC 4.7. Water level detection (water tank) “Water low” message (water reserve) Function: Water tank The water level is monitored by a capacitative sensor, located one third of the way up the water tank wall. If the electronics assembly detects, by means of the sensor, that the amount of water in the tank has dropped below the above mentioned Sensor level, a water reserve remains available for the dispensing process underway (this will cover 200 flow meter pulses). -
Page 30: Aquaclean Water Filter
PICO BARISTO 04 OPERATING LOGIC 4.9. AquaClean water filter The SAECO AquaClean water filter purifies the water your machines uses for brewing coffee. This results in a greater coffee taste. Moreover it prevents mineral deposits in the water to build up, which eliminates the need of descaling your machine for 500000ml of water. We recommend installing the water filter AquaClean the first use of the machine to the maximum before using 5000 ml of water. After a period of uses the machine, the display will indicate when the filter needs to be replaced, the maximum limit equivalent to 62500ml. In this way you can replace the filter 8 times without the need for descaling. This equals approx. 500000ml of water. When Aquaclean filter is activated the display will show an icon indicating the percentage of use (initially 100%) . The filter should be replaced after a maximum of 62500ml of water or after 3 months of use (ma- ximum time of law) The filter can not be deactivated manually, as it must end its life cycle. -
Page 31: Service Mode
CHAPTER 5 SERVICE MODE... -
Page 32: Test Mode Picobaristo Amf-Otc
PICO BARISTO 05 SERVICE MODE Test Mode PICOBARISTO AMF-OTC Introduction This document describes the Test Mode of the PicoBaristo (AMF & OTC) Coffee Machine. This ap- plication is used in order to test the machine in its mechanics and electronic components. To enter Test Mode The machine enters in Test mode by holding pressed together A and L buttons while switching on the machine by the main switch on the backside of the CA. - Page 33 TEST MODE Page 1 Pressing button TEST MODE Page 2 Pressing button TEST MODE Page 3 Pressing button Pressing button TEST MODE Page 4 Pressing button TEST MODE Page 5 Nicola.La @philips 06/08/2015 3/16 .com revNum Author Veri ed Approved SaveDate P/PP...
- Page 34 G Divella 12/06/2015 3/12 When the button A is pressed a Y appears on the display close to the Nicola.La @philips 06/08/2015 4/16 When the button A is pressed a Y appears on the display close to the revNum Author...
- Page 35 Press and maintain pressed the button ERROR: If the led switch on under a different button; check the interface board. Nicola.La @philips 06/08/2015 5/16 ERROR: If more than one leds appear under buttons; check the .com...
- Page 36 Insert the BrewUnit requires about 2-3 seconds to switch. ERROR: The indications BU -P doesn’t changes; check the BU Insert the BrewUnit presence Microswitch and the wiring (JP21). Nicola.La @philips 06/08/2015 7/16 Nicola.La @philips 06/08/2015 7/16 The indications BU -P changes from “N” to “Y”.
- Page 37 Nicola.La @philips 06/08/2015 8/16 ERROR: ( With BU )The absorbed current is more than 300mA, Press the G button to move the BU to Home .com...
- Page 38 POWER open. Check the wiring from the Electro Valve to the CPU/ POWER open. Check the wiring from the Electro Valve to the CPU/ Nicola.La @philips POWER 06/08/2015 10/16 ERROR : The L/H is zero or very low; the Electro Valve does not open.
- Page 39 HEATER changes from “OFF” to “ON” and the The absorbed current ( Amperometer on the main supply) is OK, the indication HEATER changes from “OFF” to “ON” and the temperature starts increasing. temperature starts increasing. indication HEATER changes from “OFF” to “ON” and the temperature starts increasing. Nicola.La @philips Nicola.La @philips 06/08/2015 06/08/2015 13/16 13/16 Nicola.La @philips...
-
Page 40: Steam Out
D e f a u l t Parameters Description When the Steam-Out is complete the following parameter value s are reset to their default values: Nicola.La @philips 07/08/2015 Nicola.La @philips 07/08/2015 .com revNum Author... - Page 41 PICO BARISTO 05 SERVICE MODE Dose (in impulse) of the coffee cycle in the “Latte latte_macchiato_qty Macchiato” Dose (in 1/10 seconds) of the milk cycle in the “Latte latte_macchiato_seconds Macchiato” Dose (in impulse) of the coffee cycle in the “Baby baby_cappuccino_qty Cappuccino”...
-
Page 42: Error Codes For Out Of Order Alarm
PICO BARISTO 05 SERVICE MODE filter_ filter_counter f i r s t _ Request Aqua clean filter activation next poweron request Counter of water for enable first Aqua Clean filter; if filter_startup_qty 5000 expire, the machine need a descaling action to activate a new filter. Error Codes for Out of Order alarm CODE Description NOTES The grinder is blocked The grinder is disconnected The BrewUnit is blocked in work position The BrewUnit is blocked in home position... -
Page 43: Service And Maintenance
CHAPTER 6 SERVICING AND MAINTENANCE... -
Page 44: Repair Flow
PICO BARISTO 06 SERVICING AND MAINTENANCE 6.1. Repair flow Proces stap Saeco Action Intake Visual inspection (transport damage) take care for pictures Check Type/serialnumber Log all available accessory Diagnosis Check product for consumer complaint (NFF contact consu- mer) Opening machine Visual inspection check for loosen parts, leaking etc.. Operational tests Repair Run Diagnostic to get error codes and relevant set statistics... - Page 45 PICO BARISTO 06 SERVICING AND MAINTENANCE Noise Is the sound normal Crema Blow on the coffee. Does the crema come back together Is the crema colour correct (Hazelnut) Temperature Is the coffee temperature within spec Grinder Is the grinder noise normal Steam Steam Does the steam work...
-
Page 46: Disassembly
CHAPTER 7 DISASSEMBLY... -
Page 47: Outer Shell
PICO BARISTO 07 DISASSEMBLY 7.1. Outer shell PICOBARISTO OTC PICOBARISTO AMF Remove the water tank, coffee dispens- er, drip tray, dump box, brewing unit, carafe or hot water dispenser. Unscrew the screws highlighted Remove the frame top cover and the front pa- nel controls Cover screwdriver... -
Page 48: Coffee Grinder
PICO BARISTO 07 DISASSEMBLY 7.2. Coffee grinder When reassembling Unscrew the screws hi- the coffee grinder, ghlighted, lift the grin- make sure the spring der and remove the is repositioned cor- electrical connections rectly (see photo) 7.3. Grinder blades To extract the top sup- Turn grinder port of the appliance,... -
Page 49: Carafe Connection And Hot/Steam Water Dispenser
PICO BARISTO 07 DISASSEMBLY 7.5.Carafe connection and hot/steam water dispenser Slide out the fork and Unscrew the screws hi- Unscrew the screws highlighted. When reas- remove the silicon tube ghlighted and remove the sembling the assembly to be careful to cor- carafe connection rectly position the spring. -
Page 50: Gear Motor
PICO BARISTO 07 DISASSEMBLY 7. 8. Gear motor Loosen the screws as illustrated, remove the pin boiler and the gear motor cover. The following are located inside the compartment protected by the casing: - Electric motor (A) with gears (B) and (C) for transmission and timing of the dispenser. - Brewing unit present microswitch (E). - Microswitch (D) detecting brewing unit home and work posi- tions. -
Page 51: Pump
PICO BARISTO 07 DISASSEMBLY 7. 9. Pump Disconnect the water circuit connections (A) and electrical Unhook pump from connections (B), loosen the safety valve (C) and slide the supports. pump off the brackets (D). 7. 10. Flow-meter Lift the flow meter out of the casing assembly and remove the electrical and water circuit connections. -
Page 52: Kyb Interface And Display
PICO BARISTO 07 DISASSEMBLY 7.14. KYB interface and display Loosen screws Disconnect the electrical connections. remove the cover. 7.15. Fitting and removing Oetiker clamps 1) Boiler connection. 2) Other connections. Use a suitable pair of pliers to remove Tighten the clamp as illustrated. the clamp (as illustrated). -
Page 53: Notes
CHAPTER 8 NOTES... - Page 54 PICO BARISTO 08 NOTES...
- Page 55 CHAPTER 9 WATER CIRCUIT DIAGRAM...
- Page 56 PICO BARISTO 09 WATER CIRCUIT DIAGRAM 9.1. Water circuit diagram...
- Page 57 CHAPTER 10 ELECTRICAL DIAGRAM...
- Page 58 PICO BARISTO 10 ELECTRICAL DIAGRAM 10.1. Electrical diagram...