
Related Manuals for Peavey KB-75


Summary of Contents for Peavey KB-75
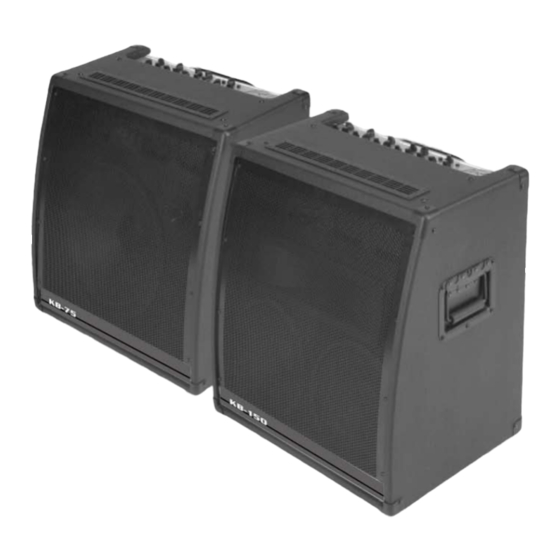
- Page 1 KB-75/KB-150 Keyboard Amplifier English/Chinese Owner Manual KB-75 150.indd 2009-6-24 16:42:20...
- Page 2 2. Be certain that all levels are down or set to the fully counter-clockwise position and set all the EQs flat 3. Set the master level to the 12:00 position 4. Connect left output of your keyboard to the left input of the KB-75/KB-150 and connect right output of your keyboard to the right input of the KB-75/KB-150 5.
-
Page 3: Front Pannel
Low EQ (2) An active tone control (shelving type: +/-15dB) that varies the low frequency range. (KB-150: channels 1‚ 2 & 3; KB-75: channels 1 & 2.) Caution: Excessive low frequency boost causes greater power consumption and increases the possibility of speaker damage. - Page 4 KB-150 and channel 3 on the KB-75.) Main/Monitor (7) This affects what signal is sent to the headphones. When in the OUT position‚ only the signal from channel 5 is sent to the headphones. Great when you need to hear a click track or midi/pre- recorded track.
-
Page 5: Rear Panel
CH5/Monitor Input Jack (6) Use this 1/4" jack to connect to the output of any line-level device. Channel 4 (Channel 3 input on KB-75) High-Impedance Input (7) This pair of 1/4" jacks accepts high-impedance microphones or line-level sources equipped with left and right 1/4"... - Page 6 This pair of 1/4" jacks allows the use of various auxiliary units (effects units‚ equalizers‚ etc.) in- line. Channel 3‚ 2 & 1 (Channel 2 & 1 on KB-75) Inputs (11‚ 12 & 13) This pair of 1/4" jacks accepts high-impedance microphones or line-level sources equipped with left and right 1/4"...
-
Page 7: Specifications
+0, -1dB, 20 Hz–20 kHz @ 60 Watts Minimum Input Level: -48 dBV‚ 4 mV RMS RMS/8 Ohms High Z Input Impedance: 100 k‚ Left Nominal Input Level: -5 dBV‚ 560 mV RMS Minimum Input Level: -22 dBV‚ 79 mV RMS KB-75 150.indd 2009-6-24 16:42:40... -
Page 8: Important Safety Instructions
Does not operate normally, or has been dropped. 15. If this product is to be mounted in an equipment rack, rear support should be provided. KB-75 150.indd 2009-6-24 16:42:40... - Page 9 中 文 KB-75 / KB-150 键盘多功能功放 谢谢你选择使用我们的KB-75/KB-150功放,我们的工程师和艺术家经过多年对键盘发声的测 试和研究,最后终于可以将键盘发声诸多特性和优点融入到KB-75/KB-150之中,所以我们可以保 证我们最新的KB-75/KB-150系列功放能够发出最优美的声音为各种键盘乐器—无论是低音或是 高音,我们的KB系列键盘功放都能够对他们进行完美的处理,并还原给你最美妙的声音. 在开始使用你的功放之前,请确定你的电源输出电压是与你的功放完全匹配的,你可以在产 品的背面看到适合你功放使用的输出电压,另外在功放的背面,你还可以发现一个额外的音箱 接口,如有需要,你可以在此接口接入多一只合适的音箱以求获取更大的扩声效果. 在使用之前请仔细的阅读这本产品说明书以确保你个人和产品的安全. 特性: 4通道(KB-75) 或5通道(KB-150) 75瓦(KB-75)或150瓦(KB-150) 及其坚固的,并可收回和锁定的拉杆大大方便了功放的移动. 均衡的立体声输出 立体声传送和返回接口 一个额外的音箱接口. 快速的使用说明 1.连接电源线到合适的电源插座 2.确定所有的音量调节旋钮已经被打倒零,并且所有的EQ调节在起始点的位置 3.请将Master Level设定在12:00 钟方位 4.连接键盘的左边输出到功放的左边输入,连接键盘的右边输出到功放的右边输入 5.设定DDT转换开关到还原 6.设定main/monitor转换开关到monitor的位置 7.打开KB-75或KB-150的电源开关 8.调节频道音量到合适的级别 9.如果需要请合适的调节EQ各个频段. KB-75 150.indd 2009-6-24 16:42:40...
- Page 10 用来控制低阻抗的麦克风或者另外低级别的音频输出(male XLR 连接) Mid EQ (6) 一个主动的音色控制钮(Peak/notch 类型: +/- 15dB)可以通过它改变中频的范围. Main/Monitor (7) 通过这个转换开关我们可以影响被送到耳机里的信号,当它在OUT 位置的时候,信号仅仅从频 道5送到耳机,但是如果打倒IN位置的时候,信号将会从所有的频道送到耳机. 注意,这个信号是 从来不会被送到主要的XLR输出口. CH5/Monitor Level (8) 控制频道5的输入级别, 控制高阻抗的麦克风或其它高级别的音源(1/4”Phone Plug) Headphone Level (9) 通过这个旋钮可以控制耳机的音量在背面板.为了防止过大的音量损害你的听力,请确定耳机 的声音已被调至最小在接入耳机之前. Master Level (10) 通过这个旋钮可以控制功放整体的音量除了耳机的音量,请确定这个旋钮被打到起始位置当 你启动功放的时候. Selector (11) 通过这个转换开关可以控制失真保护,当这个按钮在OUT位置的时候,失真保护系统就会被启 用,这样将大大减低你的单元由于失真受损的机率,所以我们建议将此开关总是打到OUT的位置 去减小单元受损的机率. KB-75 150.indd 2009-6-24 16:42:41...
- Page 11 这一组1/4” 接口能够接受高阻抗的麦克风或有着1/4” 左右输出插头的音源设备. Channel 4 (Channel 3 input on KB-75) low-impedance Input (8) 这一组1/4” 接口能够接受低阻抗的麦克风或有着一个male XLR插头的音源设备. Channel 4 (Channel 3 input on KB-75) Send/Return Jack (9 and 10) 这对1/4”接口允许不同的辅助设备的接入(效果器,均衡等). Channel 3,2&1 (Channel 2&1 on KB-75) inputs (11, 12,and 13) 这对1/4” 接口能够接收高阻抗麦克风或者其它有着1/4” 左右输出插头的音源设备.
- Page 12 1. 在使用本产品前仔细的阅读操作指南 2. 请好好的保存这本操作指南 3. 请注意所有的警示指南 4. 请按照操作指南去使用本产品 5. 不要在近水的地方操作本产品,例如浴盆,游泳池,潮湿的地下室 6. 请用微湿的抹布进行清洁 7. 请保持本产品通风口和散热口的畅通,不要将本产品放置在靠墙的地方,(最好保持超 过16CM的空间)或箱子里,因为这样会影响到本产品的通风和散热. 8. 不要将本产品放置在靠近发热体的附近,例如,电热炉,烤箱等 9. 如果发现插座和本产品的电源线插头不匹配,请不要将本产品插头的地线端拆掉以插 入这个本来不匹配的插座里,这样将导致严重的后果,并大大增加了你和本产品受到伤害 的机率, 我们建议你最好去更换一个匹配本产品插头的插座. 10. 请不要使用任何不是由原厂提供的附件和配件. 11. 当在雷电或你可能长时间不使用本产品的情况下,请将插头拔掉. 12. 考虑到本产品的重量,在搬运本产品时请注意安全操作,不要被压到手指头. 13. 一旦本产品发生故障,请找专业的维修人员进行维修,或将本产品发回购买地,由我们 的维修部门处理. 14. 请妥善的保管好电源线,不要将其折叠或刮花. 15. 本产品能够产生极大的声压,所以在使用时一定要注意将音量打到合适的位置,以免 给你的听力造成临时,或永久性的伤害. KB-75 150.indd 2009-6-24 16:42:41...