
Related Manuals for Canon Digital IXUS 500HS


Summary of Contents for Canon Digital IXUS 500HS
- Page 1 ENGLISH Camera User Guide Please read the Read This First section (p. 7). Please also read the Software Starter Guide and the Direct Print User Guide. CDI-E117-010 XXXXXXX © 2004 CANON INC. PRINTED IN JAPAN...
- Page 2 Use of genuine Canon accessories is recommended. This product is designed to perform optimally when used with genuine Canon accessories. Canon shall not be liable for any damage to this product and/or accidents such as fire, etc., caused by the malfunction of non-genuine Canon accessories (e.g., a leakage and/...
- Page 3 Camera Body Temperature If your camera is used for prolonged periods, the camera body may become warm. Please be aware of this and take care when operating the camera for an extended period. About the LCD Monitor The LCD monitor is produced with extremely high-precision manufacturing techniques.
- Page 4 About This Guide Conventions Used in the Text Icons on the right end of title bars show the applicable operating modes. As in the example below, the procedure can be performed in (Auto), (Manual), (Stitch Assist) or (Movie) mode. Using the Self-timer : This mark denotes issues that may affect the camera’s operation.
- Page 5 Thumb Index Preparing the Camera Basic Functions Shooting Playback Erasing Print Settings/Transferring Connecting the Camera to a Computer/TV My Camera Settings List of Messages Troubleshooting Appendix Photo Tips and Information...
-
Page 6: Table Of Contents
Table of Contents Items marked with are lists or charts that summarize camera functions or procedures. Read This First ..........7 Please Read....................7 Safety Precautions..................8 Preventing Malfunctions ................13 Components Guide ..........14 Preparing the Camera Charging the Battery Pack ............... 18 Installing the Battery Pack ............... - Page 7 Shooting a Movie................70 Shooting Hard-to-Focus Subjects (Focus Lock, AF Lock) ......72 Locking the Exposure Setting (AE Lock) ..........74 Locking the Flash Exposure Setting (FE Lock) ......... 75 Switching between Focusing Modes ............76 Switching between Light Metering Modes ......... 77 Adjusting the Exposure Compensation ............
- Page 8 Connecting the Camera to the Computer to Download Images without Installing Software ................125 Downloading Directly from a CF Card ............ 126 Viewing Images on a TV set........127 Customizing the Camera (My Camera Settings) Changing My Camera Settings .............. 129 Registering My Camera Settings ............
-
Page 9: Read This First
Warning Against Copyright Infringement Please note that Canon digital cameras are intended for personal use and should never be used in a manner that infringes upon or contravenes international or domestic copyright laws and regulations. -
Page 10: Safety Precautions
Similarly, never touch internal portions of the equipment that become exposed as a result of damage. There is a risk of high-voltage electrical shock. Please take the first opportunity to consult your camera distributor or the closest Canon Customer Support Help Desk. - Page 11 Confirm that smoke or fume emissions have ceased. Please consult your camera distributor or the closest Canon Customer Support Help Desk. • Stop operating the equipment if it is dropped or the casing is damaged.
- Page 12 • Use only recommended power accessories. Use of power sources not expressly recommended for this equipment may lead to overheating, distortion of the equipment, fire, electrical shock or other hazards. • Do not place the batteries near a heat source or expose them to direct flame or heat.
- Page 13 • The camera terminals of the battery charger and compact power adapter are designed for exclusive use with your camera. Do not use them with other products or batteries. There is a risk of fire and other hazards. Caution about magnetic fields Keep objects that are sensitive to magnetic fields (such as credit cards) away from the speaker of the camera (p.
- Page 14 Cautions • Avoid using, placing or storing the equipment in places subject to strong sunlight or high temperatures, such as the dashboard or trunk (boot) of a car. Exposure to intense sunlight and heat may cause the batteries to leak, overheat or explode, resulting in fire, burns or other injuries.
-
Page 15: Preventing Malfunctions
Preventing Malfunctions Avoid Strong Magnetic Fields Never place the camera in close proximity to electric motors or other equipment generating strong electromagnetic fields. Exposure to strong magnetic fields may cause malfunctions or corrupt image data. Avoid Condensation Related Problems Moving the equipment rapidly between hot and cold temperatures may cause condensation (water droplets) to form on its external and internal surfaces. -
Page 16: Components Guide
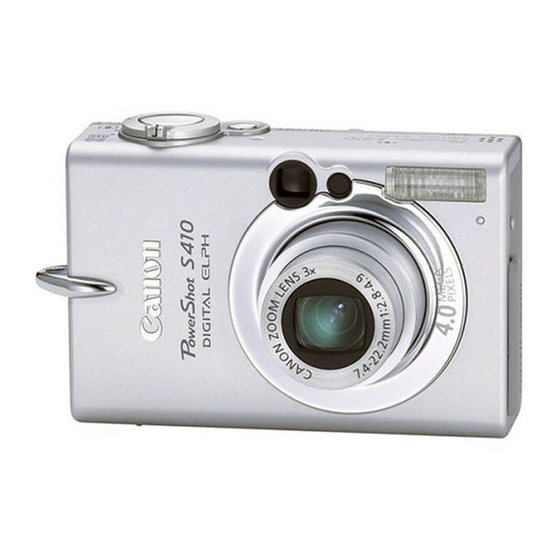
Components Guide Front View Viewfinder Window (p. 39) AF-assist Beam (p. 42) Red-eye Reduction Lamp (p. 58) Self-timer Lamp (p. 64) Microphone (p. 98) Speaker Flash (p. 58) DIGITAL Terminal (p. 120) A/V Out (Audio/Video Out) Terminal (p. 127) Terminal Cover Lens Wrist Strap Mount Attaching the Wrist Strap... - Page 17 Please refer to your Bubble Jet printer user guide. - PictBridge Compliant Printers: Interface Cable IFC-400PCU (supplied with the camera) • PictBridge Compliant Non-Canon Printers: Interface Cable IFC-400PCU (supplied with the camera) Please refer to the System Map or the Direct Print User Guide supplied...
- Page 18 Operation Panel Power Lamp Shooting Mode Dial (p. 53) Lights when the power is on or transmission preparations are complete when connected to a computer Indicators (p. 17) ON/OFF Button (p. 30) Shutter Button (p. 41) Zoom Lever Shooting: (Telephoto)/ (Wide Angle) (p.
- Page 19 Indicator The indicator lights or blinks when the ON/OFF button or shutter button is pressed. Upper Indicator Green: Ready to shoot Blinking Green: Recording to CF card / Reading CF card / Erasing from CF card/Transmitting data (during a computer connection) Orange: Ready to shoot (flash on) Blinking Orange: Ready to shoot (camera shake warning)
-
Page 20: Preparing The Camera
Preparing the Camera Charging the Battery Pack Use the following procedures to charge the battery pack the first time you use the camera or when the “Change the battery pack” message displays. Insert the battery pack into the battery charger. Align the battery pack according to the arrows on the battery and the charger. - Page 21 • It takes approximately 130 minutes to fully charge the battery pack from a fully discharged state (based on Canon’s testing standard). Charging it within a temperature range of 5° to 40 °C (41° to 104 °F) is recommended.
- Page 22 Do not allow any metal objects Fig. A Fig. B such as key rings to touch the terminals (Fig. A), as this can damage the battery pack. To carry the battery pack or store it during periods of disuse, always replace the terminal cover (Fig.
-
Page 23: Installing The Battery Pack
Installing the Battery Pack Install Battery Pack NB-1LH (supplied) as shown below. Battery Pack NB-1L can also be used with the camera. Please recharge the battery pack (p. 18) before you use it for the first time. Slide the battery cover in the direction of the arrows. - Page 24 • Do not turn off the power or open the battery cover while the upper indicator beside the viewfinder blinks green. The camera is writing, reading, erasing or transmitting an image to or from the CF card. • Remove the battery pack when the camera is not in use. Please note, however, that the date, time and other camera settings may reset to the default settings if the battery pack has been removed for more than three weeks.
-
Page 25: Installing The Cf Card
Installing the CF Card Turn the camera power off and insert the CF card with the following procedures. Slide the lock up and open the CF card slot cover. Insert the CF card with its label facing upward until the CF card eject button fully extends. - Page 26 • Since the camera is writing, reading, erasing or transmitting data to or from the CF card when the upper indicator beside the viewfinder blinks green, never perform the following actions during this time. It could corrupt the image data. - Subject the camera body to vibration or shocks.
- Page 27 Handling Precautions for CF Cards CF cards are high-precision electronic devices. Do not bend them, apply force to them, or subject them to shocks or vibration. Do not attempt to disassemble or alter the CF card. Moving a CF card rapidly between temperature extremes will cause condensation to form in the card and lead to a malfunction.
-
Page 28: Setting The Date And Time
Setting the Date and Time The Date/Time menu will appear the first time the camera power is turned on or whenever the built-in rechargeable lithium date/time battery charge is low. Start from Step 5 to set the date and time. Press the ON/OFF button until the Power Lamp power lamp lights. - Page 29 Set the date and time. • Use the button to select a field (year, month, day, hour, minute and date format). • Use the button to change its value. Press the SET button. The setting is complete. Press the MENU button. The display will return to the Shooting or Playback screen.
-
Page 30: Setting The Language
Setting the Language Use this feature to select the language for the LCD monitor display. Press the ON/OFF button until the Power Lamp power lamp lights. Press the MENU button. (Rec.) or (Play) menu is displayed. Use the button to select the (Set up) menu. - Page 31 Use the button to select a language and press the SET button. Press the MENU button. The display will return to the Shooting or Playback screen. The Language menu can also be displayed in playback mode by holding down the SET button and pressing the MENU button. This function cannot be used while a movie clip is played back, or a separately sold printer is connected to the camera.
-
Page 32: Basic Functions
Basic Functions Turning the Power On Press the ON/OFF button until the Power Lamp power lamp lights green. • The lens extends when the mode switch is set to • The lens retracts approximately 1 minute after sliding the mode switch from •... - Page 33 Power Saving Function This camera is equipped with a power saving function. When this function is turned on and it activates, restore power by pressing the ON/OFF button. Shooting Mode: Powers down approximately 3 minutes after the last control is accessed on the camera. The LCD monitor automatically turns off 1 minute* after the last control is accessed even if [Auto Power Down] is set to [Off].
-
Page 34: Switching Between Shooting/Playback
Switching Between Shooting/Playback The mode switch is used to select Shooting and Playback functions. To Shoot Images (Shooting Mode) Slide the mode switch to To Play Back Images (Playback Mode) Slide the mode switch to • When a printer (sold separately) is connected, images can be printed (see the Direct Print User Guide). -
Page 35: Using The Lcd Monitor
Using the LCD Monitor The LCD monitor can be used to compose images while shooting, adjust menu settings and play back recorded images. Icons showing the camera’s status and setting contents appear on the LCD monitor. The image in the LCD monitor will darken in strong sunlight or bright light. - Page 36 Playback Mode ( When the mode switch is set to , the LCD monitor will turn on. Press the DISP. button. The display mode changes as follows with each press. Standard Detailed No Information In Index playback mode (p. 91), the detailed display is not available.
-
Page 37: Information Displayed On The Lcd Monitor
Information Displayed on the LCD Monitor When shooting or playing back images, the shooting information or play back information appears on the LCD monitor. Shooting Mode When setting the flash, continuous mode, self-timer, macro mode, infinity mode, or the metering method, the shooting information displays on the LCD monitor for approximately 6 seconds even if the LCD monitor is set to [Standard (No Information)] or [Off]. - Page 38 Low Battery (p. 22) Exposure Compensation (p. 78) Long Shutter Mode (p. 79) Quick Shot (p. 57) Metering Mode (p. 77) White Balance (p. 81) Shooting Method (p. 63, 64) ISO Speed (p. 85) Macro/Infinity (p. 60) Photo Effect (p. 84) Flash (p.
- Page 39 Playback Mode (Standard Display) File Number Image Number Shooting Date Protection Status (p. 104) Resolution (Still Images) (p. 55) Movie (p. 93) WAVE Format Sound (p. 98) Compression (Still Images) (p. 55) Playback Mode (Detailed Display) Histogram Long Shutter Mode (p. 79) Shooting Mode (p.
- Page 40 The following information may also be displayed with some images. A sound file in a format other than the WAVE format is attached or the file format is not recognized. JPEG file with format not conforming to Design rule for Camera File System Standards RAW format file File with unrecognized format...
-
Page 41: Using The Viewfinder
Using the Viewfinder The viewfinder can be used to conserve power by setting the LCD monitor to Off (p. 33) while shooting. Shows the center of the image View Finder Image Seen in Viewfinder vs. Recorded Image Usually the recorded image is wider than the image seen in the viewfinder. -
Page 42: Using The Zoom
Using the Zoom The zoom can be adjusted from 36 mm to 108 mm in 35 mm film equivalent terms. Telephoto/Wide Angle Press the zoom lever toward • Press the zoom lever toward to zoom in (telephoto). • Press the zoom lever toward to zoom out (wide angle). -
Page 43: Pressing The Shutter Button
Pressing the Shutter Button The shutter button features a two-stage action. Pressing Halfway Pressing halfway automatically sets the exposure and focus. Press the shutter button halfway. Indicator Status Upper Indicator • Green: Metering complete Indicator (two beeps sound) • Orange: Flash will fire •... - Page 44 Pressing Fully Pressing the shutter button down fully activates the shutter and causes the shutter sound to sound. Press the shutter button fully. While the image is being recorded to the CF card, the upper indicator beside the viewfinder blinks green. Shots cannot be taken while the flash is charging.
-
Page 45: Selecting Menus And Settings
Selecting Menus and Settings Menus are used to adjust shooting and playback settings, as well as other camera settings like the Date/Time and sounds. Menus are displayed by pressing the FUNC. or MENU button according to the circumstances. Use the LCD monitor to perform the following procedures. Selecting Menu Settings with the FUNC. - Page 46 FUNC. MENU Exposure Compensation (p. 78) Photo Effect (p. 84) (1) Long Shutter Mode (p. 79) ) Compression (p. 55) White Balance (p. 81) ) Resolution (p. 55) ISO Speed (p. 85) ) Resolution (Movie)* (p. 55) ( ) Items in parentheses show default settings. *The PowerShot S410 DIGITAL ELPH/DIGITAL IXUS 430 menu is different because it does not feature the option.
- Page 47 Press the MENU button. In Shooting mode, the (Rec.) menu appears. In Playback mode, the (Play) menu appears. Use the button to select a menu. • Select the menu with the icon in the upper left corner of the LCD monitor selected. •...
- Page 48 Shooting Mode Playback Mode Rec. Menu Play Menu The menu will appear slightly different depending on the Shooting mode Set up Menu My Camera Menu • When the My camera menu is displayed, pressing the button returns to the Rec./Play menu. •...
-
Page 49: Menu Settings And Factory Defaults
Menu Settings and Factory Defaults This chart shows the options and default settings for each menu. * Default setting Rec. Menu Reference Menu Item Options Page Sets the Quick Shot option to on or off. Quick Shot • On p. 57 •... - Page 50 Play Menu Reference Menu Item Options Page Protect Protects images from accidental erasure. p. 104 Rotates images clockwise 90° or 270° in the Rotate p. 97 display. Sound Memo Adds sound memos to images. p. 98 Deletes all images from a CF card Erase all p.
- Page 51 Reference Menu Item Options Page Adjusts the volume of the start-up sound, operation sound, self-timer sound, shutter sound and playback sound. The volume Volume cannot be adjusted if [Mute] is set to [On]. Off 1 2* 3 4 5 Adjusts the volume of the start-up sound when Start-up Vol.
- Page 52 Reference Menu Item Options Page Date/Time Sets the date and time and the date format. p. 26 Format Formats (initializes) CF cards. p. 107 Sets how file numbers are assigned to images when new CF cards are inserted. File No. Reset p.
- Page 53 My Camera Menu You can select the theme, start-up image and sound, shutter sound, operation sound and selftimer sound used on this camera. These are called the My Camera settings. You can also customize the options for each item with images recorded on the CF card and newly recorded sounds or by using the supplied software.
-
Page 54: Resetting Settings To Their Default Values
Resetting Settings to Their Default Values You can reset the menu and button settings to the default settings in one operation. Press the ON/ OFF button until the Power Lamp power lamp lights green. Set the mode switch to any position. Press and hold the MENU button for more than 5 seconds. -
Page 55: Shooting
Shooting Shooting in Auto Mode In this mode, all you have to do is press the shutter button and let the camera do everything else. Slide the mode switch to turn the mode dial to Aim the camera at the subject. Use the zoom lever to achieve the desired composition (relative subject size in the viewfinder) (p. -
Page 56: Reviewing An Image Right After Shooting
Reviewing an Image Right after Shooting Right after a shot is taken, the image appears in the LCD monitor for 2 seconds. In addition, the images will keep on displaying regardless of the review duration setting if one of the following operations is performed. •... -
Page 57: Changing Resolution/Compression Settings
Changing Resolution/Compression Settings You can change the resolution and compression (excluding movies) settings to suit the purpose of the image you are about to shoot. PowerShot S500 DIGITAL ELPH/DIGITAL IXUS 500 Resolution Purpose • Print larger than A4 size* 210 x 297 mm (8.3 x 11.7 in.) prints 2592 x 1944 pixels Large... - Page 58 Compression Purpose High Superfine • Shoot higher quality images Quality Fine • Shoot normal quality images Normal Normal • Shoot more images Movies can be shot with the following resolution. Resolution (Not featured on the PowerShot S410 640 x 480 pixels DIGITAL ELPH/DIGITAL IXUS 430) 320 x 240 pixels 160 x 120 pixels...
-
Page 59: Quick Shots
Press the FUNC. button. The display will return to the Shooting screen. • See Image File Sizes (Estimated) (p. 150). • See CF Cards and Estimated Capacities (p. 148). Quick Shots You can reduce shutter lag time to capture those fleeting “photo opportunities”. -
Page 60: Using The Flash
Using the Flash Use the flash according to the guidelines below. Auto The flash fires automatically as required by the light level. The flash fires automatically as required by the lighting Auto with level, and the red-eye reduction lamp fires each time Red-eye the main flash fires. - Page 61 • When you use flash photography at higher ISO speeds, the chances of white streaks appearing in the image increase the closer you approach to the subject. • Since a slow shutter speed is selected in dark places when the flash is set to Off or Slow Synchro, take care to avoid blurring the image.
-
Page 62: Shooting Close-Ups/Infinity Shots
Shooting Close-Ups/ Infinity Shots Use this mode to record subjects in the range of 5 to 46 cm (2.0 in. to 1.5 ft.) from the lens tip when at wide- Macro angle end and in the range of 30 to 46 cm (1.0 ft. to 1.5 ft.) when at the telephoto end setting. - Page 63 Image Area in Macro Mode When the zoom is set between the telephoto end and the wide-angle end, the distance from lens to subject is the same as when the zoom is set to the telephoto end. Distance from Lens to Image Area Subject Telephoto End...
-
Page 64: Using The Digital Zoom
Using the Digital Zoom When the LCD monitor is on, images can be zoomed to the following powers with the combined optical and digital zoom functions. PowerShot S500 DIGITAL ELPH/DIGITAL IXUS 500: Approx. 3.8x, 4.9x, 6.1x, 7.6x, 9.3x, 12.0x PowerShot S410 DIGITAL ELPH/DIGITAL IXUS 430: Approx. 4.3x, 5.3x, 6.7x, 8.2x, 11.0x Press the DISP. -
Page 65: Continuous Shooting
PowerShot S410 DIGITAL ELPH/DIGITAL IXUS 430: Approximately 2.5 frames/sec. * Large/Fine, LCD monitor off mode. (These figures reflect Canon’ s testing standard. The actual figures will vary according to the shooting conditions and settings.) To cancel continuous shooting Press the... -
Page 66: Using The Self-Timer
To change the continuous shooting speed In the (Rec.) menu, select See Selecting Menus and Settings (p. 43). Use the button to select and press the MENU button. The display will return to the Shooting screen. • The interval between shots may lengthen slightly when the camera’s built-in memory fills. - Page 67 Changing the Self-timer Countdown Time In the (Rec.) menu, select See Selecting Menus and Settings (p. 43). Use the button to select and press the MENU button. • The display will return to the Shooting screen. • When is selected, the self-timer sounds and the blinking gets faster 2 seconds before the shutter activates.
-
Page 68: Shooting In Manual Mode
Shooting in Manual Mode In this mode, you can change various settings and shoot as you wish. Slide the mode switch to (Rec.) and turn the mode dial to Change the settings. See Functions Available in Each Shooting Mode (p. 160). Shoot (p. -
Page 69: Shooting Panoramic Images (Stitch Assist)
Shooting Panoramic Images (Stitch Assist) Stitch Assist can be used to shoot overlapping images that can later be merged (stitched) to create one panoramic image on a computer. The overlapping seams of several adjacent images can be joined into a single panoramic image. - Page 70 • To shoot close-ups, slide the camera over the subject, keeping it parallel to the subject as you move it. Shooting Images can be shot in two sequences in Stitch Assist. Left to right horizontally Right to left horizontally Slide the mode switch to (Rec.) and turn the mode dial to Use the...
- Page 71 Compose the second image so that it overlaps a portion of the first and shoot. • Use the button to check or retake the recorded images. • Minor discrepancies in the overlapping portions can be corrected when the images are stitched together. Repeat the procedure for additional images.
-
Page 72: Shooting A Movie
) is approximately 30 sec. at min. at , 3 min. at (according to Canon’s standardized tests). • Recording time vary by the CF card. See CF Cards and Estimated Capacities (p. 148). • The maximum length of movies may vary with the subject and shooting conditions. - Page 73 • QuickTime 3.0 or later is required to play back movie files (AVI/ Motion JPEG) on a computer. QuickTime (for Windows) is included on the Canon Digital Camera Solution Disk. On the Macintosh platform, this program is generally bundled with Mac OS 8.5 or later...
-
Page 74: Shooting Hard-To-Focus Subjects (Focus Lock, Af Lock)
Shooting Hard-to-Focus Subjects (Focus Lock, AF Lock) It may be difficult to focus on the following types of subjects. Use the focus lock or AF lock in these situations. • Subjects with extremely low contrast to the surroundings • Subjects with extremely bright objects at the center of the composition •... - Page 75 Press the shutter button halfway (two beeps will sound) and press button. • The focal distance to the object is locked. • The icon will display and the lower indicator beside the viewfinder will light yellow. Re-aim the camera to compose the shot as desired and shoot.
-
Page 76: Locking The Exposure Setting (Ae Lock)
Locking the Exposure Setting (AE Lock) You can set the exposure and focus separately. This is effective when the contrast is too strong between the subject and background or when a subject is backlit. You must set the flash to . -
Page 77: Locking The Flash Exposure Setting (Fe Lock)
Locking the Flash Exposure Setting (FE Lock) You can lock the flash exposure so that the exposure settings are correctly set for a particular portion of your subject. Press the DISP. button to turn the LCD monitor on. Press the button to set the flash Focus on the part of the subject on which you wish to lock the flash... -
Page 78: Switching Between Focusing Modes
The FE lock may be released by pressing the zoom lever, MENU button or button, or by changing the white balance, ISO speed, photo effect or the shooting mode, or by turning the LCD monitor off. Switching between Focusing Modes Although the autofocus function is preset to the AiAF setting (9 AF frames), you can set it to the center AF frame. -
Page 79: Switching Between Light Metering Modes
Switching between Light Metering Modes You can switch between metering modes to shoot. Appropriate for standard shooting conditions, including backlit scenes. The camera divides images into several zones for light metering. It evaluates complex lighting conditions, such as the position of Evaluative the subject, the brightness, the direct light, and the backlighting, and adjusts the settings to the correct... -
Page 80: Adjusting The Exposure Compensation
Adjusting the Exposure Compensation Adjust the exposure compensation setting to avoid making the subject too dark when it is backlit or shot against a bright background or to avoid making lights appear too bright in night shots. In the FUNC. menu, select See Selecting Menus and Settings (p. -
Page 81: Shooting In Long Shutter Mode
Shooting in Long Shutter Mode You can set the shutter speed to a slow setting to make dark subjects appear brighter. In the (Rec.) menu, select See Selecting Menus and Settings (p. 43). Use the button to select [On] and press the MENU button. The display will return to the Shooting screen. - Page 82 Press the FUNC. button. The display will return to the Shooting screen. To cancel the long shutter mode While [Long Shutter] is displayed in the FUNC. menu, press the SET button. The nature of CCD image sensors is such that noise in the recorded image increases at long shutter speeds.
-
Page 83: Adjusting The Tone (White Balance)
Adjusting the Tone (White Balance) When the white balance mode is set to match the light source, the camera reproduces colors more accurately. The camera sets the white balance automatically according Auto to shooting conditions. Daylight For recording outdoors on a bright day. Cloudy For recording under overcast, shady or twilight skies. - Page 84 Press the FUNC. button. The display will return to the Shooting screen. This setting cannot be adjusted when the (Sepia) or (B/W) photo effects are selected. Setting a Custom White Balance You can set a custom white balance to obtain the optimal setting for the shooting conditions by having the camera evaluate an object, such as a piece of white paper or cloth, or a photo-quality gray card that you wish to establish as the standard white color.
- Page 85 Aim the camera at the white paper, cloth or gray card and press the SET button. • Aim the camera so that the white paper, cloth or gray card completely fills the frame on the LCD monitor or the entire viewfinder before pressing the SET button.
-
Page 86: Changing The Photo Effect
Changing the Photo Effect By setting a photo effect before you shoot, you can change the look and feel of the pictures you take. Photo Effect Off Records with no effect. Emphasizes the contrast and color saturation to Vivid record bold colors. Tones down the contrast and color saturation to record Neutral neutral hues. -
Page 87: Adjusting The Iso Speed
Adjusting the ISO Speed Raise the ISO speed when you wish to reduce camera shake or turn the flash off when shooting in a dark area, or use a fast shutter speed. In the FUNC. menu, select See Selecting Menus and Settings (p. 43). * The current setting is displayed. -
Page 88: Setting The Auto Rotate Function
Setting the Auto Rotate Function Your camera is equipped with an Intelligent Orientation sensor that detects the orientation of an image shot with the camera held vertically and automatically rotates it to the correct viewing orientation in the display. You can set this function on/off. -
Page 89: Resetting The File Number
Resetting the File Number The images you shoot are automatically assigned a file number. You can set whether or not the file numbers of a new CF card consecutively follow the file numbers on the previous CF card. The file number is reset to the start (100-0001) each time a new card is inserted. - Page 90 About File Numbers and Folder Numbers Images are assigned file numbers from 0001 to 9900, and folders are assigned folder numbers from 100 to 998 (Folder numbers cannot contain 99 in the last two digits). Folder numbers cannot contain 99 in the last two digits Folder File Capacity Each folder usually contains up to 100 images.
-
Page 91: Playback
Playback Displaying Images Individually Slide the mode switch to (Playback). The last recorded image will appear in the display (single image playback). Use the button to move between the images. Use the button to move to the previous image and the button to move the next image. -
Page 92: Magnifying Images
Magnifying Images Press the zoom lever toward • Images can be magnified up to approximately 10 times in single image playback. • Hold the SET button down and press the zoom lever toward to cycle through each setting, from approximately 2.5 times, to approximately 5 and 10 times. -
Page 93: Viewing Images In Sets Of Nine (Index Playback)
Viewing Images in Sets of Nine (Index Playback) Press the zoom lever toward Up to nine images can be viewed at once in index playback. Selected Image Movie Use the button to change the image selection. To return to single image playback Press the zoom lever toward... - Page 94 Switching between Sets of Nine Images Press the zoom lever toward while in index playback. The jump bar will display. Jump Bar Use the button to move to the previous set or the next set. Hold the SET button down and press the button to jump to the first or last set.
-
Page 95: Viewing Movies
Viewing Movies You can playback movie clips shot in mode. Movies cannot be played in the index playback mode. Use the button to select a movie. Images with a icon are movies. Press the SET button. • The movie control panel will display. •... - Page 96 Pausing and Resuming Play Press the SET button during playback. The movie playback pauses. Press it again to resume. Operating the movie control panel Select a movie and press the SET button (p. 93). The movie control panel will display. Use the button to select one of the following and press the SET...
-
Page 97: Editing Movies
Editing Movies Selecting (Edit) in the movie control panel enables you to cut unwanted portions at the start or end of a movie clip. Protected movies and movies less than 1 second in duration cannot be edited. Use the button to select a movie and press the SET button. - Page 98 Use the button to select (Play) and press the SET button. • A preview of the temporarily edited movie clip plays. • To stop it, press the SET button again. Use the button to select (Save) and press the SET button. Selecting (Exit) cancels the edits and returns to the movie control panel display.
-
Page 99: Rotating Images In The Display
Rotating Images in the Display Images can be rotated clockwise 90° or 270° in the display. 0° (Original) 90° 270° In the (Play) menu, select and press the SET button. See Selecting Menus and Settings (p. 43). Use the button to select the image to be rotated and press the SET button. -
Page 100: Attaching Sound Memos To Images
Attaching Sound Memos to Images In playback mode (including single image playback, index playback, and magnifying playback), you can attach sound memos (up to 60 seconds) to an image. The sound data is saved in WAVE format. In the (Play) menu, select and press the SET button. - Page 101 Playing/Erasing Sound Memos Display an image with a sound memo attached (p. 98) and press the SET button. • Images with sound memos attached have symbols displayed on them. • The sound memo control panel will display. Use the button to select (Play) or (Erase) and press the SET button.
-
Page 102: Automated Playback (Slide Shows)
Automated Playback (Slide Shows) Starting a Slide Show A selection of images or all the images on a CF card can be displayed one- by-one in an automated slide show. Slide show image settings are based on DPOF standards (p. 110). All Images Plays all images on the CF card in order. - Page 103 Press the MENU button. The display will return to the Play menu. Pressing the MENU button again returns to the Playback screen. • Movies play for their entire recorded length regardless of the time set in the slide show settings. •...
- Page 104 Display the Slide Show menu. See Starting a Slide Show (p. 100). Use the button to select [Program] and the button to select [Show 1], [Show 2] or [Show 3]. A white checkmark will appear beside a show already containing images. Use the button and the button to choose [Select] and...
- Page 105 Adjusting the Play Time and Repeat Settings You can change the play time for all the images in a show and have the show repeat continuously. Sets the duration that each image displays. Choose between Play Time 3-10 seconds, 15 seconds, 30 seconds and Manual. Sets whether the slide show stops when all the slides have Repeat been displayed or continues until stopped.
-
Page 106: Protecting Images
Protecting Images You can protect important images and movies from accidental erasure. In the (Play) menu, select and press the SET button. See Selecting Menus and Settings (p. 43). Use the button to select an image to protect and press the SET button. -
Page 107: Erasing
Erasing Erasing Single Images You can erase images you do not need or are not satisfied with one by one. • Please note that erased images cannot be recovered. Exercise adequate caution before erasing a file. • Protected images cannot be erased with this function. Use the button to select an image for deletion and press the... -
Page 108: Erasing All Images
Erasing All Images You can erase all the images saved on the CF card. • Please note that erased images cannot be recovered. Exercise adequate caution before erasing a file. • Protected images cannot be erased with this function. In the (Play) menu, select and press the SET button. -
Page 109: Formatting Cf Cards
• When the camera is malfunctioning, a corrupted CF card might be the cause. Reformatting the CF card may solve the problem. • When a non-Canon brand CF card is malfunctioning, reformatting it may solve the problem. • CF cards formatted in other cameras, computers, or peripheral devices may not operate correctly in this camera. -
Page 110: Printing
(CF card) to a photo developing center This camera complies with the PictBridge standard, which allows you to print with non- Canon PictBridge compliant printers as well. Digital Print Order Format This guide explains DPOF print settings. For information on how to print images, refer to the Direct Print User Guide supplied with the camera. - Page 111 Please refer to the System Map supplied with your camera for direct print compatible printer (CP series or Bubble Jet printers) information. Direct Print Compatible Printing Connect the camera to the printer Set various print settings (except DPOF print settings) Print For details, see the Direct Print User Guide (separate from this guide).
-
Page 112: Setting The Dpof Print Settings
Setting the DPOF Print Settings You can select images on a CF card for printing and specify the number of print copies in advance using the camera. This is extremely convenient for sending the images to a photo developing service, or for printing on a direct print function compatible printer. - Page 113 Single Images Select images for printing. As shown below, selection methods differ according to the options chosen for the (Print Type) settings (p. 113). Number of Print Copies (Standard)/ (Both) Use the button to select an image and the button to select the number of print copies (up to maximum of 99).
- Page 114 Use the button to select [Mark all] and press the SET button. • One copy is set to print for each image. • When the print type is set to (Standard) or (Both), the number of print copies can be set individually for each image.
- Page 115 Setting the Print Style Set the print style after selecting the image to print. The following print settings can be selected. Standard Prints one image per page. Prints the selected images together at a Index Print Type reduced size in an index format. Prints the images in both the standard and Both index formats.
- Page 116 Use the button to select and the button to select an option. (Print Type) Select [Standard], [Index] or [Both]. (Date) Select [On] or [Off]. (File No.) Select [On] or [Off]. Press the MENU button. The Print Order menu will reappear. Pressing the MENU button again returns to the Play menu.
- Page 117 Resetting the Print Settings The print settings can all be removed at once. The print type resets to Standard and the Date and File No. options to Off. In the (Play) menu, select and press the SET button. See Selecting Menus and Settings (p. 43). Use the button to select [Reset] and press the SET button.
-
Page 118: Image Transmission Settings (Dpof Transfer Order)
Image Transmission Settings (DPOF Transfer Order) You can use the camera to specify settings for images before downloading to a computer. Refer to the Software Starter Guide for instructions on how to transfer images to your computer. You cannot use this function to transfer several images at once on Mac OS X computers. - Page 119 Use the button to move between images and the button to select and deselect them. Selected for Transfer • A checkmark displays on selected images. • You can press the zoom lever toward to switch to the index mode (3 images) and use the same procedures to select images.
-
Page 120: Connecting The Camera To A Computer
Connecting the Camera to a Computer The following methods can be used to download images recorded by the camera to a computer. Some methods are not applicable to all operating systems. • Downloading via a Camera to Computer Connection Windows Windows Windows Windows... -
Page 121: Connecting The Camera To A Computer
- ZoomBrowser EX: 200 MB or more (Including the PhotoRecord printing program) - PhotoStitch: 40 MB or more • Canon Camera TWAIN Driver: 25 MB or more • Canon Camera WIA Driver: 25 MB or more Display 800 x 600 pixels/ High Color (16 bit) or better is required... - Page 122 IMPORTANT You must install the software and driver bundled on the supplied Canon Digital Camera Solution Disk onto your computer before connecting the camera to a computer. The camera will not operate correctly if you connect it to your computer before installing the driver and software.
- Page 123 • Macintosh: Refer to the Software Starter Guide and download images. Select [Canon CameraWindow] in the event dialog that appears on the computer and click [OK] (first time only). If the event dialog fails to appear, click the [Start] menu, followed by [Programs] or [All Programs], [Canon Utilities], [CameraWindow], and [CameraWindow Set Auto-Launch].
- Page 124 Click [Set] in the [CameraWindow - Set Auto-Launch] window (first time only). The Download Image window will display. • Using the software and computer to download images: See the Software Starter Guide. • Using the Camera to Download Images (Direct Transfer Function) See Downloading Images by Direct Transfer (next page).
-
Page 125: Downloading Images By Direct Transfer
Downloading Images by Direct Transfer Use this method to download images using camera operations. Install the supplied software and adjust the computer settings before using this method for the first time (p. 120). Transfers and saves all images to the computer. All Images Transfers and saves to the computer only the New Images... - Page 126 Select & Transfer/Wallpaper Use the button to select , and press the button (or SET button). Use the button to select images to download and press the button (or SET button). The images will download. The button will blink blue while downloading is in progress.
-
Page 127: Connecting The Camera To The Computer To Download Images Without Installing Software
If you are using Windows XP or Mac OS X (v10.1/v10.2), you can use the software distributed with these operating systems to download images (JPEG format only) without installing the software bundled on the Canon Digital Camera Solution Disk. This is useful for downloading images to a computer in which the software is not installed. -
Page 128: Downloading Directly From A Cf Card
Downloading Directly from a CF Card Eject the CF card from the camera and insert it into a CF card reader connected to the computer. PC Card Adapter • If you are using a PC card reader or a PC card slot, first place the CF card into a PC card adapter (sold separately) and then insert the loaded adapter into the slot. -
Page 129: Viewing Images On A Tv Set
Viewing Images on a TV set Viewing Images on a TV set You can use a video-compatible television as a monitor to shoot or play back images when it is connected to the camera with the supplied AV Cable AVC-DC300. Press the ON/OFF button to turn the Power Lamp camera off. - Page 130 Press the ON/OFF button. Power Lamp • The image will appear on the TV. Shoot or play back images as usual. • If the images are not appearing on the TV when shooting, press the DISP. button. • A TV set cannot be used in (stitch assist).
-
Page 131: Customizing The Camera (My Camera Settings)
Customizing the Camera (My Camera Settings) My Camera allows you to customize the start-up image and start-up, shutter, operation and self-timer sounds. Each menu item has three choices. Example: Start-up Image option features science fiction related images and sounds. The option features animals. - Page 132 Press the MENU button. • The menu will close. • In Shooting mode, the menu can be closed by pressing the shutter button halfway. • If you select (Theme) in Step 2, you can select a consistent theme for each of the My Camera settings. •...
-
Page 133: Registering My Camera Settings
Registering My Camera Settings Images recorded onto the CF card and newly recorded sounds can be added as My Camera settings to the menu items. You can also use the supplied software to upload your computer’s images and sounds to the camera. - Page 134 Select an image or record a sound. Start-up Image Use the button to select the image you wish to register and press the SET button. Start-up, Operation, Self-timer and Shutter Sounds • Use the button to select (Record) and press the SET button. Recording will start and automatically stop when the time is exceeded.
- Page 135 File Format of My Camera Settings My Camera settings should conform to the below file formats. However, CF card images shot with this camera can be registered as My Camera settings regardless of the below formats. Start-up Image • Recording Format: JPEG (Baseline JPEG) •...
-
Page 136: List Of Messages
List of Messages List of Messages List of Messages during Shooting/Playback The following messages may appear on the LCD monitor during shooting or playback. Please refer to the Direct Print User Guide for the messages that display during a printer connection. Busy... - Page 137 A problem exists if the error code reappears. Note the number and contact your Canon Customer Support Help Desk. If an error code displays directly after taking a picture, the shot may not have been recorded. Check image...
-
Page 138: Troubleshooting
(See Formatting CF Cards (p. 107).) • If reformatting does not work, the CF card logic circuits may be damaged. Consult the nearest Canon Customer Support Help Desk. Cannot play back You attempted to play • Computer images that cannot be... - Page 139 Problem Cause Solution Lens will not retract Battery cover or CF • First close the battery cover or CF card slot cover was card slot cover and then turn the opened with power on power off. Battery cover or CF •...
- Page 140 Problem Cause Solution Use the focus lock or AF lock to Image is blurred or The subject is hard • shoot. out of focus to focus on See Shooting Hard-to-Focus Subjects (Focus Lock, AF Lock) (p. 72). Subject in recorded Insufficient light for •...
- Page 141 Problem Cause Solution White dots appear Light from the flash • This is a phenomenon that occurs on the image has reflected off with digital cameras and does not dust particles or constitute a malfunction. insects in the air. (This is especially noticeable when shooting at wide angle)
-
Page 142: Appendix
Appendix Using an AC Adapter Kit (Sold Separately) It is best to power the camera with AC Adapter Kit ACK500 (sold separately) when you are using it for long periods of time or connecting it to a computer. Turn the camera power off before connecting or disconnecting the AC adapter. -
Page 143: Using A Car Battery Charger (Sold Separately)
Using a Car Battery Charger (Sold Separately) Car Battery Charger CBC-NB1 (sold separately) can be used to charge battery packs from an automobile’s cigarette lighter socket. Always ensure that the automobile’s engine is running when you use the car battery charger. Use of it with the engine off may deplete the battery in some automobiles. -
Page 144: Camera Care And Maintenance
Never use synthetic cleansers on the camera body or lens. If dirt remains, contact the closest Canon Customer Support Help Desk as listed on the separate Canon Customer Support leaflet. -
Page 145: Specifications
Specifications All data is based on Canon’s standard testing methods. Subject to change without notice. PowerShot S500 DIGITAL ELPH/DIGITAL IXUS 500 PowerShot S410 DIGITAL ELPH/DIGITAL IXUS 430 (W): wide angle (T): telephoto Camera Effective Pixels PowerShot S500 DIGITAL ELPH/DIGITAL IXUS 500: Approx. - Page 146 Shutter Speeds 15 – 1/2000 sec. 15 – 1 sec. possible in long shutter mode. Slow shutter speeds of 1.3 sec. or slower operate with noise reduction. Light Metering System Evaluative, Center-weighted average or Spot (Center) Exposure Control System Program AE Exposure Compensation ±...
- Page 147 Single (histogram displayable), Index (9 thumbnail images), Magnified (approx. 10x (max.) in LCD monitor), Sound memos (up to 60 sec.) or Slide show. Direct Print Canon Direct Print and Bubble Jet Direct compatible, and PictBridge compliant Display Languages 12 languages available for menus and messages...
- Page 148 Power Source Rechargeable lithium-ion battery (type: NB-1LH/NB-1L) AC Adapter Kit ACK500 Car Battery Charger CBC-NB1 Operating Temperature 0 – 40 °C (32 – 104 °F) Operating Humidity 10 – 90% Dimensions 87.0 x 57.0 x 27.8 mm (3.4 x 2.2 x 1.1 in.) (excluding protrusions) Weight Approx.
- Page 149 Battery Capacity Battery Pack NB-1LH (fully charged) LCD monitor on Approx. 190 images Number of recordable images LCD monitor off Approx. 440 images Playback Time Approx. 140 minutes * Excludes movie data. * At low operating temperatures, battery pack performance may be reduced and the low battery icon may appear earlier than usual.
- Page 150 CF Cards and Estimated Capacities PowerShot S500 DIGITAL ELPH/DIGITAL IXUS 500 : With card included with the camera FC-32MH FC-64M FC-128M FC-256MH FC-512MSH (2592 x 1944 pixels) (2048 x 1536 pixels) 1095 (1600 x 1200 pixels) 1734 1891 1563 3122 (640 x 480 pixels) 1355 2720...
- Page 151 PowerShot S410 DIGITAL ELPH/DIGITAL IXUS 430 : With card included with the camera FC-32MH FC-64M FC-128M FC-256MH FC-512MSH (2272 x 1704 pixels) (1600 x 1200 pixels) 1734 1522 (1024 x 768 pixels) 1390 2714 1891 1563 3122 (640 x 480 pixels) 1355 2720 5203...
- Page 152 Image File Sizes (Estimated) PowerShot S500 DIGITAL ELPH/DIGITAL IXUS 500 Compression Resolution (2592 x 1944) 2053 KB 1395 KB (2048 x 1536) 1602 KB 893 KB (1600 x 1200) 1002 KB 558 KB (640 x 480) 249 KB 150 KB (640 x 480) 660 KB/sec.
- Page 153 CompactFlash™ Card Card Slot Type Type I Dimensions 36.4 x 42.8 x 3.3 mm (1.4 x 1.7 x 0.1 in.) Weight Approx. 10 g (0.4 oz.) Battery Pack NB-1LH Type Rechargeable Lithium Ion Cell Nominal Voltage 3.7 V Typical Capacity 840 mAh Cycle Life Approx.
- Page 154 Car Battery Charger CBC-NB1 (Optional) Rated Input DC 12 – 24 V, 4.3 W Rated Output 4.2 V DC/0.55 A Charging Time Approx. 130 minutes* Operating Temperatures 0 – 40 °C (32 – 104 °F) Dimensions 90.4 x 56.0 x 28.0 mm (3.6 x 2.2 x 1.1 in.) Weight Approx.
-
Page 155: Photo Tips And Information
Photo Tips and Information Tip for Using the Self-timer (p.64) Normally the camera shakes a little when you press the shutter button. Setting the self-timer to delays the shutter release for 2 seconds and allows the camera to stop shaking, thus preventing a blurred image. Even better results can be obtained by placing the camera on a stable surface or by using a tripod to shoot. -
Page 156: Iso Speed
ISO Speed (p.85) The ISO speed is the numeric representation of the camera’s sensitivity to light. The higher the ISO speed, the higher the sensitivity. A high ISO speed allows you to shoot images in dark indoor or outdoor conditions without a flash and also helps prevent blurred images due to camera shake. -
Page 157: Index
Index Selecting Images ....110 DPOF Transfer Order ....116 AC Adapter Kit ACK500 ... 140 AE Lock ........74 AF Frame ........41 Erasing ........105 AF Lock ........72 All Images......106 AF-assist Beam......42 Single Images....105 AiAF........... - Page 158 Play Menu ......48 Resolution ......... 55 Review Duration ......54 Rec. Menu......47 Rotate ........97 Selecting Menus and Settings ..........43 Set up Menu......48 Self-Timer........64 Messages Set up Menu ......48 List of Messages during Shooting Mode Shooting/Playback .....
- Page 159 MEMO...
- Page 160 • Canon reserves the right to change the specifications of the hardware and software described herein at anytime without prior notice. • No part of this guide may be reproduced, transmitted, transcribed, stored in a retrieval system, or translated into any language in any form, by any means, without the prior written permission of Canon.
- Page 161 If such changes or modifications should be made, you could be required to stop operation of the equipment. Canon U.S.A. Inc. One Canon Plaza, Lake Success, NY 11042, U.S.A. Tel No. (516) 328-5600 Canadian Radio Interference Regulations THIS CLASS B DIGITAL APPARATUS MEETS ALL REQUIREMENTS OF THE CANADIAN INTERFERENCE CAUSING EQUIPMENT REGULATIONS.
-
Page 162: Functions Available In Each Shooting Mode
Functions Available in Each Shooting Mode The chart below is a reference for the settings available for various shooting conditions. The settings selected in each shooting mode are saved after you finish shooting. Reference Function Stitch Page Auto Manual Movie Assist –... - Page 163 Reference Function Stitch Page Auto Manual Movie Assist Digital Zoom – – p. 62 Exposure Compensation – p. 78 – – – Evaluative Light Center-Weighted Metering – – – p. 77 Average Method – – – Spot Long Shutter – –...