
Related Manuals for Linksys WAP200


Summary of Contents for Linksys WAP200
- Page 1 Wireless-G Access Point with Power Over Ethernet and Rangebooster Model No. WAP200 Model No. Model No. Model No. Model No. USER GUIDE BUSINESS SERIES...
- Page 2 Wireless-G Access Point with Power Over Ethernet and Rangebooster Copyright and Trademarks Specifications are subject to change without notice. Linksys is a registered trademark or trademark of Cisco Systems, Inc. and/or its affiliates in the U.S. and certain other countries. Copyright © 2006 Cisco Systems, Inc. All rights reserved.
-
Page 3: Table Of Contents
Wireless-G Access Point with Power Over Ethernet and Rangebooster Table of Contents Chapter 1: Introduction Welcome What’s in this User Guide? Chapter 2: Planning Your Wireless Network Network Topology Roaming Network Layout Example of a simple wireless network Chapter 3: Getting to Know the Wireless-G Access Point... - Page 4 Wireless-G Access Point with Power Over Ethernet and Rangebooster The Administration - Log Tab The Administration - Factory Default Tab The Administration - Firmware Upgrade Tab The Administration - Reboot Tab The Administration - Config Management Tab The Status - Local Network Tab...
- Page 5 Wireless-G Access Point with Power Over Ethernet and Rangebooster List of Figures Figure 2-1: Example of a Simple Wireless Network Figure 3-1: Front Panel Figure 3-2: Back View Figure 3-3: Desktop Placement and Antenna Setup Figure 4-1: Connect the Ethernet Cable...
- Page 6 Wireless-G Access Point with Power Over Ethernet and Rangebooster Figure 6-20: Security Monitor - Basic Settings Figure 6-21: Security Monitor - Event Log Figure 6-22: Administration - Management Figure 6-23: Administration - Log Figure 6-24: Administration - Factory Default Figure 6-25: Administration - Firmware Upgrade...
-
Page 7: Chapter 1: Introduction Welcome
802.11b standards and wired networks. Use the instructions in this Guide to help you connect the Access Point, set it up, and configure it to bridge your different networks. These instructions should be all you need to get the most out of the Access Point. -
Page 8: What's In This User Guide
This chapter describes the physical features of the Access Point. • Chapter 4: Connecting the Wireless-G Access Point This chapter instructs you on how to connect your Access Point to your network and placement options. • Chapter 5: Setting up the Wireless-G Access Point This chapter explains how to perform the most basic setting changes through the web-based utility. - Page 9 • Appendix H: Regulatory Information This appendix supplies the Access Point’s regulatory information. • Appendix I: Contact Information This appendix provides contact information for a variety of Linksys resources, including Technical Support. Chapter 1: Introduction What’s in this User Guide?
-
Page 10: Chapter 2: Planning Your Wireless Network
Linksys also provides products to allow wireless adaptors to access wired network through a bridge such as the wireless access point, or wireless router. An integrated wireless and wired network is called an infrastructure network. -
Page 11: Network Layout
To link your wired network with your wireless network, connect the Access Point’s Ethernet network port to any switch or router with Power over Ethernet (PoE)—or a PoE injector, such as the Linksys WAPPOE or WAPPOE12. Note that the 12 VDC on the WAPPOE12 is for the splitter output. Both PoE Injectors provide 48 VDC power output. -
Page 12: Example Of A Simple Wireless Network
The above diagram shows a typical infrastructure wireless network setup. The wireless Access Points are connecting to a Linksys switch that provides power to the Access Points. Each Access Point can connect multiple wireless devices to the network. This network will provide connectivity among wireless network devices and PCs that have a wired connection to the switch. -
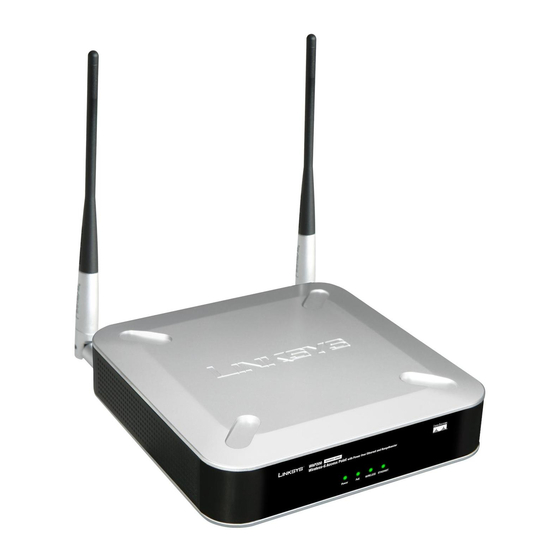
Page 13: Chapter 3: Getting To Know The Wireless-G Access Point
Wireless-G Access Point with Power Over Ethernet and Rangebooster Chapter 3: Getting to Know the Wireless-G Access Point The LEDs The Access Point's LEDs, where information about network activity is displayed, are located on the front panel. Figure 3-1: Front Panel Power Green. -
Page 14: The Ports
The Access Point’s port are located on the back of the device. Figure 3-2: Back View Reset Button There are two ways to reset the Access Point to the factory default configuration. Either press the Reset button, for approximately ten seconds, or restore the defaults using the Access Point's web-based utility. -
Page 15: Antennas And Positions
The Access Point’s antennas are located on the back of the device. The Access Point can be placed on a desktop or wall-mounted. When placed on a desktop, the Access Point can be stacked with other Linksys Business Series products. -
Page 16: Chapter 4: Connecting The Wireless-G Access Point
2. If you are using Power Over Ethernet (POE), proceed to the following section, “Placement Options.” If you are not using POE, then connect the included power adapter to the Access Point’s Power port. Then plug the power adapter into an electrical outlet. The LEDs on the front panel will light up as soon as the Access Point powers on. -
Page 17: Placement Options
There are three ways to place the Wireless-G Access Point. The first way is to place it horizontally on a surface, so it sits on its four rubber feet. The second way is to stand the Access Point vertically on a surface. The third way is to mount it on a wall. -
Page 18: Chapter 5: Setting Up The Wireless-G Access Point
There are three ways to connect to your Access Point for the first time. 1. If you have a 48VDC Power Injector (e.g. Linksys WAPPOE), power up your Access Point first, then connect the Injector’s cable to your PC. Configure your PC to have the static IP address on the same subnet as the Access Point’s default IP address (192.168.1.245). -
Page 19: Navigating The Utility
(You can set a new password from the Administration - Management tab.) Then click the OK button. After setting up the Access Point to use DHCP or manually configure a new IP address, move your Access Point to the desired network. You will have to use the new IP address the next time you access the web-based utility. - Page 20 • Firmware Upgrade. Upgrade the Access Point’s firmware on this screen. • Reboot. Use this screen to reboot the Access Point. • Config Management. You can save the configuration file for the Access Point to your PC, as well as restore the backup configuration file to the Access Point.
- Page 21 • Wireless. This screen displays wireless network settings including SSID, network mode, and wireless channel. • System Performance. This screen displays the current traffic statistics of this Access Point for both Wireless and LAN ports. Chapter 5: Setting Up the Wireless-G Access Point...
-
Page 22: Chapter 6: Configuring The Wireless-G Access Point
Host Name. This is the host name assigned to the Access Point. This host name will be published to your DNS server if the Access Point is configured to acquire the IP address through DHCP. In that case, Linksys recommends to follow the company policy on the host name assignment. The default name is Linksys. -
Page 23: The Setup - Time Tab
Wireless-G Access Point with Power Over Ethernet and Rangebooster • Subnet Mask. The Subnet Mask must be the same as that set on the LAN that your Access Point is connected to. The default is 255.255.255.0. • Default Gateway. Your ISP will provide you with the Default Gateway Address, which is the ISP server’s IP address. -
Page 24: The Wireless - Basic Wireless Settings Tab
Wireless Channel. Select the appropriate channel to be used among your Access Point and your client devices. The default is channel 6. You can also select Auto so that your Access Point will select the channel with the lowest amount of wireless interference while the system is powering up. Auto channel selection will start when you click Save Settings button, it will take several seconds to scan through all the channels to find the best channel. -
Page 25: The Wireless - Wireless Security Tab
Wireless Isolation (between SSID). Wireless Isolation prevents eavesdropping in the network. When it is Enabled, wireless frames received on this Access Point will not be forwarded to other wireless networks (SSIDs). For example, if you have a wireless hotspot, you may want to keep the wireless network (SSID) isolated from your other wireless networks (SSIDs). -
Page 26: Figure 6-6: Wireless - Wireless Security (Wpa-Personal)
WPA Shared Key. Enter a WPA Shared Key of 8-63 characters. Figure 6-6: Wireless - Wireless Security (WPA-Personal) Key Renewal Timeout. Enter a Key Renewal Timeout period, which instructs the Access Point how often it should change the encryption keys. The default is 3600 seconds. -
Page 27: Figure 6-8: Wireless - Wireless Security (Wpa2-Personal Mixed)
WPA Algorithm. Mixed Mode automatically chooses TKIP or AES for data encryption. WPA Shared Key. Enter a WPA Shared Key of 8-63 characters. Key Renewal Timeout. Enter a Key Renewal Timeout period, which instructs the Access Point how often it should change the encryption keys. The default is 3600 seconds. -
Page 28: Figure 6-10: Wireless - Wireless Security (Wpa2-Enterprise)
Shared Secret. Enter the Shared Secret key used by the Access Point and RADIUS server. Key Renewal Timeout. Enter a Key Renewal Timeout period, which instructs the Access Point how often it should change the encryption keys. The default is 3600 seconds. -
Page 29: Figure 6-12: Wireless - Wireless Security (Radius)
RADIUS Server IP Address. Enter the RADIUS server’s IP address. RADIUS Server Port. Enter the port number used by the RADIUS server. The default is 1812. Shared Secret. Enter the Shared Secret key used by the Access Point and RADIUS server. Disable There is no option to be configured for this mode. -
Page 30: The Wireless - Wireless Connection Control Tab
Wireless Client List Instead of manually entering the MAC addresses of each client, the Access Point provides a convenient way to select a specific client device from the client association table. Click this button and a window appears to let you select a MAC address from the table. -
Page 31: The Wireless - Advanced Wireless Settings Tab
Wireless-G Access Point with Power Over Ethernet and Rangebooster The Wireless - Advanced Wireless Settings Tab This screen allows you to configure the advanced settings for the Access Point. Linksys recommends to let your Access Point automatically adjust the parameters for maximum data throughput. -
Page 32: The Wireless - Vlan & Qos Tab
AP Management VLAN. When the VLAN option is enabled, the value entered (VLAN ID) in this field defines the VLAN that connects to the Access Point. The default value is 1. The VLAN should be accessible from the wired side in order to use web-based utility. To access the web-based utility from wireless side, the SSID needs to map to the same VLAN ID. - Page 33 Tx Rate Limiting. You can limit the maximum data rate used in your network to save bandwidth and power consumption on client devices. The actual data rate is determined by the Auto-Fallback mechanism between your Access Point and a client device. The default is 54 Mbps for Mixed or G-Only wireless mode, 11 Mbps for B-Only mode.
-
Page 34: The Ap Mode Tab
On this screen you can change the Access Point’s mode of operation. In most cases, you can keep the default setting - Access Point. You may wish to change the Access Point’s mode of operation if you want to use the Access Point as a wireless repeater to extend the range of your wireless network. -
Page 35: Figure 6-18: Wireless Repeater Mode
Wireless Repeater. When set to Wireless Repeater mode, the Wireless Repeater is able to talk to up a remote access point within its range and retransmit its signal. Click Site Survey to select the access point that will have its signal repeated by this Access Point or enter the MAC address of the access point manually. -
Page 36: Figure 6-19: Wireless Bridge Mode
Wireless Bridge. This mode connects physically separated wired networks using multiple access points. Wireless clients will not be able to connect to the access point in this mode. Enter the MAC address(es) of the access point(s) that will bridge to this access point. -
Page 37: The Security Monitor - Basic Settings Tab
This feature works together with Linksys Business Series wireless client adapters. A client utility will be provided with the client card, which will allow you to download information from the Access Point. The current version will support wireless Access Points and wireless clients detection and classification. -
Page 38: The Security Monitor - Event Log Tab
• New Client Detected. Indicates a new STA is associated with an AP. • New Access Point Detected. Indicates a new AP has been detected joining the network. • Duration Attack. Indicates a STA packet contains an abnormally large duration value in the 802.11 header. - Page 39 • New Client Detected. Indicates a new STA is associated with an AP. • New Access Point Detected. Indicates a new AP has been detected joining the network. • Duration Attack. Indicates a STA packet contains an abnormally large duration value in the 802.11 header.
-
Page 40: The Administration - Management Tab
User name. Modify the administrator user name. The default is admin. AP password. Modify the administrator password for the Access Point’s web-based utility. The default is admin. Re-enter to confirm. To confirm the new password, enter it again in this field. - Page 41 SNMP SNMP is a popular network monitoring and management protocol. It provides network administrators with the ability to monitor the status of the Access Point and receive notification of any critical events as they occur on the Access Point. To enable the SNMP support feature, select Enabled. Otherwise, select Disabled. The default is Disabled.
-
Page 42: The Administration - Log Tab
You can have logs that keep track of the Access Point’s activities. Email Alert E-Mail Alert. If you want the Access Point to send e-mail alerts in the event of certain attacks, select Enabled. The default is Disabled. E-Mail Address for Logs. Enter the e-mail address that will receive logs. -
Page 43: The Administration - Factory Default Tab
On this screen you can restore the Access Point’s factory default settings. Factory Default Note any custom settings before you restore the factory defaults. Once the Access Point is reset, you will have to re-enter all of your configuration settings. -
Page 44: The Administration - Reboot Tab
Device Reboot. To reboot the Access Point, click the Yes radio button. Click Save Settings to apply your change and the Access Point will reboot itself, or click Cancel Changes to cancel your change. Help information is available on the right side of the screen. -
Page 45: The Status - Local Network Tab
Hardware Version. This is the version of the Access Point’s current hardware. Software Version. This is the version of the Access Point’s current software. Local MAC Address. The MAC address of the Access Point’s Local Area Network (LAN) interface is displayed here. -
Page 46: The Status - Wireless Tab
Wireless-G Access Point with Power Over Ethernet and Rangebooster The Status - Wireless Tab The Wireless screen displays the Access Point’s current status information for the wireless network(s). Wireless Network MAC Address. The MAC Address of the Access Point’s wireless interface is displayed here. -
Page 47: The Status - System Performance Tab
Wireless-G Access Point with Power Over Ethernet and Rangebooster The Status - System Performance Tab The System Performance screen displays the Access Point’s status information for its current settings and data transmissions. System Performance Wired Name. This indicates that the statistics are for the wired network, the LAN. - Page 48 Wireless-G Access Point with Power Over Ethernet and Rangebooster Bytes Received. This shows the number of bytes received for each wireless network. Bytes Sent. This shows the number of bytes sent for each wireless network. Error Packets Received. This shows the number of error packets received for each wireless network.
-
Page 49: Appendix A: Troubleshooting
Frequently Asked Questions Can the Access Point act as my DHCP Server? No. The Access Point is nothing more than a wireless hub, and as such cannot be configured to handle DHCP capabilities. Can I run an application from a remote computer over the wireless network? This will depend on whether or not the application is designed to be used over a network. - Page 50 Access Point. Before using the roaming function, the workstation must make sure that it is set to the same channel number as the Access Point of the dedicated coverage area. To achieve true seamless connectivity, the wireless LAN must incorporate a number of different functions. Each node and Access Point, for example, must always acknowledge receipt of each message.
- Page 51 Can Linksys wireless products support file and printer sharing? Linksys wireless products perform the same function as LAN products. Therefore, Linksys wireless products can work with NetWare, Windows NT/2000, or other LAN operating systems to support printer or file sharing.
- Page 52 (frequency). How do I reset the Access Point? Press the Reset button on the back of the Access Point for about ten seconds. This will reset the unit to its default settings. How do I resolve issues with signal loss? There is no way to know the exact range of your wireless network without testing.
-
Page 53: Appendix B: Wireless Security
Wireless-G Access Point with Power Over Ethernet and Rangebooster Appendix B: Wireless Security Linksys wants to make wireless networking as safe and easy for you as possible. The current generation of Linksys products provide several network security features, but they require specific action on your part for implementation. - Page 54 This includes hackers. So, don’t broadcast the SSID. Wireless networking products come with a default SSID set by the factory. (The Linksys default SSID is “linksys”.) Hackers know these defaults and can check these against your network. Change your SSID to something unique and not something related to your company or the networking products you use.
- Page 55 WPA2 Mixed. WPA2 Mixed modes provide users an upgrade path from WPA to WPA2. You can have client devices running both WPA and WPA2 and the Access Point will automatically select the security method used by the client.
-
Page 56: Appendix C: Upgrading Firmware
The Access Point's firmware is upgraded through the web-based utility’s Administration - Firmware Upgrade tab. Follow these instructions: 1. Download the firmware upgrade file from the Linksys website, www.linksys.com. 2. Extract the firmware upgrade file on your computer. 3. Open the Access Point’s web-based utility. -
Page 57: Appendix D: Windows Help
Windows Help and are described in this appendix. TCP/IP Before a computer can communicate with the Access Point, TCP/IP must be enabled. TCP/IP is a set of instructions, or protocol, all PCs follow to communicate over a network. This is true for wireless networks as well. -
Page 58: Appendix E: Glossary
This glossary contains some basic networking terms you may come across when using this product. For more advanced terms, see the complete Linksys glossary at http://www.linksys.com/glossary. Access Point - A device that allows wireless-equipped computers and other devices to communicate with a wired network. Also used to expand the range of a wireless network. - Page 59 HTTP (HyperText Transport Protocol) - The communications protocol used to connect to servers on the World Wide Web. Infrastructure - A wireless network that is bridged to a wired network via an access point. IP (Internet Protocol) - A protocol used to send data over a network.
- Page 60 Passphrase - Used much like a password, a passphrase simplifies the WEP encryption process by automatically generating the WEP encryption keys for Linksys products. Ping (Packet INternet Groper) - An Internet utility used to determine whether a particular IP address is online.
- Page 61 Wireless-G Access Point with Power Over Ethernet and Rangebooster RJ-45 (Registered Jack-45) - An Ethernet connector that holds up to eight wires. Roaming - The ability to take a wireless device from one access point's range to another without losing the connection.
- Page 62 Wireless-G Access Point with Power Over Ethernet and Rangebooster TKIP (Temporal Key Integrity Protocol) - a wireless encryption protocol that provides dynamic encryption keys for each packet transmitted. Topology - The physical layout of a network. TX Rate - Transmission Rate.
-
Page 63: Appendix F: Specifications
Wireless-G Access Point with Power Over Ethernet and Rangebooster Appendix F: Specifications Model WAP200 Standards IEEE802.11g, IEEE802.11b, IEEE802.3, IEEE802.3u, IEEE802.3af (Power Over Ethernet), 802.1p (QoS priority), 802.1q (VLAN), 802.1X (Security Authentication), 802.11i - Ready (Security WPA2), 802.11e - Ready (Wireless QoS), 802.11F (Wireless Roaming) - Page 64 Wireless-G Access Point with Power Over Ethernet and Rangebooster DHCP DHCP Client Operating Modes Access Point Access Point Mode, point-to-point Bridge Mode, point-to-multipoint Bridge Mode, Repeater Mode Wireless Spec/Modulation Radio and Modulation Type: 802.11b/DSSS, 11g/OFDM Channels Operating Channels: 11 North America, 13 Most of Europe (ETSI and Japan) # of Internal Ant.
- Page 65 Wireless-G Access Point with Power Over Ethernet and Rangebooster Wireless Security Monitor Scan and Classify wireless devices in the network. Reports new clients and APs joining the network and suspicious network events. (working together with 200 Business series client cards)
-
Page 66: Appendix G: Warranty Information
Your exclusive remedy and Linksys' entire liability under this warranty will be for Linksys at its option to repair or replace the Product or refund Your purchase price less any rebates. -
Page 67: Appendix H: Regulatory Information
Wireless-G Access Point with Power Over Ethernet and Rangebooster Appendix H: Regulatory Information FCC Statement This device complies with Part 15 of the FCC Rules. Operation is subject to the following two conditions: (1) This device may not cause harmful interference, and (2) this device must accept any interference received, including interference that may cause undesired operation. - Page 68 Wireless-G Access Point with Power Over Ethernet and Rangebooster Industry Canada Statement This device complies with Industry Canada ICES-003 and RSS210 rules. Déclaration d’Industrie Canada Cet appareil est conforme aux normes NMB003 et RSS210 d'Industrie Canada. Industry Canada Statement Operation is subject to the following two conditions: 1.
- Page 69 User Information for Consumer Products Covered by EU Directive 2002/96/EC on Waste Electric and Electronic Equipment (WEEE) This document contains important information for users with regards to the proper disposal and recycling of Linksys products. Consumers are required to comply with this notice for all electronic products bearing the following symbol:...
- Page 70 Wireless-G Access Point with Power Over Ethernet and Rangebooster Appendix H: Regulatory Information...
- Page 71 Wireless-G Access Point with Power Over Ethernet and Rangebooster Appendix H: Regulatory Information...
- Page 72 Wireless-G Access Point with Power Over Ethernet and Rangebooster Appendix H: Regulatory Information...
- Page 73 Wireless-G Access Point with Power Over Ethernet and Rangebooster For more information, visit www.linksys.com. Appendix H: Regulatory Information...
-
Page 74: Appendix I: Contact Information
Can't find information about a product you want to buy on the web? Do you want to know more about networking with Linksys products? Give our advice line a call at: Or fax your request in to: If you experience problems with any Linksys product,...