Advertisement
Quick Links
4-286-048-32 (1)
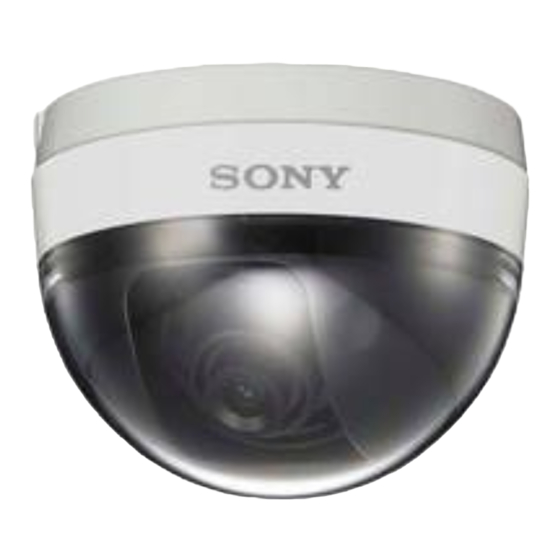
Color Video Camera
半球型摄像机
Operating Instructions
Before operating the unit, please read this manual thoroughly and
retain it for future reference.
使用说明书
使用本机前,请仔细阅读本使用说明书并妥善保存以备日后参考。
SSC-N12/N14
http://www.sony.net/
2011 Sony Corporation
4286048320
Printed in China
English
Owner's Record
The model and serial numbers are located on the bottom.
Record these numbers in the spaces provided below.
Refer to these numbers whenever you call upon your Sony dealer regarding this
product.
Model No.
Serial No.
WARNING
To reduce a risk of fire or electric shock, do not expose this
product to rain or moisture.
To avoid electrical shock, do not open the cabinet. Refer
servicing to qualified personnel only.
The apparatus shall not be exposed to dripping or splashing and no objects filled
with liquid, such as vases, shall be placed on the apparatus.
WARNING
This installation should be made by a qualified service person and should
conform to all local codes.
WARNING
A readily accessible disconnect device shall be incorporated in the building
installation wiring.
CAUTION
The rating label is located on the bottom.
ATTENTION
The electromagnetic fields at specific frequencies may influence the picture of
the unit.
Features
This is a dome-shaped color video camera for which the 1/3 type Super HAD
CCD II ™ has been adopted. (SSC-N12)
This is a dome-shaped color video camera for which the 1/3 type EXview HAD
CCD II ™ has been adopted. (SSC-N14)
It has the following features:
Manual setting of the camera direction - panning, tilting and rotating.
Fixed-focus lens as standard equipment. The focal length of the lens is 6 mm.
High quality CCD and clear dome casing enable high sensitivity.
Elec Day/Night Function
Noise Reduction
Backlight compensation through the center measurement.
Automatic white balance tracking and adjustment (ATW).
DC 12 V powher supply system.
Super HAD CCD II ™ is a registered trademark of Sony Corporation. (SSC-N12)
EXview HAD CCD II ™ is a registered trademark of Sony Corporation. (SSC-N14)
Notes on Use
Before Use
If you find condensation before use, turn on the power after leaving it out for
long enough.
Power supply
The SSC-N12/N14 operates on DC 12 V power.
- When connecting the transformer, be sure to connect each lead to the
appropriate terminal. Wrong connection may cause malfunction and/or
damage to the video camera.
Handing of the unit
Be careful not to spill water or other liquids on the unit, or allow combustible or
metallic objects to fall inside the body. If used with a foreign object inside, the
camera is liable to fail, or be a cause of fire or electric shock.
Data and security
Always make a test recording, and verify that it was recorded successfully. SONY
WILL NOT BE LIABLE FOR DAMAGES OF ANY KIND INCLUDING, BUT NOT LIMITED
TO, COMPENSATION OR REIMBURSEMENT ON ACCOUNT OF FAILURE OF THIS
UNIT OR ITS RECORDING MEDIA, EXTERNAL STORAGE SYSTEMS OR ANY OTHER
MEDIA OR STORAGE SYSTEMS TO RECORD CONTENT OF ANY TYPE.
Personal information
The images taken by the system using this device can identify individuals
and thus they fall under "personal information" stipulated in the "Act on the
Protection of Personal Information". Please handle the video data appropriately
according to law.
Information recorded using this product may also be "personal information".
Upon disposal, transfer, repair, or any other occasion where this product or
storage media is passed on to a third party, practice due care in its handling.
Operating or storage location
Do not shoot an extremely bright object (an illumination, the sun, etc.). Also,
avoid operating or storing the camera in the following locations, as these can be
a cause of a malfunction.
Extremely hot or cold places (Operating temperature: –10°C to +50°C [14°F to
122°F])
Exposed to direct sunlight for a long time, or close to heating equipment (e.g.,
near heaters)
Close to sources of strong magnetism
Close to sources of powerful electromagnetic radiation, such as radios or TV
transmitters
Locations subject to vibration or shock
Humid or dusty locations
Locations exposed to rain
Locations under the influence of fluorescent light or reflection of a window
Under an unsteady light (the image will flicker.)
Where it is subject to moisture.
Where it is subject to fume and swear.
Ventilation
To prevent heat buildup, do not block air circulation around the camera.
Transportation
When transporting the camera, repack it as originally packed at the factory or in
materials of equal quality.
Cleaning
Use a blower to remove dust from the lens.
Use a soft, dry cloth to clean the external surfaces of the camera. Stubborn
stains can be removed using a soft cloth dampened with a small quantity of
detergent solution, then wipe dry.
Do not use volatile solvents such as alcohol, benzene or thinners as they may
damage the surface finishes.
Other
When the iBLC switch is set to ON, "hunting" may occur; that is, the image may
become darker and lighter as the camera "hunts" for the optimum exposure
level. If hunting occurs, set the iBLC menu to OFF.
When the CRS function is set to ON, Auto White Balance may be overly
sensitive, or hunting may occur in some cases.
The focus may be less sharp under near infrared light than under visible light.
The best camera performance may not be obtained under near infrared light
due to the lens coating.
Note on laser beams
Laser beams may damage the CCDs. If you shoot a scene that includes a laser beam,
be careful not to let a laser beam become directed into the lens of the camera.
In the event of any problems with the operation of the camera, contact your
Sony dealer.
Location and Function of Part
The figure shows the camera without the dome casing.
Side
Power cable
Connect the power cable to DC 12 V ( ). The connector tip is a quick-
disconnect type. You can screw the cables in either connectors of the tip.
BNC cable
Connect the BNC cable to a monitor or video device ( ).
Gap adjustment flange (knockout type)
If the cable creates a gap between the installation surface and the camera,
break off the knockout flange by using nippers and insert the cable through
the opening. There is one knockout.
Inside
Mode setting DIP switch
The label is inside the slit cover.
The following DIP switches are turned on if they have been set to the top
positions.
Location
PinNo.
Switch
Right (ON)
Left (OFF)
1
AGC
ON
2
iBLC
ON
3
ATR-Lite
ON
4
CRS
ON
5
D/N
AUTO
6
Not use
1: AGC (Automatic Gain Control) switch (Initial setting: ON)
Use this switch to increase the gain of the video amplifier when set to ON.
2: iBLC (Intelligent Backlight Compensation) ON/OFF switch (Initial
setting: OFF)
Use this switch to adjust the exposure to compensate for situations where
the subject is lit from behind.
3: ATR-Lite (Lite Adaptive Tone Reproduction) switch (Initial setting:
OFF)
When the switch is set to ON, the camera will adjust the tone
automatically in accordance to the difference between bright and dark.
4: CRS (Color Rolling Suppressor) switch (Initial setting: OFF)
When the switch is set to ON, the camera will reduce color rolling.
Note
If color rolling still occurs with CRS ON, try setting the "iBLC" and "ATR-Lite"
switches to ON also.
5: D/N (Day/Night) switch (Initial setting: OFF)
Choose the modes of D/N:
D/N mode (when the switch is set to AUTO): switch to the color mode
when in a high bright environment; switch to the black mode when in a
low light environment.
Color mode (when the switch is set to OFF)
TOP mark
This mark is used to determine the direction of the angle adjuster.
TOP mark
Indicates that the SONY logo is on the opposite side of the product, in order
to determine the mounting direction of the base bracket.
Connecting the Cables
1
Connect the BNC cable to a monitor or video device (see figure
2
Connect the power cable to the power supply (DC 12 V) (see figure
Caution
When you connect the power cable, be sure that the exposed ends of the
power cable do not touch each other to prevent a short circuit.
(continued on the reverse side)
中文
警告
为减少⽕灾或电击危险,请勿让本设备受到⾬淋或受潮。
为防⽌触电严禁拆开机壳,维修请咨询具备资格⼈⼠。
设备不要受到滴水或水溅,不要将盛满液体的花瓶等物品放在设备上。
警告
本安装应该由有资格的服务人员进行,并须符合所有当地法规规定。
警告
应该在设备外部组入易于使用的断电设备。
注意事项
额定标签位于底部。
警告
此为 A 级产品。在生活环境中,该产品可能会造成无线电干扰。
在这种情况下,可能需要用户对干扰采取切实可行的措施。
如果发生干扰,请咨询最近的 Sony 授权服务中心。
注意
某些特定频率的电磁场可能会干涉本装置的图像。
关于旧产品的处理
请不要将旧的产品与一般的生活垃圾一同弃置。
正确弃置旧的产品有助于避免对环境和人类健康造成潜在的负面影响。
具体处理方法请遵循当地的规章制度。
特性
这是一款采用 1/3 型 Super HAD CCD II ™ 的半球型摄像机。(SSC-N12)
这是一款采用 1/3 型 EXview HAD CCD II ™ 的半球型摄像机。(SSC-N14)
具有以下特点:
手动设定摄像机方向-水平、垂直和旋转。
定焦镜头作为标准配置,镜头的焦距为 6 mm。
高品质 CCD 和透明的圆顶盖确保了高灵敏度。
电子白天/黑夜功能
降噪功能
通过中心测光的背光补偿。
自动白平衡跟踪和调节(ATW)。
12 V 直流电源系统。
Super HAD CCD II ™ 是 Sony Corporation 的注册商标。(SSC-N12)
EXview HAD CCD II ™ 是 Sony Corporation 的注册商标。(SSC-N14)
使用须知
使用前
如果使用前发现有湿气凝结,请搁置足够长时间后再打开电源。
电源
SSC-N12/N14 必须使用12 V 直流电源。
- 连接变压器时,请务必将各导线连接至适当的端口。错误的连接将导致摄
像机发生故障和(或)损坏。
使用本机
请小心不要溅水或溅洒其他液体在本机上,或使易燃物或金属物掉入机内。
若在异物进入机内的状态下使用本机,摄像机可能会发生故障或因此发生火
灾或触电。
数据和安全措施
在记录前,请始终进行记录测试,并确认记录是否成功。SONY 对任何损坏
概不负责。由于本机故障或由记录介质、外部存储系统或者任何其他介质或
储存系统记录的任何形式的记录内容的损害不作(包括但不限于)退货或赔
偿。
个⼈信息
使用本设备通过系统拍摄的影像能够识别个人,因此应归入"Act on the
Protection of Personal Information(个人信息保护法)"中规定的"personal
information(个人信息)"内。请按照法律正确处理视频数据。
使用本产品记录的信息可能也是"personal information(个人信息)"。丢
弃、转让、维修时或在本产品或存储媒体转交给第三方的任何其他场合,
请小心处理。
操作或存放场所
请勿拍摄非常亮的物体(灯光、阳光等)。避免在以下位置使用或存放摄像
机,否则会导致故障。
极热或极冷的地方(操作温度:–10℃ 至 +50℃)
长时间暴露于直射阳光下,或者靠近热源(比如加热器)的地方
靠近强磁源的位置
靠近无线电或电视发射器等强电磁辐射源的地方
易于受到强力振动或撞击的地方
潮湿或有灰尘的地方
暴露于雨水的地方
受到荧光灯或窗户反射光影响的地方
在不稳定光线的下面(图像会闪烁。)
结露和高湿的环境
油烟或油污的环境
通风
为了避免热量积蓄,不要阻挡摄像机附近的通风。
运送
当运送摄像机时,重新以出厂时的包装进行包装,或用同等品质的材质包
装。
清洁
用吹灰器清除镜头灰尘。
使用柔软、干燥的布清洁摄像机的外表面。要清除顽固的污渍,请用少量
清洁剂蘸湿软布,然后擦干即可。
不要使用酒精、苯或稀释剂等挥发性溶剂,这些物质可能会破坏表面光洁
度。
其他
当 iBLC 开关设定为 ON 时,可能出现"猎振";这是因为摄像机"猎振"
以设定最佳曝光等级而可能使图像变得忽明忽暗。如果发生猎振,请将
iBLC 设定为 OFF。
当 CRS 功能设定为 ON 时,自动白平衡可能过于灵敏,或可能在某些区域
内发生猎振。
在近处的红外线条件下,聚焦可能不如在可见光条件下清晰。
因镜头涂层的原因,在近处的红外线条件下摄像机可能无法发挥其最佳性
能。
关于激光束
激光束可能会损坏 CCD。若拍摄含有激光束的场面,请注意不要让激光束直接射
入摄像机的镜头。
摄像机在使用过程中出现的任何问题请与您的 Sony 经销商联系。
OFF
各部件位置和功能
OFF
图中所示的摄像机未包括圆顶外壳。
OFF
侧面
OFF
电源电缆
OFF
将电源电缆连接至 12 V 直流电源( )。连接器端为快速断线型,可固定
任一端连接器上的电缆。
BNC 电缆
将 BNC 电缆连接至监视器或视频装置( )。
间隙调整法兰(排出型)
若电缆在安装表面与摄像机之间产生了间隙,请用钳子折断排出法兰并将
电缆穿过开口处。有一个排出法兰。
内部
模式设定 DIP 开关
指示标签位于开口罩的内侧。
如果下列 DIP 开关被设定于顶端位置,则它们处于打开状态。
PinNo.
开关
右(ON)
1
AGC
2
iBLC
3
ATR-Lite
4
CRS
5
D/N
6
1 : AGC(自动增益控制)开关(初始设定:ON)
设定为 ON 时,可使用此开关以提高视频放大器的增益。
2 : iBLC(智能逆光补偿)ON/OFF 开关(初始设定:OFF)
使用此开关对处于逆光环境的拍摄对象进行曝光补偿。
3 : ATR-Lite(简易适应性色调再生)开关(初始设定:OFF)
此开关设定为 ON 时,摄像机将根据明暗之间的差异自动调节色调。
4 : CRS(色彩维稳)开关(初始设定:OFF)
).
当此开关设定为 ON 时,摄像机将会减少色彩不稳。
).
注意
如果在 CRS 处以 ON 时仍发生色彩不稳,请尝试将"iBLC"和
"ATR-Lite"开关也设定为 ON。
5 : D/N(日/夜)开关(初始设定:OFF)
选择D/N的模式:
D/N 模式(此开关设定为 AUTO 时):在很明亮的环境中切换到彩色模
式;在低亮度的环境中则切换到黑白模式。
彩色模式(此开关设定为 OFF 时)
TOP 标记
以此确定角度调节器的方向。
TOP 标记
表示 SONY 标识在产品上的相反方向,以此确定底座的安装方向。
连接电缆
1
将 BNC 电缆连接至监视器或视频装置(参见图
2
将电源电缆连接至电源插座(12 V 直流电源)(参见图
注意
为防止发生短路,在连接电源电缆时,请勿使电源电缆裸露端相互接触。
1
ON
2
3
4
位置
5
左(OFF)
6
ON
OFF
ON
OFF
ON
OFF
ON
OFF
AUTO
OFF
未使用
)。
)。
(接反面)
Advertisement

Related Manuals for Sony SSC-N12


Summary of Contents for Sony SSC-N12
- Page 1 TOP mark 设定为 ON 时,可使用此开关以提高视频放大器的增益。 2 : iBLC(智能逆光补偿)ON/OFF 开关(初始设定:OFF) Indicates that the SONY logo is on the opposite side of the product, in order to determine the mounting direction of the base bracket. 使用此开关对处于逆光环境的拍摄对象进行曝光补偿。 3 : ATR-Lite(简易适应性色调再生)开关(初始设定:OFF)...
- Page 2 Unit : mm (inches)/单位:mm Note 缺口 注意 Always verify that the unit is operating properly before use. SONY WILL NOT BE LIABLE FOR DAMAGES OF ANY KIND INCLUDING, BUT NOT LIMITED English 在使用前请始终确认本机运行正常。无论保修期内外或基于任何理由, TO, COMPENSATION OR REIMBURSEMENT ON ACCOUNT OF THE LOSS OF SONY 对任何损坏概不负责。由于本机故障造成的现有损失或预期利润...