Table of Contents
Advertisement
Quick Links
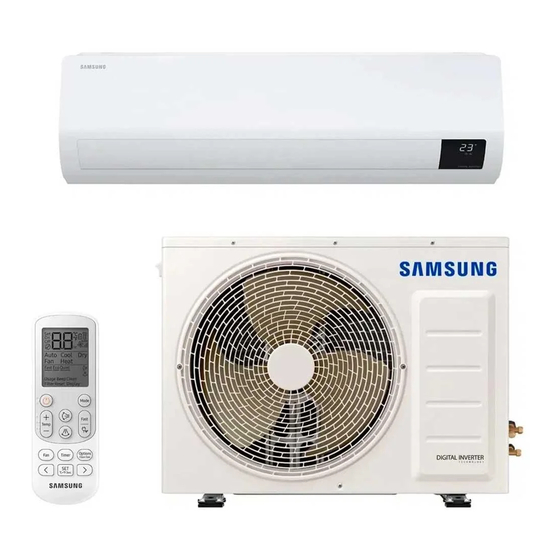
Air conditioner
User manual
AR**AVHZ***
• Thank you for purchasing this Samsung air conditioner.
• Before operating this unit, please read this manual carefully and retain it for future reference.
RAC078-00_IB_21Y AR9500T CO SEDA_AZ_EN-WEB_.indd 1
RAC078-00_IB_21Y AR9500T CO SEDA_AZ_EN-WEB_.indd 1
2021-04-12 오후 4:31:18
2021-04-12 오후 4:31:18
Advertisement
Table of Contents

Related Manuals for Samsung AR AVHZ Series


Summary of Contents for Samsung AR AVHZ Series
- Page 1 Air conditioner User manual AR**AVHZ*** • Thank you for purchasing this Samsung air conditioner. • Before operating this unit, please read this manual carefully and retain it for future reference. RAC078-00_IB_21Y AR9500T CO SEDA_AZ_EN-WEB_.indd 1 RAC078-00_IB_21Y AR9500T CO SEDA_AZ_EN-WEB_.indd 1 2021-04-12 오후...
- Page 2 Contents Safety Information Safety Information At a Glance Indoor Unit Overview Display Remote Control Overview Replacing the remote control batteries Remote Control Operation Selecting an operation mode • • To set the temperature To adjust the fan speed To adjust the airflow direction Smart Features Power Smart Features •...
- Page 3 (Aplicável somente ao Brasil) Pilhas e baterias, após seu uso, não devem ser jogadas em lixo comum. Para evitar riscos à saúde humana e ao meio ambiente, realize o descarte ambientalmente adequado, em um Serviço Autorizado Samsung. English RAC078-00_IB_21Y AR9500T CO SEDA_AZ_EN-WEB_.indd 3 RAC078-00_IB_21Y AR9500T CO SEDA_AZ_EN-WEB_.indd 3...
-
Page 4: Safety Information
Incorrect installation, use, or maintenance of this appliance can result in death, serious injury, or property damage. Keep these instructions with this appliance. This manual is subject to change. For the latest version, visit www.samsung.com. Because the instructions in this manual cover various models, the characteristics of your air conditioner may differ slightly from those described. - Page 5 The user and installer guides should be read carefully. The user and installer guides should be read carefully. FOR GENERAL This appliance is not intended for use by persons (including children) with reduced physical, sensory or mental capabilities, or lack of experience and knowledge, unless they have been given supervision or instruction concerning use of the appliance by a person responsible for their safety.
- Page 6 Safety Information Fix the outdoor unit firmly so that the electric part of the outdoor unit is not exposed. • Failing to do so may result in electric shock, fire, explosion, or problems with the product. Do not install this appliance near a heater, or inflammable material. Do not install this appliance in a humid, oily or dusty location, in a location exposed to direct sunlight and water (or rain).
- Page 7 FOR POWER SUPPLY WARNING When the circuit breaker is damaged, contact your nearest service centre. Do not pull or excessively bend the power line. Do not twist or tie the power line. Do not hook the power line over a metal object, place a heavy object on the power line, insert the power line between objects, or push the power line into the space behind the appliance.
- Page 8 Safety Information To reinstall the air conditioner, please contact your nearest service centre. • Failing to do so may result in problems with the product, water leakage, electric shock, or fire. • Delivery service for the product is not provided. If you reinstall the product in another location, additional construction expenses and an installation fee will be charged.
- Page 9 CAUTION Do not place objects or devices under the indoor unit. • Water dripping from the indoor unit may result in fire or property damage. Check that the installation frame of the outdoor unit is not broken at least once a year. •...
- Page 10 Safety Information Do not touch the pipes connected with the product. • This may result in burns or injury. Do not use this air conditioner to preserve precision equipment, food, animals, plants or cosmetics, or for any other unusual purposes. •...
-
Page 11: Indoor Unit Overview
At a Glance Indoor Unit Overview The appearance of the actual product may differ slightly from the image below. 01 Air intake 05 Airflow blade (left and right) 02 Air filter 06 Power button/Remote control receiver 03 Front panel 07 Room temperature sensor 04 Airflow blade (up and down) 08 Display Display... -
Page 12: Remote Control Overview
Remote Control Overview Most operating instructions in this manual require using the remote control. 01 Set temperature indicator 02 Timer option indicator 03 Operation mode indicator 04 Options indicator 05 Low battery indicator 06 Transmit indicator 07 Fan speed indicator 08 Vertical air swing indicator 09 Horizontal air swing indicator 10 Power button... -
Page 13: Remote Control Operation
Remote Control Operation You can use the air conditioner easily by selecting a mode and then by controlling the temperature, fan speed, and air direction. Selecting an operation mode To change the current mode between Auto, Cool, Dry, Fan press the (Mode) button. -
Page 14: To Adjust The Airflow Direction
Remote Control Operation To set the temperature To control the temperature in each mode, press the (Temperature) button: Mode Temperature control Auto/Cool Adjust by 1 ℃ from 16 ℃ to 30 ℃. Adjust by 1 ℃ from 18 ℃ to 30 ℃. No temperature control. -
Page 15: Power Smart Features
Smart Features Power Smart Features Auto mode Use Auto mode to perform the powerful cooling function to automatically reach the desired temperature. When the difference between the room temperature and the set temperature decreases, the air conditioner controls the fan speed and airflow direction. ▶... -
Page 16: Dry Mode
Power Smart Features Dry mode Use Dry mode in rainy or humid weather. ▶ ▶ Select Dry. NOTE • The proper set temperature range for dehumidifying operation is 24 to 26 ℃. If you feel that the current humidity seems high, use a lower set temperature. -
Page 17: Fast Function
Variety Smart Features Fast function Use the Fast function to quickly cool your room. This function is the most powerful cooling function provided by the air conditioner. You can select this function in Cool mode. In Cool mode ▶ NOTE •... -
Page 18: Eco Function
Variety Smart Features Eco function Use the Eco function to reduce electricity consumption while staying cool. You can select this function in Cool mode. In Cool mode ▶ NOTE • When the Eco function starts, the pattern appears on the remote control for a few seconds and vertical air swing begins. -
Page 19: Quiet Function
Quiet function Use the Quiet function to reduce the unit’s operating noise. You can select this function in Cool mode. In Cool mode ▶ ▶ ▶ Select Quiet. ▶ NOTE • You can change the set temperature and the airflow direction, but you cannot change the fan speed. -
Page 20: Auto Clean Function
Variety Smart Features Auto clean function Use the Auto clean function if the indoor unit produces odors. Activating Auto clean To activate Auto clean, press the (Options) button for at least 3 seconds. The indoor unit display shows: If the air conditioner is off, Auto clean starts immediately. If the air conditioner is running, Auto clean starts as soon as the air conditioner turns off. - Page 21 Canceling Auto clean To cancel Auto clean while it is running, follow the procedure below: ▶ Press and hold for 3 or more seconds. ▶ ▶ Select Clean. ▶ NOTE • Canceling Auto clean does not deactivate it. Deactivating Auto clean To deactivate Auto clean, follow the procedure below while the air conditioner is in operation or turned off: ▶...
-
Page 22: Display Lighting Function
Variety Smart Features Display lighting function Use the Display lighting function to turn on or off the lighting of the indoor unit display. ▶ ▶ Select Display. ▶ NOTE • If you change the current mode or function when the Display lighting function is on, the display lighting turns on for 5 seconds and then turns off again. -
Page 23: Time Scheduling
Time scheduling Timed on/ Timed off function Use the Timed on/off function to turn the air conditioner on or off after a duration. Scheduling durations before the air conditioner turns on or off helps use the air conditioner economically. ▶ Select On or Off ▶ (Set the duration.) ▶... - Page 24 Time scheduling good'sleep function Use the good'sleep function to save energy while you are sleeping. You can select this function in Cool mode. In Cool mode ▶ ▶ (Select (Set the duration.) ▶ NOTE • To cancel the good'sleep function, set the duration to 0.0. •...
- Page 25 Cleaning and Maintenance Schedule Task How often By whom Instruction Run the Auto clean "Auto clean function" on As needed Owner function. page 20. "Cleaning the filter" on page Clean the filter. Once every two weeks Owner Clean the exterior of the "Cleaning the outside of the As needed Owner...
-
Page 26: Cleaning The Outside Of The Indoor Unit
Cleaning Cleaning the outside of the indoor unit 1 Turn off the air conditioner and wait until the fan stops. 2 Disconnect the power supply. 3 Use a soft brush or tepid damp cloth to clean the exterior. Soft brush Tepid damp cloth WARNING •... -
Page 27: Cleaning The Filter
Cleaning the filter Clean the air filter every two weeks or when the (filter-cleaning reminder) appears on the indoor unit display. The time between cleanings may vary, depending on the usage and environmental conditions. Vacuum cleaner Soft brush 30 minutes Mild detergent 1 Slide the filter off of the unit. -
Page 28: Troubleshooting
Appendix Troubleshooting If the air conditioner is not operating normally, refer to the troubleshooting guide below. Problem Solution • Make sure the unit is receiving power. • Check the circuit breaker. If it is flipped off, flip it on again and The air conditioner stops restart the unit. - Page 29 Problem Solution • Replace the batteries in the remote control. • Make sure the remote control can send an unobstructed signal to The remote control does not the unit. work. • Keep bright lights away from the unit. Light from fluorescent bulbs or neon signs may interrupt the signal from the remote control.
- Page 30 Appendix Models Unit AR12AVHZDWK W (Btu/h) 3520 (12000) 3,24 Capacity W (Btu/h) Voltage V,Hz 220V / 60Hz Watt 1085 Consumption Watt Ampere 7,80 Current Ampere Indoor 889 x 299 x 215 Dimension Outdoor 660 x 475 x 242 Indoor 8,92 Weight Outdoor 26,92...
- Page 31 Nota Fiscal de venda ao Consumidor Final do produto, emitida no Brasil, por um revendedor autorizado pela SAMSUNG. A SAMSUNG, sem nenhum custo para o usuário, reparará o produto de acordo com os termos desta garantia. O reparo poderá incluir a substituição de peças, por novas ou recondicionadas equivalentes, dependendo de prévio consentimento do consumidor quanto às últimas.
- Page 32 Appendix English RAC078-00_IB_21Y AR9500T CO SEDA_AZ_EN-WEB_.indd 32 RAC078-00_IB_21Y AR9500T CO SEDA_AZ_EN-WEB_.indd 32 2021-04-12 오후 4:31:23 2021-04-12 오후 4:31:23...
-
Page 33: Informação Ambiental
Solicitamos observar a legislação existente em sua região, com relação á destinação do produto no seu final de vida, disposição dos componentes da embalagem e das pilhas e baterias. Se você tiver comentários ou dúvidas relacionadas aos produtos Samsung, entre em contato com a Central de Atendimento ao Cliente SAMSUNG. - Page 34 MEMO 34 English RAC078-00_IB_21Y AR9500T CO SEDA_AZ_EN-WEB_.indd 34 RAC078-00_IB_21Y AR9500T CO SEDA_AZ_EN-WEB_.indd 34 2021-04-12 오후 4:31:23 2021-04-12 오후 4:31:23...
- Page 35 English RAC078-00_IB_21Y AR9500T CO SEDA_AZ_EN-WEB_.indd 35 RAC078-00_IB_21Y AR9500T CO SEDA_AZ_EN-WEB_.indd 35 2021-04-12 오후 4:31:23 2021-04-12 오후 4:31:23...
- Page 36 Fone: (48) 3024-3368 Fone: (75) 3221-7344 88095-700 44001-240 Fone: (66) 3426-8596 VILA FRIO ASSISTENCIA TECNICA AUTORIZADA 78710-525 sac@evolucaorefrigeracao.com.br 8206670 5299445 RUA BURARAMA, 16 refrigsuzuki@terra.com.br portoalegre@samsung.srv.br 4295354 4295709 Fone: (27) 3326-5548 29111-270 INFOAR 3454133 vilafrio@vilafrio.com.br TRAVESSA VENEZUELA, 210 NANOTEC Fone: (51) 3025-1440 90240-220 RUA TORQUATO LARANJA, 46 infoar@infoar.com.br...