Table of Contents
Advertisement
Available languages
Available languages
Quick Links
owneR'S ManUal
aRp-1314
aRp-1314
poRtable aIR condItIoneR
acondIcIonadoR de aIRe poRtÁtIl
condItIonne UR d' aIRe poRtable
Página en Español
17
Read and retain these instructions for future reference.
For any customer Support needs, please choose the Support tab on
www.royalsovereign.com
Royal Sovereign International, Inc
Advertisement
Table of Contents

Related Manuals for Royal Sovereign ARP-1314


Summary of Contents for Royal Sovereign ARP-1314
- Page 1 UR d' aIRe poRtable Página en Español Read and retain these instructions for future reference. For any customer Support needs, please choose the Support tab on www.royalsovereign.com Royal Sovereign International, Inc...
- Page 2 IntRodUctIon Thank you for choosing Royal Sovereign to provide you and your family with all of the “Home Comfort” requirements for your home, apartment, or office. This Portable Air Conditioner can be set-up in just minutes and can be easily moved from room to room. It is a multi-functional room air comfort system that offers you Air Conditioning, Dehumidification and Air Circulation modes.
-
Page 3: Table Of Contents
contentS Page Precautions for use∙∙∙∙∙∙∙∙∙∙∙∙∙∙∙∙∙∙∙∙∙∙∙∙∙∙∙∙∙∙∙∙∙∙∙∙∙∙∙∙∙∙∙∙∙∙∙∙∙∙∙∙∙∙∙∙∙∙∙∙∙∙∙∙∙∙∙∙∙∙∙∙∙∙∙∙∙∙∙∙∙∙∙∙∙∙∙∙∙∙∙∙∙∙∙∙∙∙∙∙∙∙∙∙∙∙∙∙∙∙∙∙∙∙∙∙∙∙∙∙∙∙∙∙∙∙∙∙∙∙∙∙∙∙∙∙∙ 4 Identification of parts∙∙∙∙∙∙∙∙∙∙∙∙∙∙∙∙∙∙∙∙∙∙∙∙∙∙∙∙∙∙∙∙∙∙∙∙∙∙∙∙∙∙∙∙∙∙∙∙∙∙∙∙∙∙∙∙∙∙∙∙∙∙∙∙∙∙∙∙∙∙∙∙∙∙∙∙∙∙∙∙∙∙∙∙∙∙∙∙∙∙∙∙∙∙∙∙∙∙∙∙∙∙∙∙∙∙∙∙∙∙∙∙∙∙∙∙∙∙∙∙∙∙∙∙∙∙∙∙∙∙∙∙∙∙ 5 Installation instructions∙ ∙ ∙∙∙∙∙∙∙∙∙∙∙∙∙∙∙∙∙∙∙∙∙∙∙∙∙∙∙∙∙∙∙∙∙∙∙∙∙∙∙∙∙∙∙∙∙∙∙∙∙∙∙∙∙∙∙∙∙∙∙∙∙∙∙∙∙∙∙∙∙∙∙∙∙∙∙∙∙∙∙∙∙∙∙∙∙∙∙∙∙∙∙∙∙∙∙∙∙∙∙∙∙∙∙∙∙∙∙∙∙∙∙∙∙∙∙∙∙∙∙∙∙∙∙∙∙∙ 6~7 Operation∙∙∙∙∙∙∙∙∙∙∙∙∙∙∙∙∙∙∙∙∙∙∙∙∙∙∙∙∙∙∙∙∙∙∙∙∙∙∙∙∙∙∙∙∙∙∙∙∙∙∙∙∙∙∙∙∙∙∙∙∙∙∙∙∙∙∙∙∙∙∙∙∙∙∙∙∙∙∙∙∙∙∙∙∙∙∙∙∙∙∙∙∙∙∙∙∙∙∙∙∙∙∙∙∙∙∙∙∙∙∙∙∙∙∙∙∙∙∙∙∙∙∙∙∙∙∙∙∙∙∙∙∙∙∙∙∙∙∙∙∙∙∙∙∙ 8~11 Maintenance∙∙∙∙∙∙∙∙∙∙∙∙∙∙∙∙∙∙∙∙∙∙∙∙∙∙∙∙∙∙∙∙∙∙∙∙∙∙∙∙∙∙∙∙∙∙∙∙∙∙∙∙∙∙∙∙∙∙∙∙∙∙∙∙∙∙∙∙∙∙∙∙∙∙∙∙∙∙∙∙∙∙∙∙∙∙∙∙∙∙∙∙∙∙∙∙∙∙∙∙∙∙∙∙∙∙∙∙∙∙∙∙∙∙∙∙∙∙∙∙∙∙∙∙∙∙∙∙∙∙∙∙∙∙∙∙∙∙∙∙∙∙∙∙∙ 12 Troubleshooting∙∙∙∙∙∙∙∙∙∙∙∙∙∙∙∙∙∙∙∙∙∙∙∙∙∙∙∙∙∙∙∙∙∙∙∙∙∙∙∙∙∙∙∙∙∙∙∙∙∙∙∙∙∙∙∙∙∙∙∙∙∙∙∙∙∙∙∙∙∙∙∙∙∙∙∙∙∙∙∙∙∙∙∙∙∙∙∙∙∙∙∙∙∙∙∙∙∙∙∙∙∙∙∙∙∙∙∙∙∙∙∙∙∙∙∙∙∙∙∙∙∙∙∙∙∙∙∙∙∙∙∙∙∙∙∙∙∙∙∙ 13 Specifications∙ ∙ ∙∙∙∙∙∙∙∙∙∙∙∙∙∙∙∙∙∙∙∙∙∙∙∙∙∙∙∙∙∙∙∙∙∙∙∙∙∙∙∙∙∙∙∙∙∙∙∙∙∙∙∙∙∙∙∙∙∙∙∙∙∙∙∙∙∙∙∙∙∙∙∙∙∙∙∙∙∙∙∙∙∙∙∙∙∙∙∙∙∙∙∙∙∙∙∙∙∙∙∙∙∙∙∙∙∙∙∙∙∙∙∙∙∙∙∙∙∙∙∙∙∙∙∙∙∙∙∙∙∙∙∙∙∙∙∙∙∙∙∙∙∙ 14 Warranty∙ ∙ ∙∙∙∙∙∙∙∙∙∙∙∙∙∙∙∙∙∙∙∙∙∙∙∙∙∙∙∙∙∙∙∙∙∙∙∙∙∙∙∙∙∙∙∙∙∙∙∙∙∙∙∙∙∙∙∙∙∙∙∙∙∙∙∙∙∙∙∙∙∙∙∙∙∙∙∙∙∙∙∙∙∙∙∙∙∙∙∙∙∙∙∙∙∙∙∙∙∙∙∙∙∙∙∙∙∙∙∙∙∙∙∙∙∙∙∙∙∙∙∙∙∙∙∙∙∙∙∙∙∙∙∙∙∙∙∙∙∙∙∙∙∙∙∙∙∙∙∙∙ 15 Contact information∙∙∙∙∙∙∙∙∙∙∙∙∙∙∙∙∙∙∙∙∙∙∙∙∙∙∙∙∙∙∙∙∙∙∙∙∙∙∙∙∙∙∙∙∙∙∙∙∙∙∙∙∙∙∙∙∙∙∙∙∙∙∙∙∙∙∙∙∙∙∙∙∙∙∙∙∙∙∙∙∙∙∙∙∙∙∙∙∙∙∙∙∙∙∙∙∙∙∙∙∙∙∙∙∙∙∙∙∙∙∙∙∙∙∙∙∙∙∙∙∙∙∙∙∙∙∙∙∙∙∙∙∙∙∙ 16 Página en Español∙∙∙∙∙∙∙∙∙∙∙∙∙∙∙∙∙∙∙∙∙∙∙∙∙∙∙∙∙∙∙∙∙∙∙∙∙∙∙∙∙∙∙∙∙∙∙∙∙∙∙∙∙∙∙∙∙∙∙∙∙∙∙∙∙∙∙∙∙∙∙∙∙∙∙∙∙∙∙∙∙∙∙∙∙∙∙∙∙∙∙∙∙∙∙∙∙∙∙∙∙∙∙∙∙∙∙∙∙∙∙∙∙∙∙∙∙∙∙∙∙∙∙∙∙∙∙∙∙∙∙∙∙∙∙∙ 17... -
Page 4: Precautions For Use
pRecaUtIonS FoR USe electrical Specifications and power cord Check to ensure that the electrical service being used is adequate for the model you’ve chosen. The electrical rating of your new air conditioner is defined on the serial plate of the unit. Please refer to the rating when checking electrical requirements to ensure they meet the electrical codes of your location. -
Page 5: Identification Of Parts
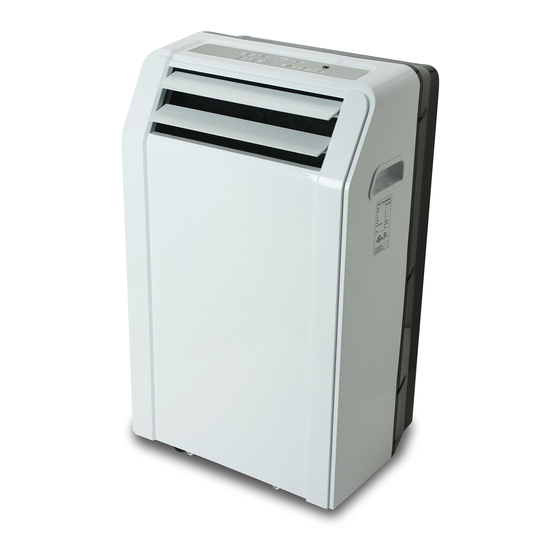
IdentIFIcatIon oF paRtS 1. Control panel 2. Air outlet 3. Handle 4. Caster wheel 5. Upper Air Filter 6. Air intake 7. Air Outlet 8. Upper Drain Outlet 9. Air intake 10.∙Lower∙Air∙Filter 11. Bottom tray drain outlet 12. Power cord outlet... -
Page 6: Installation Instructions∙ ∙ ∙∙∙∙∙∙∙∙∙∙∙∙∙∙∙∙∙∙∙∙∙∙∙∙∙∙∙∙∙∙∙∙∙∙∙∙∙∙∙∙∙∙∙∙∙∙∙∙∙∙∙∙∙∙∙∙∙∙∙∙∙∙∙∙∙∙∙∙∙∙∙∙∙∙∙∙∙∙∙∙∙∙∙∙∙∙∙∙∙∙∙∙∙∙∙∙∙∙∙∙∙∙∙∙∙∙∙∙∙∙∙∙∙∙∙∙∙∙∙∙∙∙∙∙∙∙ 6~7
InStallatIon Unpack your New Portable Air Conditioner and let the machine stand upright for 2 hours before starting. Unpack all parts listed below. If any parts are missing do not return this product to the place of purchase. Please visit our website www.royalsovereign.com and click on the “Support” tab. accessories Include 1.∙Exhaust∙hose 2. - Page 7 Part 2: Attaching exhaust hose 1. Co n nect the hose connector to the air outlet by aligning the tabs on the hose to the PAC and snap it into place. part 3: Installing window slider kit Fig 2.
-
Page 8: Operation∙∙∙∙∙∙∙∙∙∙∙∙∙∙∙∙∙∙∙∙∙∙∙∙∙∙∙∙∙∙∙∙∙∙∙∙∙∙∙∙∙∙∙∙∙∙∙∙∙∙∙∙∙∙∙∙∙∙∙∙∙∙∙∙∙∙∙∙∙∙∙∙∙∙∙∙∙∙∙∙∙∙∙∙∙∙∙∙∙∙∙∙∙∙∙∙∙∙∙∙∙∙∙∙∙∙∙∙∙∙∙∙∙∙∙∙∙∙∙∙∙∙∙∙∙∙∙∙∙∙∙∙∙∙∙∙∙∙∙∙∙∙∙∙∙ 8~11
opeRatIon before Use •∙Check∙to∙make∙sure∙the∙rubber∙drain∙plugs∙are∙securely∙plugged∙into∙the∙drain∙ports∙on∙the∙back∙of∙the∙unit∙to∙prevent∙water∙leaks •∙Check∙to∙make∙sure∙that∙air∙conditioner∙has∙been∙properly∙vented∙out∙the∙window∙(∙See∙Installation∙pg∙7.) •∙Check∙to∙make∙sure∙air∙conditioner∙is∙on∙a∙flat∙surface •∙Conduct∙a∙Power∙Plug∙Check: 1. Press the RESET button on the power cord. 2. Plug cord into an electrical outlet. 3. Press the TEST button on the power cord. The RESET button should pop up. 4. Press the RESET button for use. 5. - Page 9 Mode descriptions Selects∙the∙appropriate∙operating∙mode.∙Each∙time∙you∙press∙the∙button,∙a∙mode∙is∙selected∙in∙a∙sequence∙that∙goes∙from∙AUTO,∙COOL,∙DRY,∙FAN∙and∙HEAT(Only∙for∙models∙with∙ Heat∙function). cool mode -∙Press∙the∙"MODE"∙button∙until∙the∙"COOL"∙indicator∙light∙comes∙on. - Press the ADJUST buttons " " or " " to select your desired room temperature. The temperature can be set within a range of 62°F~88°F. - Press the "FAN SPEED" button to choose the fan speed.
- Page 10 tIMeR operation - When the unit is on, first press the Timer button, the TIMER OFF indicator light illuminates. It indicates the Auto Stop program is initiated. - When the unit is off, first press the Timer button, the TIMER ON indicator light illuminates. It indicates the Auto Start program is initiated. -∙∙...
- Page 11 Remote control For∙first∙use:∙∙Remove∙the∙plastic∙from∙between∙the∙battery∙and∙the∙contacts. To∙use:∙aim∙remote∙control∙at∙the∙sensor∙on∙the∙control∙panel on/oFF:∙Press∙to∙turn∙the∙unit∙on∙or∙off Mode:∙Press∙to∙choose∙operation∙mode:∙Auto∙ Cool Dehumidify Fan Speed:∙Press∙to∙choose∙between∙Auto∙ ∙Low∙ High fan speed teMp:∙Press∙up∙or∙down∙to∙control∙room∙temperature∙or∙timer∙hours econoMY:∙Press∙to∙set∙or∙cancel∙sleep∙mode∙operation tIMeR on/oFF:∙Press∙to∙set∙unit∙to∙automatically∙turn∙off∙or∙on∙with∙a∙timer led display:∙∙ P ress∙this∙button∙to∙clear∙the∙display∙on∙the∙indoor∙unit,∙press∙it∙again∙to∙light∙the∙display. SwInG:∙Used∙to∙stop∙or∙start∙louver∙movement∙and∙set∙the∙desired∙up/down∙airflow∙direction. ReSet:∙∙ O nce∙the∙recessed∙RESET∙button∙is∙pressed,∙all∙of∙the∙current∙settings∙will∙be∙cancelled∙and∙the∙controller∙will∙return∙to∙the∙initial∙settings. locK:∙∙ P ress∙this∙recessed∙button∙to∙lock∙all∙current∙settings,∙and∙the∙remote∙controller∙will∙not∙accept∙any∙operation∙except∙that∙of∙the∙LOCK.∙ Use∙the∙LOCK∙mode∙when∙you∙want∙to∙prevent∙settings∙from∙being∙changed∙accidentally.∙ Press∙the∙LOCK∙button∙again∙to∙cancel∙the∙LOCK∙function.∙A∙lock∙symbol∙will∙appear∙on∙ the remote controller display when the lock function is activated.
-
Page 12: Maintenance
MaIntenance drainage Occasionally,∙you∙may∙need∙to∙drain∙the∙unit.∙∙The∙LED∙display∙∙will∙show∙P1∙when∙draining∙is∙necessary.∙ to drain: 1. Turn off the power to the unit and unplug. 2. Place a water tray under the drainage port to collect water. 3. Remove the rubber drainage plug. 4. Replace the plug, when drainage water stops flowing. For continuous drainage into a floor drain: 1. -
Page 13: Troubleshooting
1. Turn off the power to the unit and unplug. 2. Wipe down unit with a soft, dry, or damp cloth. A mild detergent can be used. 3. Never use a volatile substance such a gasoline or abrasive cleaners. -
Page 14: Specifications
SpecIFIcatIonS - Figures noted in the contents are for reference only; variation may result due to the application in different countries or regions, and shall be based on practical operation. Model aRp-1314 Cooling Capacity 13,500∙BTU Dehumidifying Capacity 3 pints per hour / 1.4 liters per hour Standard Cooling Input Power / Current 1480W∙/∙12A... -
Page 15: Warranty
This warranty shall apply only if the air conditioner is used on Alternating∙Current∙(AC)∙circuit,∙in∙accordance∙with∙the∙factory∙provided∙instructions∙which∙accompany∙it. lIMIted FIVe YeaR waRRantY (coMpReSSoR) For a period of five years from the date of purchase, when this Royal Sovereign Portable Air Conditioner is operated and maintained according to the instruction manual provided with∙the∙product,∙Royal∙Sovereign∙will∙supply∙a∙replacement∙compressor∙(parts∙only),∙free∙of∙charge,∙if∙the∙original∙compressor∙is∙determined∙to∙be∙defective∙in∙workmanship∙or∙ material.∙If∙repair∙becomes∙necessary,∙please∙contact∙our∙customer∙service∙center.∙You∙will∙be∙responsible∙for∙all∙freight,∙insurance,∙and∙any∙other∙transportation∙charges∙to∙get∙the∙... -
Page 16: Contact Information
RoYal SoVeReIGn InteRnatIonal, Inc. RS canada Inc. RS InteRnatIonal aUStRalIa ptY. ltd. 2∙Volvo∙Drive∙Rockleigh,∙NJ∙07647∙USA 5610∙Timberlea∙Blvd,∙Mississauga,∙L4W∙4M6,∙CANADA 30∙Prime∙Drive,∙Seven∙Hills,∙NSW∙2147,∙AUSTRALIA TEL∙:∙+1)∙800-397-1025∙∙∙∙∙∙∙∙FAX∙:∙+1)∙201-750-1022 TEL∙:∙+1)∙905-461-1095∙∙∙∙∙∙∙∙∙∙∙∙∙∙TF:∙+1)∙866∙961-6673∙∙∙ TEL∙∙:∙+61)∙2-9674-2127∙ FAX∙∙:∙+61)∙2-9674-2027 Fax∙:∙+1)∙905-461-1096 2013.06... -
Page 17: Página En Español
ManUal de InStRUccIoneS aRp-1314 aRp-1314 poRtable aIR condItIoneR acondIcIonadoR de aIRe poRtÁtIl condItIonne UR d' aIRe poRtable Página en Español Lea∙y∙guarde∙estas∙instrucciones∙para∙referencia∙futura. para cualquier necesidad de soporte técnico, seleccione la ficha Soporte en favor www.royalsovereign.com Royal Sovereign International, Inc... - Page 18 IntRodUccIÓn Gracias por elegir Royal Sovereign a usted y su familia con todos los requisitos "Comodidad en el hogar" para su casa, apartamento u oficina. Este aire acondicionado portátil puede ser puesta en marcha en cuestión de minutos y se puede mover fácilmente de una habitación a otra. Se trata de un sistema de confort del aire ambiente multifuncional que le ofrece aire acondicionado, deshumidificación y los modos de circulación de...
- Page 19 contenIdoS Página Precauciones para∙∙∙∙∙∙∙∙∙∙∙∙∙∙∙∙∙∙∙∙∙∙∙∙∙∙∙∙∙∙∙∙∙∙∙∙∙∙∙∙∙∙∙∙∙∙∙∙∙∙∙∙∙∙∙∙∙∙∙∙∙∙∙∙∙∙∙∙∙∙∙∙∙∙∙∙∙∙∙∙∙∙∙∙∙∙∙∙∙∙∙∙∙∙∙∙∙∙∙∙∙∙∙∙∙∙∙∙∙∙∙∙∙∙∙∙∙∙∙∙∙∙∙∙∙∙∙∙∙∙∙∙∙∙∙∙ ∙20 Identificación de los∙ ∙ ∙∙∙∙∙∙∙∙∙∙∙∙∙∙∙∙∙∙∙∙∙∙∙∙∙∙∙∙∙∙∙∙∙∙∙∙∙∙∙∙∙∙∙∙∙∙∙∙∙∙∙∙∙∙∙∙∙∙∙∙∙∙∙∙∙∙∙∙∙∙∙∙∙∙∙∙∙∙∙∙∙∙∙∙∙∙∙∙∙∙∙∙∙∙∙∙∙∙∙∙∙∙∙∙∙∙∙∙∙∙∙∙∙∙∙∙∙∙∙∙∙∙∙∙∙∙∙∙∙∙∙∙∙ 21 Instalación∙∙∙∙∙∙∙∙∙∙∙∙∙∙∙∙∙∙∙∙∙∙∙∙∙∙∙∙∙∙∙∙∙∙∙∙∙∙∙∙∙∙∙∙∙∙∙∙∙∙∙∙∙∙∙∙∙∙∙∙∙∙∙∙∙∙∙∙∙∙∙∙∙∙∙∙∙∙∙∙∙∙∙∙∙∙∙∙∙∙∙∙∙∙∙∙∙∙∙∙∙∙∙∙∙∙∙∙∙∙∙∙∙∙∙∙∙∙∙∙∙∙∙∙∙∙∙∙∙∙∙∙∙∙∙∙∙∙∙∙∙∙ 22~23 Operación∙ ∙ ∙∙∙∙∙∙∙∙∙∙∙∙∙∙∙∙∙∙∙∙∙∙∙∙∙∙∙∙∙∙∙∙∙∙∙∙∙∙∙∙∙∙∙∙∙∙∙∙∙∙∙∙∙∙∙∙∙∙∙∙∙∙∙∙∙∙∙∙∙∙∙∙∙∙∙∙∙∙∙∙∙∙∙∙∙∙∙∙∙∙∙∙∙∙∙∙∙∙∙∙∙∙∙∙∙∙∙∙∙∙∙∙∙∙∙∙∙∙∙∙∙∙∙∙∙∙∙∙∙∙∙∙∙∙∙∙∙∙∙∙∙ 24~27 Mantenimiento∙∙∙∙∙∙∙∙∙∙∙∙∙∙∙∙∙∙∙∙∙∙∙∙∙∙∙∙∙∙∙∙∙∙∙∙∙∙∙∙∙∙∙∙∙∙∙∙∙∙∙∙∙∙∙∙∙∙∙∙∙∙∙∙∙∙∙∙∙∙∙∙∙∙∙∙∙∙∙∙∙∙∙∙∙∙∙∙∙∙∙∙∙∙∙∙∙∙∙∙∙∙∙∙∙∙∙∙∙∙∙∙∙∙∙∙∙∙∙∙∙∙∙∙∙∙∙∙∙∙∙∙∙∙∙∙∙∙∙∙∙∙ 28 Solución de problemas∙∙∙∙∙∙∙∙∙∙∙∙∙∙∙∙∙∙∙∙∙∙∙∙∙∙∙∙∙∙∙∙∙∙∙∙∙∙∙∙∙∙∙∙∙∙∙∙∙∙∙∙∙∙∙∙∙∙∙∙∙∙∙∙∙∙∙∙∙∙∙∙∙∙∙∙∙∙∙∙∙∙∙∙∙∙∙∙∙∙∙∙∙∙∙∙∙∙∙∙∙∙∙∙∙∙∙∙∙∙∙∙∙∙∙∙∙∙∙∙∙∙∙∙∙∙∙∙∙∙ 29 Especificaciones∙ ∙ ∙∙∙∙∙∙∙∙∙∙∙∙∙∙∙∙∙∙∙∙∙∙∙∙∙∙∙∙∙∙∙∙∙∙∙∙∙∙∙∙∙∙∙∙∙∙∙∙∙∙∙∙∙∙∙∙∙∙∙∙∙∙∙∙∙∙∙∙∙∙∙∙∙∙∙∙∙∙∙∙∙∙∙∙∙∙∙∙∙∙∙∙∙∙∙∙∙∙∙∙∙∙∙∙∙∙∙∙∙∙∙∙∙∙∙∙∙∙∙∙∙∙∙∙∙∙∙∙∙∙∙∙∙∙∙∙∙∙ ∙30 Garantía∙∙∙∙∙∙∙∙∙∙∙∙∙∙∙∙∙∙∙∙∙∙∙∙∙∙∙∙∙∙∙∙∙∙∙∙∙∙∙∙∙∙∙∙∙∙∙∙∙∙∙∙∙∙∙∙∙∙∙∙∙∙∙∙∙∙∙∙∙∙∙∙∙∙∙∙∙∙∙∙∙∙∙∙∙∙∙∙∙∙∙∙∙∙∙∙∙∙∙∙∙∙∙∙∙∙∙∙∙∙∙∙∙∙∙∙∙∙∙∙∙∙∙∙∙∙∙∙∙∙∙∙∙∙∙∙∙∙∙∙∙∙∙∙∙∙∙∙∙∙∙ 31 Contacto Inforamtion∙∙∙∙∙∙∙∙∙∙∙∙∙∙∙∙∙∙∙∙∙∙∙∙∙∙∙∙∙∙∙∙∙∙∙∙∙∙∙∙∙∙∙∙∙∙∙∙∙∙∙∙∙∙∙∙∙∙∙∙∙∙∙∙∙∙∙∙∙∙∙∙∙∙∙∙∙∙∙∙∙∙∙∙∙∙∙∙∙∙∙∙∙∙∙∙∙∙∙∙∙∙∙∙∙∙∙∙∙∙∙∙∙∙∙∙∙∙∙∙∙∙∙∙∙∙∙∙∙∙∙∙∙ 32...
- Page 20 pRecaUcIoneS de USo especificaciones eléctricas y cable de alimentación Compruebe∙que∙el∙servicio∙eléctrico∙que∙se∙utiliza∙es∙el∙adecuado∙para∙el∙modelo∙que∙usted∙ha∙elegido.∙La∙clasificación∙eléctrica∙de∙su∙nuevo∙ aparato de aire acondicionado se define en la placa de serie de la unidad. Por favor refiérase a la calificación al comprobar los requisitos eléctricos para asegurarse de que cumplen con los códigos de electricidad de su localidad. •∙Instale∙el∙aparato∙de∙aire∙acondicionado∙de∙acuerdo∙con∙las∙instrucciones∙de∙instalación∙proporcionadas.
- Page 21 IdentIFIcacIÓn de laS pIezaS 1. panel de control 2. salida de aire 3. manejar 4. rueda rueda 5. Superior del filtro de aire 6. toma de aire 7. salida de aire 8. Outlet Drain superior 9. toma de aire 10.∙Baja∙del∙filtro∙de∙aire...
- Page 22 InStalacIÓn Saque su nuevo acondicionador de aire portátil y dejar que la máquina en posición vertical durante 2∙horas∙antes∙de∙comenzar. Desembale∙todas∙las∙piezas∙que∙se∙indican∙a∙continuación.∙Si∙falta∙alguna∙pieza,∙no∙devuelva∙este∙ producto al lugar de compra. Por favor visite nuestro sitio web www.royalsovereign.com y haga clic en la pestaña "Compatibilidad". accesorios Incluir 1.
- Page 23 Parte 2: Conexión de la manguera de escape 1. Conecte el conector de la manguera a la salida de aire, alineando las lengüetas de la manguera para la PAC y que encaje en su lugar. parte 3: Instalación de equipo deslizador de la ventana Fig 2.
- Page 24 opeRacIÓn antes del uso •∙Asegúrese∙de∙que∙los∙tapones∙de∙drenaje∙de∙goma∙están∙bien∙conectados∙a∙los∙orificios∙de∙drenaje∙en∙la∙parte∙posterior∙de∙la∙unidad∙para∙evitar∙fugas∙de∙agua •∙Asegúrese∙de∙que∙el∙aire∙acondicionado∙ha∙sido∙ventilado∙adecuadamente∙por∙la∙ventana∙(Consulte∙Instalación∙pg∙7). •∙Compruebe∙que∙el∙aire∙acondicionado∙esté∙en∙una∙superficie∙plana •∙Llevar∙a∙cabo∙un∙tapón∙de∙verificación∙de∙energía: 1. Pulse el botón RESET en el cable de alimentación. 2. Enchufe el cable en una toma de corriente. 3. Pulse el botón de prueba del cable de alimentación. El botón RESET debe aparecer. 4.
- Page 25 Selecciona∙el∙modo∙de∙funcionamiento∙apropiado.∙Cada∙vez∙que∙se∙pulsa∙el∙botón,∙se∙selecciona∙un∙modo∙en∙la∙siguiente∙secuencia:∙AUTO,∙COOL∙DRY,∙FAN∙y∙calor∙(Sólo∙para∙los∙ modelos∙con∙función∙de∙calor). modo col -∙Pulse∙el∙botón∙"MODE"∙hasta∙que∙el∙indicador∙"COOL"∙se∙enciende. - Pulse los botones ajustan " " o " "∙para∙seleccionar∙la∙temperatura∙deseada.∙La∙temperatura∙se∙puede∙ajustar∙en∙un∙rango∙de∙62∙°F∙a∙88∙°F. - Pulse el botón "FAN SPEED" para seleccionar la velocidad del ventilador. Modo Heat (Sólo para los modelos con función de calor) - Pulse el botón "MODE"...
- Page 26 operación de temporizador -∙∙ C uando∙la∙unidad∙está∙encendida,∙primero∙pulse∙el∙botón∙del∙temporizador,∙el∙temporizador∙apagado∙la∙luz∙indicadora∙se∙ilumina.∙Se∙indica∙que∙se∙inició∙el∙programa∙de∙parada∙ automática. -∙Cuando∙la∙unidad∙está∙apagada,∙primero∙pulse∙el∙botón∙del∙temporizador,∙el∙temporizador∙SOBRE∙luz∙indicadora∙se∙ilumina.∙Indica∙que∙se∙inicie∙el∙programa∙Auto∙Start. -∙∙ P ulse∙o∙mantenga∙pulsado∙el∙botón∙UP∙o∙DOWN∙para∙cambiar∙el∙tiempo∙de∙Auto∙por∙incrementos∙de∙0,5∙horas,∙hasta∙10∙horas,∙y∙luego∙en∙incrementos∙de∙1∙hora∙hasta∙24∙ horas. El control de la cuenta regresiva del tiempo restante hasta el inicio. - El tiempo seleccionado se registrará en 5 segundos y el sistema volverá automáticamente a mostrar la configuración de la temperatura anterior. -∙Encendido∙de∙la∙unidad∙o∙desactivar∙en∙cualquier∙momento∙o∙el∙ajuste∙de∙la∙configuración∙del∙temporizador∙de∙0.0,∙se∙cancelará∙la∙función∙Auto∙Start∙/∙Stop∙programa∙asignado.
- Page 27 Remoto Para∙el∙primer∙uso:∙Retire∙el∙plástico∙entre∙la∙batería∙y∙los∙contactos. Modo∙de∙empleo:∙apunte∙el∙control∙remoto∙hacia∙el∙sensor∙del∙panel∙de∙control on/oFF:∙Pulse∙para∙encender∙la∙unidad∙o∙fuera Modo:∙presione∙para∙seleccionar∙el∙modo∙de∙funcionamiento:∙Auto∙ ventilador fresco deshumidificación VelocIdad del VentIladoR:∙Presione∙para∙seleccionar∙entre∙Auto∙ Baja Alta velocidad de ventilador teMp:∙Oprima∙hacia∙arriba∙o∙hacia∙abajo∙para∙controlar∙la∙temperatura∙ambiente∙o∙la∙hora∙del∙temporizador econoMÍa:∙Presione∙para∙ajustar∙o∙cancelar∙el∙funcionamiento∙en∙modo∙de∙reposo tIMeR on/oFF:∙Pulse∙para∙ajustar∙la∙unidad∙para∙apagar∙automáticamente∙o∙con∙un∙temporizador display led:∙∙ P ulse∙este∙botón∙para∙borrar∙la∙pantalla∙de∙la∙unidad∙interior,∙pulse∙de∙nuevo∙para∙encender∙la∙pantalla. GIRo:∙Se∙utiliza∙para∙detener∙o∙iniciar∙el∙movimiento∙de∙las∙palas∙y∙configurar∙la∙dirección∙del∙flujo∙de∙aire∙arriba∙/∙abajo∙deseada. ReSet:∙∙ U na∙vez∙que∙se∙pulsa∙el∙botón∙empotrado∙RESET,∙todos∙los∙ajustes∙actuales∙quedarán∙anuladas∙y∙el∙controlador∙volverá∙a∙la∙ configuración inicial. locK:∙∙ ∙ P resione∙este∙botón∙empotrado∙para∙bloquear∙todos∙los∙ajustes∙actuales∙y∙el∙control∙remoto∙no∙aceptará∙ninguna∙operación∙ excepto∙la∙del∙bloqueo. Utilice∙el∙modo∙LOCK∙cuando∙desea∙evitar∙que∙los∙ajustes∙sean∙cambiados∙por∙error. Pulse∙el∙botón∙LOCK∙de∙nuevo∙para∙cancelar∙la∙función∙de∙bloqueo.∙Un∙símbolo∙de∙un∙candado∙ aparecerá∙en∙visualizar∙el∙mando∙a∙distancia∙cuando∙se∙activa∙la∙función∙de∙bloqueo.
- Page 28 MantenIMIento drenaje En∙ocasiones,∙es∙posible∙que∙tenga∙que∙drenar∙la∙unidad.∙La∙pantalla∙LED∙mostrará∙P1∙durante∙el∙drenaje∙es∙necesario. para descargar: 1. Apague la unidad y desenchufe. 2. Coloque una bandeja de agua debajo de la salida de drenaje para recoger el agua. 3. Retire el tapón de drenaje de goma. 4.∙Vuelva∙a∙colocar∙el∙tapón,∙cuando∙el∙agua∙de∙drenaje∙deja∙de∙fluir. para el drenaje continuo en un desagüe en el suelo: 1.
- Page 29 1. Apague la unidad y desenchufe. 2.∙Limpie∙la∙unidad∙con∙un∙paño∙suave∙y∙seco∙o∙húmedo.∙Un∙detergente∙suave∙puede∙ser∙utilizado. 3.∙Nunca∙use∙una∙sustancia∙volátil∙de∙gasolina∙tales∙o∙productos∙de∙limpieza∙abrasivos. 4. No salpique agua sobre la unidad. almacenamiento del aparato de aire acondicionado Si∙no∙va∙a∙utilizar∙la∙unidad∙durante∙mucho∙tiempo,∙asegúrese∙de∙drenar∙el∙acondicionador∙de∙aire,∙limpie∙el∙filtro∙de∙aire,∙desenchufe∙el∙cable∙de∙alimentación∙y∙el∙abrigo∙alrededor∙ de los ganchos del cable de alimentación y retire la pilas del mando a distancia antes de su almacenamiento. Después del drenaje, mantener el aire acondicionado funcionando en el modo FAN durante al menos 8 horas para secar completamente la unidad para evitar el moho.
- Page 30 -∙∙ L as∙cifras∙observadas∙en∙el∙contenido∙son∙sólo∙de∙referencia;∙variación∙puede∙resultar∙debido∙a∙la∙aplicación∙en∙los∙diferentes∙países∙o∙regiones,∙y∙se∙basará∙en∙el∙funcionamiento∙ práctico. "Residuos∙eléctricos∙no∙se∙deben∙tirar∙con∙la∙basura∙doméstica.∙Por∙favor∙recicle∙donde∙existan∙instalaciones.∙Consulte∙con∙su∙autoridad∙local∙o∙minorista∙para∙el∙reciclaje∙de∙ consejo ". Modelo aRp-1314 Capacidad de enfriamiento 13,500∙BTU Deshumidificación Capacidad 3∙litros∙por∙hora∙/∙1.4L∙/∙h Estándar de refrigeración Potencia de entrada 1480W∙actuales∙/∙12A Air∙Flow∙volumen∙(alto∙/∙medio∙/∙bajo) 540∙/∙480∙/∙410(m³/h) Voltaje∙/∙∙Frecuencia 115V∙/∙60HZ Sound∙Pressure∙Level∙53/50/47dB 53/50/47dB∙(alta∙/∙media∙/∙baja) Peso neto 76 libras / 34.5Kg Unidad∙Dimensiones∙(W∙×∙D∙×∙H) 19.3∙×∙15.7∙×∙32(in)∙/∙490∙×∙398∙×∙812(mm) Embalaje∙Dimensiones∙(W∙×∙D∙×∙H) 22.2×∙20∙×∙34.6(in)∙/∙565∙×∙510∙×∙880(mm)∙∙...
- Page 31 Un aÑo de GaRantÍa lIMItada Royal∙Sovereign∙garantiza∙que∙cada∙acondicionador∙de∙aire∙portátil∙está∙libre∙de∙defectos∙en∙materiales∙y∙mano∙de∙obra.∙Nuestra∙obligación∙bajo∙esta∙garantía∙se∙limita∙a∙la∙ reparación∙o∙sustitución,∙sin∙cargo∙alguno,∙cuando∙se∙entrega∙a∙un∙centro∙autorizado∙de∙Royal∙Sovereign∙de∙servicios,∙de∙cualquier∙pieza∙defectuosa∙(s)∙de∙los∙mismos∙a∙excepción∙ de partes dañadas durante el transporte. Esta garantía está en vigor para el comprador original, por un período de un año desde la fecha de compra y no es transferible. Esta garantía∙es∙válida∙únicamente∙si∙el∙aire∙acondicionado∙se∙utiliza∙en∙el∙circuito∙de∙corriente∙alterna∙(AC),∙de∙acuerdo∙con∙la∙instrucciones∙de∙fábrica∙que∙lo∙acompañan.
- Page 32 RoYal SoVeReIGn InteRnatIonal, Inc. RS canada Inc. RS InteRnatIonal aUStRalIa ptY. ltd. 2∙Volvo∙Drive∙Rockleigh,∙NJ∙07647∙USA 5610∙Timberlea∙Blvd,∙Mississauga,∙L4W∙4M6,∙CANADA 30∙Prime∙Drive,∙Seven∙Hills,∙NSW∙2147,∙AUSTRALIA TEL∙:∙+1)∙800-397-1025∙∙∙∙∙∙∙∙FAX∙:∙+1)∙201-750-1022 TEL∙:∙+1)∙905-461-1095∙∙∙∙∙∙∙∙∙∙∙∙∙∙TF:∙+1)∙866∙961-6673∙∙∙ TEL∙∙:∙+61)∙2-9674-2127∙ FAX∙∙:∙+61)∙2-9674-2027 Fax∙:∙+1)∙905-461-1096 2013.06...