Table of Contents
Advertisement
Available languages
Available languages
Quick Links
SAFETY RECALL
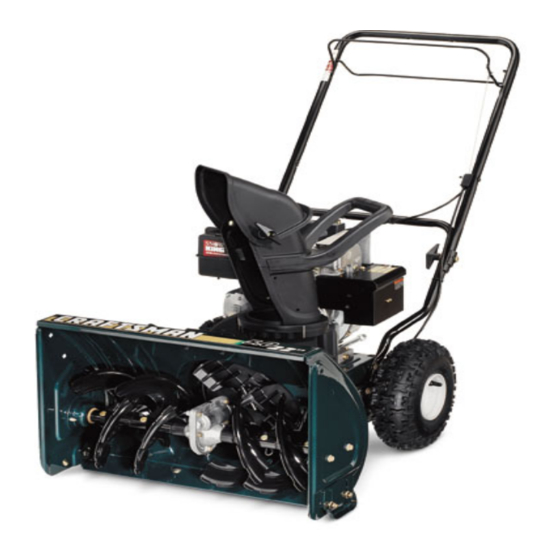
CHECK YOUR TWO STAGE COMPACT
SNOW THROWER TO SEE IF IT IS RECALLED...
Over inflating the tire with excessive pressure (well above 20 PSI) may
cause the plastic wheel rims to explode posing a risk of serious injury.
8 AM and 5 PM EST Monday through Friday.
IMPORTANT!
If you have already received and installed the Recall Kit which includes two
Pressure Relief Valves, two Warning labels, and installation instructions (Form # 769-02127,
769-02722 or 769-02723), please disregard this notice.
In cooperation with the U.S. Consumer Product Safety Commission
31A-3BAD762 and 31AS3DDE729
Sold between July 2004 and March 2006
________________________________
Do not inflate tires!
CALL
Customer Service toll free between
1-888-848-6038
Yard Machine Models Affected
31A-3AAD700, 31A-3BAD700,
31A-3BAD729, 31A-3BAD752,
Troy-Bilt Models Affected
31AS3BB2766
Craftsman Models Affected
247.88255 (31A-3BDE799)
Sold between July 2004 and March 2006
247.88700 (31AS3AAD799)
Sold between July 2005 and March 2006
Form No. 769-04961
Advertisement
Chapters
Table of Contents

Related Manuals for Craftsman 247.887000


Summary of Contents for Craftsman 247.887000
- Page 1 31A-3BAD762 and 31AS3DDE729 Troy-Bilt Models Affected 31AS3BB2766 Sold between July 2004 and March 2006 ________________________________ Craftsman Models Affected 247.88255 (31A-3BDE799) Sold between July 2004 and March 2006 247.88700 (31AS3AAD799) Sold between July 2005 and March 2006 Over inflating the tire with excessive pressure (well above 20 PSI) may cause the plastic wheel rims to explode posing a risk of serious injury.
- Page 2 • Operation follow all safety rules • Service and operating • Maintenance instructions. • Español, p. 29 Sears, Roebuck And Co., Hoffman Estates, IL 60179, U.S.A. Visit our website: www.sears.com/craftsman . 769-00750A.fm FORM NO (5/2004) Printed in U.S.A.
-
Page 3: Table Of Contents
Sears will repair, free of charge, any defect in material and workmanship. If this Craftsman snow thrower is used for commercial or rental purposes, this warranty applies for only 30 days from the date of purchase. -
Page 4: Safe Operation Practices
IMPORTANT SAFE OPERATION PRACTICES WARNING: This symbol points out important safety instructions which, if not followed, could endanger the personal safety and/or property of yourself and others. Read and follow all instructions in this manual before attempting to operate this machine. Failure to comply with these instructions may result in personal injury. - Page 5 Never run an engine indoors or in a poorly ventilated plug wire and ground against the engine to prevent area. Engine exhaust contains carbon monoxide, an unintended starting before cleaning, repairing, or odorless and deadly gas. inspecting. Do not operate machine while under the influence of Check bolts, and screws for proper tightness at frequent alcohol or drugs.
-
Page 6: Assembly
ASSEMBLY IMPORTANT: This unit is shipped with the engine full of oil. After assembly, see page 8 for fuel and oil fill-up Handle details. Knob Saddle Washer Removing From Carton 1. Cut the corners of the carton and lay the sides flat on the ground. - Page 7 Final Adjustments Check the adjustments as instructed and IMPORTANT: make any final adjustments necessary before operating the unit. Check all nuts and bolts for tightness.Failure to High Position follow these instructions may cause damage to unit. Middle Position Tire Pressure (Pneumatic Tires) Low Position The tires are over-inflated for shipping purposes.
-
Page 8: Operation
OPERATION Read this owner’s manual and safety rules before operating your snow thrower. Compare illustration below with your snow thrower to familiarize yourself with the location of various controls and adjustments. Operating Controls (See Figure 6 ) Auger Control Upper Handle Drive Control Oil Fill/ Starter Rope... - Page 9 A. Electric Starter Skid Shoe The space between the shave plate and the ground can The snow thrower engine is equipped with a 120 volt be adjusted. For close snow removal, place skid shoes A.C. electric starter and recoil starter. The electric in the low position.
- Page 10 NOTE: When engaging the electric starter, a slight Frozen Recoil Starter hesitation of a few seconds may occur before the If the starter is frozen and will not turn the engine, engine starts to turn. This is normal and is not harmful proceed as follows: to the engine.
- Page 11 on a narrower stretch with less volume of snow. Auger Control Test 7. On each succeeding pass, readjust the chute Perform the following test before IMPORTANT: assembly to the desired position and slightly operating the snow thrower for the first time and at the overlap the previously cleared path.
-
Page 12: Maintenance
MAINTENANCE General Recommendations • All adjustments in the Service and Adjustments section of this manual should be checked at least • Always observe safety rules when performing any once each season. maintenance. • Follow maintenance schedule on this page. • The warranty on this snow thrower does not cover •... - Page 13 Spark Plug Clean spark plug and reset the electrode gap to 0.030" at least once a season or every 100 hours of operation; replace every 200 hours of operation. • Clean area around the spark plug base. Lube here • Remove and inspect the spark plug.
-
Page 14: Service & Adjustment
SERVICE & ADJUSTMENTS If the augers do not turn, check to see if the pins have WARNING: Always stop the engine of the sheared. Replace, if needed, with proper shear pins. snow thrower, disconnect spark plug wire and refer to item 22 on page 22 for part number. move it away from the spark plug before NEVER replace the auger shear pins with IMPORTANT:... - Page 15 Adjustments Engine Pulley Auger Belt Auger Cable Periodic adjustment to the auger control cable may be required due to normal stretch and wear on the belt. Adjustment is needed if the augers seem to hesitate while turning, but the engine maintains speed, or continue turning with the auger control disengaged.
-
Page 16: Off-Season Storage
OFF-SEASON STORAGE If the snow thrower will not be used for 30 days or WARNING: Do not drain carburetor if using longer, or if it is the end of the snow season when the fuel stabilizer. Never use engine or carburetor last possibility of snow is gone, the equipment needs to cleaning products in the fuel tank or permanent be stored properly. -
Page 17: Trouble-Shooting
TROUBLE-SHOOTING Problem Possible Cause Remedy Engine fails to start 1. Fuel tank empty, or stale fuel. 1. Fill tank with fresh gasoline. 2. Blocked fuel line. 2. Clean the fuel line. 3. Choke not ON. 3. Turn Choke knob to ON position. 4. - Page 18 Safety & Decorative Labels: Location and Part Number 777I22141 777I22138 777S32236 777S32066 777D07445...
-
Page 19: Parts List
PARTS LIST... - Page 20 Craftsman Snow Thrower Model 247.887000 Ref. No. Part No. Description Ref. No. Part No. Description 710-0449 Carriage Screw 5/16-18 x 2.25” 710-0896 Screw, 1/4-14 x.625” 710-0605 Mach. Screw 1/4-20 x 1.825” 711-1364 Clevis Pin 710-0726 Screw, 5/16-12 x.75” 738-1231 Axle...
- Page 21 Craftsman Snow Thrower Model 247.887000 Shown for reference only Shown for reference only...
- Page 22 Craftsman Snow Thrower Model 247.887000 Ref. No. Part No. Description 710-0654A TT Sems Screw 3/8-16 x 1.0” 710-0696 Hex Bolt 3/8-24 x 0.875” 710-1245B Lock Bolt 5/16-24 x 0.875” — Engine 736-0242 Bell Washer,.340 x.872 x.060 736-0247 Flat Washer,.406ID x 1.25OD 736-0331 Bell Washer,.390 x 1.13 x.062...
- Page 23 Craftsman Snow Thrower Model 247.887000 Shown for reference only...
- Page 24 Craftsman Snow Thrower Model 247.887000 Ref. No. Part No. Description Ref. No. Part No. Description 684-04037 Chute Assembly 717-1772A Worm Shaft 710-04071 Carriage Bolt 5/16-18 x 1.0” 715-04020 Spiral Pin 710-0451 Carriage Bolt 5/16-18 x 0.750” 721-0327 Oil Seal 712-04063...
- Page 25 Craftsman 5 hp. Engine 143.045003 for Snow Thrower Model 247.887000...
- Page 26 Craftsman 5 hp. Engine 143.045003 for Snow Thrower Model 247.887000 Key No. Part No. Description Key No. Part No. Description 36469A Cylinder (Incl. 2,20,72,72A & 125) 34443C Solid State Ignition 26727 Dowel Pin 610118 Spark Plug Cover — Oil Drain Extension (purchase locally)
- Page 27 Craftsman 5 hp. Engine 143.045003 for Snow Thrower Model 247.887000 Key No. Part No. Description Key No. Part No. Description 33670A Exhaust Gasket 343A 651060 Screw, 10-32 x 23/64" 35771A Muffler (Incl. 274) 33344 Heat Baffle 792005 Screw, 1/4-20 x 2-27/64"...
- Page 28 Craftsman 5 hp. Engine 143.045003 for Snow Thrower Model 247.887000 Rewind Starter 590707 Key No. Part No. Description 590599A Spring Pin 590600 Washer 590696 Retainer 590601 Washer 590697 Brake Spring 590698 Starter Dog 590699 Dog Spring 590709 Pulley & Rewind Spring Assembly...
- Page 29 Craftsman 5 hp. Engine 143.045003 for Snow Thrower Model 247.887000 Carburetor 640084B Key No. Part No. Description 631615 Throttle Shaft & Lever Assembly 631767 Throttle Return Spring 640070 Throttle Shutter 650506 Shutter Screw 632108 Choke Shaft & Lever Assembly 631890...
-
Page 30: Espanòl
Sears reparará sin cargo cualquier defecto de materiales o mano de obra. Si esta máquina quitanieve Craftsman se utiliza para propósitos comerciales o de alquiler, esta garantía se aplica sólo durante 30 días a partir de la fecha de compra. -
Page 31: Prácticas De Seguridad En La Operación
PRÁCTICAS DE OPERACIÓN SEGURAS ADVERTENCIA: Este símbolo indica instrucciones de seguridad importantes que de no seguirse, podrían poner en peligro la seguridad personal y/o la propiedad suya y de terceros. Lea y siga todas las instrucciones en este manual antes de iniciar la operación de esta máquina. En caso de no seguir estas instrucciones podrían producirse lesiones personales. - Page 32 Nunca encienda el motor en espacios cerrados o en una zona No cambie la configuración del regulador del motor ni acelere poco ventilada. El escape del motor contiene monóxido de demasiado el mismo. El regulador controla la velocidad carbono, un gas inodoro y letal. máxima segura de operación del motor.
-
Page 33: Ensamblado
ENSAMBLADO IMPORTANTE:Esta unidad se envía con aceite en el cárter pero sin gasolina. Después del ensamblado, consulte la Superior de la página 35 para los detalles de llenado de combustible y manija aceite. Arandela còncava Extracción de la unidad de la caja Corte las esquinas de la caja de cartón y extiéndala en el piso Quite todos los insertos de empaque. - Page 34 Ajustes finales IMPORTANTE: Controle los ajustes tal como se detalla y realice los ajustes finales necesarios antes de operar la unidad. Si no sigue estas instrucciones la máquina quitanieve podría dañarse. Posición alta Presión de los neumáticos Posición media Posición baja Los neumáticos tienen un exceso de aire para el embarque.
-
Page 35: Operación
OPERACIÓN Lea este manual del propietario y las reglas de seguridad antes de poner en funcionamiento su máquina quitanieve. Compare las ilustraciones que aparecen debajo con su unidad para familiarizarse con la ubicación de los distintos controles y ajustes. Controles de operación (Ver Figura 6 ) Gancho del control de la barrena. - Page 36 Antes de encender el motor Arranque en frío Determine si el cableado de su hogar es un sistema de tres cables conectado a tierra. Consulte con un electricista matriculado si no está Aceite del motor seguro. Esta unidad es enviada sin aceite en el motor. para los llenados subsiguientes, use el grado de aceite para motor ADVERTENCIA: El arrancador eléctrico debe...
- Page 37 15. Deje que el motor se enfríe por algunos minutos ya que Desconecte el cable de alimentación primero del el motor no alcanzará la potencia total hasta lograr la receptáculo y después de la máquina quitanieve. temperatura operativa. NOTA: El sonido inusual provocado cuando tira de la cuerda Arranque en caliente del arrancador o cuando gira el arrancador no dañará...
- Page 38 Consejos de operación Herramienta de limpieza del canal NOTA: Deje que el motor se caliente unos minutos ya que el ADVERTENCIA: Detenga el motor quitando mismo no desarrolla la potencia máxima hasta que alcanza la la llave de encendido y espere que se detengan temperatura de funcionamiento.
-
Page 39: Mantenimiento
MANTENIMIENTO Recomendaciones generales presente manual deben ser verificados por lo menos una vez todas las temporadas. • Respete siempre las reglas de seguridad cuando • Siga el cronograma de mantenimiento que aparece en realice tareas de mantenimiento. la página siguiente. •... - Page 40 Varilla del nivel del aceite Electrodos Rellene si Lectura de nivel de se requiere aceite del motor .030” Porcelana Distancia Figura 8 Apriete la varilla del nivel del aceite Lubricación Para ubicar los puntos de lubricación de la máquina quitanieve, consulte Figura 9 . Una vez por temporada, lubrique los puntos de giro en el gancho del control de la barrena con un aceite liviano para motor.
-
Page 41: Servicio Y Ajuste
SERVICIO Y AJUSTES diseñada de manera que los pernos se cortan. ADVERTENCIA: Detenga siempre el motor Si las barrenas no giran, verifique si los pernos se cortaron. de la máquina quitanieve, desconecte el cable de la Reemplácelos cuando sea necesario. Ver Figura 10 . bujía y póngalo separado de la misma antes de Junto con la máquina quitanieve se incluyen dos pernos de realizar todo tipo de ajustes o reparaciones. - Page 42 Gire la transmisión hacia adelante para soltar la presión Polea del motor en la correa de transmisión. Correa de la Quite la correa de transmisión de alrededor de la polea barrena del motor y aléjela de la unidad. Ubique una nueva correa de transmisión dentro de la ranura de la polea del motor.
-
Page 43: Almacenamiento Fuera De Temporada
ALMACENAMIENTO FUERA DE TEMPORADA Si no se utilizará el equipo durante 30 días o más, o al Ponga el motor en marcha hasta vaciar el depósito de finalizar la temporada de nieve cuando ya no existe combustible y hasta que el motor se detenga debido a la posibilidad de que nieve, es necesario almacenar el equipo falta de combustible. -
Page 44: Guía Para La Solución De Problemas
SOLUCIÓN DE PROBLEMAS Problema Causa posible Solución El motor no arranca El tanque de combustible está vacío o el combustible es viejo Llene el tanque con gasolina limpia. La línea del combustible está bloqueada Limpie la línea del combustible. La obturación no está en posición ON Rote la palanca de obturación a posición (ENCENDIDO) ON (ENCENDIDO). - Page 45 Get it fixed, at your home or ours! Your Home For repair – in your home – of all major brand appliances, lawn and garden equipment, or heating and cooling systems, no matter who made it, no matter who sold it! For the replacement parts, accessories and owner’s manuals that you need to do-it-yourself.