Table of Contents
Advertisement
Quick Links
Advertisement
Table of Contents

Related Manuals for AEG LWX9A9613C


Summary of Contents for AEG LWX9A9613C
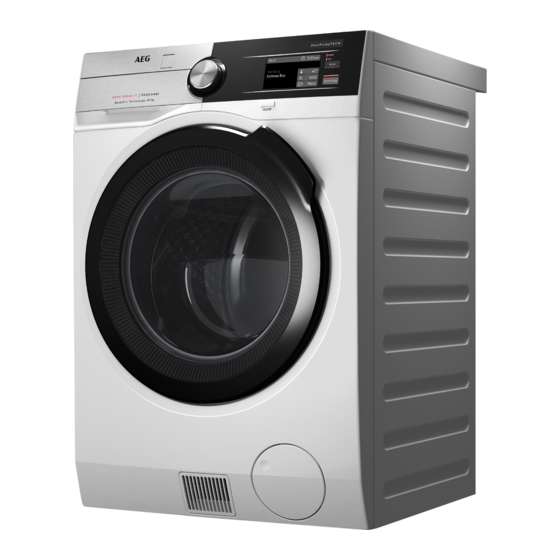
- Page 1 LWX9A9613C User Manual Washer Dryer USER MANUAL...
-
Page 2: Table Of Contents
14. DAILY USE - WASHING ONLY................ 34 15. DAILY USE - WASHING & DRYING..............40 16. DAILY USE - DRYING ONLY................42 17. SETTINGS......................44 18. HINTS AND TIPS....................46 19. CARE AND CLEANING..................49 20. TROUBLESHOOTING..................56 21. WARRANTY .....................62 22. ENVIRONMENTAL CONCERNS..............64 AEG Home app... -
Page 3: Safety Information
Products must be used, installed and operated in accordance with this manual. You may not be able to claim on the AEG manufacturer’s warranty in the event that your product fault is due to failure to adhere to this manual. - Page 4 1.1 Children and vulnerable people safety WARNING! Risk of suffocation, injury or permanent disability. This appliance can be used by children aged from 8 • years and above and persons with reduced physical, sensory or mental capabilities or lack of experience...
- Page 5 ENGLISH This appliance is intended to be used in household • and similar applications such as: staff kitchen areas in shops, offices and other – working environments; farm houses; – by clients in hotels, motels, bed & breakfast and – other residential type environments;...
- Page 6 The appliance must be connected to the water mains • using the new supplied hose sets, or other new hose sets supplied by the Authorised Service Centre. Old hose sets must not be reused. • If the mains power supply cable is damaged, it must •...
-
Page 7: Safety Instructions
ENGLISH Do not use high pressure water sprays and/or steam • to clean the appliance. Clean the appliance with a moist cloth. Use only • neutral detergents. Do not use abrasive products, abrasive cleaning pads, solvents or metal objects. Before any maintenance operation, deactivate the •... - Page 8 Authorised Service Centre for the have been contaminated by hair care replacement of the inlet hose. products be placed in a tumble dryer • When unpacking the appliance, It is they should first be washed in hot possible to see water flowing from the water with extra detergent -this will drain hose.
-
Page 9: Product Description
ENGLISH 2.7 Disposal • Dispose of the appliance in accordance with local requirements • Disconnect the appliance from the for the disposal of Waste Electrical mains electrical and water supplies. and Electronic Equipment (WEEE). • Cut off the mains electrical cable close to the appliance and dispose of •... -
Page 10: Technical Data
4. TECHNICAL DATA Dimension Width/ Height/ Total 60.0 cm /87.0 cm /66.0 cm depth Electrical connection Voltage 220-240 V Overall power 2200 W Fuse 10 A Frequency 50 Hz Level of protection against ingress of solid particles IPX4 and moisture ensured by the protective cover, ex‐... - Page 11 ENGLISH Make sure not to damage the hoses. 2. Remove the cardboard top and the polystyrene packaging materials. 7. Remove the polystyrene protection from the bottom. 3. Remove the internal film. 8. Pull up the appliance in vertical position. 4. Open the door and remove the polystyrene piece from the door seal and all the items from the drum.
- Page 12 11. Pull out the plastic spacers. 12. Put the plastic caps, that you find in the user manual bag, in the holes. 10. Remove the three bolts by using the spanner supplied with the appliance. We recommend that you...
- Page 13 ENGLISH 45º 45º 20º 20º The appliance must be level and stable. Make sure that the inlet hose is not in vertical position. A correct adjustment of the appliance level prevents the 3. If necessary, loose the ring nut to set vibration, noise and the it in the correct position.
- Page 14 If this occurs, close the water tap and contact the authorized service centre to replace the hose. Make sure that the drain 5.6 Water drainage hose end is not immersed in the water. There may be a The drain hose should be positioned at a...
-
Page 15: Accessories
If you install the appliance on a plinth authorised dealer that is not an accessory supplied by AEG, secure the appliance in the fixing Read carefully the instructions supplied plates. with the accessory. Read carefully the instructions supplied Only appropriate with the accessory. -
Page 16: Control Panel
7. CONTROL PANEL 7.1 Control panel description Touch screen On/Off button Programs, options and settings Pressing this button for a few can also be set by scrolling and seconds allows to activate or tapping the touch screen. deactivate the appliance. Two... - Page 17 ENGLISH 2. The following screen pops up: 8.3 More settings • tap on OK to confirm the language: After you set the time, the More settings • tap on Change to change it. screen pops up. 8.2 Time setup If you tap on Later, the program list screen appears and you can set the 1.
-
Page 18: Touch Screen
5. Tap on the Detergent Type 1 bar. The following window pops up. Tap on OK to confirm your choice. 2. Tap on OK to enter the Detergent Dosing menu. 3. Tap on the Detergent Type 1 or Detergent Type 2 bar. -
Page 19: Wi-Fi Connectivity Setup
ENGLISH When a shortcut is visible on the summary screen, it is possible to enter an option/ setting menu by just tapping on the relevant shortcut. The different option/setting menus can be scrolled: • up and down, or The summary screen shows: •... - Page 20 To connect the appliance to enjoy the full 1. Go to the App Store on your smart range of features and services you need: device. 2. Download and install the AEG Home • Wireless network at home with app. internet connection enabled.
- Page 21 To activate the remote start: 1. In the program list screen, select the desired program. 2. When the program summary screen 3. Configure the AEG Home app on appears, tap on More to enter your smart device. the option list.
-
Page 22: Before First Use
If a program is running, the App notifies If an error occurs, the appliance warns that the update will start at the end of that update has failed: just press any the program. buttons or turn the knob to return to normal use. - Page 23 ENGLISH Program Program description Mixed fabrics (cotton and synthetic items). Complete pro‐ NonStop 3h/3kg gram to wash and dry laundry loads up to 3 kg in one go. It only lasts 3 hours. Washing programs Delicates Delicate fabrics such as acrylics, viscose and mixed fab‐ rics requiring gentler washing.
- Page 24 Program Program description Steam programs Steam can be used for dried, washed or worn once laundry. These programs can reduce creases and odours and make your laundry softer. Do not use any detergent. If necessary, remove stains by washing or using localized stain removal.
- Page 25 ENGLISH Program temperature, maximum spin speed and maximum load Program Default tempera‐ Reference spin Maximum load ture speed Temperature Spin speed range range Cottons 40 °C 1600 rpm 9 kg 95 °C - Cold 1600 rpm - 400 rpm Cottons Eco 40 °C 1600 rpm 9 kg...
- Page 26 Program options compatibility When you set a washing program and enter the menu , the dis‐play shows the available options only. Child Lock, Delay Start and Memory are selectable with all programs. The options Stains, Prewash and Soak cannot be set together.
- Page 27 ENGLISH Drain 1) If you set the shortest duration, we recommend that you decrease the load size. It is possible to fully load the appliance, however the washing results can be less satisfactory. 2) This option is not available when setting 400 rpm. 3) This option is not available with temperature lower than 40 °C.
- Page 28 Dryness Level Type of fabric Load Synthetics and mixed fab‐ up to 4 kg rics (jumpers, blouses, under‐ wear, household and bed lin‐ Delicate fabrics up to 2 kg (acrylics, viscose and deli‐ cate mixed fabrics) Wool items up to 1 kg...
-
Page 29: Options
ENGLISH Dryness Level Type of fabric Load Spin Suggested (kg) spee duration (mins) (rpm) Cupboard Dry Cottons and Linen 1600 270 - 290 For items to be (bathrobes, bath towels, etc) 1600 160 - 180 stored 1600 110 - 120 Synthetics and mixed fabrics 1200 170 - 190... - Page 30 You can activate this option: • After you have pressed the Start/ Pause button: Start/Pause button and the touch screen are deactivated. It is possible to turn the appliance off by means of the On/Off button.
- Page 31 ENGLISH • Quick option (Mid): if your laundry is Touch the Start/Pause button: the normally or lightly soiled, it may be appliance performs the spinning advisable to shorten the washing phase and drains the water. program. • or activate the Silent option. When •...
- Page 32 Use this function for heavy soiled 13.8 Time Dry garments. The appliance soaks the Thanks to this option it is possible to set laundry at 30°C for about half an hour the most suitable time for the fabrics to before washing.
- Page 33 ENGLISH When you return to program summary 2. Tap on the Memory bar to enter the submenu. screen, the shortcut will be on. 3. Tap on the Memory 1 or Memory 2 to save the set program. The status 13.12 Soft Plus will change from Empty to In Use .
-
Page 34: Daily Use - Washing Only
Tap on the Remote Start Mode bar to 13.16 Remote Start Mode activate it. The remote start is available When you return to program summary after you have completed screen, the shortcut will be on and the the App installing and door will be locked. - Page 35 ENGLISH 14.6 Loading the laundry 1. Open the appliance door. The weight sensor window pops up. Or just tap on the program name in the program summary window to return to the program list window and scroll the program list up or down to set the 2.
- Page 36 14.7 Filling the detergent and additives 5. If you have already set Detergent Type 1 or Detergent Type 2 with average suggested dosage for the Before using the detergent type of detergent you are using , the dispenser, make sure that...
- Page 37 ENGLISH 14.8 Check the position of the With the flap in the flap position DOWN: • Do not use gelatinous 1. Pull out the detergent dispenser until or thick liquid it stops. detergents. 2. Press the lever down to remove the •...
- Page 38 14.10 The ProSense load • The shortcut detection After touching the Start/Pause button: 1. The ProSense starts the laundry load detection to calculate the real program duration. The display shows the message Adjusting program to current load. The appliance adjusts automatically...
- Page 39 ENGLISH If the ProSense phase is When you activate the already carried out and the appliance again, the display shows the end of the last water filling is already started, the new program selected program. Turn the starts without repeating the program dial to set a new cycle.
-
Page 40: Daily Use - Washing & Drying
15. DAILY USE - WASHING & DRYING WARNING! Refer to Safety chapters. This appliance is an automatic washer dryer. 15.1 Complete programs - Wash and dry Not all programs are compatible with drying function. The NonStop 3h/3kg program is already a complete wash&dry program. - Page 41 ENGLISH 2. Tap on Dryness Level and then 2. Tap on the Time Dry bar. on the top bar to return to the program summary screen. The display will show the chosen level (e.g. Extra Dry) and the updated program duration. The minimum timed drying is 10 minutes.
-
Page 42: Daily Use - Drying Only
ProSense estimation starts. During 1. Remove the laundry from the the program, the display will keep appliance. you informed about each phase. 2. Make sure that the drum is empty. After drying phase, clean the 15.4 At the end of the drying... - Page 43 ENGLISH 16.2 Drying - Automatic 3. Scroll the hour and minute bars left or right to set the desired timed levels drying. 1. After entering the Dryness Level menu, scroll the submenu bar left or right to change the drying level. If compatible with the program, it is possible to set one of these levels: a.
-
Page 44: Settings
17. SETTINGS 17.1 Introduction In the program summary screen, just tap on the screen to return to the program list screen. Scroll the list up or down to find Settings. 3. The screen returns to the setting list automatically. Tap on the Programs bar to return to the program summary screen. - Page 45 ENGLISH If the Cycle End Buzzer is on, the screen 17.8 Detergent Dosing shows the shortcut (buzzer on) or Through this setting you can save the average detergent dosage suggested in (buzzer off). Refer to "Shortcuts" the detergent packaging, so the section in this chapter.
-
Page 46: Hints And Tips
The shortcut appears when the relevant option is set. 17.11 Machine Information Here you can find a short description about all programs, options and settings. < To find the desired description, e.g.: 17.10 Shortcuts 1. Tap on the Machine Information bar. - Page 47 ENGLISH • Turn multilayered fabrics, wool and We recommend that you pre-treat these items with printed illustrations inside stains before you put the items in the out. appliance. • Pre-treat stubborn stains. Special stain removers are available. • Wash stubborn stains with a special Use the special stain remover that is detergent.
- Page 48 – the laundry is lightly soiled, Use the correct quantity of water – there is large amounts of foam softener. Follow the instructions that you during washing. find on the packaging of the product. • When using detergent tabs or pods, 18.6 Prepare the drying cycle...
-
Page 49: Care And Cleaning
ENGLISH 18.10 Additional drying To avoid the static charge at the end of the drying cycle: If, at the end of the drying program, 1. Use fabric conditioner in the washing the laundry is still damp, set a short cycle. drying cycle again. - Page 50 19.6 Door seal CAUTION! Do not clean the metal This appliance is designed with a self surfaces with chlorine-based cleaning draining system, allowing light detergent. fluff fibers that fall off the clothes to be drained out with the water. Regularly 19.4 Descaling...
- Page 51 ENGLISH 19.8 Cleaning the detergent 3. Flush the detergent drawer out under running warm water to remove any dispenser traces of accumulated detergent. After cleaning, replace the top part in To prevent possible deposits of dried its position. detergent or clotted fabric softener 4.
- Page 52 1. Push the hook to open the primary 5. Close the primary air filter cover. air filter. 6. Pull the secondary filter out. 2. Pull the primary air filter out. 7. Clean the secondary air filter with 3. Open the primary air filter cover by your hand and, if necessary, with a pulling it upwards.
- Page 53 ENGLISH WARNING! • Do not remove the filter while the appliance operates. • Do not clean the pump if the water in the appliance is hot. Wait until the water cools down WARNING! Each time you carry out the special program CLE to remove fluff, clean the drain filter afterwards.
- Page 54 10. Clean the filter under the water tap. 11. Put the filter back into the special guides by turning it clockwise. Make sure that you tighten the filter 5. When the bowl is full of water, turn correctly to prevent leakages.
- Page 55 ENGLISH 19.11 Cleaning the inlet hose filter and the valve filter It could be necessary to clean the filters when: • The appliance does not fill with water. • The appliance takes long time to fills with water. • The indicator of the Start/Pause button flashes and the display shows the related alarm. Refer to 'Troubleshooting' chapter.
-
Page 56: Troubleshooting
19.12 Emergency drain 1. Disconnect the mains plug from the mains socket. If the appliance cannot drain the water, 2. Close the water tap. carry out the same procedure, described 3. Put the two ends of the inlet hose in in 'Cleaning the drain pump' paragraph. - Page 57 ENGLISH With some problems, the display shows an alarm message and the Start/Pause button may flash continuously: If the appliance is overloaded, remove some items from the drum and/or keep pressed the door while touching the Start/Pause button until the indicator stops flashing (see the picture below).
- Page 58 Program will con‐ • Wait until mains supply is stable. tinue when electrici‐ ty supply is stable: The mains supply is unstable. A water leak has • Disconnect the appliance and close the water tap. Contact the been detected: Authorised Service Centre.
- Page 59 ENGLISH Problem Possible solution • Make sure that a washing program that ends with water in tub, has not been selected. • Make sure that the washing program is finished. • Set the drain or the spin program if there is water in the drum. If the spin and drain programs are not available in the program dial, they can be set via App.
- Page 60 Problem Possible solution • Increase the detergent quantity or use a different detergent. • Use special products to remove the stubborn stains before The washing results you wash the laundry. are not satisfactory. • Make sure that you set the correct temperature.
- Page 61 ENGLISH 20.2 Fluff in the fabrics CAUTION! Risk of burns! Make sure During the washing and/or drying phase, that the water temperature some types of fabric, (sponge, wool, is not too high and the sweatshirt) could release fluff. laundry is not hot. If The released fluff could stick to the necessary, wait until they fabrics during the next cycle.
-
Page 62: Warranty
Australia for a period conditions of the product warranties of 60 months and in New Zealand for for AEG Appliances. It is an important a period of 60 months, following the document. Please keep it with your... - Page 63 Important Notice Before calling for service, please ensure that the steps listed in clause 8 above have been followed. SERVICE AUSTRALIA aeg.com/au...
-
Page 64: Environmental Concerns
FOR SERVICE FOR SPARE PARTS or to find the address of your nearest au‐ or to find the address of your nearest spare thorised service centre in Australia parts centre in Australia PLEASE CALL 1300 363 664 PLEASE CALL 13 13 50... - Page 65 ENGLISH...
- Page 68 AEG Home app The software in this product contains components that are based on free and open source software. AEG gratefully acknowledges the contributions of the open software and robotics communities to the development project. To access the source code of these free and open source software components whose license conditions require publishing, and to see their full copyright information and applicable license terms, please visit: http://aeg.opensoftwarerepository.com (folder NIU5)